GO!® for a Star
by Marjorie Busby, Marjorie’s Quilting Bee
Marjorie has been sewing since she was a child, her quilting career started in her mid-twenties when she made her first quilts for her children. Thus when Marjorie left UNC to spend more time with her family, she felt right at home in the quilting world…Read more about blogger.
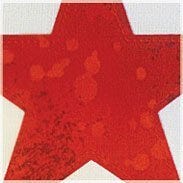
The AccuQuilt GO!® Star-2", 3", 4" die is one of the first appliqué dies that I purchased. At the time, I did not have an embroidery machine and my quilting repertoire did not include raw edge appliqué. Those stars were cut so perfectly that I just had to have them. My quilting horizons have definitely grown with the use of that die. Just after I got the Star die, I purchased an embroidery machine. Of course as a tech lover, my goal was to learn to digitize. One of the first things that I digitized was the star shape and I have been finding new ways to use it ever since. Last year I made a quilt top for SewCalGal’s Quilts of Valor Challenge using the Star die and my embroidery machine.
This year, I decided to help coordinate a similar QOV Challenge. We’re calling this year’s Challenge: GO!® for the Star. The Challenge will run from April 1 through May 31, and we hope to get quilters from all over the U.S. to make quilts for active service members and veterans who have served in a war zone. My plan has been to use the GO! Stars die again to make my quilt for the challenge. As always, I was thinking of using a new technique. Of course, anytime I make something with the embroidery machine, I also try to come up with an alternate method for those who do not have embroidery machines. So stay tuned even if you are not an embroidery machine owner because this method will work for you too.
My recent experiments with the Star die have been to use a ‘quilt as you go’ technique and assemble the quilted blocks into a quilt. I checked YouTube and remembered some quilt shows I had seen years ago and came up with a system that seems to work. It seems the most likely workable technique is one that attaches sashing to the front and back of the blocks after they have been quilted. I don’t know who came up with this technique, but I came up with something that works.
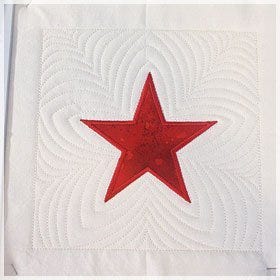
Machine Embroidery Method: The embroidery design is one that I digitized myself. It includes not only the machine embroidery for the Star appliqué, it also includes the quilting stitches for the block. I first did the machine appliqué of the star. The only modification that was made of the usual machine embroidery setup was that unbleached muslin was used as a stabilizer so that the quilt block would be soft after it was finished. Muslin is softer than the typical stabilizer and requires extra care when handling, but it does work. If you have any trouble with it, use spray starch to stiffen the muslin.

After the machine embroidery is completed, do NOT remove the block from the hoop, but do remove the hoop from the machine. The hoop is then turned upside down on a flat surface and a square of batting (I used Hobbs Heirloom 80/20) and a square of backing are carefully laid on the back of the hoop. These layers are carefully pinned on four corners using silk pins. For the first few blocks that were made, I used up to 12 pins, but quickly learned that pinning the outside corners works great. The important part is to prevent the batting and backing from folding under around the edges when the hoop is re-attached to the machine. Then the hoop with the quilt sandwich is placed back on the machine, and the quilting design stitches.
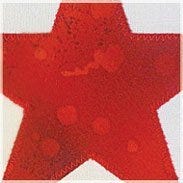
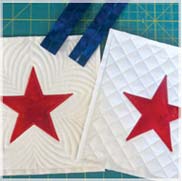
Sewing Machine Method: The star die has very straight sides and sharp points that make it easy to use a straight or zigzag machine stitch to sew it to the background fabric. Here are a couple of photos of stars that I stitched to background fabric. I did use a lightweight stabilizer underneath the fabric while stitching. It’s also important to use a small needle – size 9-11 when doing this kind of stitching and a strong, but lightweight thread such as 50 wt Aurifil.
Once the star die has been appliquéd onto the background fabric, mark a square boundary around the block that includes the area you want to quilt and then make a quilt sandwich of the block. Pin or stabilize the sandwich for quilting. Use a free motion quilting or walking foot quilting design.
SewCalGal has a great Free Motion Quilting Challenge throughout 2012, and you will find more information here.
You can also find information about free motion quilting at the Free Motion Quilting Project sponsored by Leah Day.
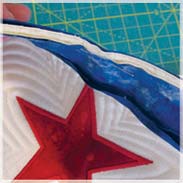
Quilt Assembly for all methods: To assemble the quilt, you’ll need two inch strips which are cut with the AccuQuilt GO!® 2" Strip Cutter die (55025). These are cut on the lengthwise grain for greater accuracy. The 2" strips are pressed using a Clover bias tape maker. The strips are then cut to the exact length of one side of the quilt block. Mine were 7-1/2".
The side edge of the quilt block is sandwiched between the two strips and a 1/2" seam is stitched. The next block is then attached to the strip’s fold on the back and the top fold is stitched down to complete the union.
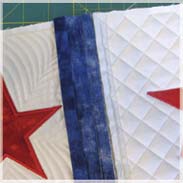

When two full rows are completed, the two rows are joined in the same way with a long strip. I was concerned that the block intersections might be a little difficult to align, but everything lined up perfectly. I think the key is having the strips cut on the lengthwise grain of fabric. Here’s a photo of the finished blocks that I assembled.
That made it more difficult to get the stitches nice and even on the top stitching. This is a perfect method for making smaller quilts and quilted items like table toppers, table runners, and baby quilts. I love that I can be stitching the sashing onto some blocks while other blocks are stitching and being quilted on my embroidery machine. I will continue to use my longarm quilting machine for larger quilts. I love this technique and the beautiful quilting that I can achieve with it.
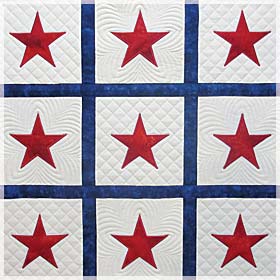
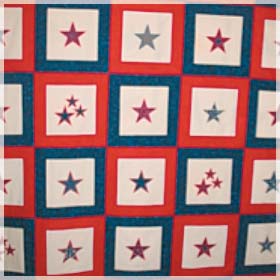
Stars, Quilts, and the QOV Challenge: Stars have great significance in the quilting world, and quilters have been creating star quilts as long as there have been quilts. Native Americans have traditionally used star quilts to mark special celebrations in life and as a sacred symbol providing a protective and guiding light for warriors and hunters. I didn’t know the history of star quilts when planning the QOV Challenge for the Spring. Nonetheless, a star theme was chosen thinking of the significance of the star in the American flag and in the military. Now I realize that it’s perfect for quilts of valor, and a wonderful way for quilters to honor active duty service members and veterans who have served in a war zone.
This year’s Challenge is being sponsored by AccuQuilt and Aurifil. You can find more information here.

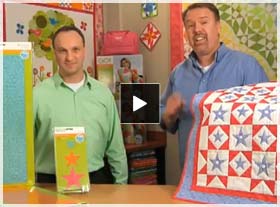
Watch Video:
Alex Anderson & Ricky Tims Introducing
the GO!® Star-2", 3", 4" Die (55028)
Watch Video:
How to use the GO!® Fabric Cutter
to cut the GO! Stars & Stripes Die Set (50414)
About Blogger:
Marjorie lives in Carrboro, NC. She was born in the foothills of North Carolina, but moved east to Chapel Hill and spent her career doing clinical research in nutrition at the University of North Carolina - School of Medicine. The training in research has had a strong influence on her quilting career. In research, there is always a new quest, a new problem to be solved, and innovative methods to be developed. In addition, there are young people who are coming into the field and need to be mentored. And that is also true of quilting. While she has been sewing since she was a child, her quilting career started in her mid-twenties when she made her first quilts for her children. Thus when Marjorie left UNC to spend more time with her family, she felt right at home in the quilting world. Rather than writing grants and teaching classes, she started blogging in January of 2008 as a way to share her experiences and discoveries in quilting. In addition to quilting, Marjorie enjoys spending time with her daughters and their families which include six grandchildren.