
Radiating Petals
by Natalia Bonner, Piece N Quilt
About five years ago, Natalia left her job of six years, bought a Gammill Long Arm Quilting Machine and decided to pursue a career as a machine quilter…Read more about blogger
I’ve made Dresden Plates in the past but my cutting must have been inaccurate because the plates just never seemed to lie quite as nicely as I’d like them to.
I recently had the chance to use the AccuQuilt GO!® Fabric Cutter and GO!® Dresden Plates die. It was great to work with both the GO! and the Dresden Plates die. I love the accuracy and the fact that this die contains both the pointed petals and the rounded petals. You can use rounded or pointed plates to create a full circle and use a 4" circle as the center. I didn’t use the rounded petals for this tutorial but I definitely plan to create more Dresden blocks and use the rounded petals. Another idea would be to mix the pointed and rounded petals together. With all these options, this die can be so versatile. You can easily make a difficult looking project easy with the GO! Dresden Plates die.
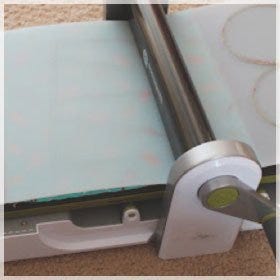
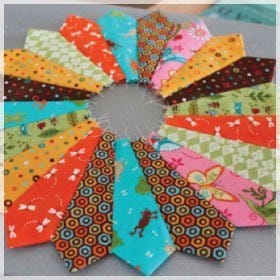
I began by selecting eight different prints and then used my GO! Dresden Plates die to quickly cut four layers of Dresden pieces at one time.
You can either make good use of your scraps or use your favorite fabrics to create something beautiful. It was so easy to cut using the GO! Fabric Cutter that my four-year-old daughter did all the cutting for me.
It was amazing to see how accurate every cut piece came out. As a quilter, you know how difficult it can be to ensure every piece comes out identical to the rest.
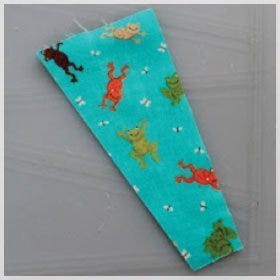
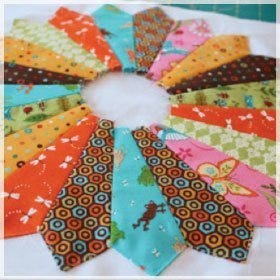
Once you cut these out with your AccuQuilt GO! Fabric Cutter, you’ve instantly created about a 13" Dresden Plate shape. You could easily trim it down if you wanted to work with a smaller shape.
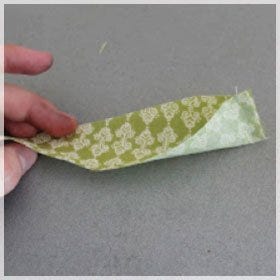
Next, I folded the large end of the Dresden pieces in half. Put right sides together and sew across the top as shown here.
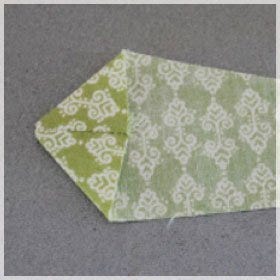
I then turned that point that I had sewn right sides out and pressed into the nice point as demonstrated here.
Once you’ve completed these steps, you’re ready to sew the pieces together.
If you’re working with the rounded petals, AccuQuilt makes it very easy to pin and sew the cut pieces together as they have matching notches. They fit together so nicely. For perfect results, I would suggest sewing them together in four sets of five blocks. Press the seams open and then sew the four sections together.
I then appliquéd them onto a 14" square of white background material.
To accurately center your Dresden plate on the background, I suggest folding your background fabric in half, then in half again. Press the folds and it creates four equal squares. This way you can line the Dresden plate design up on your fold lines. I definitely recommend doing the same thing with your center circle to make sure you have it nicely centered. I used a top stitch and stitched very close to the outside edge of the Dresden Plate.
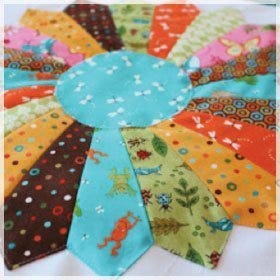
Once you’ve appliquéd the Dresden design on your background fabric, cut out the 4" circle included on the GO! Dresden Plate die.
Now you’re ready to appliqué the circle using a blanket stitch to the center of the Dresden.
You could use this for a wall hanging, table topper, quilt, or anything for that matter. This couldn’t have been more simple as the whole block came together in less than an hour.
I love the scrappy look of the Dresden plate designs. They are a great use of scraps or even pre-cut fabrics like a layer cake or jelly roll. Just imagine what scraps you could use to make this complicated looking design!
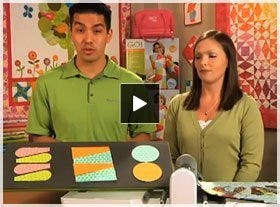
Watch Video:
How to use the GO! Fabric Cutter
to cut GO! Dresden Plates

Watch Video:
How to use the Studio™ Fabric Cutter
to cut Studio Dresden Plates (50001) | (50002)
About Blogger:
Natalia was born and raised in Heber, Utah. During her childhood, her mom owned a Custom Curtain and Decorating Shop, where she spent many summers at the shop watching the ladies sew, and then taking their scraps and making her own quilts. Natalia entered one of these quilts in the local fair and it went on to win a ribbon at the State Fair.
About five years ago, when Natalia was pregnant with her daughter Chesney, she and her husband decided that she would no longer work as a dental assistant. She left her job of six years and bought a Gammill Long arm Quilting Machine. She decided at that point to pursue a career as a machine quilter.
Natalia continues to machine quilt for herself and others. She has won multiple ribbons for her quilts; has been published in several magazines and books; and has spent time teaching about pre-cut fabrics, machine quilting and her raw edge starch appliqué technique. Natalia LOVES quilting and hopes to share her love with all quilters!
She likes to share what she’s been up to on her blog www.piecenquilt.blogspot.com. It’s a fun outlet for Natalia to share the quilts that she’s machine quilted, patterns and tutorials that her mother and her have designed, or just what she’s up to! Stop by and say hello. Natalia loves connecting with old and new friends.