Freaky Fast {Mock} Cathedral Windows
by Ebony Love, LoveBug Studios
Award-winning quilter Ebony Love is the owner of LoveBug Studios, a
long-arm quilting and quilt design business…Read more about blogger.

When I first purchased my AccuQuilt Studio™ Fabric Cutter, circle dies were among my first purchases. In fact, my very first die purchase was a custom circle with a pinked edge.
I have tried just about every circle cutting template, ruler, and tool on the market, and there simply isn’t anything else that will cut circles as quickly or as accurately. Circles are still among my favorite dies; my only regret is not finding AccuQuilt sooner!
There are many different sizes of standard circles in the Studio collection, ranging from 3/16" up to 8 1/2", and several dies come with multiple sizes on the die board. If you pre-fuse fabric before cutting circles, it can speed up appliqué projects and really cut down the time it takes to make a project. The larger circles are perfect for making mock cathedral windows, which is the project I’ve chosen to demonstrate today.
This candle mat project takes about two hours start to finish, which makes this a perfect choice for a quick gift or a class, and the large circle is a great way for new quilters to get their feet wet sewing curves.
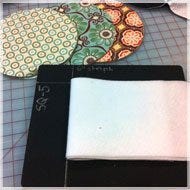
Materials:
- 5-6 fat quarters of your choice (each FQ yields four 8- 1/2" circles)
- Two 6" strips of fusible fleece (enough to yield 9 squares)
- 50094 - Studio Circle-8 1/2" (Jumbo)
- 50131 - Studio Square-5 1/2" (Quilt Block A)
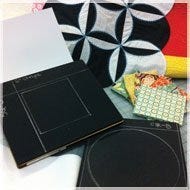
- Lightweight cardboard or template plastic
Tip: I use a silver sharpie to outline the shapes on my dies, and then I draw registration lines 1/4" away from the blades. This shows me exactly what I need to cover the blades, and gives me a straight edge to align the grain of the fabric.
Fold your fat quarters in half along the 18" edge, using the selvage as a straight edge, and then fold it down approximately 9" and layer it on the circle die, making sure you cut off the selvage. Use your registration lines to align the folds; you’ll have a little extra fabric leftover to use in another project.
You will be able to cut two fat quarters at a time using this method. For this project, you need a total of 18 circles; I used 6 fat quarters to get more variety.
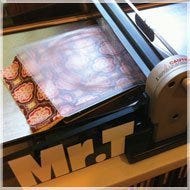
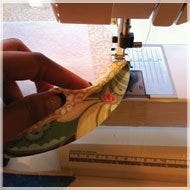
Layer your mat on top, and roll the die through your cutter. You get to see ‘Mr. T’ in action!
Layer the fusible fleece on the 5- 1/2" square die; I cut four layers at a time because of the thickness of the fleece. You need a total of nine squares.
You will also need to cut one 5 1/2" square template from a piece of cardboard or template plastic. Go ahead and use your die! The Studio dies are very versatile and durable, and it’s okay to cut other materials with your dies every once in a while.
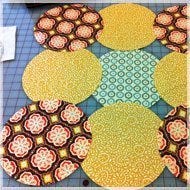
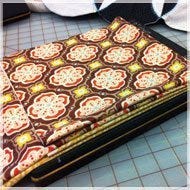
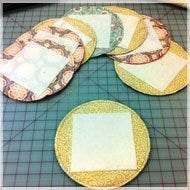
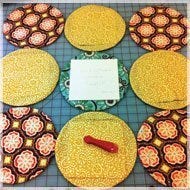
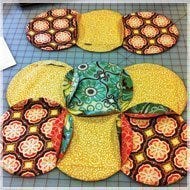
You may want to lay out your circles to decide which ones you want to show on the front. Experiment with your circles to see what layout is most pleasing to you. You’re essentially making a 9-patch block, only with circles!
The circles on top will be the center of the cathedral window.
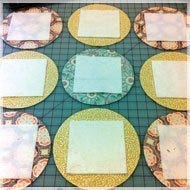
Turn over your circles so that the wrong side is facing up. Then, center your fusible fleece on top of the circles, with the fusible side down.
(Note: I decided to swap out my center, so it’s different from the previous photo.)
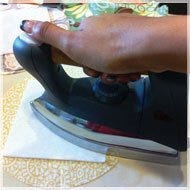
Follow the manufacturer’s instructions to fuse the fleece to the fabric. At this point, it doesn’t need to be a completely permanent bond; it just needs to survive handling over the next several steps.
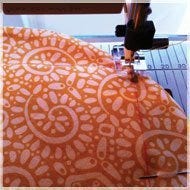
Take this circle with the fused fleece and layer it with a non-fused circle, with right sides together. Stitch these circles together with a 1/4" seam, all the way around.
Yes, completely close the circle, all the way around!
When you are all finished, you’ll have a total of nine stitched circles.
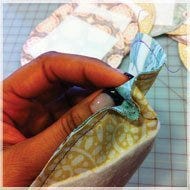
Carefully pull apart your stitched circles, and cut a hole about 1/2" above the fusible fleece. This is your hole for turning.
Tip: Be careful! Whichever fabric you cut into, is the fabric that will be the center of your cathedral window.
Widen the hole with your scissors to give yourself room to turn the circle inside out. Don’t cut all the way to the edge.
This hole will get hidden when we stitch the rows together, so don’t worry about it!
Turn the circle inside out, and use a point turner to help you get the circle nice and round. Use your iron and a bit of steam to help the circle hold its shape.
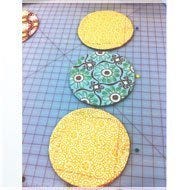
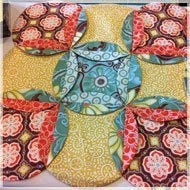
Lay out your circles again. If you want to leave the outside edges rounded, make sure that you orient the turning hole toward the inside of the project.
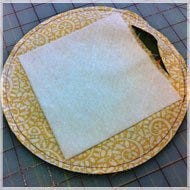
Lay your 5 1/2" square template on top of each circle, and trace around it with chalk or a pencil. These marks are your stitching lines.
Take two circles, with their marked sides out, and pin them together on the side where you are stitching the seam.
In this photo, the center row is layered on top of the far right row.
Stitch on the marked line through all layers.
Tip: Use a stitch-in-the-ditch foot to follow the marked line exactly.
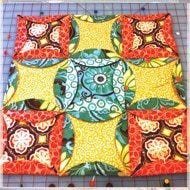
Continue stitching the circles together, into rows, and then stitch the rows together. You can start to see the cathedral windows taking shape!
After you get all the rows stitched, use your iron to flatten the flaps and form the windows. You can leave the outsides rounded, or press them inward to complete the shape.
Tip: This is also a great quilt-as-you-go project. Leave the outside edges unfolded, and you can add more circles later to make the project bigger.
This is easier to work with if you pin down the outside flaps before stitching.
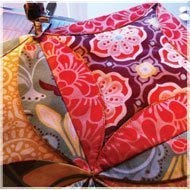
Use a nice decorative thread or stitch to secure the flaps. Here, I just used a nice 50 wt Aurifil® thread with a straight stitch, but if you’re doing a decorative stitch, you might want to switch to a 30 or 40 wt thread instead.
Tip: I used my invisible zipper foot as an edge guide. Don’t forget to use a needle appropriately sized for the weight of your thread and fabric.
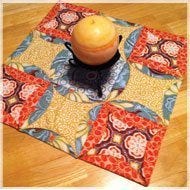
Enjoy your freaky-fast candle mat!


About Blogger:
Award-winning quilter Ebony Love is the owner of LoveBug Studios, a long-arm quilting and quilt design business. She publishes her patterns and offers die cutting services under the brand Quilt Possible!, and is also the publisher and editor-in-chief of a new digital publication, Blocks to Die For!, especially for fabric die-cutting enthusiasts. Ebony is recognized as one of the leading experts in fabric die cutting techniques, and she regularly produces free videos featuring tips & techniques for getting the most out of your dies. You can find dozens of her videos on YouTube under the username “LoveBugStudios” or in AccuQuilt’s video library.