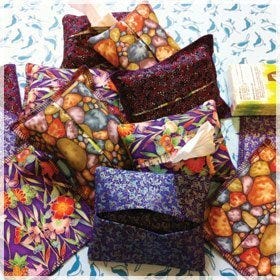
Quick Gift Tissue Holders
by Ebony Love, LoveBug Studios
Award-winning quilter Ebony Love is the owner of LoveBug Studios, a
long-arm quilting and quilt design business…Read more about blogger.
I am always looking for different ways to use my AccuQuilt Studio™ dies and get more mileage out of them. Nothing is more fun than discovering a new time-saving tip or project to make with my dies, and this quick gift using the Studio Batting Rectangles-4" x 5" (50073) die is one of my favorites. I hand these out like candy!
Although this die is labeled as a “batting” die and is sized for use with the rag quilting set, you don’t have to limit yourself to rag quilts, or to only cutting batting!
This die is just as versatile as any other Studio die, and the blades are exactly the same, so feel free to use it to cut anything that you would normally cut with your Studio Fabric Cutter.
The 4" x 5" cut size can seem a little odd for quilting since it’s not a regular “block” shape, but rectangles can be a fun change from plain squares, and in the case of this project, helps you whip out quick gifts in a matter of minutes.
This is a fat-quarter friendly project, and is great for little “make and take” activities or group sew-ins. In fact, I learned to make these while at a quilting retreat with the Chicago Modern Quilt Guild. As soon as I returned home, I set about searching for a die that would make quick work of these. AccuQuilt did not disappoint!
I will mention that the fit of the tissue package is quite snug; I actually like the snug fit because as you use the tissues and pull them from the cover, the package will stay in place. You could also take the tissues out of the plastic packaging and use them that way, although if you plan to give these away or sell them, people prefer pristine tissues that no one else has touched.
Materials:
- 1-2 fat quarters of your choice (1 fat quarter will yield 12-15 rectangles)
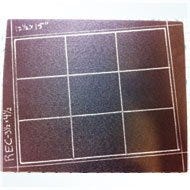
- Studio Batting Rectangles-4" x 5" (Giant – 50073)
Tip: See how the rectangle shape is angled on the die board? This is to help the accuracy of the cut, and ensures that the blade does not flex as it travels through the cutter. You want to avoid orienting a die with a blade that is exactly parallel with the roller, so if you have a shape that isn’t angled on the board, you should angle it slightly when you lay it on the tray.
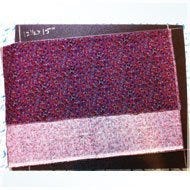
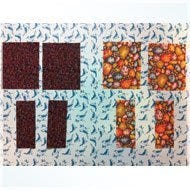
Layer your fat quarter on the die, lining up the selvage with the longest side of the die. You’ll get nine rectangles from the bottom layer. Fold the top of the fat quarter down so that the fabric covers the outside blade. Depending on the accuracy of your fat quarter, you may be able to get up to six full rectangles on the top layer.
Go ahead, stack up those fat quarters! You can layer up to five fat quarters on the die.
As you layer them, alternate the location of the folds on the die so that you are creating an even stack.
Layer the mat on top of the die and run it through the cutter. See how quick and easy this is?
Notice how the fat quarter I layered on top did not quite make a full rectangle in the second row. This is why your fat quarter yield will vary.
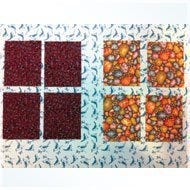
Each tissue cover requires four rectangles. Feel free to mix & match if you’re cutting multiple fabrics!
Take two rectangles and fold them in half lengthwise. Press the fold well.
For each tissue cover, you now have two full rectangles, and two folded rectangles.
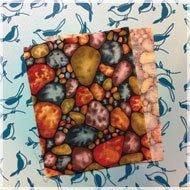
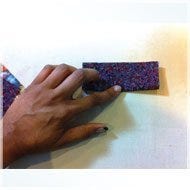
Take the two full rectangles, and line them up with wrong sides together. This is important!

Take the two folded rectangles and lay them on top of the two full rectangles. The folds should face toward the center, and all raw edges will be aligned.
Tip: If you’re mixing and matching fabrics, note that the full rectangle on top, closest to the folded ones, will be the outside bottom of your tissue case.
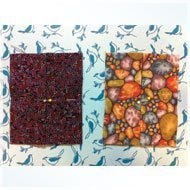
Place a couple of pins to hold the four layers together.
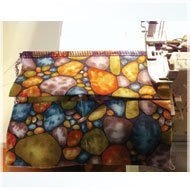
Stitch all the way around the tissue holder with a 1/4" seam using the method of your choice. I used a serger to finish the edges, but you could use a zigzag or decorative machine stitch.
Note: If you’re using a serger with the knife blade up, make sure you remove the pins well before you reach them so you don’t get injured by metal shards or damage your machine!
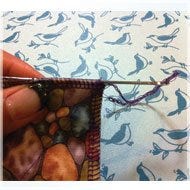
If you’re using a serger, use a double-eyed or tapestry needle to bury the thread tail; this is a neater finish than clipping the thread tail and insures your work won’t unravel.
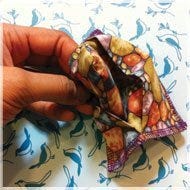
Turn the tissue cover inside out, poking out the corners to make it square.
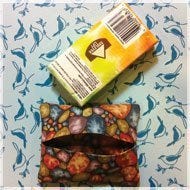
Insert the tissue packet into the cover; yes, it’s a snug fit, but it will fit!
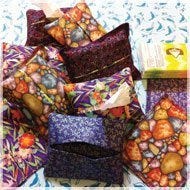
These are so cute in a pile! You can also embellish these in any way you wish! I’ve sometimes added little keychain loops on the edges made from the colorful part of leftover selvage, or from bits of ribbon or yarn.
Another idea is to use a decorative stitch around the edge and don’t bother turning them inside out. We think our serger thread is pretty enough to leave on the outside too!


About Blogger:
Award-winning quilter Ebony Love is the owner of LoveBug Studios, a long-arm quilting and quilt design business. She publishes her patterns and offers die cutting services under the brand Quilt Possible!, and is also the publisher and editor-in-chief of a new digital publication, Blocks to Die For!, especially for fabric die-cutting enthusiasts. Ebony is recognized as one of the leading experts in fabric die cutting techniques, and she regularly produces free videos featuring tips & techniques for getting the most out of your dies. You can find dozens of her videos on YouTube under the username “LoveBugStudios” or in AccuQuilt’s video library.