
The weather has been chilly the last few mornings and I could see my breath in the air. I know that winter is on its way. I really like the crisp feeling of a cool autumn morning. It inspires me to change my decorations and begin nesting my home for the coming winter season.
Prior to being a quilt pattern designer, for almost 30 years I was a florist. Wreaths for any season have always made my heart sing.
My Story
 When I was young my grandma would have her gas-filled at a full-service gas station. The one we frequented was Mr. Bond's Texaco on West Norfolk Road. Mrs. Bond was a crafter/maker at heart. Several times during the year she would bring handmade goods into her husband's filling station to sell to regular customers. It was her way of earning what midwestern farmwives would call "egg money." Just a little bit of money of her own to spend as she pleased.
In the latter half of the 1970's, she made and sold quite a few  patchwork wreaths. Her wreath form was straw and she picked cotton balls covered in calico and gingham into the straw base. They were bright and colorful. They had a down-home chic flair. My grandmother bought one of these wreaths and it hung on her front door for many Christmases to come.
I have fond memories of that wreath and those Christmases. I wanted to make a wreath that was handmade but more contemporary with a nod to the era of that patchwork wreath. I have been seeing several wreaths that had beautiful hand embroidery and I was inspired to attempt this with patchwork instead of embroidery.
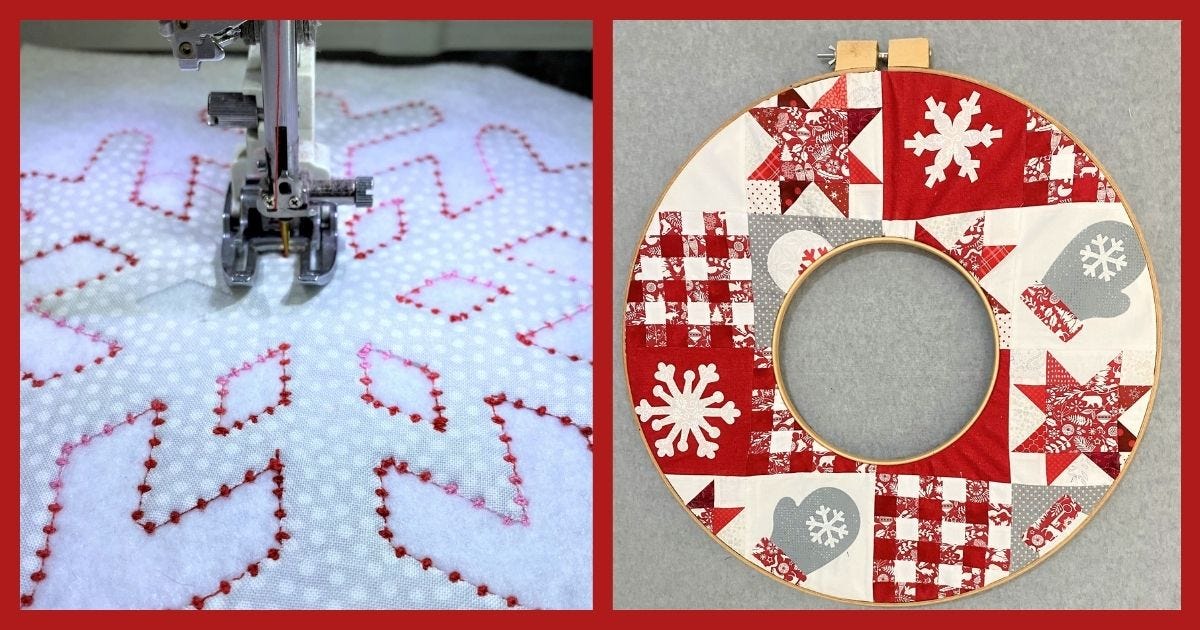
So this is how I made my Scandinavian-inspired patchwork wreath. I call it a Hygge wreath. Hygge (pronounced HUE-gah) is a Danish and Norwegian word for a mood of coziness and comfortable conviviality with feelings of wellness and contentment. In that Scandinavian tradition, I designed my patchwork Hygge wreath.
The Dies You Need

Here is a list of the Accuquilt Dies I used to create this wreath:
- 1 1/2" strip Die 55024
- GO! Qube Mix & Match 6" Block
- GO! Snowflake 55359
- GO! Holiday Medley Die 55043
- NEW GO! Mitten Die 55564
- GO! Snowflake 7" Die 55450 (optional for embellishment)
Additional Items You Need
- Fabric to complete project

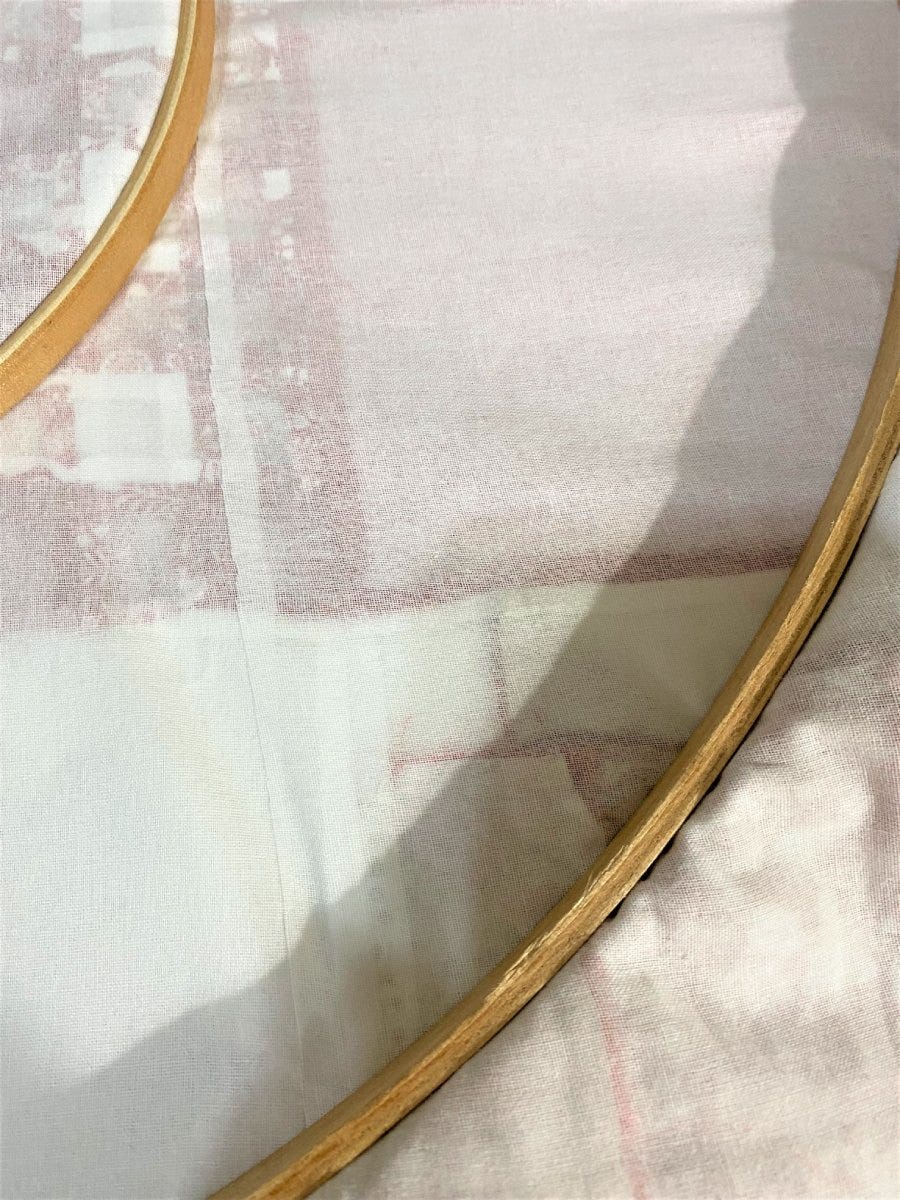
- Two wooden embroidery/quilting hoops. One 23-24" in diameter and one 10" in diameter.
- 1 1/2 yards of Pellon SF101
- An upholstery electric stapler with staples.
- A hot glue gun and hot glue
- Sharp small scissors to cut the center
Let's Make a Modern, Handmade Wreath
I began by creating several quilt blocks. I used a limited color palette of white, grey, and red. I created three different blocks using these colors.
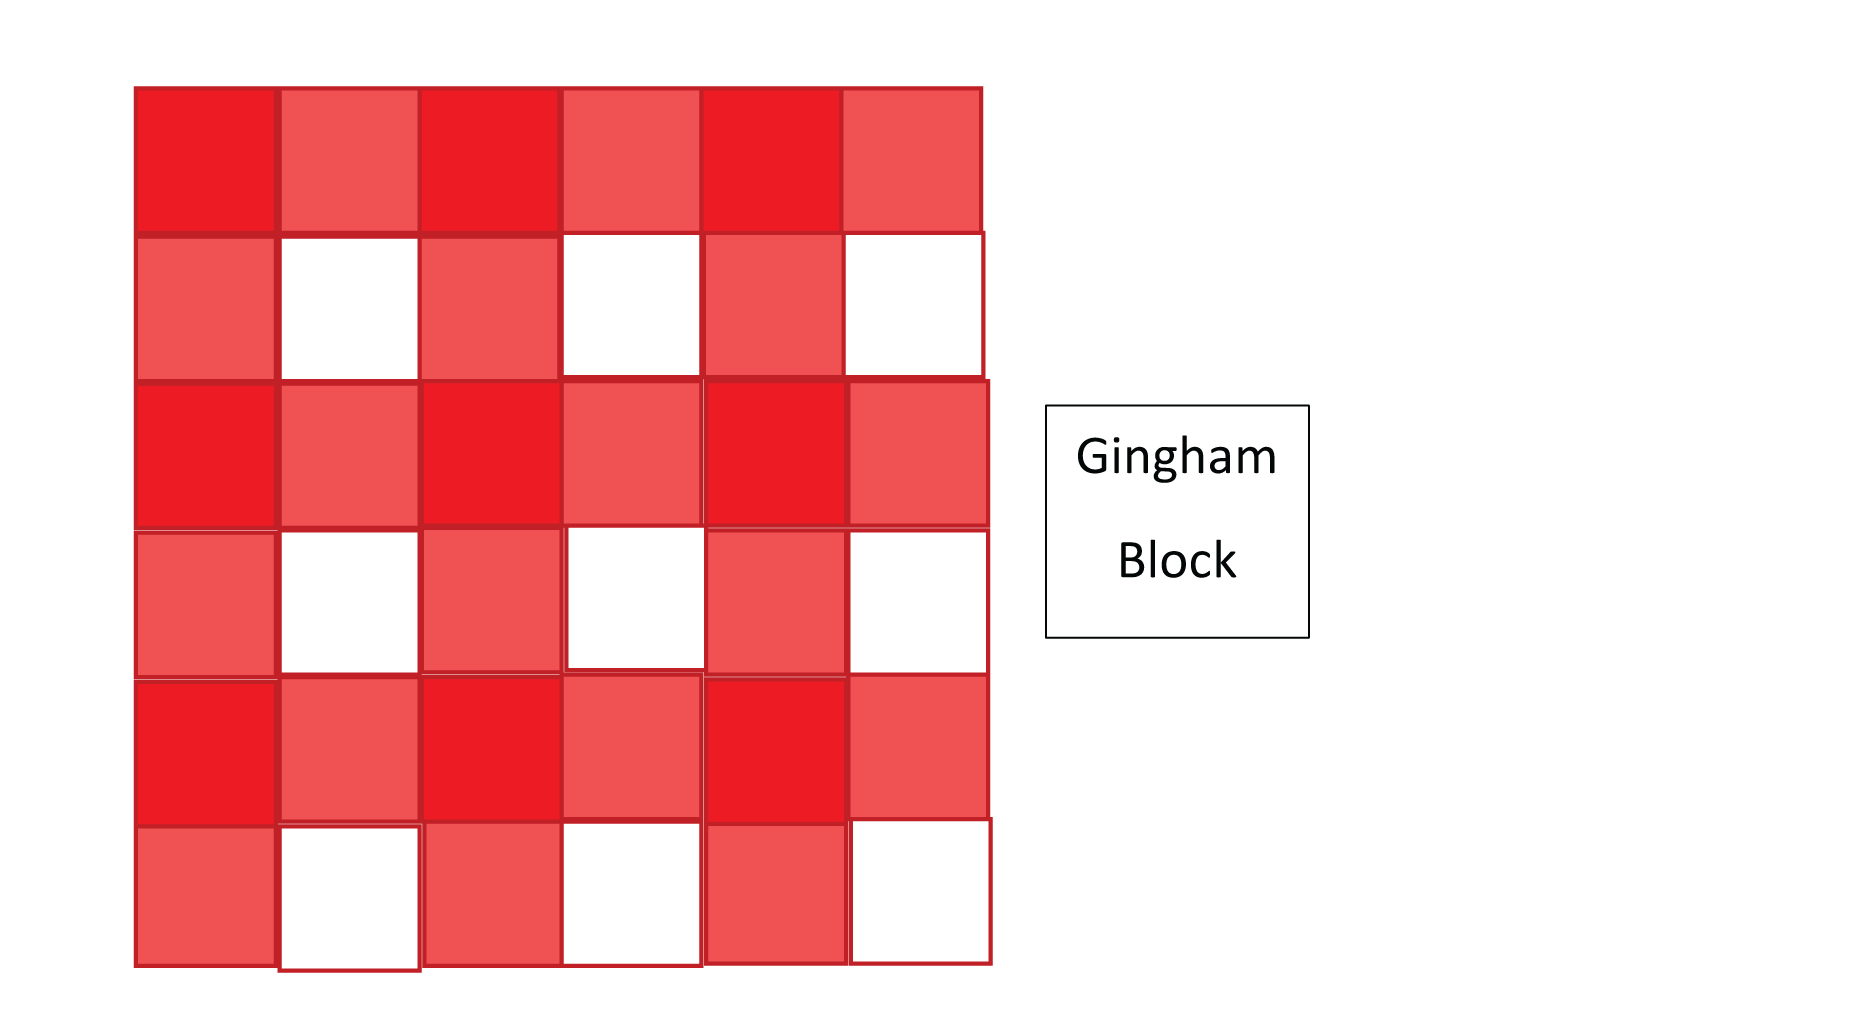
Pro Tip: Shorten your stitch length to about 1.2 and use a polyester blend thread so you can stretch your blocks in the hoop. The first block is a 6" gingham block. I used the 1 1/2" strip die 55024 to cut strips of a dark red tone-on-tone fabric, a white on white fabric and a red/white print fabric.
 I made strip sets of six strips. The first set was red/print/red/print/red print. The second set was print/white/print/white/print/white. Once both strip sets were sewn and pressed. I cut 1 1/2" segments of both and sewed them together. Alternate between the red and print and white and print rows.
I also constructed 6" 8-pointed star blocks. I used the GO! Qube Mix & Match 6" Block for these star blocks.
I used the center square die 55701, the corner square die 55702, the half-square triangle die 55705 and the rectangle die 55158.
See the diagram and chart here.

| Star Piece | Fabric | Die Used | Quanity Needed | Cuts |
| Half-square Triangles | Assorted Reds | 55705 | 8 | 2 |
| Center square | Red Scandinavian Print | 55701 | 1 | 1 |
| Corner squares | White tone on tone | 55702 | 4 |
1
|
| Side Rectangles | White tone on tone | 55158 | 4 | 2 |
Create the side flying geese units.
Sew 2 to either side of the center square.
Sew a corner square to each end of both remaining flying geese units.
Sew the center square strip between the other two strips.
Here is a diagram of how to construct the eight-pointed star block.

This is the same technique I used in the Turkey Trot Table Runner - if you read that post.

In addition to these two pieced blocks, I also created two applique blocks. A snowflake applique block using Snowflakes found on the Accuquilt GO! Snowflake 55359 and the Accuquilt GO! Holiday Medley Die 55043.
I also added Accuquilt's new mitten die to some blocks for a more "hygge" feel. This super cute new die has endless possibilities for applique. You could change the snowflake on the back of the mitten to a letter and make monogrammed mittens. They could be tree ornaments or an advent calendar. Have fun playing with this new die.

Once I had a variety of blocks I laid them out to form a small patchwork quilt top that was at least as large as my outer embroidery/quilting hoop's diameter.
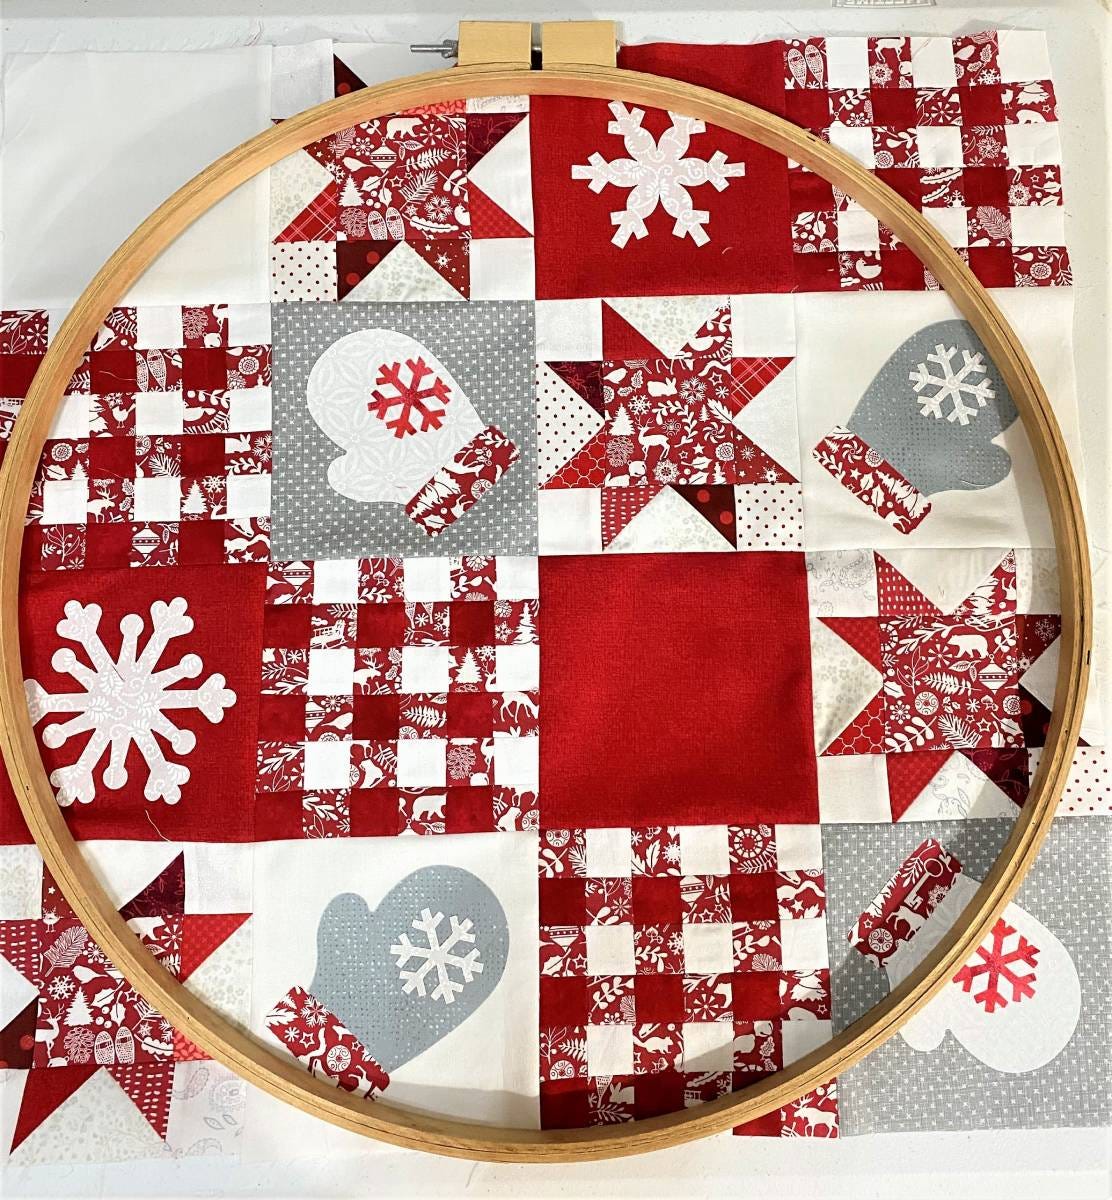
As you can see some of the blocks are empty. That is because those blocks will only have small portions of them in the finished wreath. There is no need to take time to make them special if the majority will end up discarded.

While this layout is large enough to fill the wreath to the edge, it is not quite big enough to be hooped properly in the embroidery/quilting hoop. So I added a 3-inch border on all sides.
This made enough space for the wreath to be held securely by both embroidery/quilting hoops. Once I have enough of the patchwork to cover the entire wreath, I stabilize the top by ironing Pellon's SF101 to the backside of this pieced top.
The SF 101 is a woven lightweight interfacing that will support the patchwork and allow me to stretch the quilt top without popping any stitches.
Pro Tip: Make sure you use WOVEN interfacing because non-woven interfacing can be torn easily if it is stretched.
Pro Tip: Do not quilt or layer with batting. The batting becomes extremely difficult to use in this project. You will not be able to adjust the embroider hoops correctly if you hoop the top with batting or quilt it before you begin making the wreath.

To begin the wreath construction, you need to hoop the center of your patchwork.
You will use the 10-inch embroider hoop and you will hoop it from the back. In other words, the outer adjustable ring of the 10" embroidery hoop will be on the backside of your patchwork. Hoop the patchwork with the center centered in this 10" hoop.
Tighten the screw on the outer hoop and pull the fabric taut. There will be some rippling along the outside of the 10" embroidery hoop this is normal.
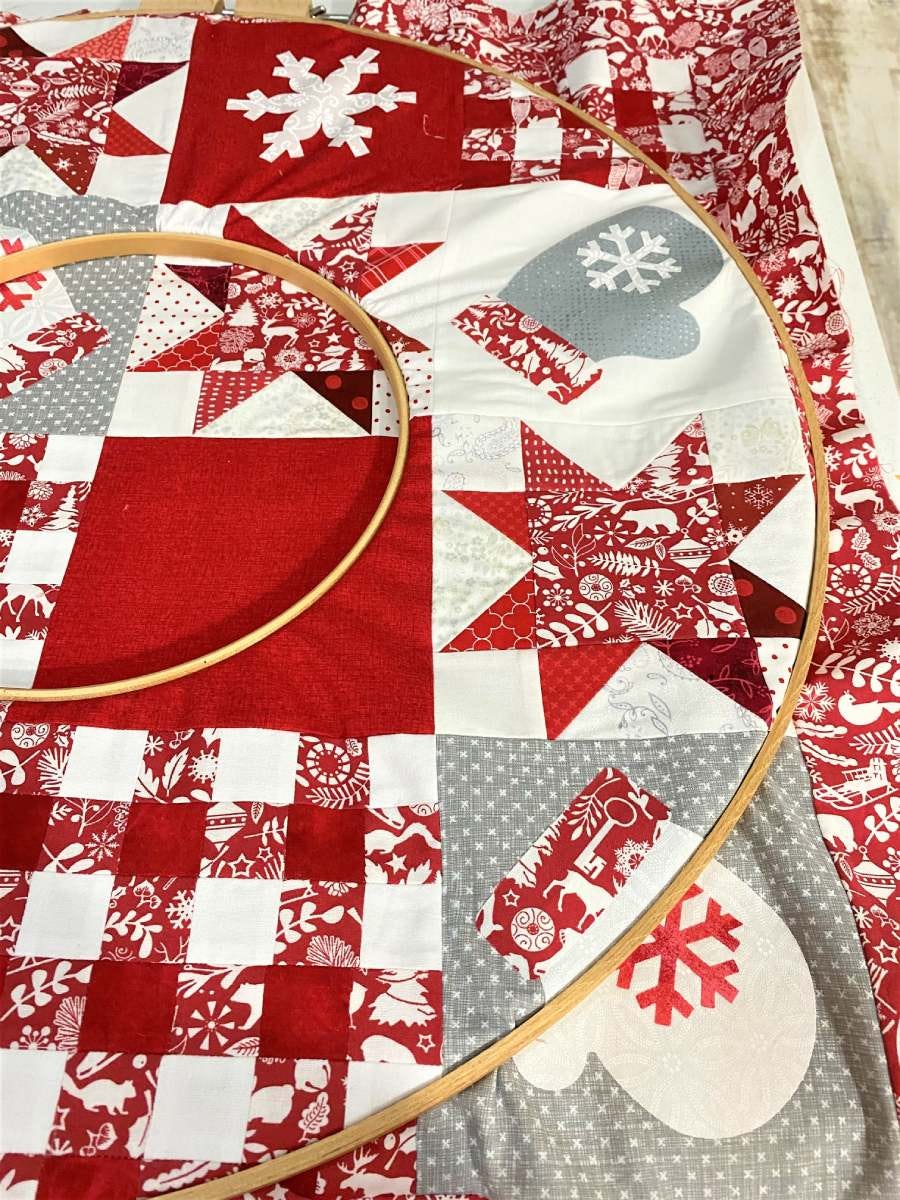 Now, center this hooped quilt top in the large 23-24" quilting/embroidery hoop.
In this second hooping, you will have the inner hoop on the backside of the quilt top and the outer hoop with the adjustment screw on the top side of the patchwork.
Do your best to keep the adjustment screw assembly at the top of the wreath. Be patient and accurate in your placement. It will show and it will pay off to be careful and thoughtful.
If it does not hoop properly on your first try, you are not alone. I adjusted the outer hoop three times before I was satisfied with its placement.
So take your time and make sure the outer hoop is placed well before continuing on.
Once the outer hoop is properly placed, turn the adjustment screw to tighten the hoop and begin to stretch your fabric so there are no large wrinkles or bumps between the inner and outer hoop.
Do not pull too hard because you will dislodge both hoops and have to start the entire project again. Be thoughtful and diligent about your initial placement of both hoops. The SF 101 fused to the back of your quilt top will allow you to create a taut and mostly wrinkle-free surface between the two hoops.
You may need to adjust the screw as you move and pull on your fabric in the hoop. It is normal to have to give it a little extra twist.

Once you are satisfied with the placement of your hoops and the tautness of the fabric in both hoops, then it's time to begin completing your wreath.
To start you will need to plug in your electric staple gun. You know the one you bought a few years ago when everyone was making tuffets and you were sure you'd make many so you invested in that upholstery stapler that's now gathering dust on the back shelf of your craft cabinet.
Well, get it out and dust it off. Here's a new project to use it on.
Place staples into the 10" hoop from the backside of the wreath. Place them as if you are looking at a clock face. You need a staple at 12, at 6, at 3, and at 9.
Pro Tip: If the staples don't properly nest when you staple, you can use a small hammer to make sure the staples are secure and in both layers of the embroidery hoop.


Be careful not to shoot the staple all the way through both pieces of the hoop. There are some long staples out there that will do this. Look for a shallow staple to use in this project.
You can add additional staples at the other clock face numbers if you wish. Just alternate from one side to the other of the hoop as you add staples. I found just the four on the inner hoop work perfectly.
Once you have completed the stapling on the inner hoop, move to the outer hoop and begin stapling down the quilt top to the inside of the inner ring.
Start with staples at 12,6,3, and 9. Then fill in between these points so that the entire outer hoop's inner ring is stapled to the quilt top.
Once both hoops are stapled to the quilt top, you can begin trimming the quilt top to fit the wreath hoops. Use small sharp scissors for this task.
You will need to have clean strong cuts. Dull or bulky scissors will hinder your cutting and can lead to a hole in your wreath. I use Karen Kay Buckley scissors with the turquoise handle here. You can use any sharp serrated scissors you like.
Trim the excess from the outer hoop you will lose most of the four corners. Trim so that the staples still hold the quilt top in place.

After you have trimmed the quilt top at the outer hoop you can move to the inner hoop. Use your sharp scissor point to clip a hole in the quilt top at the center of the inner hoop.
Insert the scissors into this small opening and trim away most of the center. Leave about 1" all the way around the inside of the 10-inch embroidery hoop's inner hoop.
With the same scissors, slice that fabric left in the inner space about every 1" to 1 1/2" around the entire circumference of the hoop.
Hold your scissors perpendicular to the hoop and make little slits that come right up to the hoop. Fold these pieces back around the 10" embroidery hoop and hot glue them to the outer ring of the 10" embroidery hoop.

Congrats! Your Wreath is Done!
Your wreath is now complete and can be hung wherever you please!

You can add additional wool felt and fabric embellishments if you so choose.
The best embellishments are the Go! Mitten Die 55564 and the GO! Snowflake 7" Die 55450. I layered the fabric shapes cut using these two dies with wool felt and used a pretty decorative stitch on my machine to edge the motif.
You can add these to your wreath or make them coordinating tree ornaments. This little dot stitch in a variegated red thread is striking.
Here's a Homemade Cocoa Mix You Can Gift!
So sit back and enjoy the simple calm of this patchwork wreath. The perfect accompaniment to this would be a warm cup of cocoa.
Each year at Christmas I make a homemade cocoa mix that I gift to friends, my children's teachers, and co-workers. This cocoa mix can be easily stored and will last all winter in a mason jar next to your coffee in the pantry.
My favorite is white chocolate cocoa; it has a soft Scandinavian-inspired flavor. Here are the instructions so you can make cocoa for the people on your gift list.

White Chocolate Cocoa Mix
1 - 2 pound bag of powdered sugar
1 - 15 0z. Container of French Vanilla powdered creamer
1 - 22.75 oz. Package of Powdered Milk
1 - 13 oz. Container Malted Milk Powder
2- 3.3 oz. packages of White Chocolate Pudding Mix
Vanilla Powder about 2 oz.
1 package of White Chocolate chips to top the mix.
- Combine the powdered sugar, creamer, malted milk, pudding mix, and malted milk powder. Whisk together.
- Once combined add the Vanilla Powder if you have it. Whisk to completely incorporate the Vanilla Powder.
- Pour into mason jars for gifting. Fill jar about 3/4 full. Top the jar off with White Chocolate Chips.
To serve, combine 2 TBSP to 1/4 cup of Cocoa Mix with Hot Water or Warmed Milk. Stir to dissolve the powder and enjoy.
Enjoy Your Winter
I hope you can relax and enjoy this winter. Take some time for some self-care and do something nice for yourself. A hot cup of White Chocolate cocoa and some new Accuquilt Dies might be just the prescription for a happy and easy quilting new year. Check out the AccuQuilt gift guide below.

Find Your Holiday Gifts Now!
Get your quilting gifts now! Check out our new Quilter’s Gift Guide for inspiration, stocking stuffers, weekend projects, bundles, and the HOTTEST dies available (Did someone say, Gnomes?)!
Shop now while popular items are still available and ready to ship. Don’t miss out on what your heart desires due to national shipping delays – order today!


