
Looking for a quick project you can finish in a day or two? This adorable wall hanging/table topper takes only one die to complete and designer Kelly Cole even reused classic printed sheets for a vintage look and feel. This tutorial teaches an important lesson that busting scraps and recycling materials you already have can still lead to gorgeous results!
Hello! I am so very happy to share my first tutorial with the AccuQuilt community. Allow me to introduce myself; I'm Kelly Cole the creator of Vintage Fabric Studio where I refresh, prep, and package vintage sheets and fabric with quilters in mind. I had the pleasure of using the Block on Board® (BOB®) die named GO! Hattie's Choice-8" Finished (#55220) to make the cutest wall hanging or table topper sized quilt.

The Hattie's Choice (and all the AccuQuilt GO! Dies) takes hesitation out of the quilting equation. Go ahead and choose your fabrics, cut your simple squares and rectangles and place them onto the die. Once your fabrics are on the board, cover with the cutting mat, turn the GO! Cutter handle, and you are ready to sew. I'm going to repeat that – YOU ARE READY TO SEW!

To create this one-of-a-kind quilt top I chose one-of-a-kind fabrics from my shop Vintage Fabric Studio which specializes in unique vintage sheet prints. Vintage Fabric Studio renews vintage linens which creates a sustainable fabric source for vintage fabric lovers everywhere. To mimic the quilt top, use the following suggested color choices.
Fabrics Needed
- 2 FQ's low-volume for Unit A
- 2 FQ's Bright Yellow for Unit B
- 1 FQ of Dark Pink for Unit A Center Block
- 1 FQ each: Light Pink, Light Blue, Light Yellow for Unit C and Unit B Center Block
- ¼ Yard Yellow Binding cut into 2½" Strips
- 1 yard Backing Fabric
Cut Chart
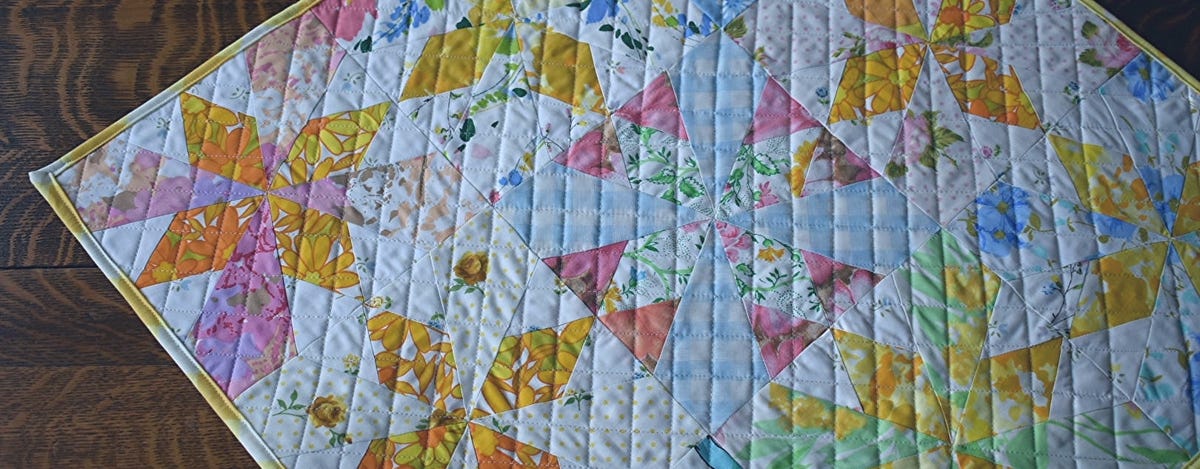
Finished quilt top measures 24"x24". B These fabrics are not an exact match to the shown quilt but will give the same look as the one pictured.
- Unit A
- Low-Volume 64 pieces
- Dark Pink 8 pieces
- Unit B
- Dark Yellow 32 pieces
- Light Pink 4 pieces
- Unit C
- Light Yellow 12 pieces
- Light Blue 12 pieces
- Light Pink 12 pieces
Sewing Instructions
Following the instructions included in the GO! Hattie's Choice die, sew Unit A to Unit B. This first step is key to the success of your finished block. The first units I sewed together were not properly lined up and my entire block did not come together properly. The shortest edge of the triangle should not be in the middle of Unit B. See photo below of what not to do.

Lucky for us, this is the trickiest part of sewing a block! The next photo shows what your pieces look like when properly lined up. The short edge is pointing down and long edges are aligned with the sides of Unit B.

After properly sewing together Unit A to Unit B, you will have a complete Unit ABA to sew onto Unit C. Then sew four ABAC Units.

Once you have sewn four ABAC Units together, sew two ABAC Units together to create a half-block. Sew two half-blocks together to create a Hattie's Choice block.

Repeat the steps eight times to complete all nine blocks; use the following guidelines to match up fabric colors for outside blocks and the center block.
Finished Blocks by Color
- 1 Center Block with Dark Pink Unit A, Light Pink Unit B, Light Blue Unit C
- 3 Outside Blocks with Low-Volume Unit B, Dark Yellow Unit B, Light Blue Unit C
- 3 Outside Blocks with Low-Volume Unit B, Dark Yellow Unit B, Light Pink Unit C
- 2 Outside Blocks with Low-Volume Unit B, Dark Yellow Unit B, Light Yellow Unit C

Arrange blocks into a three by three block quilt top and sew blocks together row by row. Space out the different color combinations for a balanced composition. Quilt and bind using your preferred method.

Cutting and sewing these complex blocks was a breeze when I read the detailed and illustrated instructions (ha!). Hattie's Choice is one of those patterns where conventional template cutting makes you second guess your quilting decisions. I know first hand because several years ago I choose a quilt block very similar to the Hattie's Choice for my infant son's first quilt. I choose my fabrics, cut out my templates, and then didn't ever make a single block. That, my friends, was the struggle of stitching a complex quilt block before AccuQuilt!

Thank you for joining me today! Sewing this quilt up was such a fun project. I hope you consider one of AccuQuilt's BOB dies for your next project. Pair any of them up with a special set of fat quarters for a no-brainer quilt and if you make a Hattie's Choice Quilt, please tag AccuQuilt and I (@kelly_vintagefabricstudio) on Instagram so we can see what you are up to!
All the Best!
Kelly Cole
Vintage Fabric Studio on Instagram
What #QuarantineQuilting project are you working on? Share with us on social media or in the comments!


