

How Do You Prepare a Quilt for Quilting?
Last time we met, my discussion of favorite tools morphed into one about preparing a quilt for quilting. We were already about halfway through the pin-basting process. (If you missed that discussion, see my October 3, 2016 blog entry.) The backing was laid out, with the batting on top, and the quilt top of the batting, all the layers smoothed out and secured with 1" safety pins so they won’t shift out of position during the machine quilting.
What now?
Unclip the binder clips (or remove the masking tape) that you used to secure the backing to the table you’re working on. Now, in all likelihood, you have both batting and backing extending well beyond the edge of your quilt top. Who wants to deal with all that extra bulk when maneuvering your quilt under the arm of your domestic machine? Note that this is a quilt you’re preparing to quilt yourself on your own home sewing machine. If you were sending it off to a longarm quilter, you would simply provide the quilt top, backing, and batting separately so they could be mounted on the rollers of the longarm.
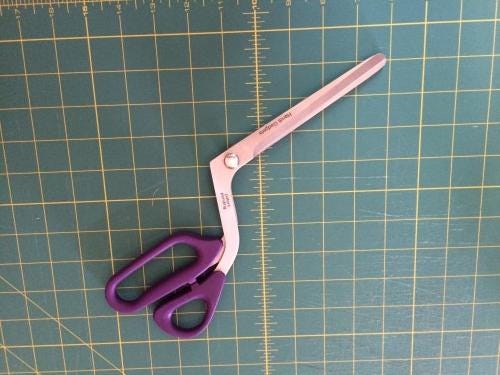
Here’s where another of my favorite tools—batting shears—comes in handy. I can’t even remember how I acquired a pair, but they’re great. The extra-long blades, the angle of the handle in relation to the blades, and, I assume, the nature of the blades themselves, make cutting through batting a snap. After you’re certain that the bottom blade is between the batting and backing, trim the batting to extend by about a half-inch to an inch beyond the edge of the quilt top. Trim all the way around the quilt.
You could also do this with a rotary cutter and mat, but manipulating a full-size mat around between the batting and backing can get a little awkward. If you happen to have an old, warped rotary cutting mat around, use tin snips or heavy-duty scissors to cut a 3" – 4" strip from one edge. It will slide around beneath the batting more easily while you trim using your rotary cutter. (Note that just because you can’t accurately cut fabric on a warped mat doesn’t mean it’s outlived its usefulness.) The trimming doesn’t have to be precise; just neat, and you can eye-ball “neat.”
The next step is to take your fabric shears (or rotary cutter) and trim the backing off about an inch beyond the trimmed batting.
After trimming, fold the backing over the batting, then position the folded edge one-quarter inch over the edge of the quilt top and safety pin it in place. Note: This is NOT the binding for the quilt, although invariably when people see that I’ve done this, they think it is. It’s not.

I pin the trimmed and folded edge onto the quilt top for a number of really good reasons.
- It cuts down on unnecessary bulk, making the machine quilting process easier.
- It encases the edge of the batting, thereby cutting down significantly on the amount of lint that will get into your machine as you quilt.
- The pinned edge of the backing is exactly where the edge of the quilt binding will be, and you can guide your quilting accordingly.
- Perhaps most importantly, you will never have the misfortune of discovering that somehow the loose edge of excess backing got tucked under and quilted into the back of your quilt! Yes, it can happen, no matter how much you promise yourself that you’ll be careful and keep that loose backing out of the way. I can tell you from personal experience that it’s no fun to try to cut away that mis-quilted backing without damaging your quilt and even less fun to take out the quilting stitches.
While we’re on the subject of batting (Uh-oh, I’m getting off the subject here, but this digression is a good one.), did you know that you can piece it? If you’ve never thought of doing this, you are probably just as suspicious as I was when I first heart this suggested more than a decade (or more) ago. No, it’s not pieced with a standard seam, nor should you sew one kind of batting to another. But if you have some fairly wide (and on this topic, anything about 12" or more I’d call "wide") leftover pieces of the same kind of batting, you can join them and create a new (and free) batt.
I am forever in Maurine Nobel’s debt for teaching me this method.
- Take two pieces of batting.
- Position them on a rotary cutting mat with the edges overlapping by about 2".
- With a rotary cutter (I recommend one with a 60mm blade), cut through both layers with a gently curving, serpentine cut the length of the overlap, making sure to stay within the overlapped edges.

- Remove the excess trimming of batting from the top layer.
- Use a fat Sharpie (permanent ink) pen to make small registration marks (dots) opposite each other on either side of the curved cut. Batting stretches easily and these dots will enable you to keep the pieces aligned properly when sewing them together.

- Remove the second trimmed edge from beneath the layers.
- Put a walking foot (the one with a set of feed dogs in it, which will help move the batting under the needle without stretching it).
- Select a zigzag stitch that is made with (approximately) 3 stitches on one zig and 3 stitches on the zag. This prevents a bunched-up ridge that can form if using a one-stitch zig, one-stitch zag stitch. Machines vary, so look for a stitch that approximates what I’m describing. Adjust the stitch width and length as needed to get a smooth line of stitching back and forth across the cut edges.

- If your machine comes with both a straight-stitch throat plate (single hole; recommended for piecing and quilting) and a zigzag-stitch throat plate (wide hole to accommodate the sideways movement of the needle), now is the time to make sure you have the zigzag plate on your machine.
- Butt the curved- edges of the batting pieces (NO overlap here) and join with your multiple-stitch zigzag, keeping the registration dots opposite each other so the curves match perfectly.
The reason for the serpentine cut is so that even if the quilt is repeatedly folded right where that join is, there’s no danger of the batting “breaking” along that seam.
There is a product on the market designed to fuse two pieces of batting together. I confess, I’ve never tried it because to my way of thinking, why pay for a product when I’m already happy with a method that doesn’t cost any more than a little time? I suspect the manufacturer recommends a straight cut but I also suspect that the product itself probably prevents any such breakage from happening. If my (Maurine’s) technique doesn’t appeal to you, or if you don’t have a walking foot, by all means, give the fusible a try.
If you do try this piecing technique, you’ll start to get a feel for the size of batting the leftovers you have will make. The small baby and kids’ quilts I make invariably have pieced batts and I defy anyone to tell the difference. Rather than try to make a specific size, I simply piece what I have into whatever size it ends up becoming.
I measure the new batts, label them with their dimensions, add those dimensions to a file card, and store them in one of those big zipper bags from someone’s purchase of a queen-size comforter. (Heaven knows, I’ve never bought one, but my friends know I make good use of the bags they come in!) The file card goes in so I can see the sizes of the batts within (I have more than one bag of pieced batts) without having paw through them in search of the size I need.
When I need a batt larger than the ones I have on hand, I buy a king-size, cut out what I need for the next few large quilts, then make more batts with what’s left. Check out the price per square inch; a king is the most economical way, other than buying an entire roll.)
The first time I overcame my suspicions and tried piecing batting, I spent the rest of the afternoon happily making new batts out of leftovers (because, of course, I had never thrown out a good piece of batting). To this day, if I feel like doing something quilt-related but am not in the mood to work on what I have underway, making new batts is often what I choose to do—that or making bindings, but that’s a discussion for another day. Also for another time, an answer I promised you last time but didn’t deliver this time.
Next time, I promise.
Any questions, comment on this entry OR email me at content@accuquilt.com
by Linda Baxter Lasco
Linda’s past and present roles in the quilting world include teacher, lecturer, judge, and quilt shop staff member. She also completed stints as program chair for both the Artful Hands Quilt Guild and the Rhododendron Needlers Quilt Guild, in Mansfield and Walpole, Massachusetts, respectively.
Additionally, while working as a senior editor at the American Quilter’s Society for nine years, Lasco edited many books and stand-alone patterns. She also wrote the quilting book, Red, White & Quilted, published in 2014.
The GO! Qube -Just Add Fabric!


