
Hello, friends! It's Melissa Corry from Happy Quilting and I am thrilled to be bringing you a new quilt tutorial.
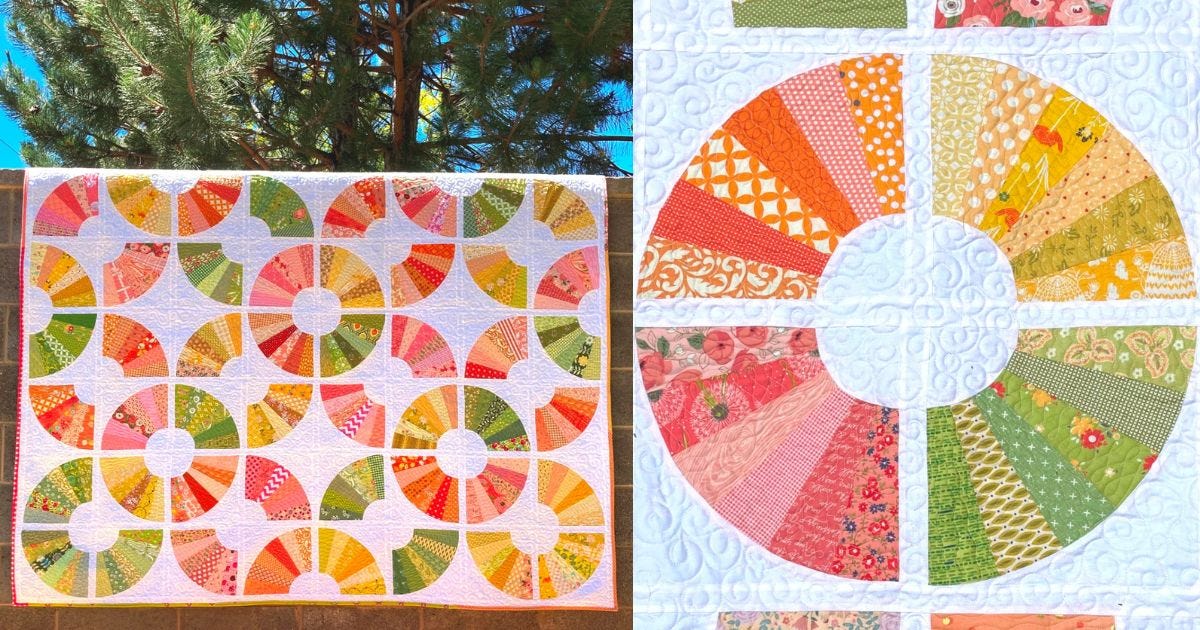
A Scrappy Summer Take on the Classic Grandmother's Fan Quilt
I just love curved piecing with the AccuQuilt system! It makes it so quick and easy to cut. Plus, piecing is a breeze when all of the notches line up!
When I found out about the GO! Grandmother's Fan-9" Finished Die being added to AccuQuilt's permanent die collection, I knew I wanted to make a quilt with it! You all know how I love scrappy quilts.
This quilt is a great place to start if you are new to curved piecing. The large curve in the grandmother's fan block is a great example to learn the feel of piecing curves. Again, the notches on the pieces make it super easy to line everything up just right.
Materials Needed
This quilt is a wonderful scrap-buster, and cutting scraps is so much easier and faster with a GO! Fabric Cutter!
What you will need:
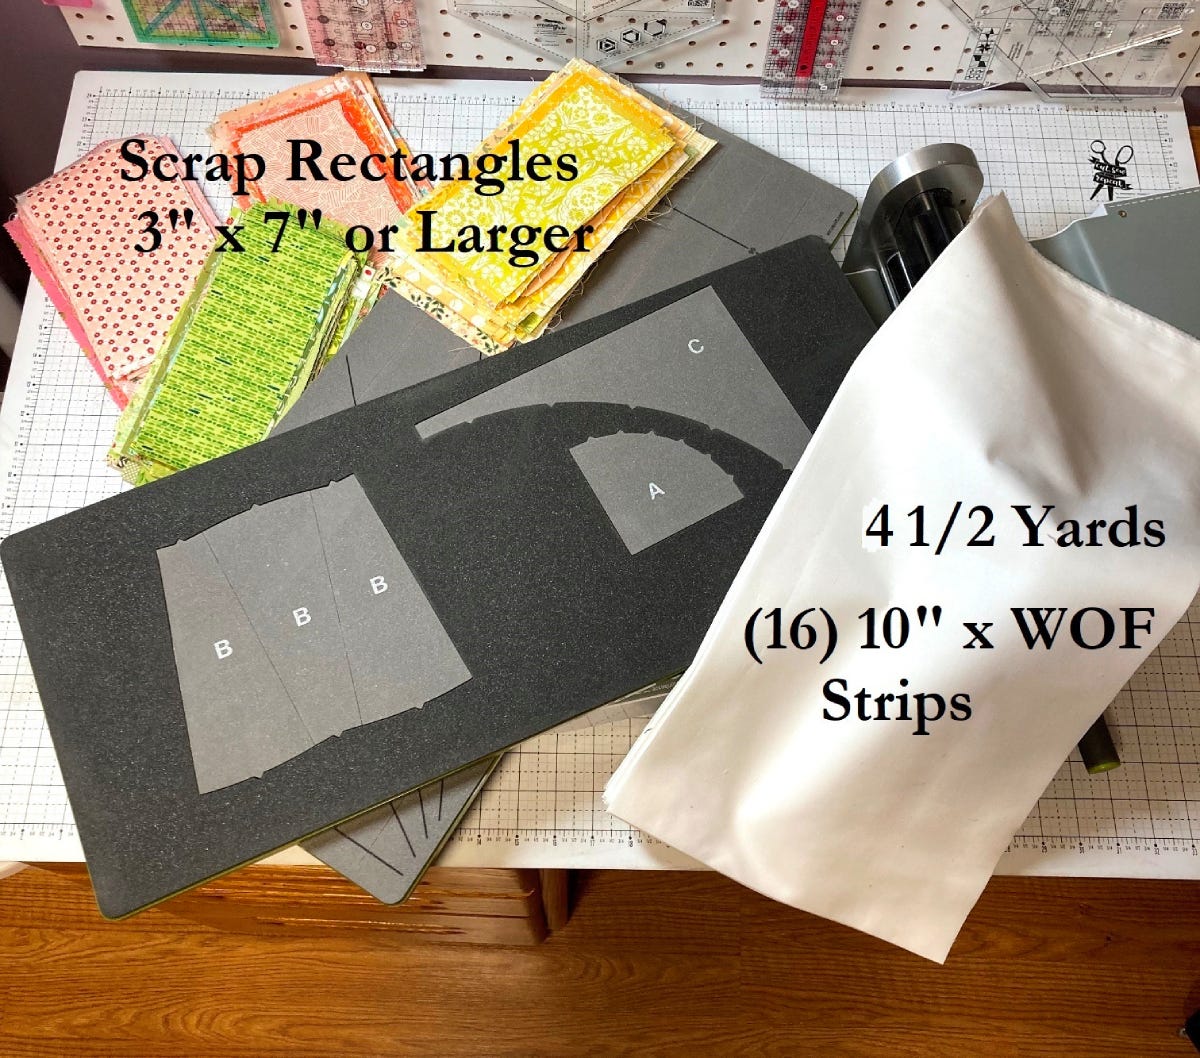
- GO! Grandmother's Fan-9" Finished Die
- GO! Strip Cutter-1 1/2" (1" Finished) 5 Strips Die
- 4 1/2 yards of solid fabric
- Approximately 1 1/2 yards each of these scrap colors (in any pattern):
- Orange
- Yellow
- Green
- Pink
- 3/4 yard of fabric for binding (I used scrap binding pieces in yellow, green, orange, and pink)
- 5 yards of printed fabric for backing
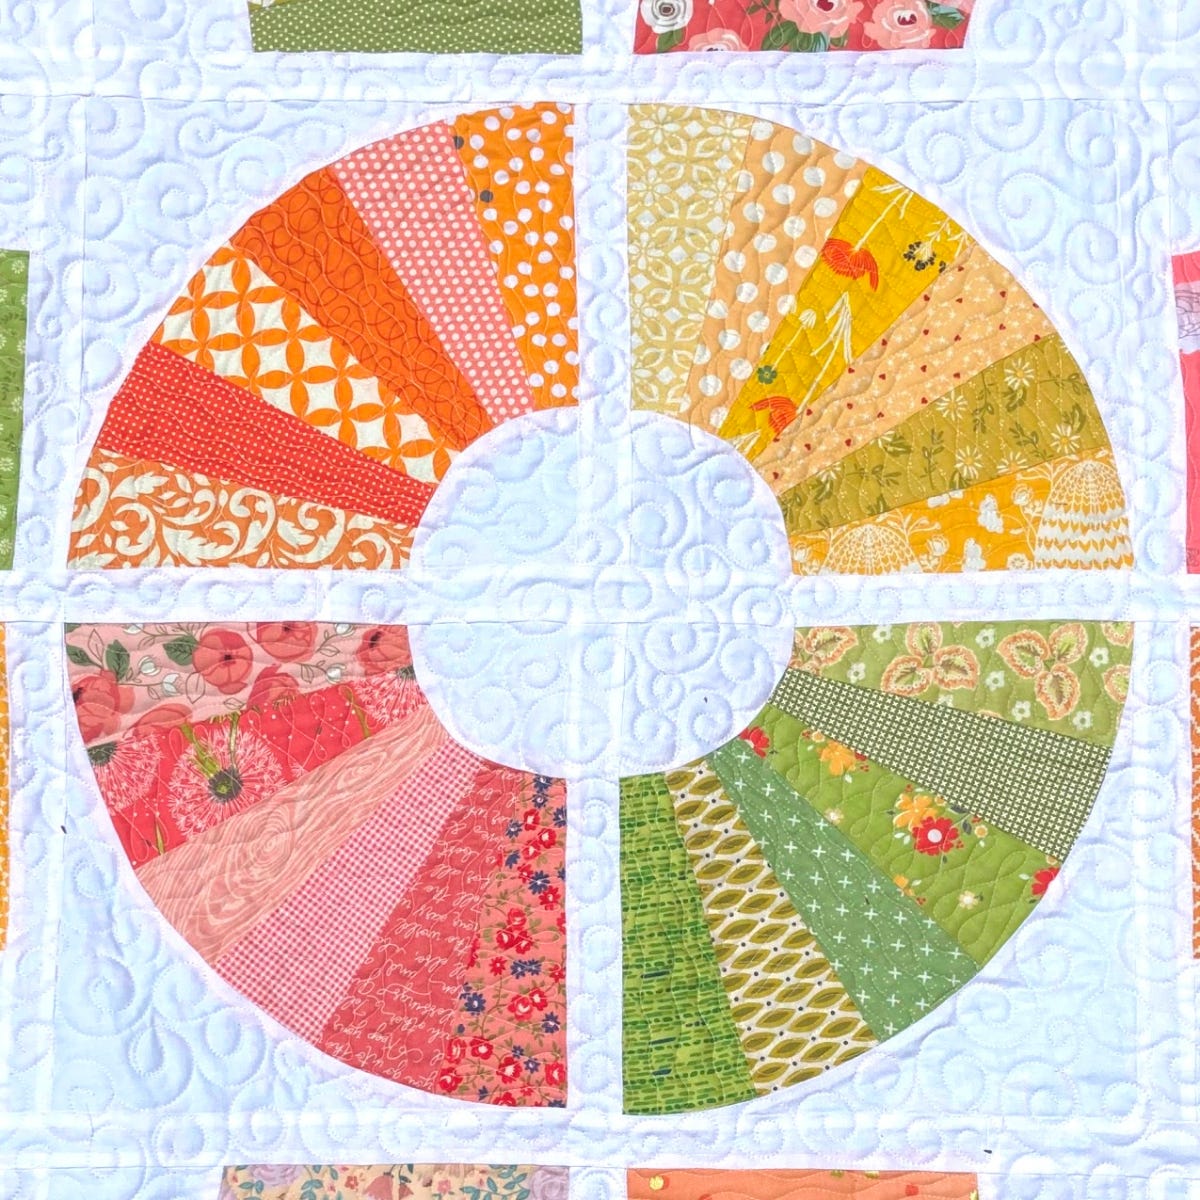
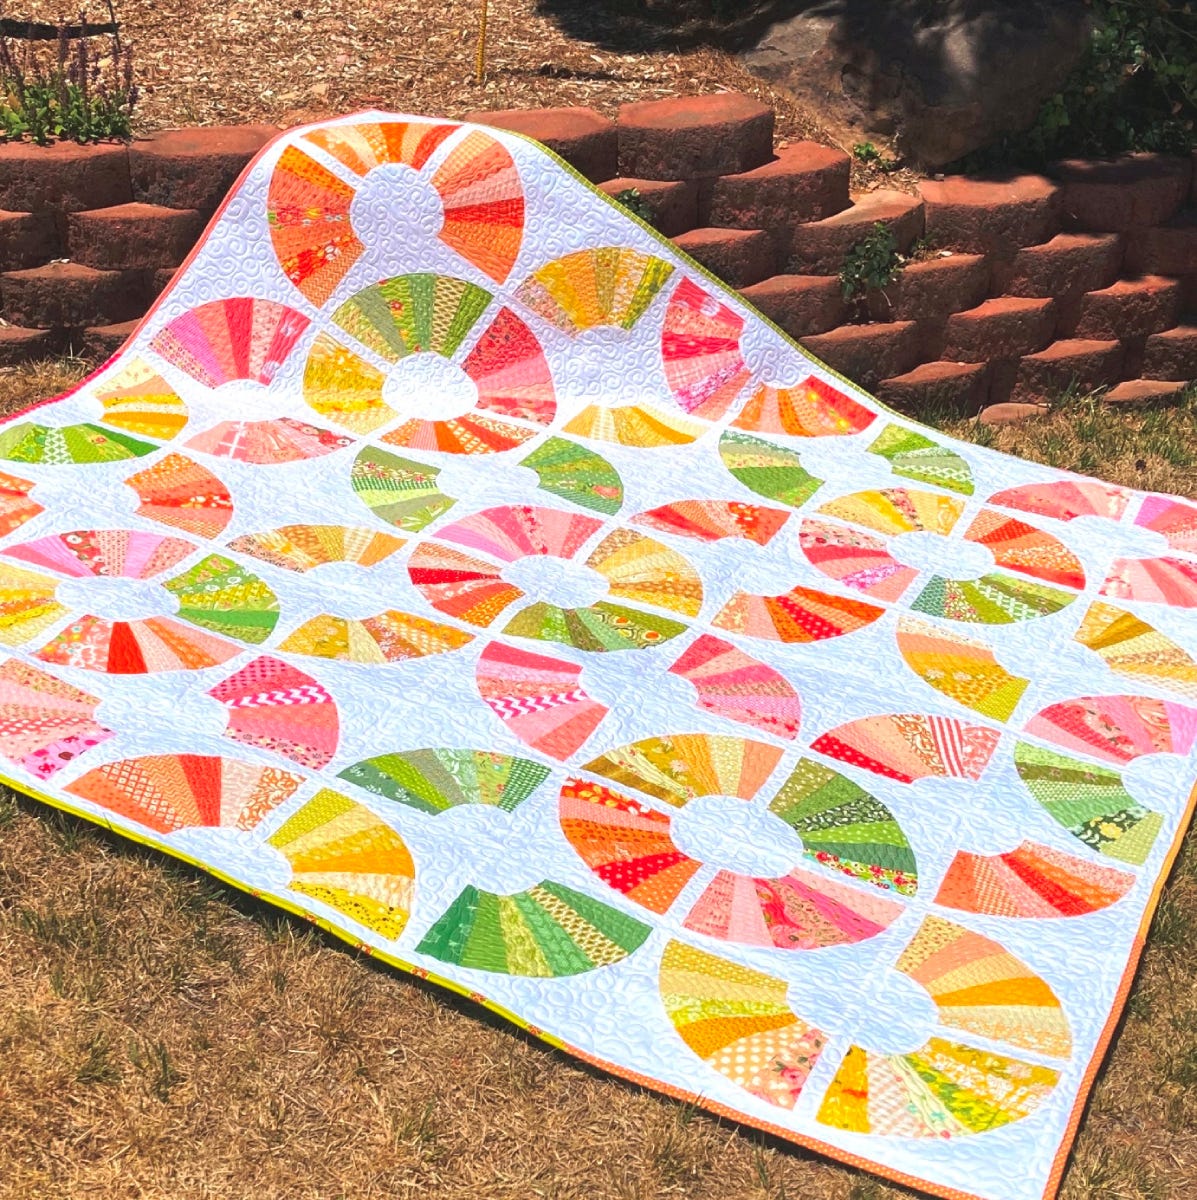
I chose to use the classic colors of rainbow sherbet because nothing says "summer" to me like this tasty ice cream flavor. Plus it's the perfect way to use up your scraps! I pulled scraps from my yellow, orange, green, and pink bins for this Summer Slice quilt. Just remember, the scraps should be 3" x 7" or larger.
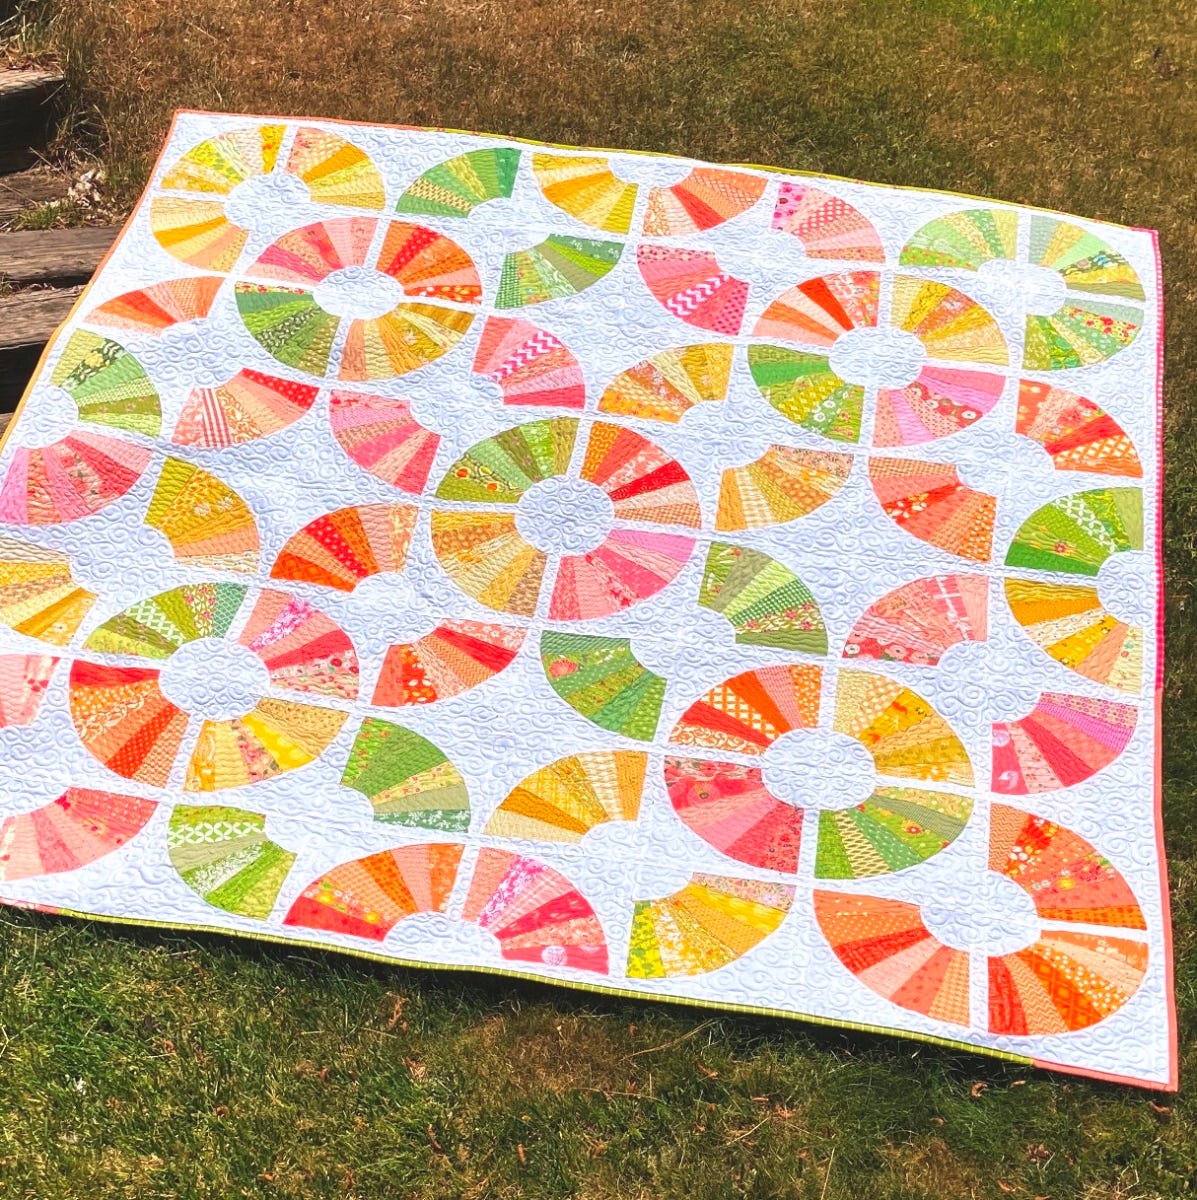
Once you have your fabric chosen and cut, it's time for some fun piecing. Before you know it, you have a gorgeous 81" x 81" Summer Slice quilt that is perfect for a picnic!
Preparing Scraps and Yardage
1. From the background yardage, cut 16 10" x Width of Fabric (WOF) strips.
2. From the scraps, cut 96 large rectangles at least 3" x 7" or larger from each of the four colors.
- You don't need to cut all of the scraps to 3" x 7". I cut one scrap that size as a guide, and then grabbed pieces from my scrap bins that were at least that large.
- When I needed to cut a piece from a larger scrap, I used scissors and got it to the approximate size.
PRO TIP: Be sure to press the wrinkly scrap pieces before you start. It makes piecing easier down the line.
PRO TIP: The scraps in each color can be as light, dark, saturated, pastel, etc. as you like. It is good to have a mix of all the shades and hues. Be sure that the scrap "reads" the chosen color.
Cutting Directions
I found the easiest way to cut the pieces for this quilt was one color at a time and cutting out the background pieces while I was at it.
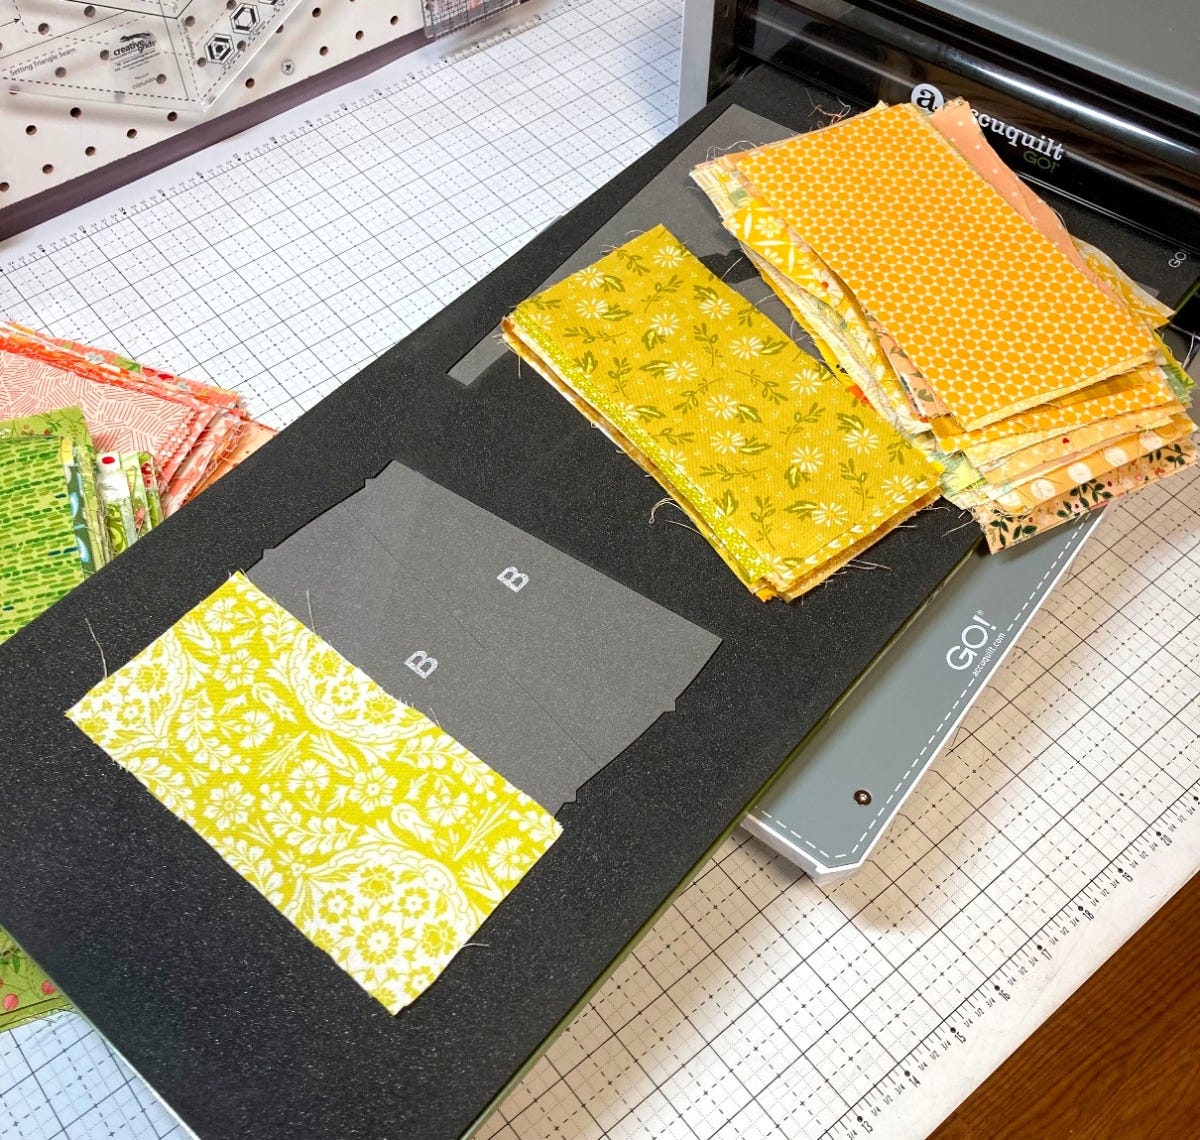
1. Choose a color to start with and lay these scraps over the "B" pieces on the die board.
- I call this shape "slice."
PRO TIP: You can stack up to six layers to cut at once. Align and overlap them to get the most out of the fabric.
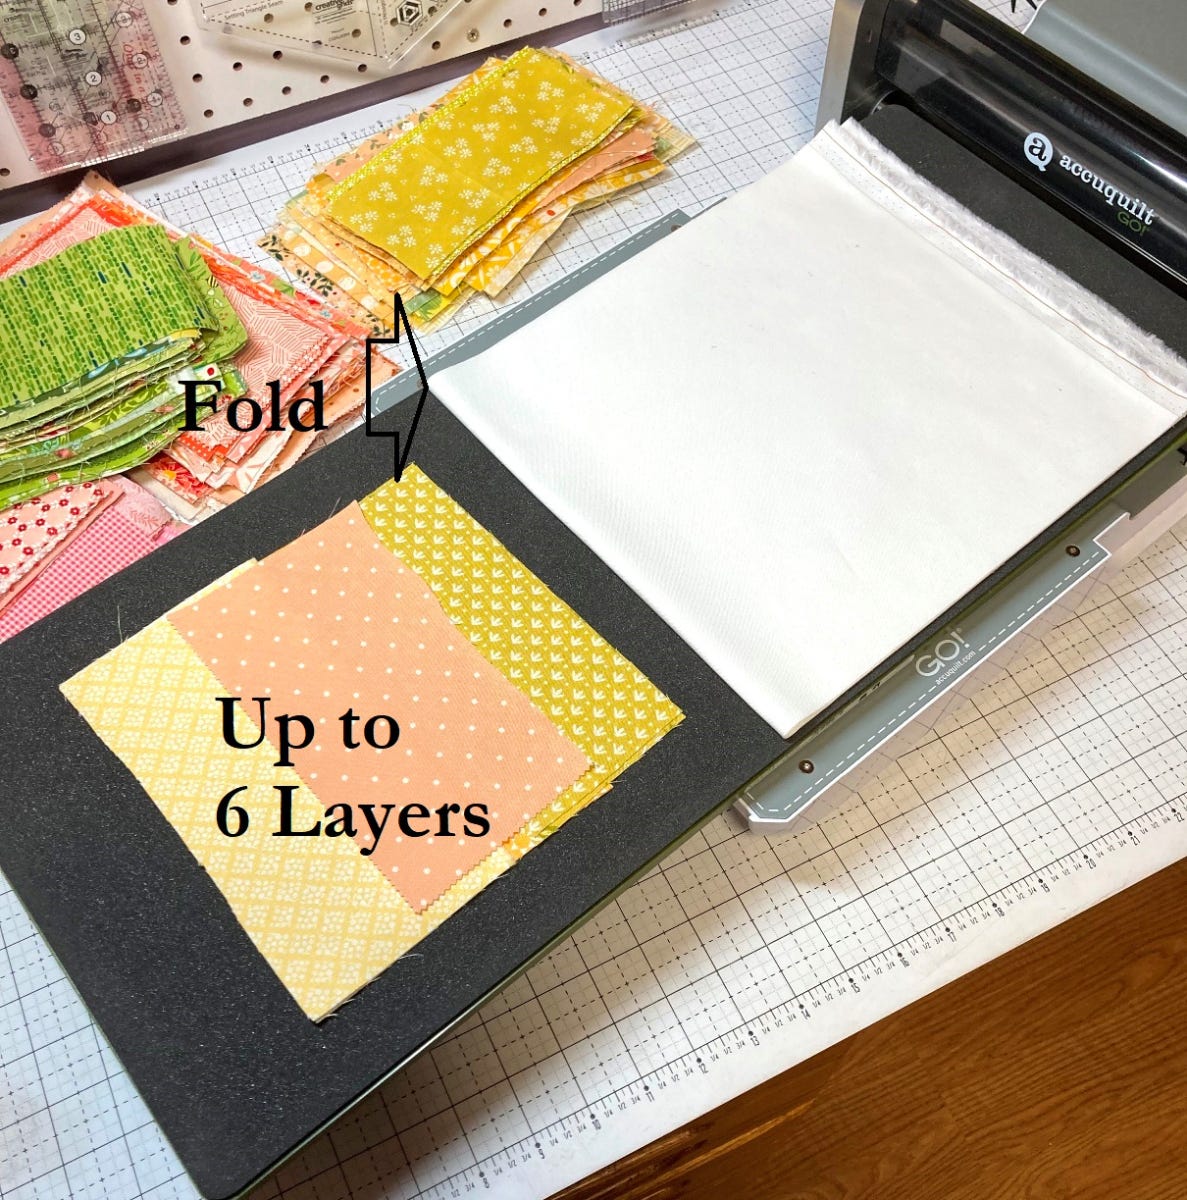
2. Add some background pieces to cut as well.
- To do this, take a 10" x WOF strip and fold it in half.
- Place the strip over the "A" (I call this "pie") and "C" (I call this "crust") pieces with the fold in the middle of the die. This allows you to cut four sets of background pieces.
- You will use the scraps for the sashing, so it is important to put that fold in the middle so that the sashing strips are longer.
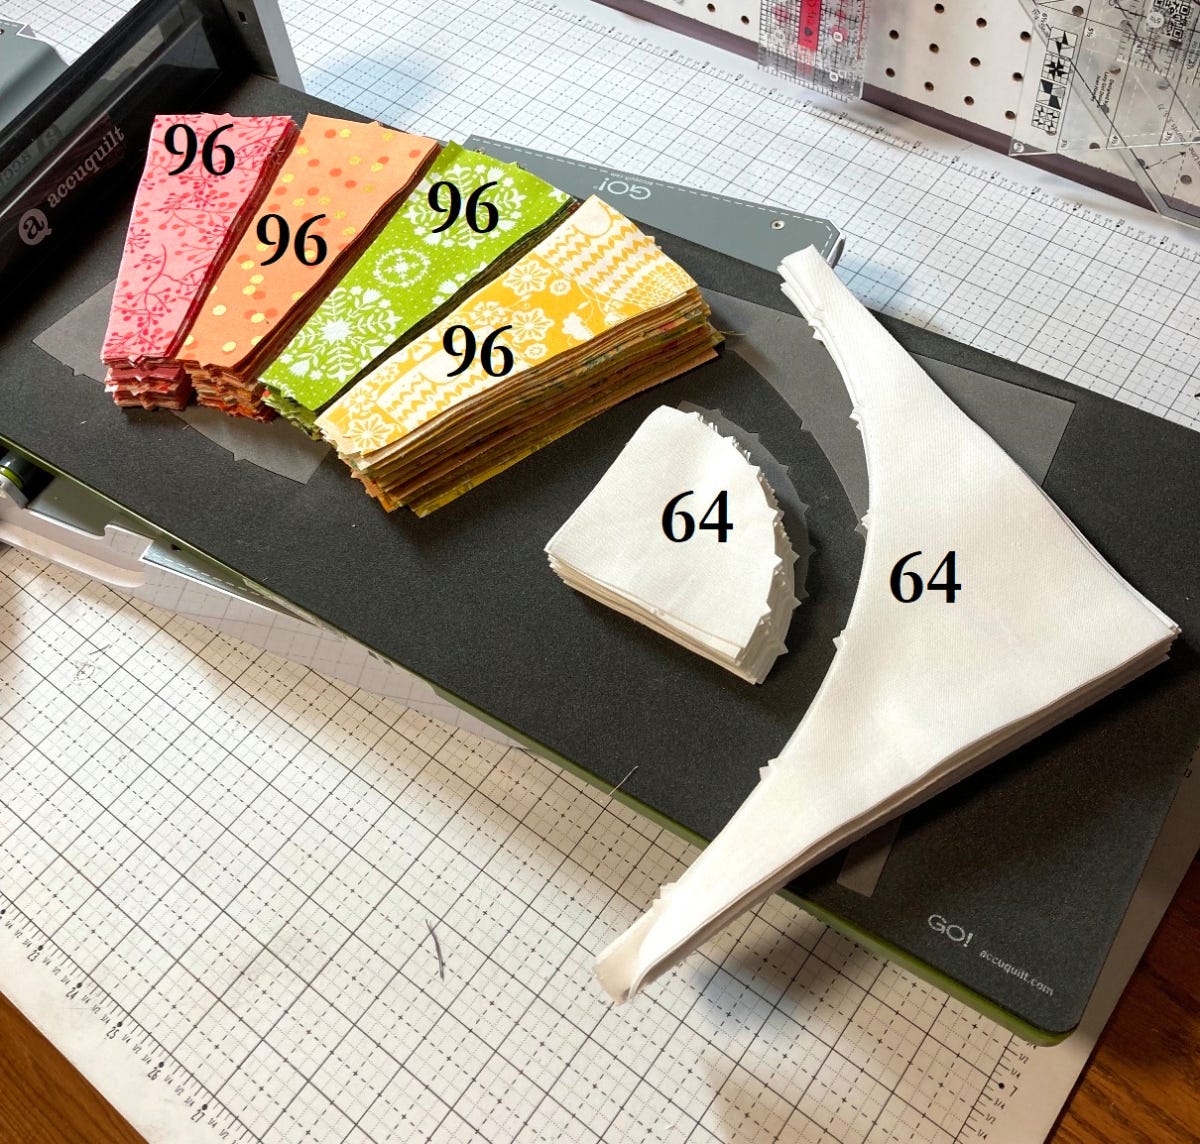
3. Run the die through your GO! Fabric Cutter and there will be lots of lovely little slices ("B" pieces), four background crusts ("C" pieces), and four background pies ("A" pieces).
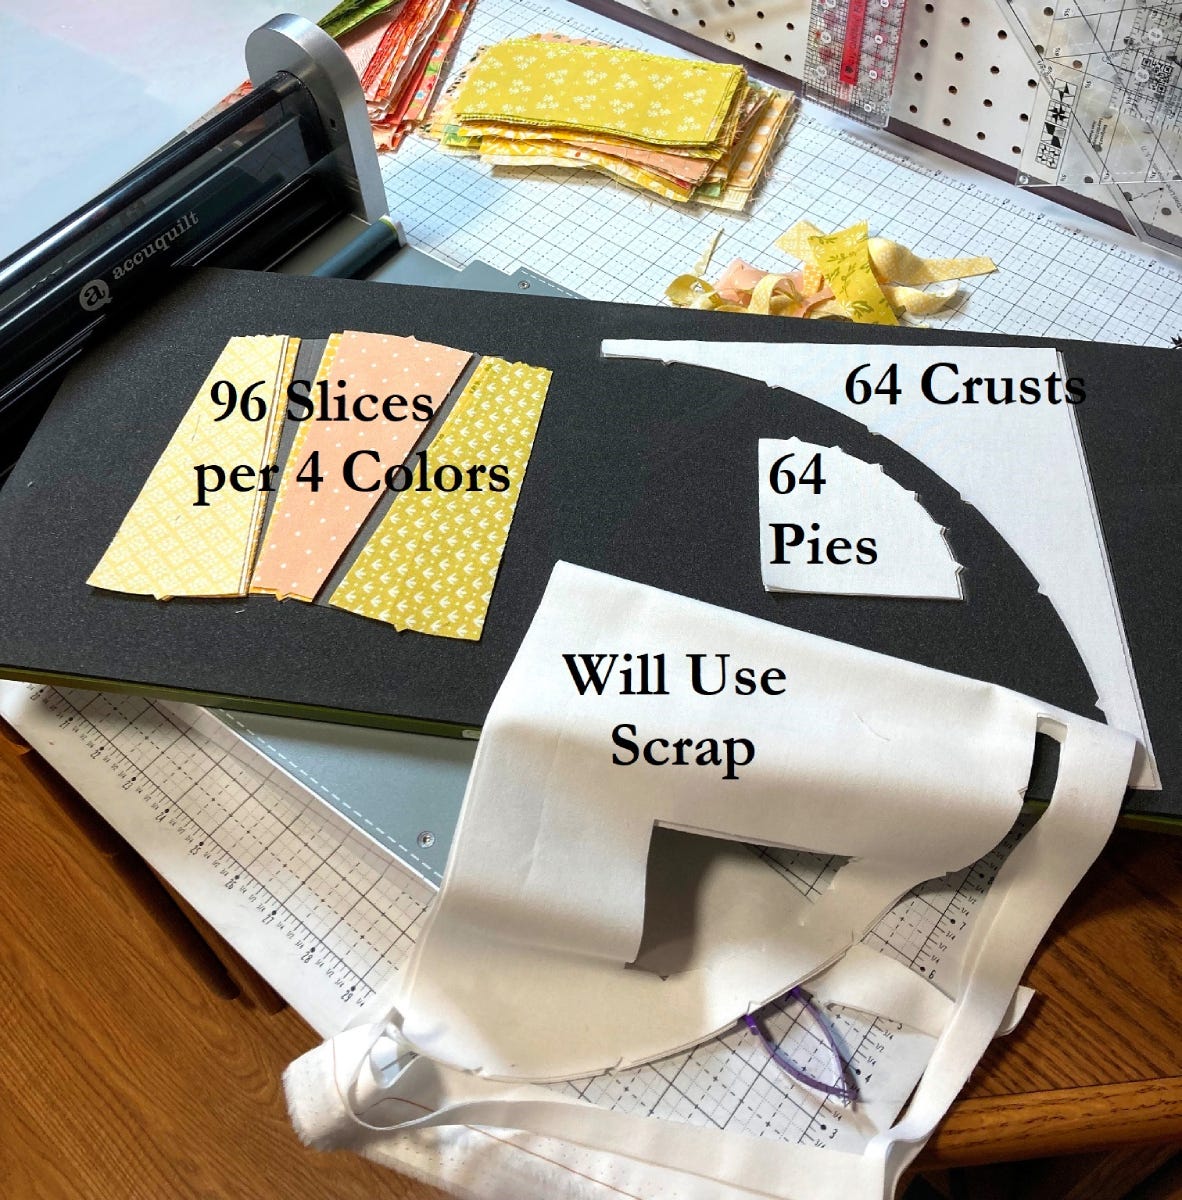
4. Continue cutting in this fashion until you have cut:
- 96 slices (shape "B") in each of the four colors
- 64 background crusts (shape "C")
- 64 background pies (shape "A")
PRO TIP: Be sure to set the scraps aside from the background cutting each time as you will use those soon.
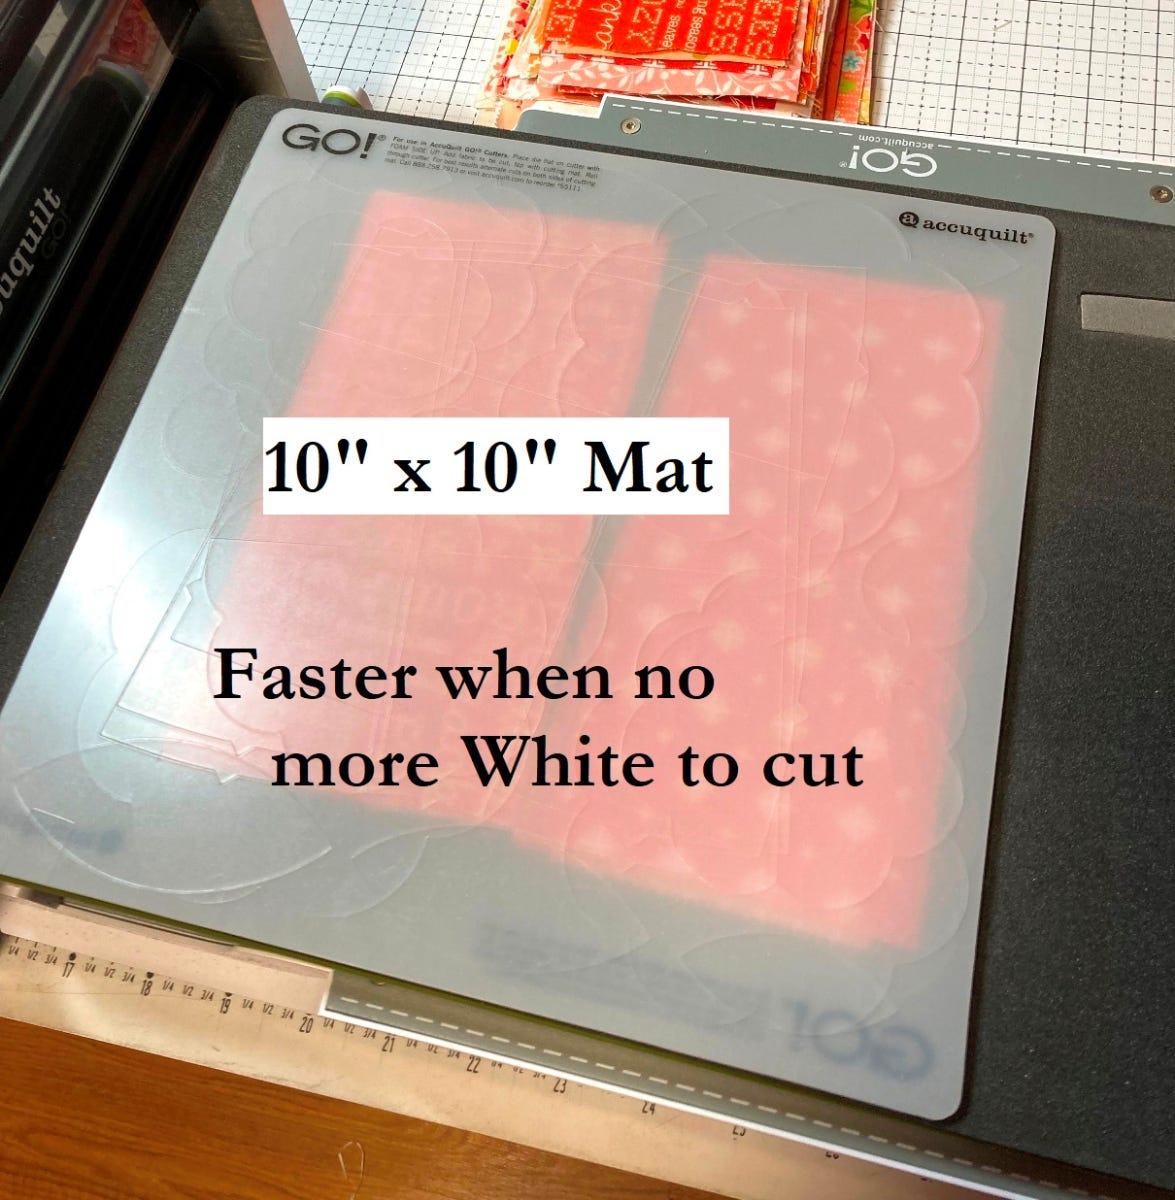
NOTE: Once the background is all cut, you will just be cutting prints. I found it faster at this point to use a 10" x 10" cutting mat and just place it over the slice (shape "B") pieces. I also found that I liked just using two of the three slices ("B" shapes) on the die board. It made it easier to see where my rectangles lined up, and I could easily stack up to six layers without worrying about the overlap between the rectangles.
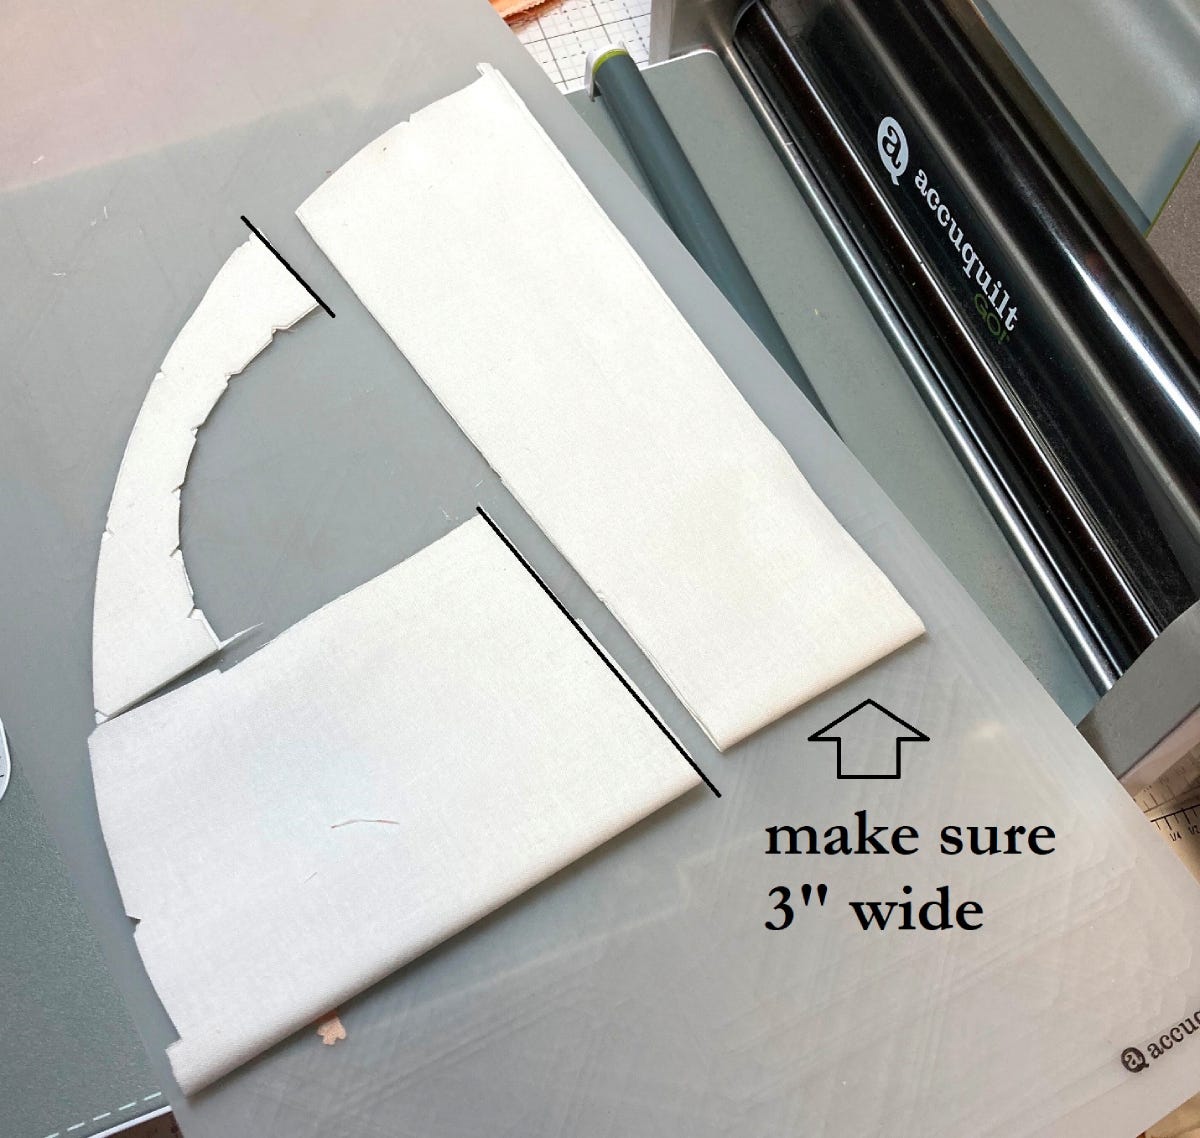
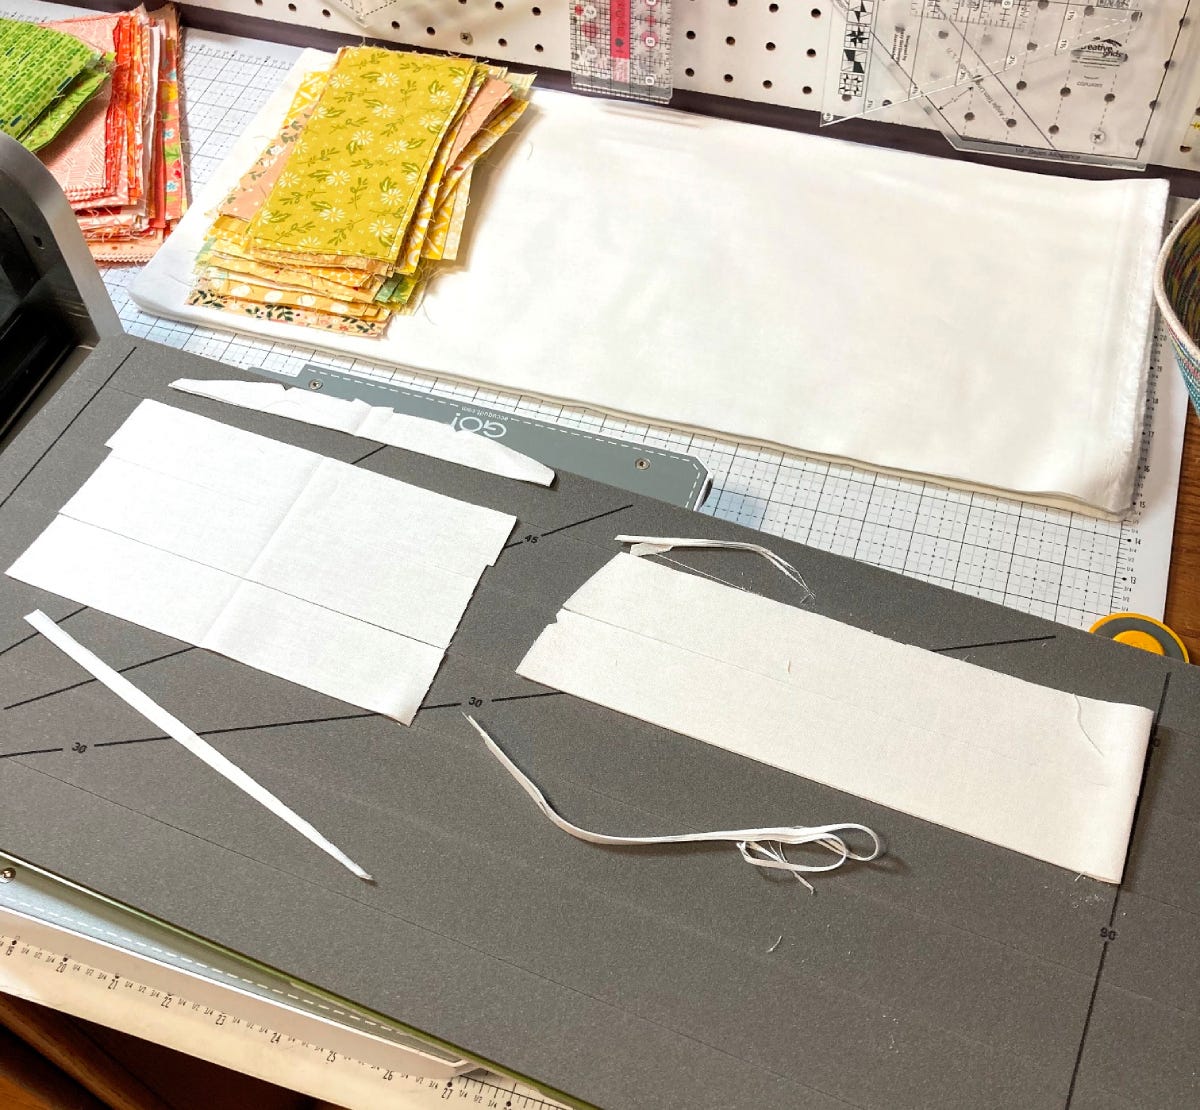
5. Cut the background scraps that were set aside to use for the sashing in the quilt.
- Start by cutting the scraps into two usable pieces. Cut along the pie line as shown below.
- Be sure that you don't cut your angle too sharp as you want to make sure you have 3" of usable fabric on the long piece.
6. Open the short piece and place it on the GO! Strip Cutter-1 1/2" (1" Finished) 5 Strips Die, taking care that it covers three strips. Keep the long scrap folded and place it on the die, taking care that it covers two strips.
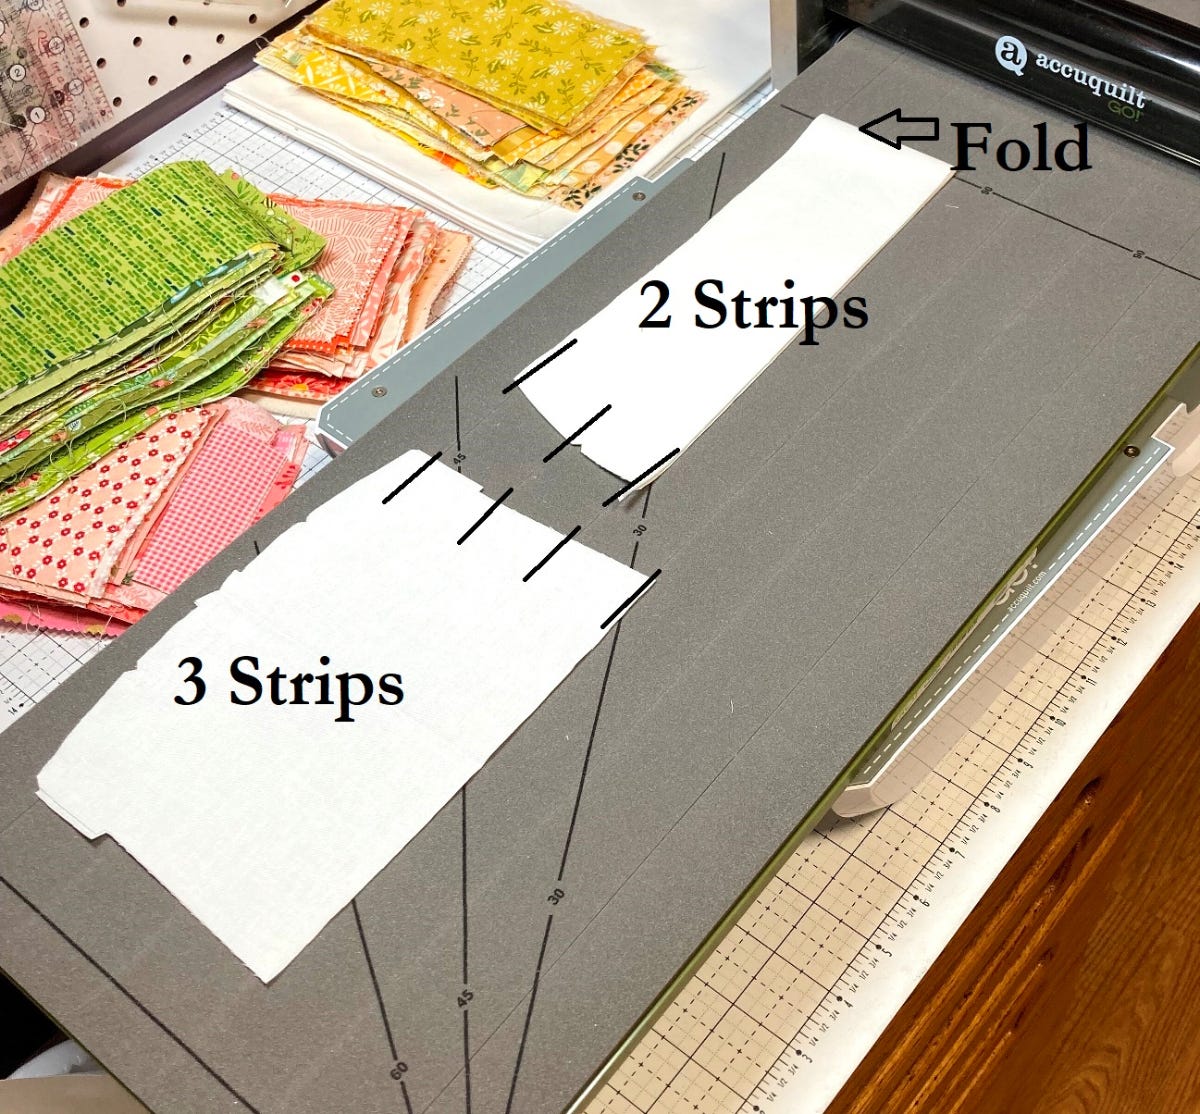
6. Run the GO! Strip Cutter Die through your GO! Fabric Cutter until there are 16 scrap background pieces.
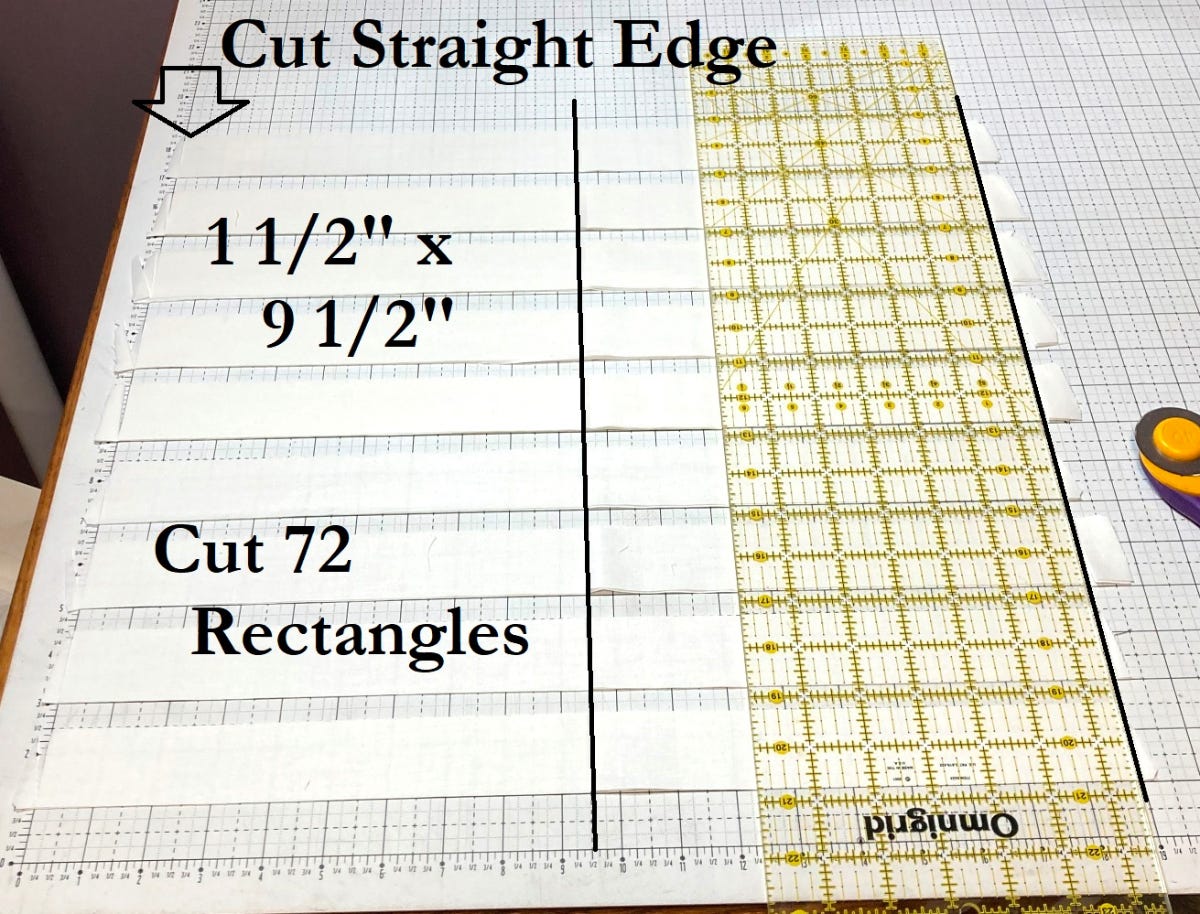
7. Layout the strips on the cutting mat, using the horizontal lines on the mat to align them.
- You can also use a GO! Quilting Ruler or GO! Rotary Cutting Mat to help with this step.
8. Stack several layers up and cut a straight edge along the edge of the strips.
9. Measure in 9 1/2" and cut the strips.
10. Continue in this fashion until you have cut 72 - 1 1/2" x 9 1/2" rectangles.
11. From all of the remaining strip pieces, cut straight edges on each of the ends.
12. Sew all of the strips together end to end to make one long 1 1/2" strip.
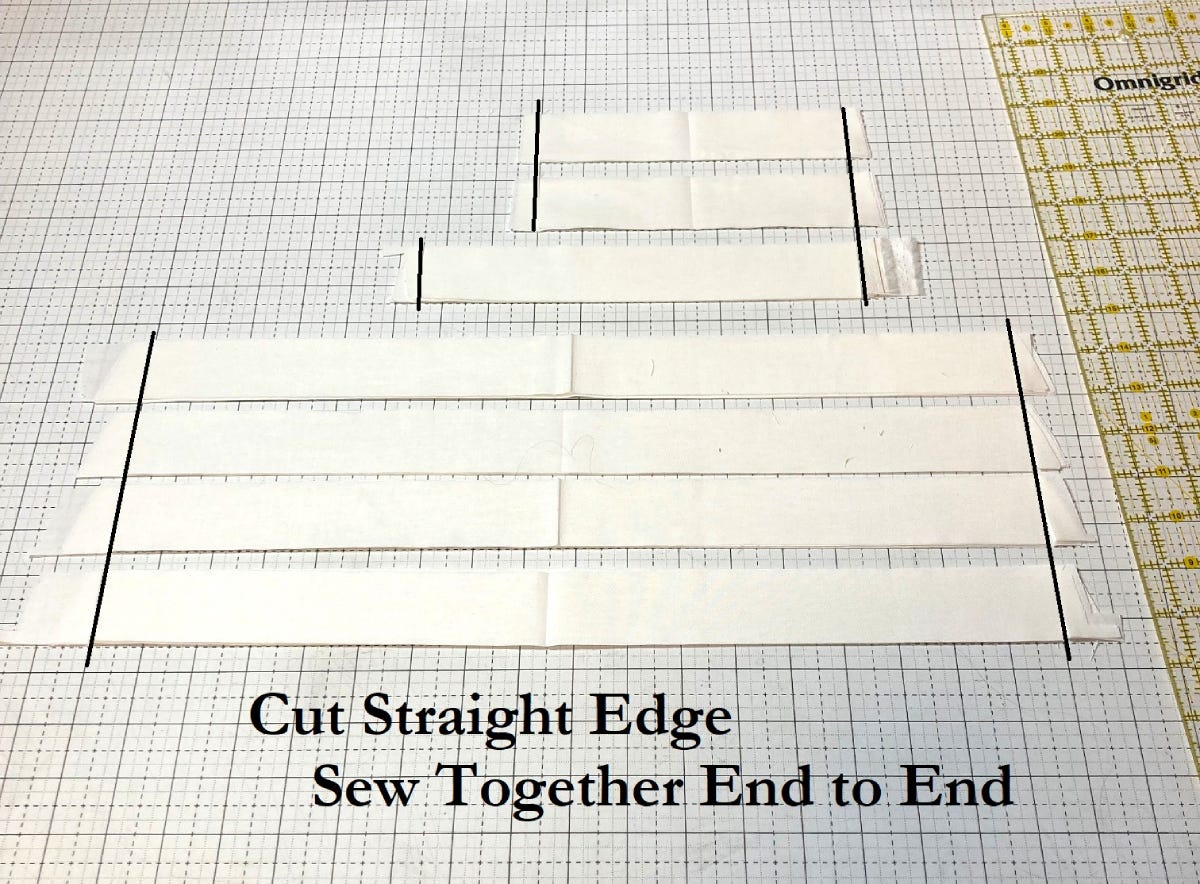
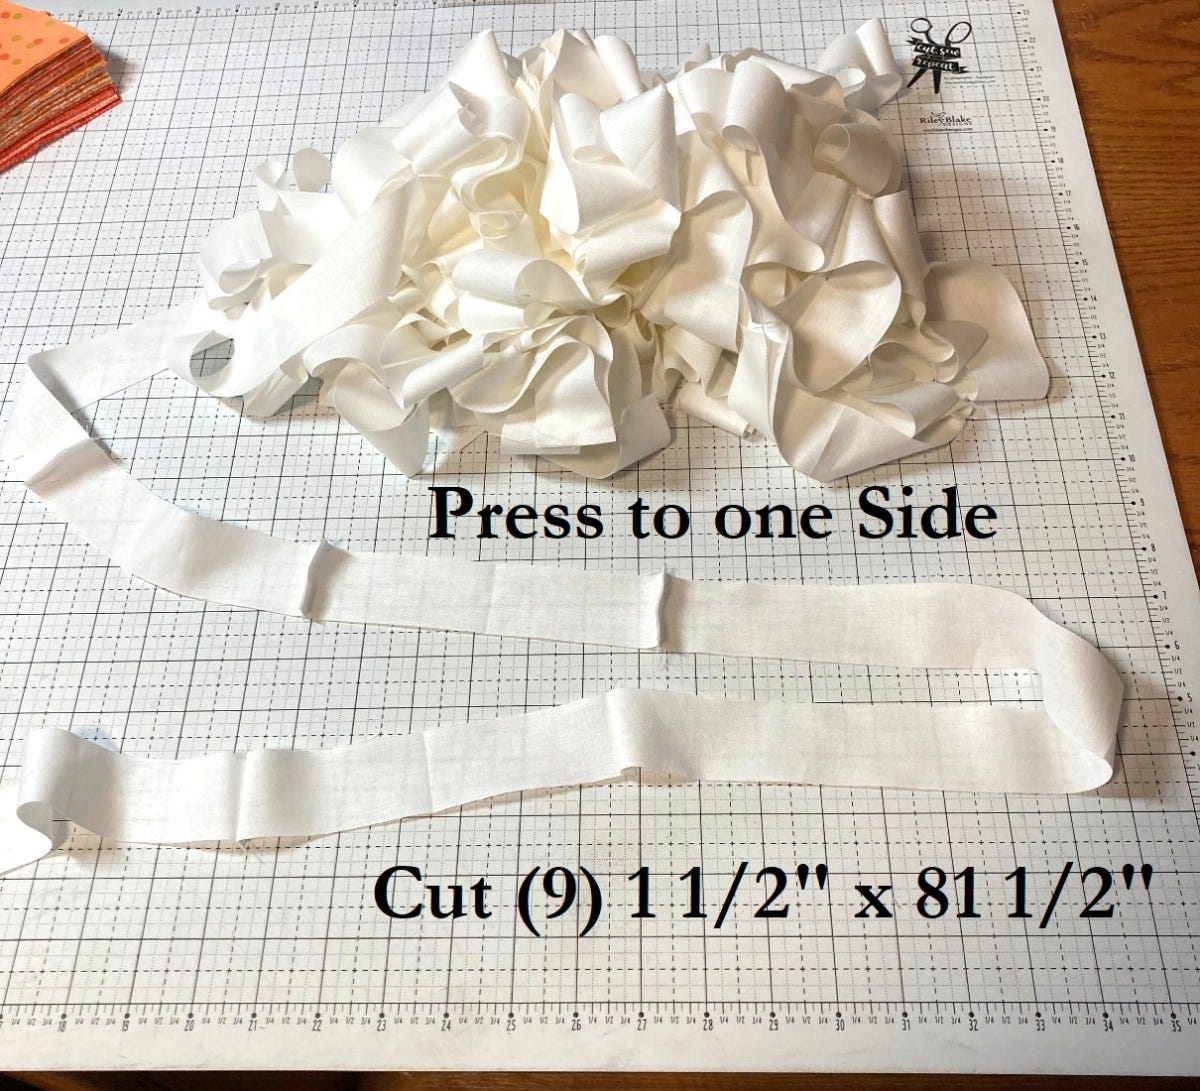
13. Press the seam allowances (and there will be a lot of them) to one side.
14. From your long strip, cut nine 1 1/2" x 81 1/2" strips.
- These become the long sashing between rows.
- If you like to cut your sashing longer and trim down once it is sewn together, cut your strips 82" to 83" long.
Piecing the Summer Slice Block
With the cutting done, you are ready to start piecing blocks!
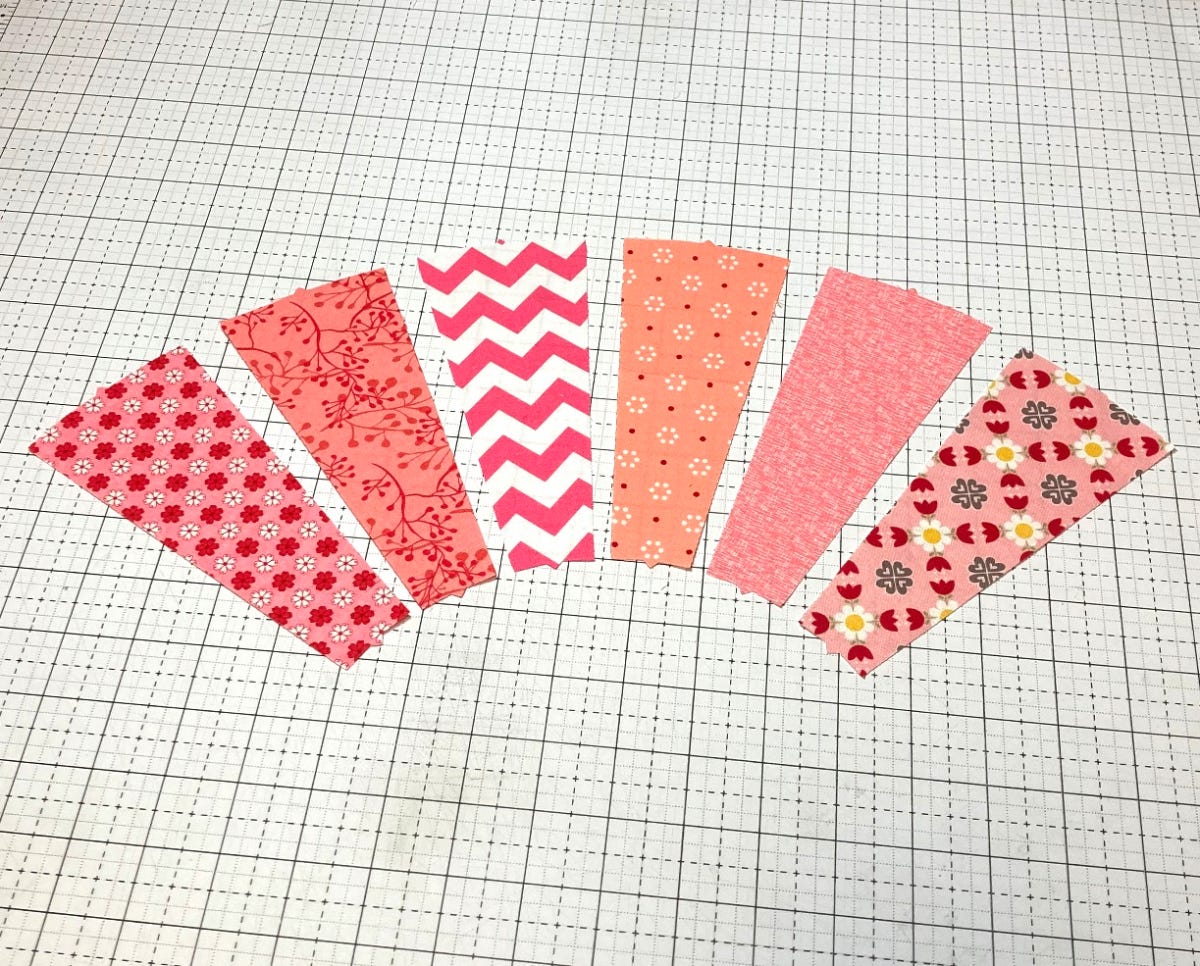
1. Start by laying out six of the slices ("B") in one color.
- As you can see, it is fun to have an assortment of shades and hues in the colors you choose to start with.
2. Place the second slice ("B") onto the first slice ("B") with right sides together aligning the edges.
3. Sew a 1/4" seam along the edge.
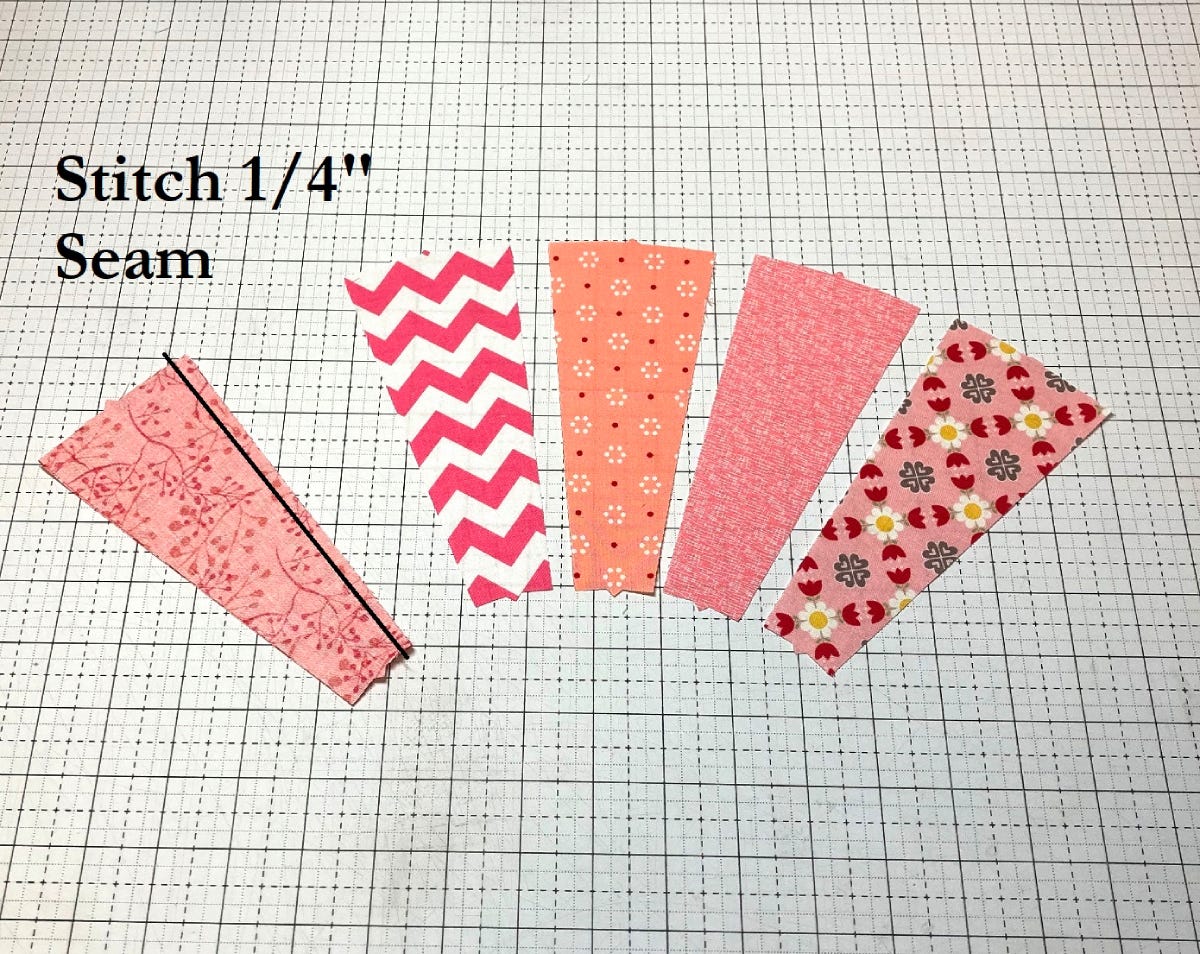
4. Place the third slice ("B") onto the now-sewn together first/second slice ("B") with the right sides together - aligning the edges.
5. Sew a 1/4" seam along the edge.
6. Continue in this process until you have sewn all six slices ("B") together.

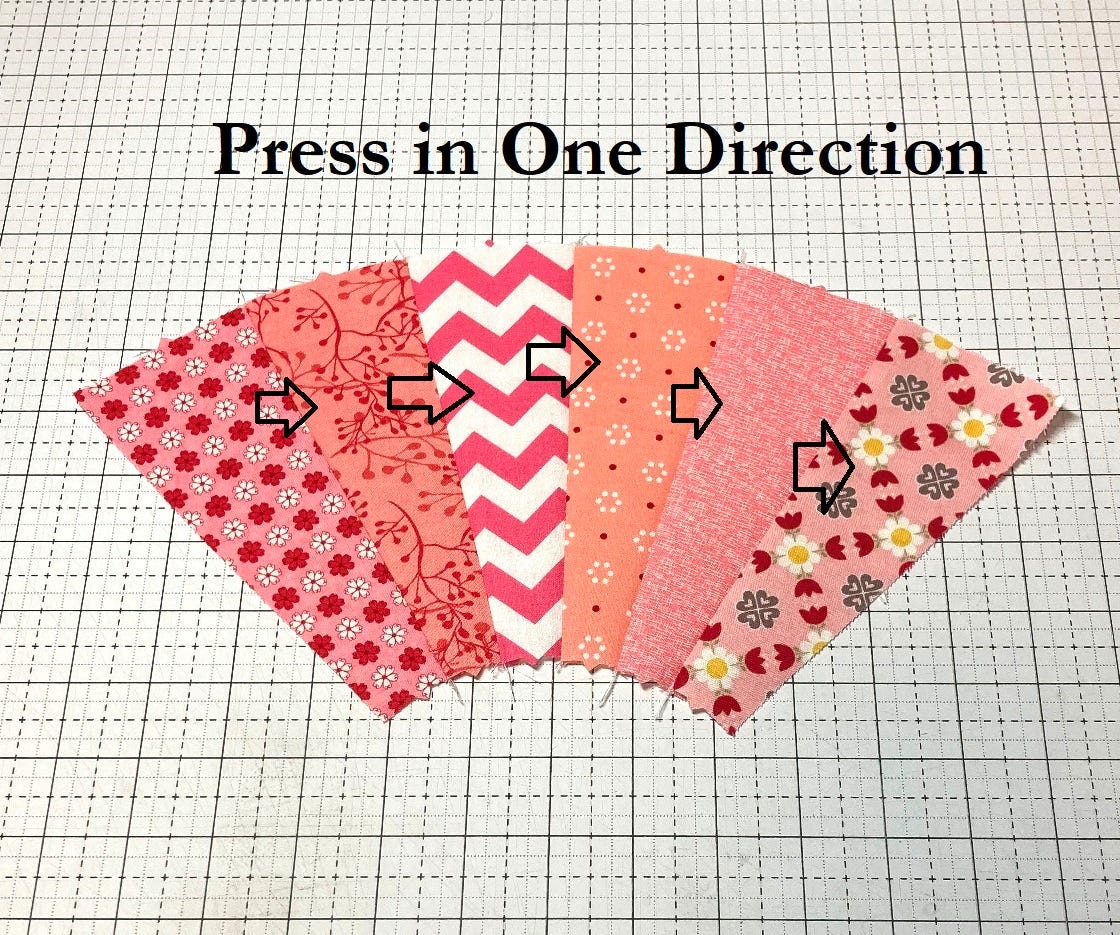
7. Once the slices ("B") are all sewn together, press the seam allowances in one direction.
- I like to press them from the front or right side so that I avoid getting any bubbles in the seam allowances.
8. Grab a background crust ("C") piece and a background pie ("A") piece and lay them out as shown below.
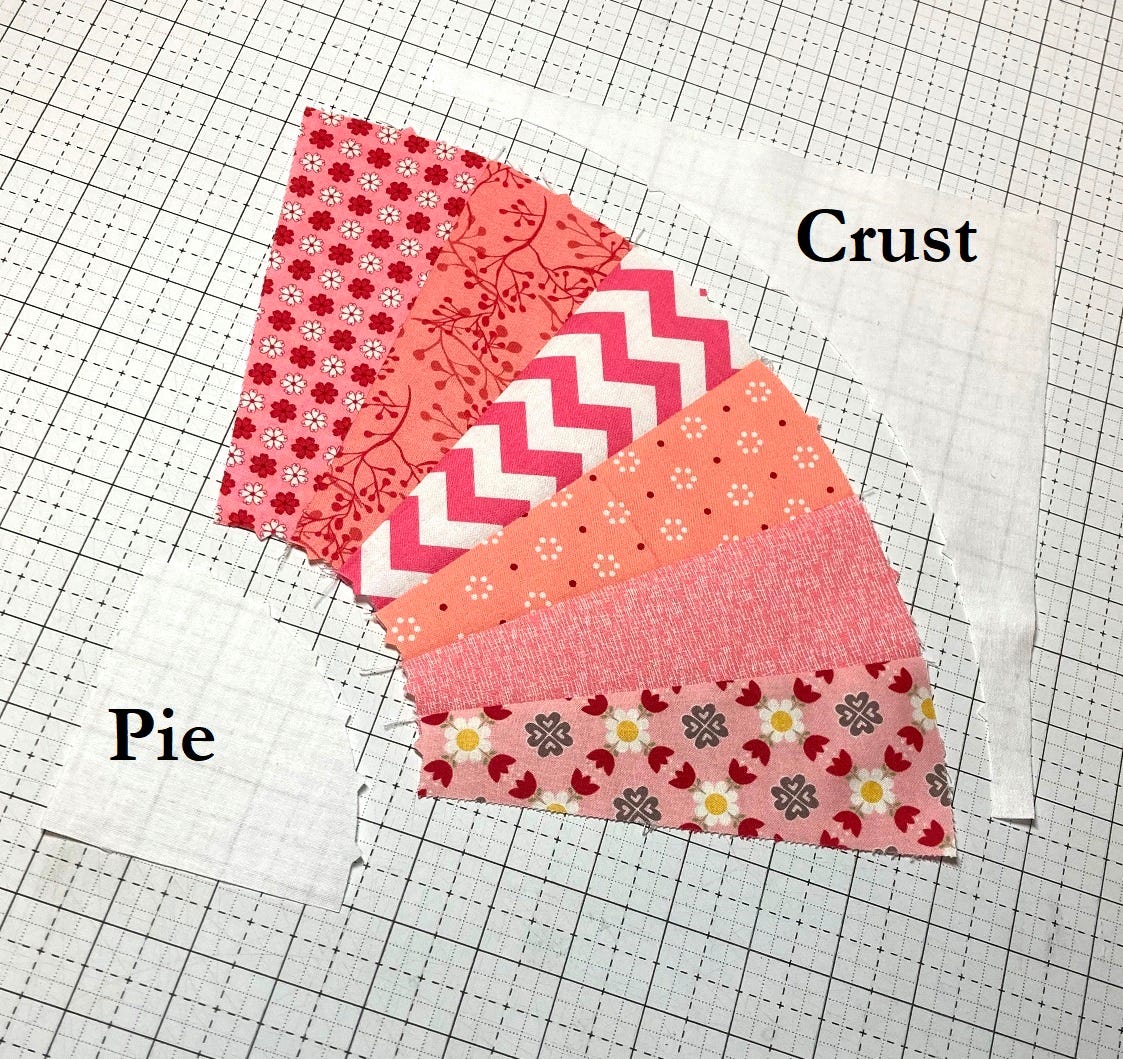
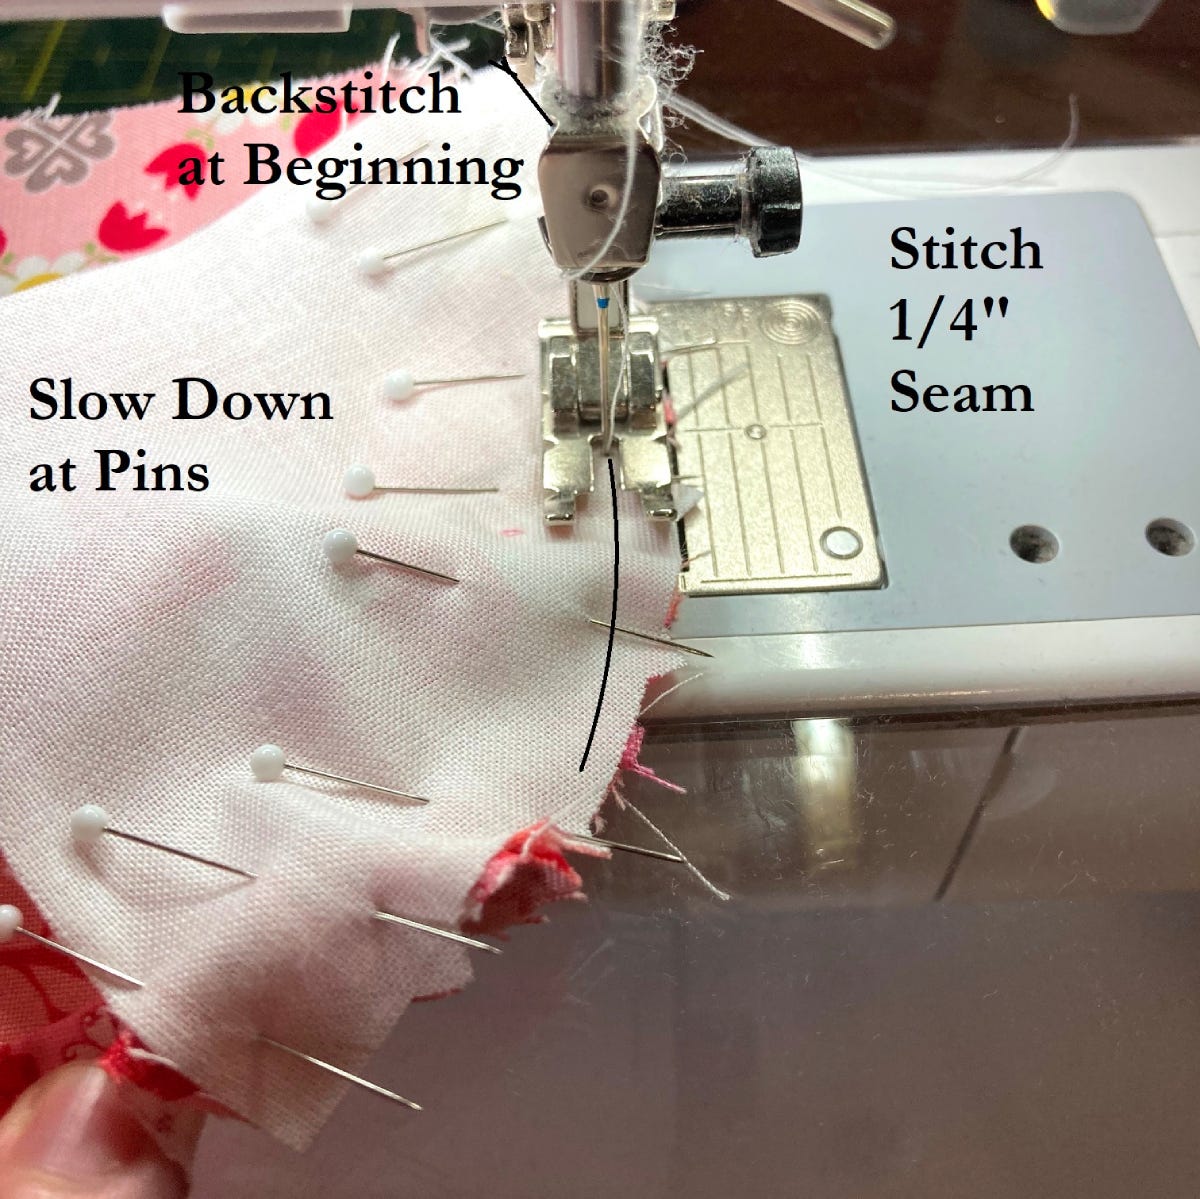
9. Place the background pie piece ("A") onto the slice ("B;" fan) unit with the right sides together.
10. Align each of the notches and pin them.
PRO TIP: I found it easiest to start pinning in the center and work my way out on each side.

11. Sew a 1/4" seam along the pinned edge.
- I like to backstitch at the beginning and end of my units when sewing curves. I sew over pins with curved piecing and take care to slow down before each pin and "hop it."
- This unit pretty much lines itself up as it is so small, but if you are new to curved piecing and want to see more hints on sewing curves, you can see this curved tutorial with lots of helpful hints on sewing curves.
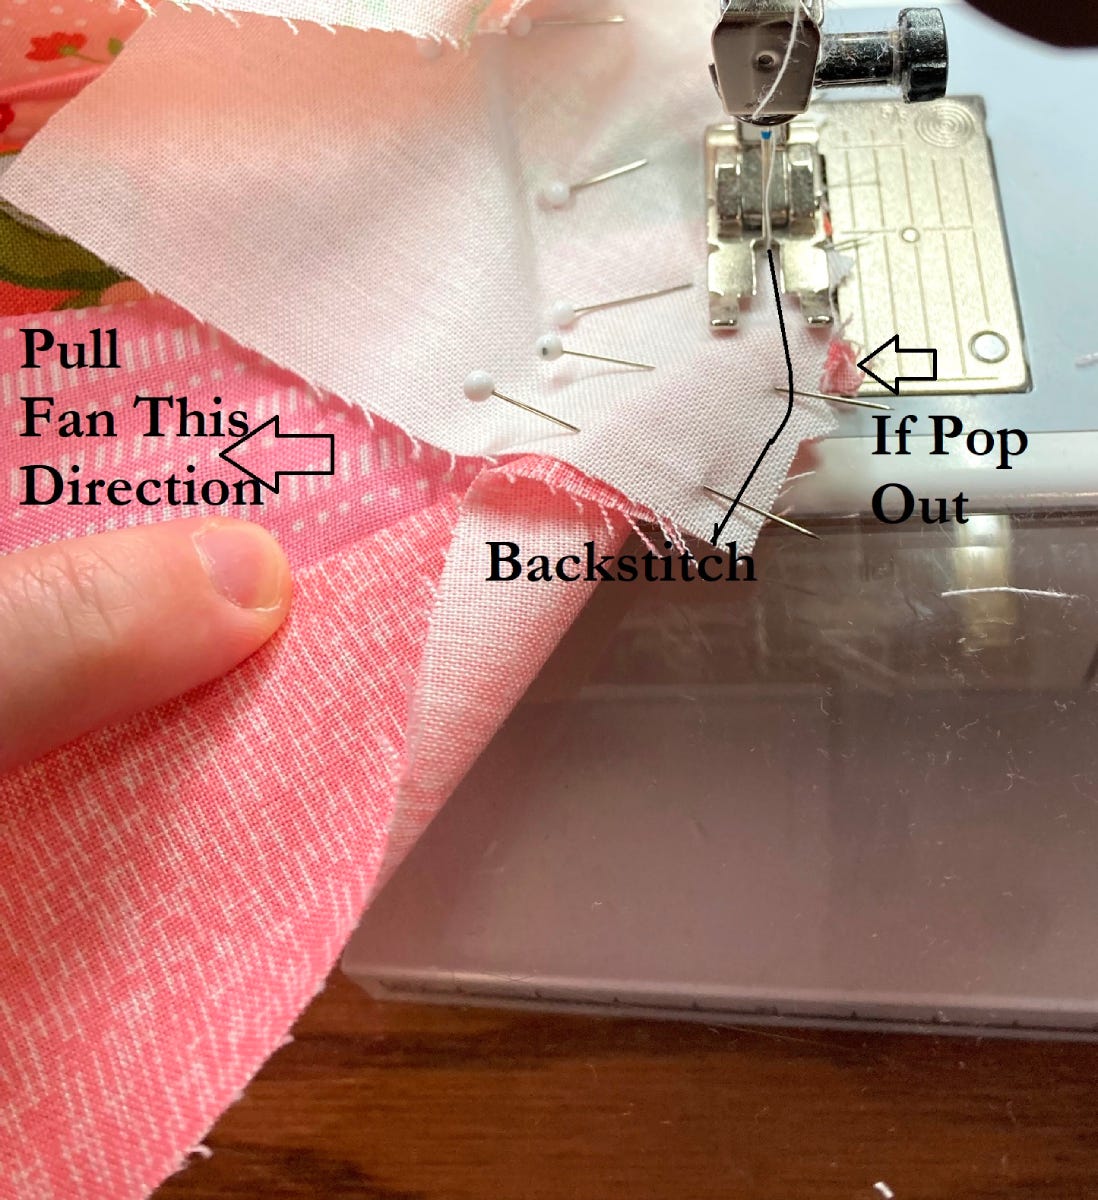
PRO TIP: The one thing I found to watch on this particular curve is some of the bulk of the seams popping out along the pinned edges. To fix this, I found it easiest to gently pull the slice ("B;" fan) unit to the left and pull it back into alignment.
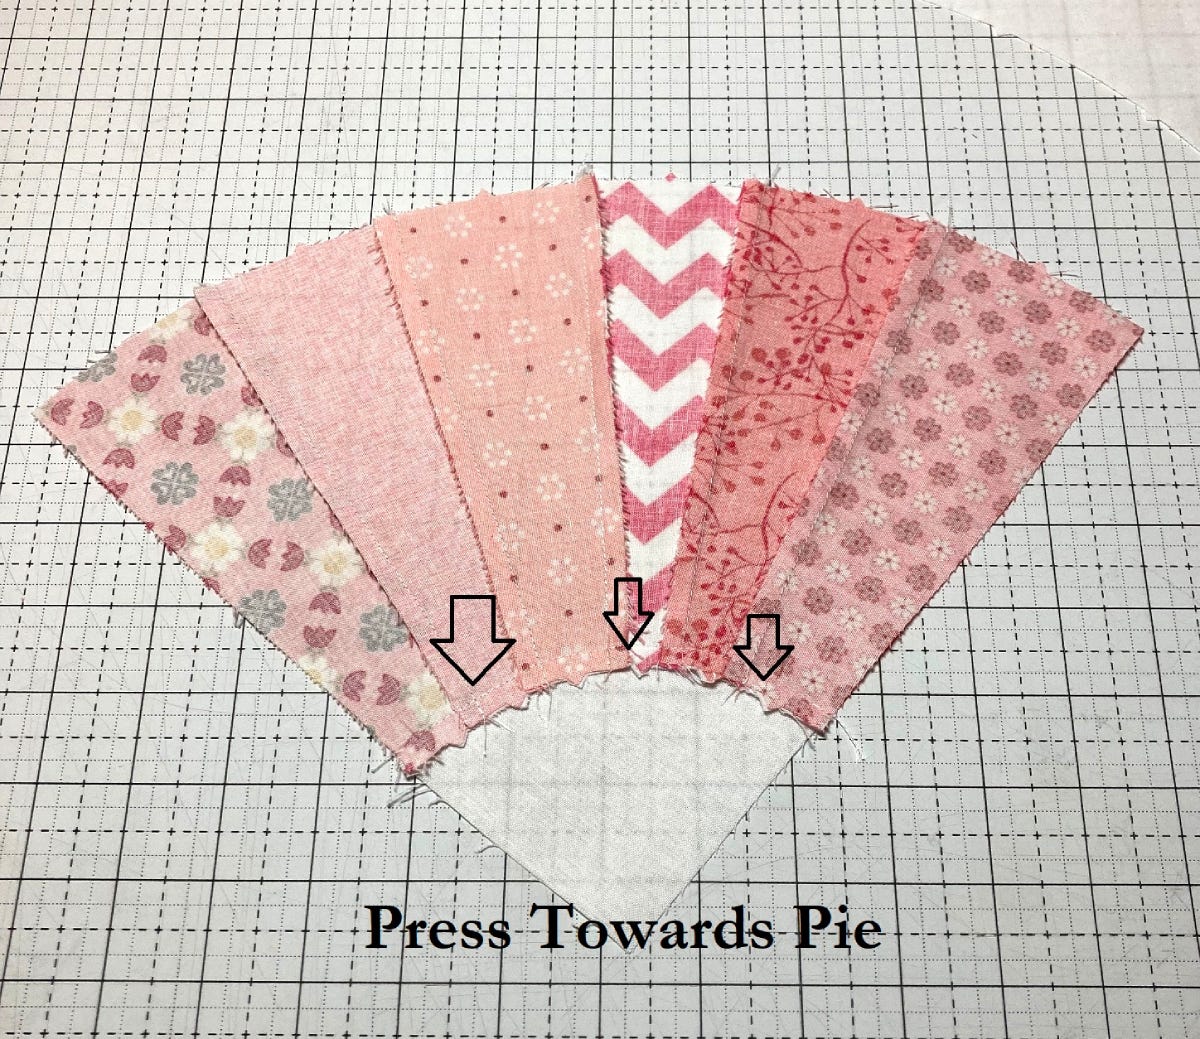
12. Once the seam is sewn, press the seam allowance towards the background pie ("A") piece. This will make it lie the flattest.
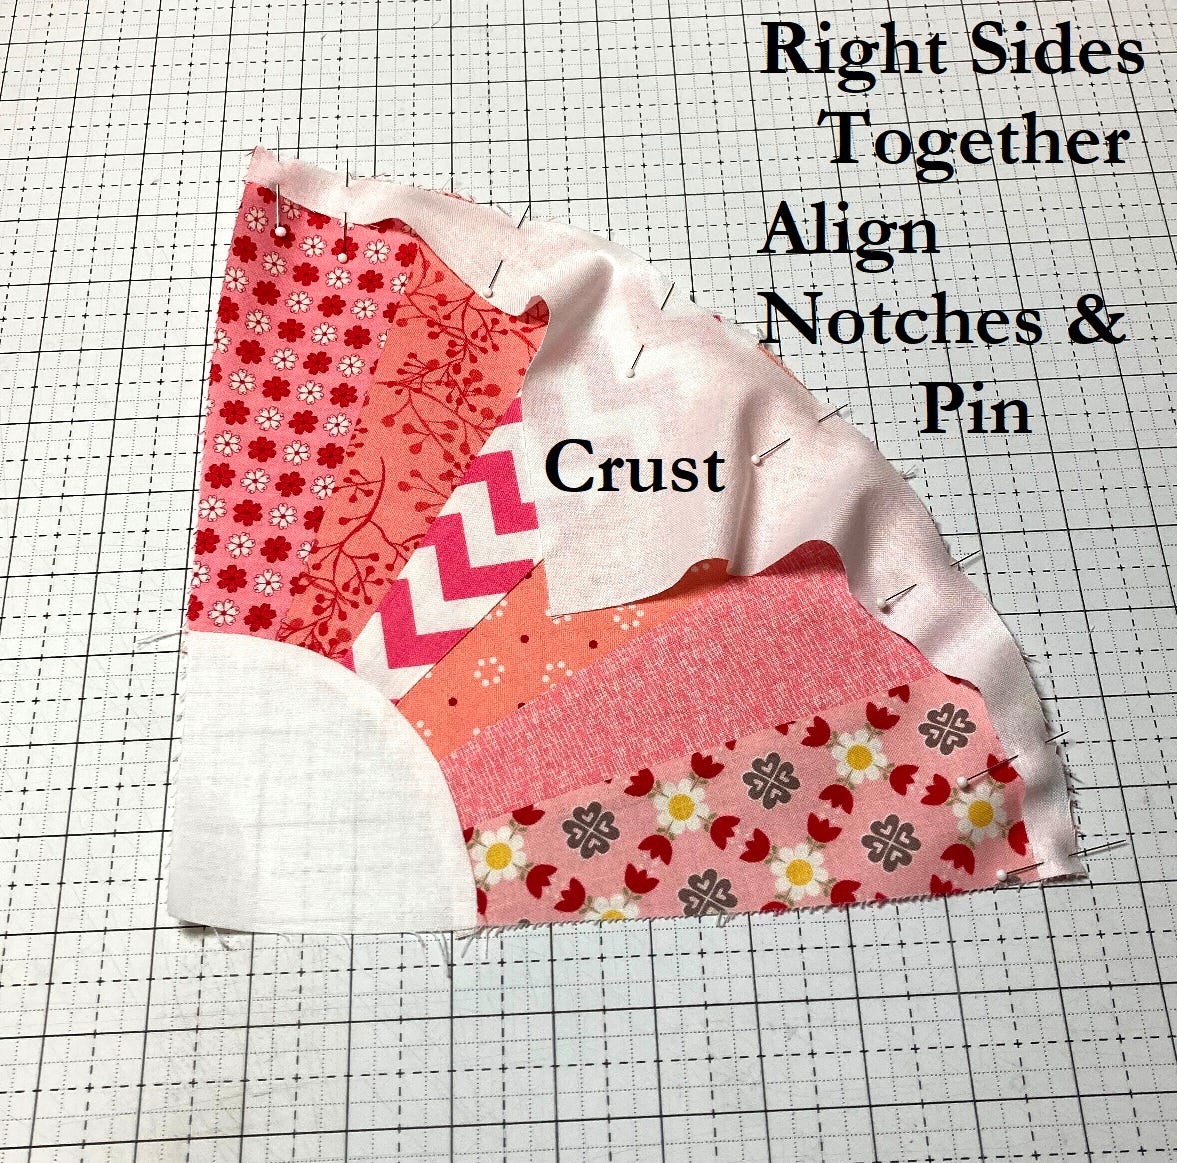
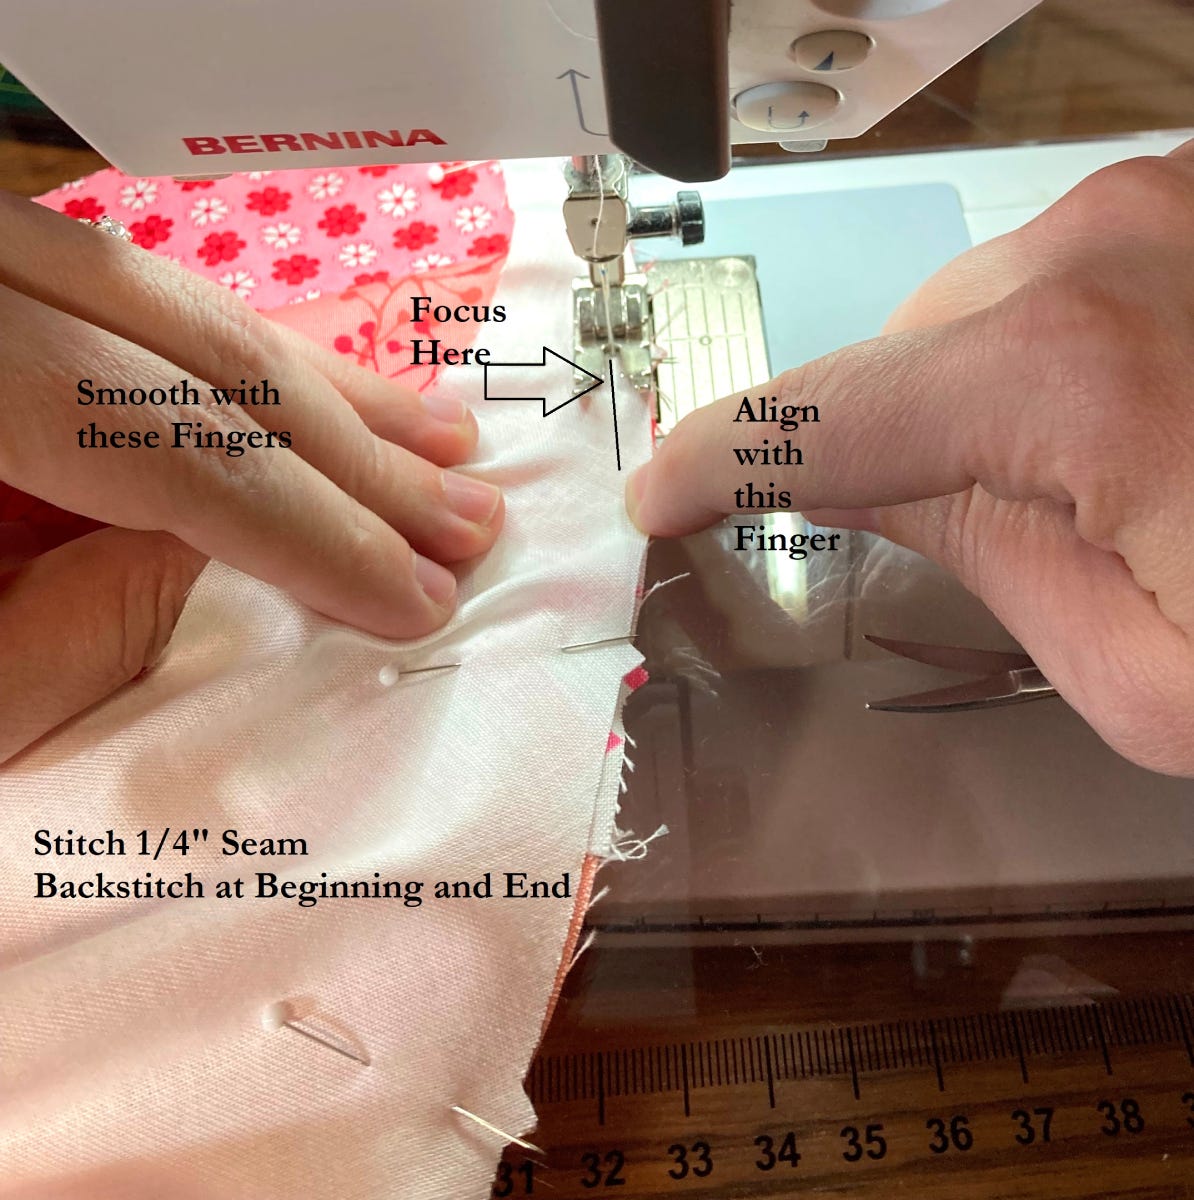
13. For the background crust ("C") piece, place it onto the slice ("B;" fan) unit with the right sides together.
14. Align each of the notches and pin them.
15. Sew a 1/4" seam along the pinned edge.
- Again, I like to backstitch at the beginning and end and "hop" my pins.
- Remember: when sewing with curves, only worry about aligning right in front of your presser foot.
- Smooth the wrinkles with your left fingers and align with your right fingers.
- Don't worry about bubbles or creases out along the left-hand edge - as long as it doesn't go under the seam, it will press out.
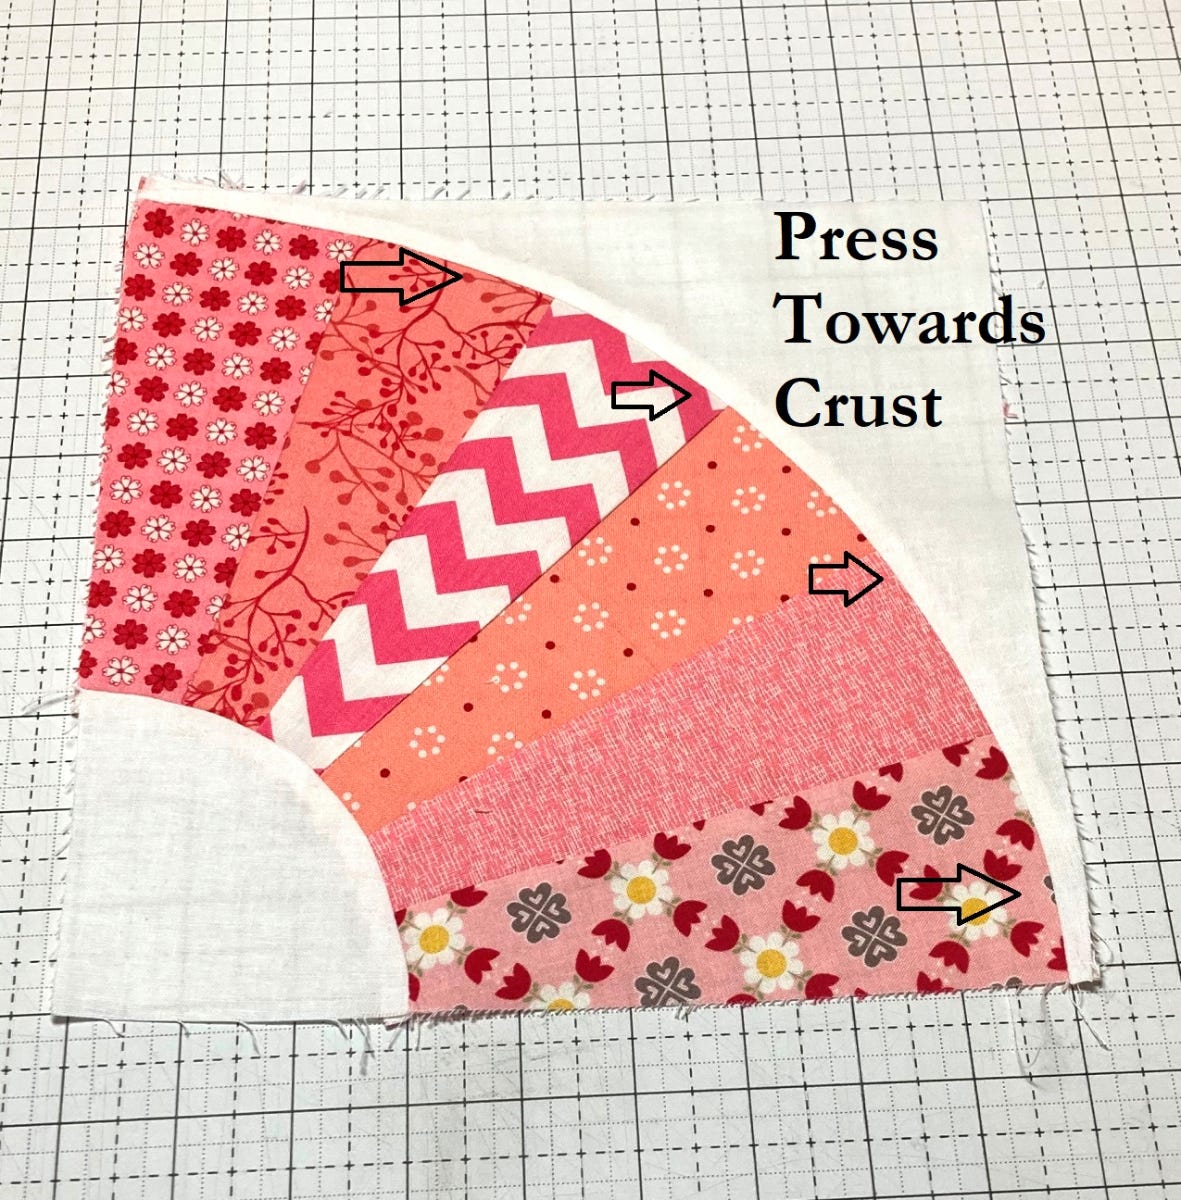
16. Once the seam is sewn, press the seam allowance towards the background crust ("C") piece.
- Again, this will make it lie the flattest.
Piecing All The Grandmother's Fan Blocks
Now that you have made one block, you are ready to make them all!
1. Make 16 blocks in each of the four colors.
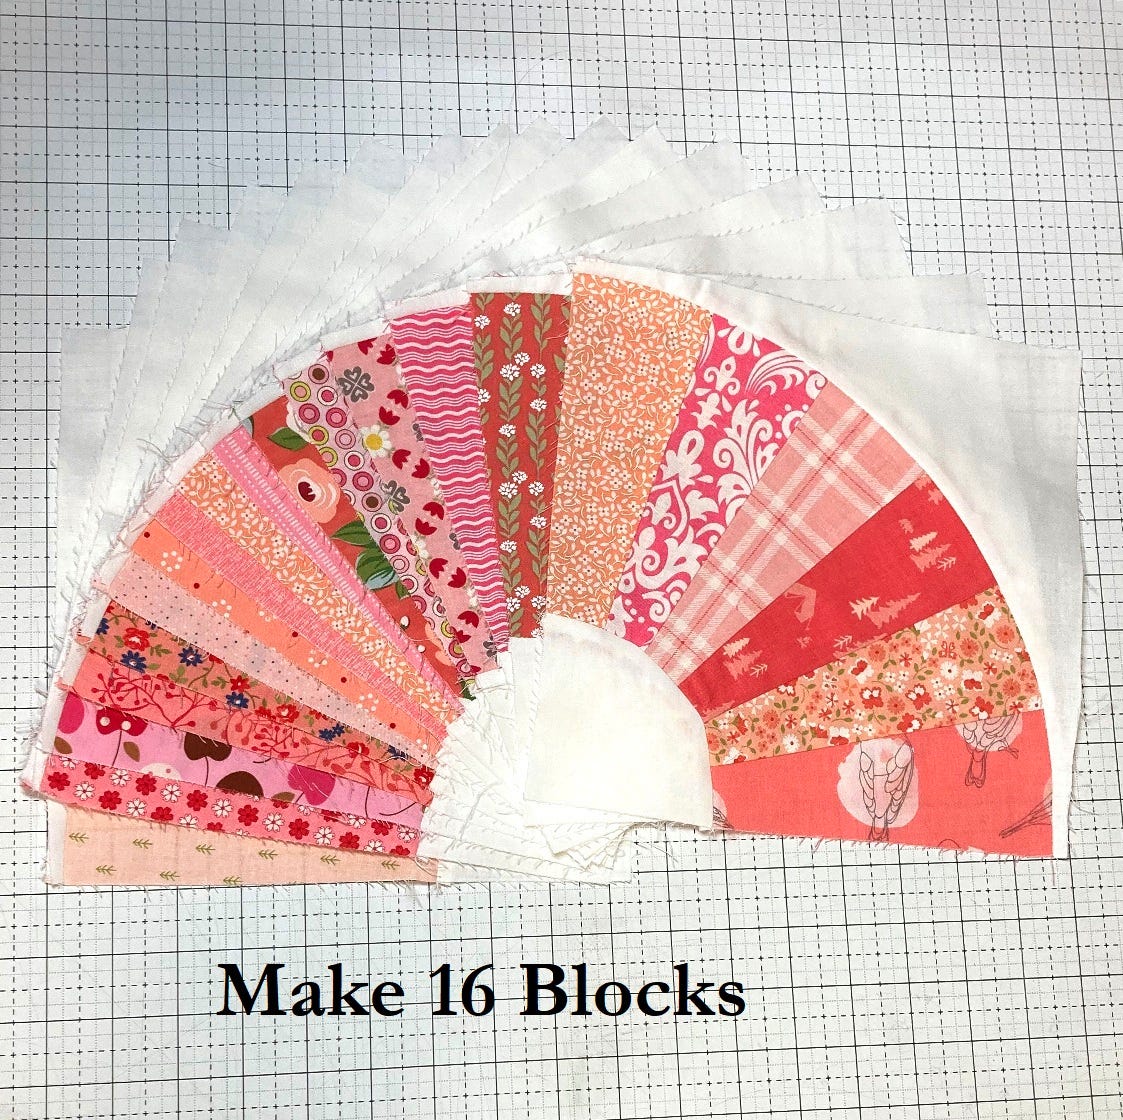
PRO TIP: I found it fastest to chain stitch each of the steps for all 16 blocks in each colorway. This will save a lot of time. If you haven't chain stitched, it is simply sewing each step 16 times before cutting your threads between each step.

Before you know it, you will have 64 beautiful blocks in four summer-inspired colorways. The blocks will be unfinished at 9 1/2" x 9 1/2", but there is no need to square them up. You don't want to accidentally cut off your 1/4" seam allowance at the crust ("C") points.

Piecing The Quilt Top
Now, with all of the blocks made, you are ready to sew them into a quilt top!
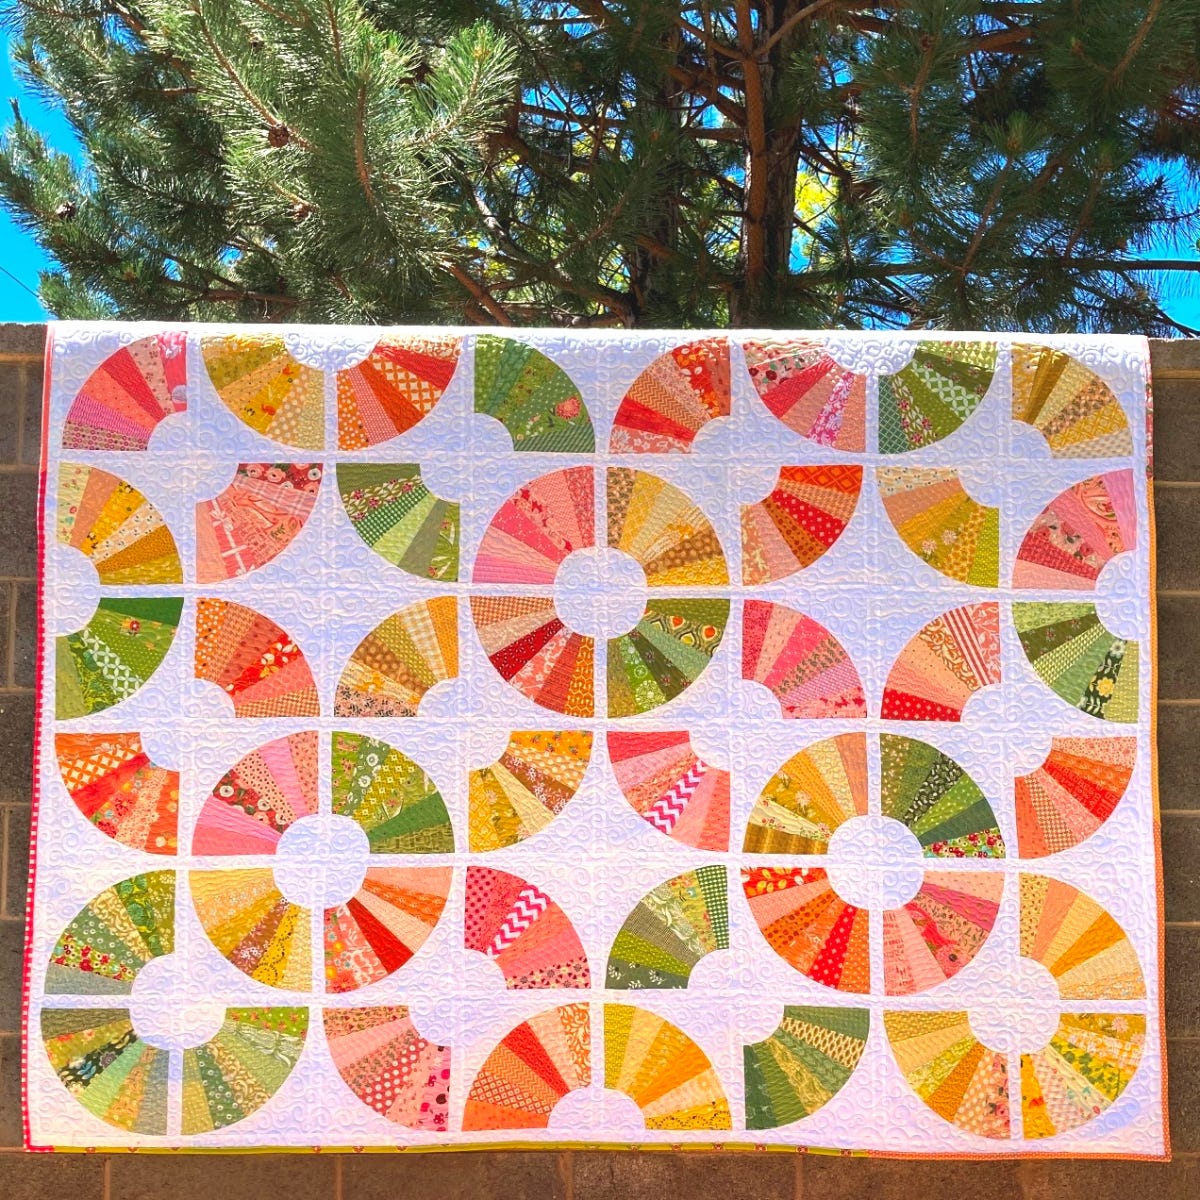
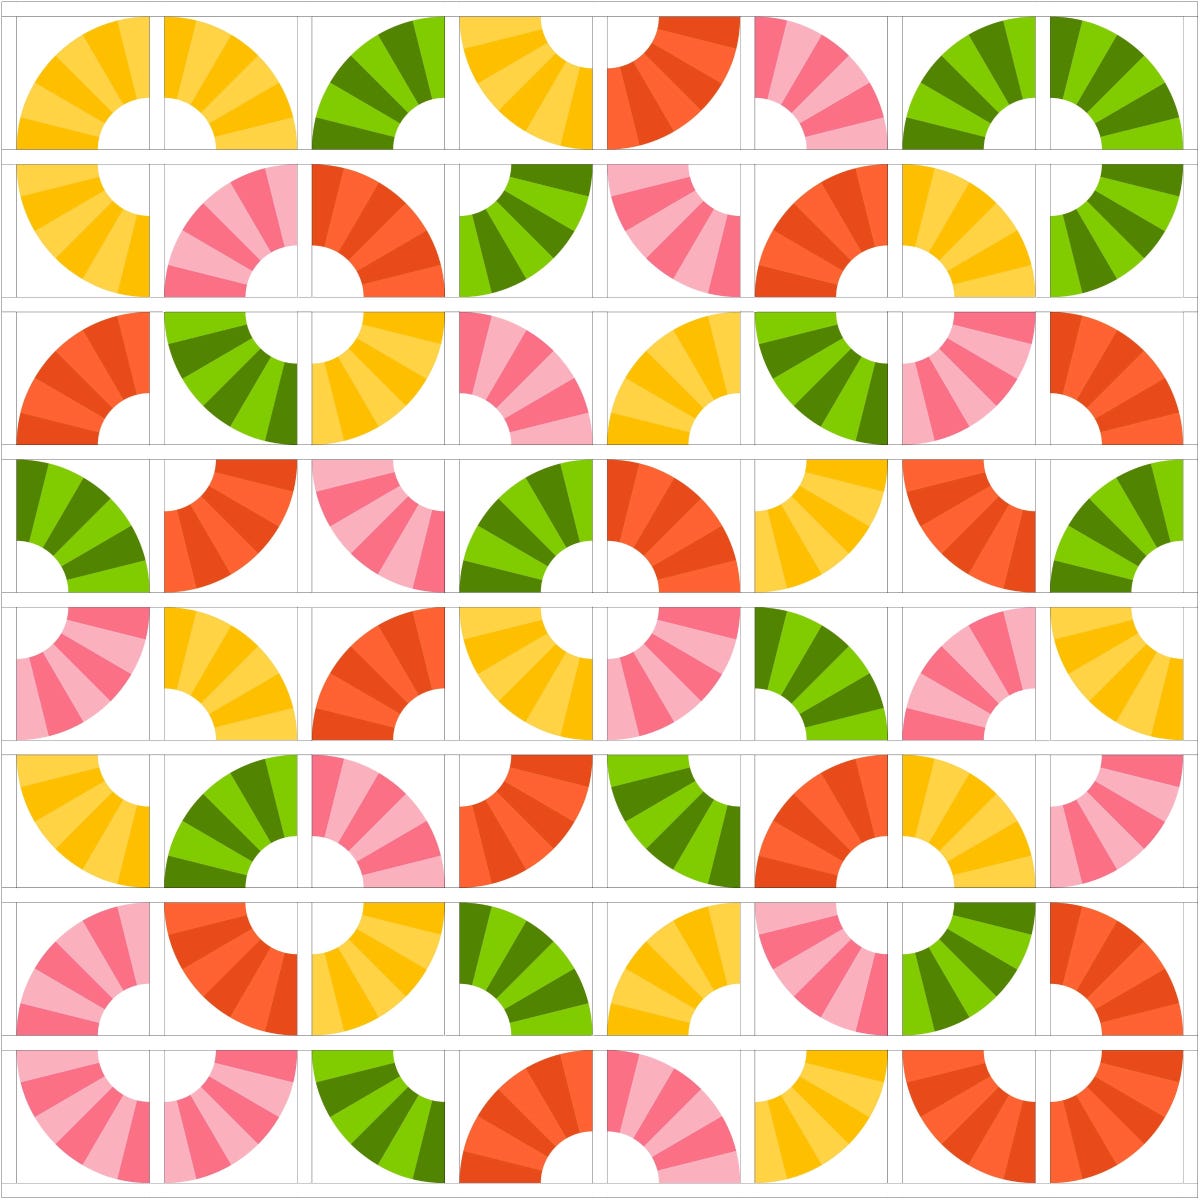
1. Layout the blocks in the following layout, taking care to pay close attention to the color and directional orientation:
- Place the 1 1/2" x 9 1/2" strip to either side of the blocks in each block row as shown.
- Place the long sashing strips toward the top, and bottom, of the block rows as shown.
2. Sew the blocks and the sashing rectangles together into rows.
3. Press the seams toward the sashing.
4. Sew the block rows and long sashing strips together to complete the quilt top.
5. Press the seams toward the sashing rows.
NOTE: If you are new to quilting, you can see this tutorial and surf down to the "Making the Quilt Top" directions for more detailed instructions on sewing the quilt top together. It is the same concept, just different blocks.
Finishing
All that is left is to turn that finished quilt top into a finished quilt!
Time to baste it, quilt it, and bind it - which is a whole lot in one little sentence.
NOTE: If you are new to quilting, check out my video tutorial series on finishing your quilt. It will walk you through basting, quilting, and binding step by step.
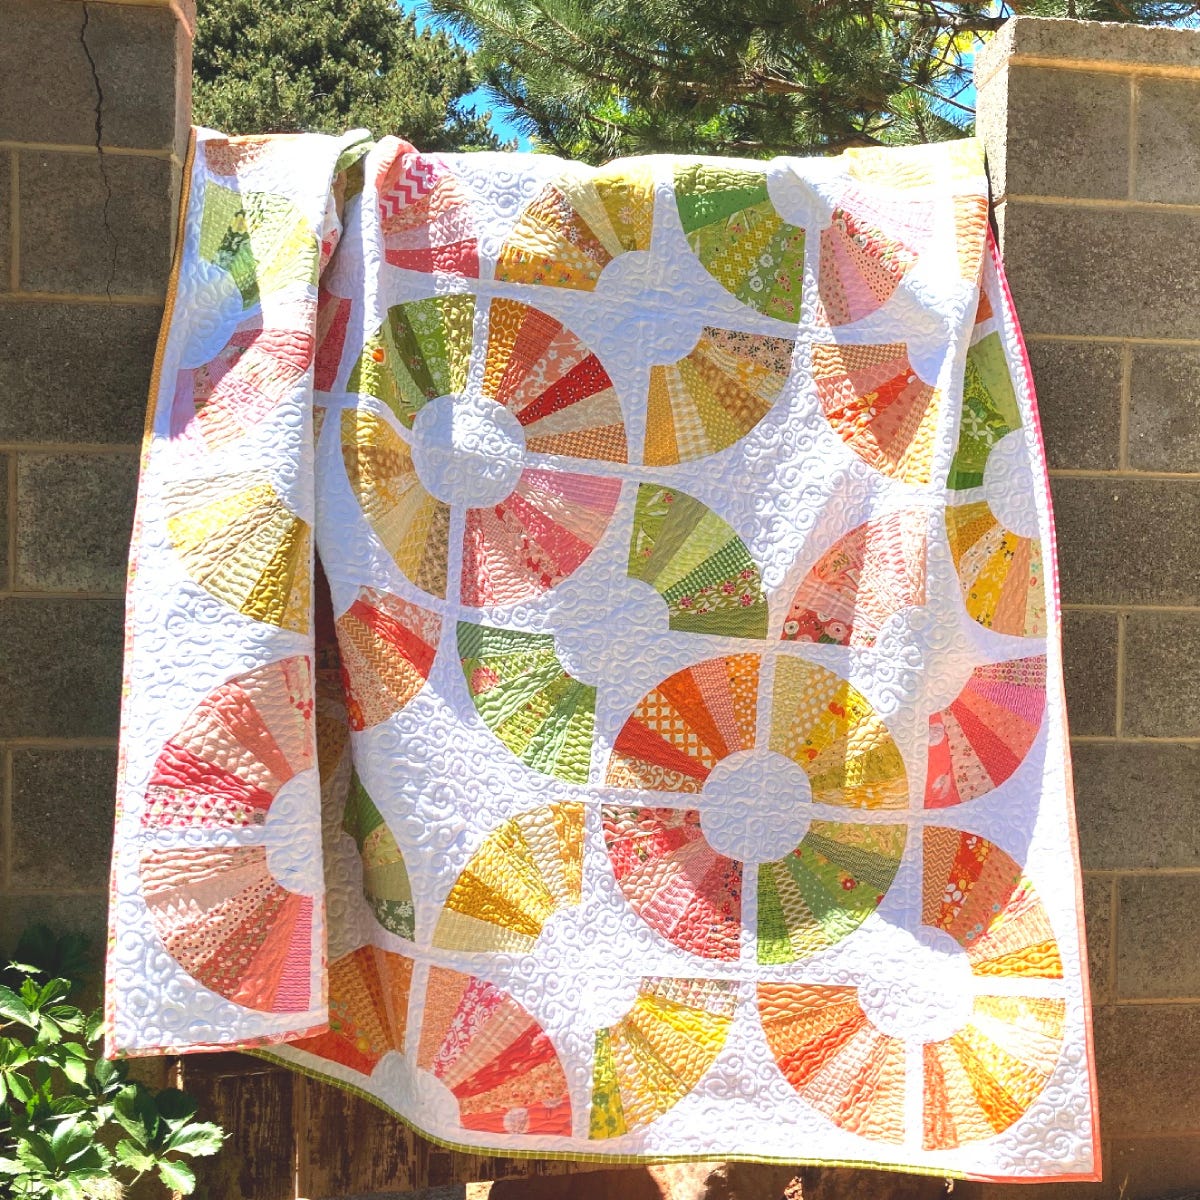
I quilted mine with some of my favorite free motion quilting designs: curls in the background and alternated between a wishbone design and wavy lines on the slices.
I also used leftover binding pieces to give it a scrappy binding!
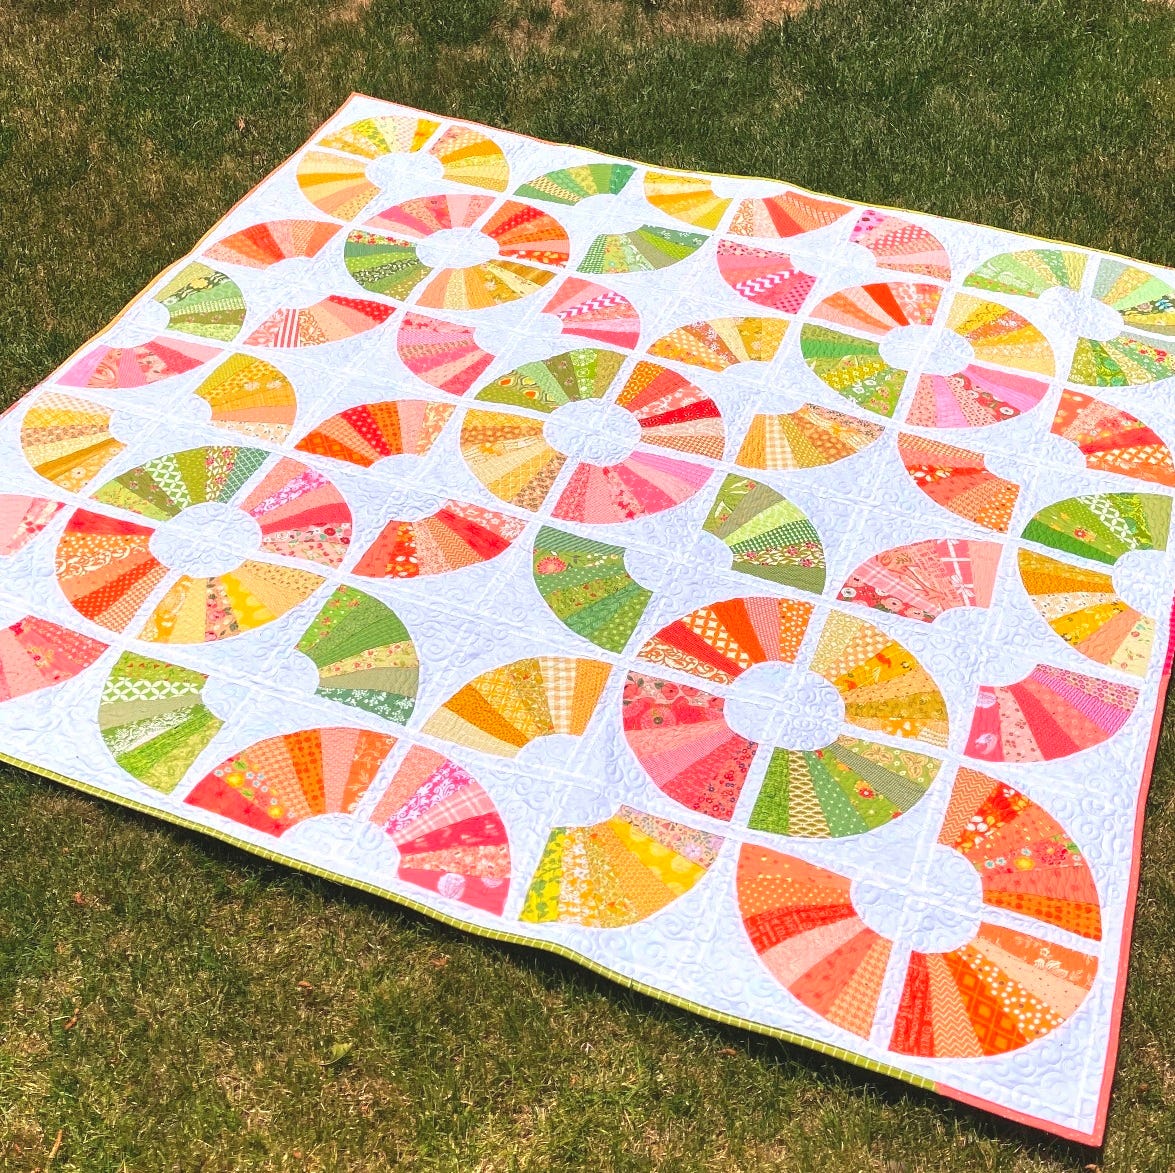
Now, you can sit back and enjoy your beautiful 81" x 81" Summer Slice quilt!
How Will You Refresh the Grandmother's Fan Block?
I hope that you have enjoyed this tutorial! It was a lot of fun to make, especially since the traditional Grandmother's Fan block is so easy to give a fresh, new look.
If you make your own Summer Slice quilt, we would love to see it! Share it with us on social media with the hashtag #AccuQuiltBuilt and tag us @happyquiltingmc and @AccuQuilt on social media. We can't wait to see your Summer Slice quilts, and I hope that you all have a very happy quilting day!
Did you miss AccuQuilt's relaunch party for the GO! Grandmother's Fan-9" Finished Die? Check out their fantastic celebration filled with more inspiration, helpful tips, and further fun you can have when creating a Grandmother's Fan block!


