
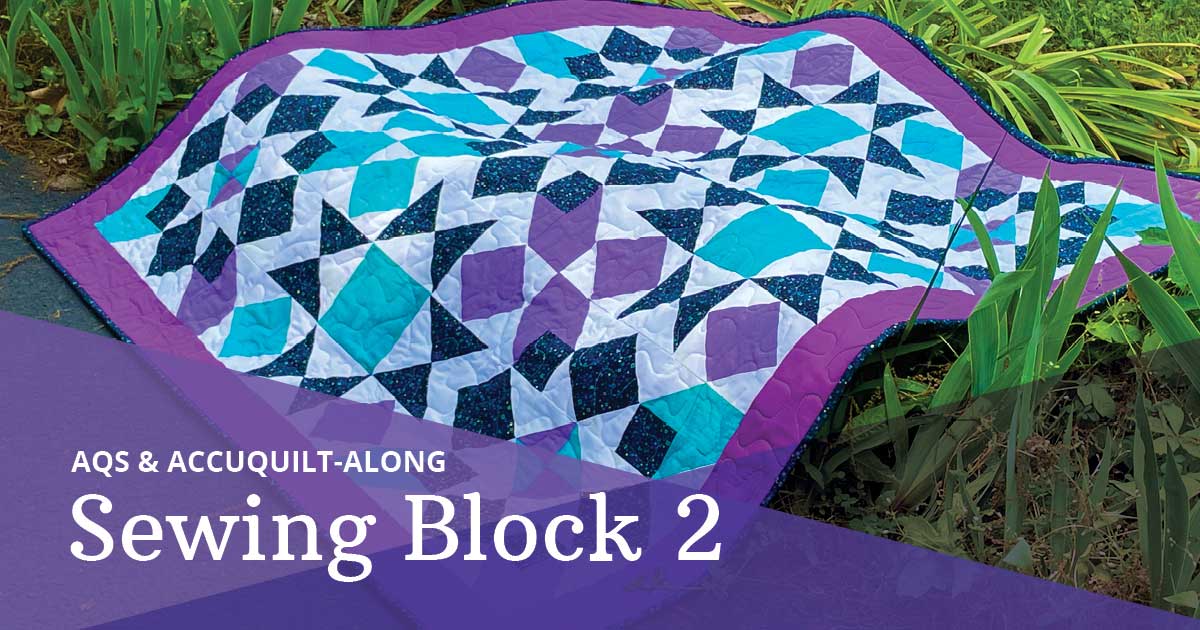
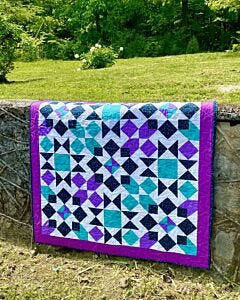
Welcome back to our Quilt-Along! We’re moving right along and are ready to look at how to put together the second block for the GO! Simply Qubed Throw Quilt by Anita Amador. If you’re just joining us here no worries! This is a free, relaxed project that you can join at any time. We introduced the project on AccuQuilt Live March 27, with the details in both the AQS and AccuQuilt blog posts that day. That post also included traditional rotary cutting directions for the project, provided by AQS.
We started the project with cutting and organizing our pieces on AccuQuilt Live April 10 and in our blog the same day. Last week, on April 17 we worked on sewing together Block 1. You can watch those earlier shows on our website, YouTube channel and Facebook page.
-
 GO! Simply Qubed Throw Quilt PatternSpecial Price $0.00 Regular Price
$4.99You Save $4.99
Today, we’re going to be sewing together Block 2 for this quilt. As a reminder, this pattern is written for use with the GO! Qube Mix & Match 10” Finished Block, but since each Qube has the same shapes, just in different sizes, you can use any GO! Qube!
-
 GO! Qube Mix & Match 4" BlockSpecial Price $249.99 Regular Price
$368.90You Save $118.91 -
 GO! Qube Mix & Match 5" BlockSpecial Price $249.99 Regular Price
$368.90You Save $118.91 -
 GO! Qube Mix & Match 6" BlockSpecial Price $249.99 Regular Price
$368.90You Save $118.91 -
 GO! Qube Mix & Match 8" BlockSpecial Price $249.99 Regular Price
$368.90You Save $118.91 -
 GO! Qube Mix & Match 9" BlockSpecial Price $249.99 Regular Price
$368.90You Save $118.91 -
 GO! Qube Mix & Match 10" BlockSpecial Price $309.99 Regular Price
$472.89You Save $162.90 -
 GO! Qube Mix & Match 12" BlockSpecial Price $309.99 Regular Price
$472.89You Save $162.90
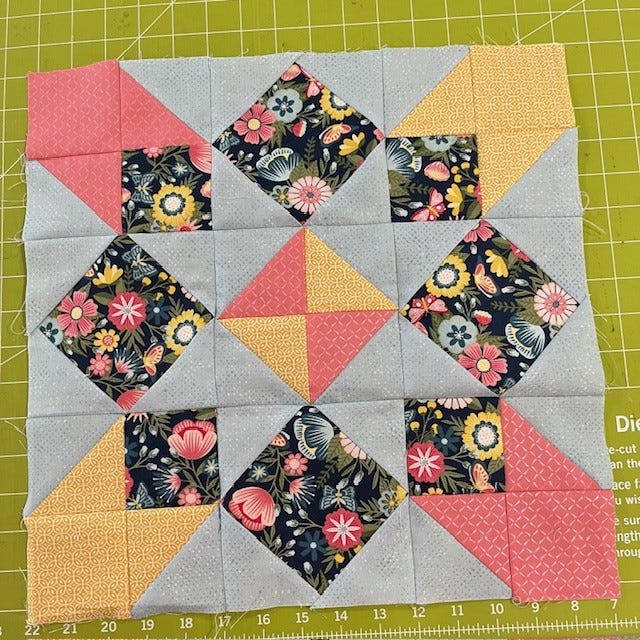
Block 2
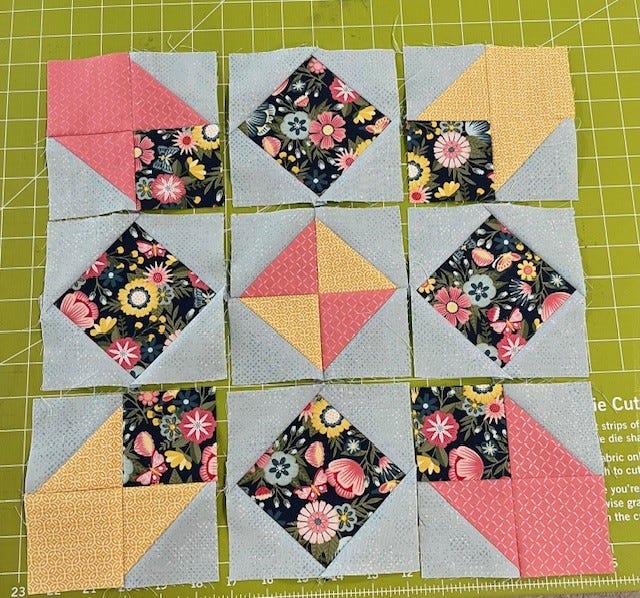
Just like Block 1, Block 2 is laid out in a 3 x 3 grid, also known as a 9-patch. Be sure to keep your pattern directions handy for correct placement of the units and colors in this block!
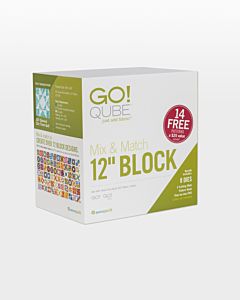
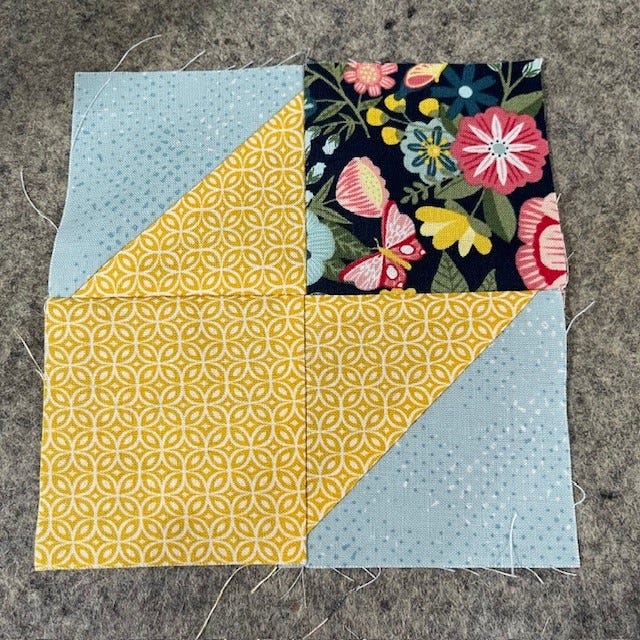
Your first step will be chain piecing half square triangle units! You’ll be creating these in two different color combinations. I’m following the pattern directions and pressing these to the dark side. If you happen to be using the 4” or 5” Qube, you probably will want to press them open instead due to the size.
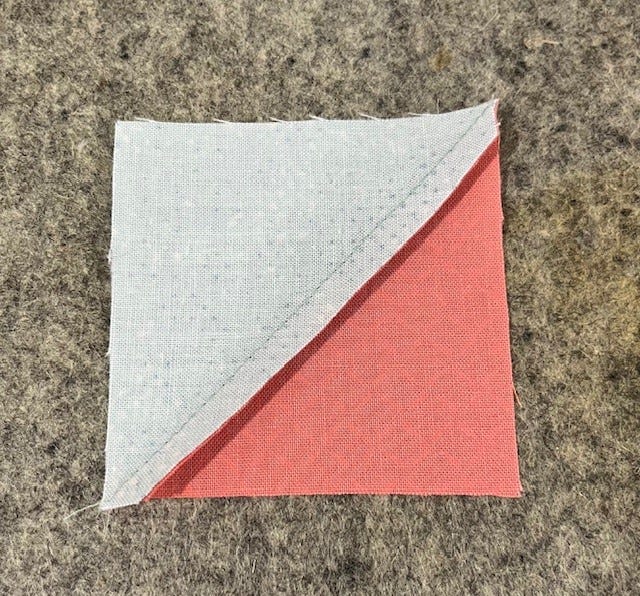
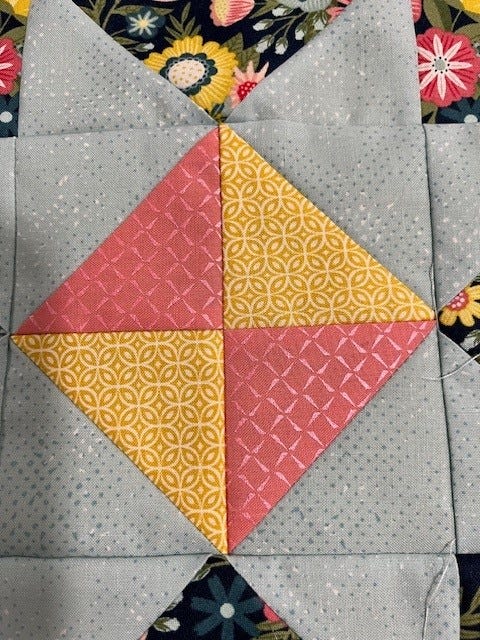
Set those units aside and it’s time to create square on point units, like we did for Block 1 last week. Unlike last week, all of these units will be the same – with your coordinated pattern/focus fabric in the center from Shape 6 and a Shape 5 half square triangle from your background on each side.
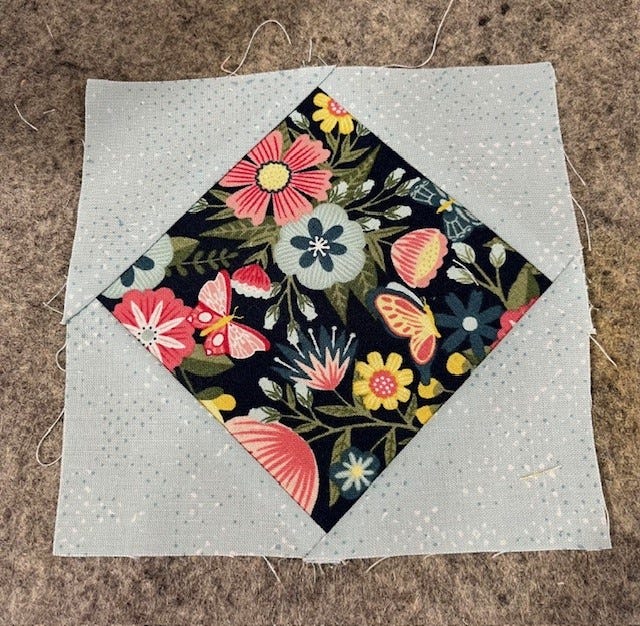
With all these units together, let’s build some 4-patch units for our block. In the pattern, you’ll see the 3 different 4-patch units we still need to build for this block. As with the earlier half square triangles, pressing these to the dark side (or towards the solid square) will help you get perfect center points and make it easier to spin or open up that point to lay flat.
Building Blocks
Okay now, this is where I ran into trouble when I put my first block together! Be sure to refer to the diagram in the pattern when laying out your units to sew them together. Note that you will be creating almost a ring in the center of the block with your coordinating print/focus fabric, and that the accent colors are in opposite corners.
After having to "un-sew" and turn one corner unit on my first block, I'm now laying out all my units before I start sewing my rows together!
Whenever possible, sew the units together into rows with the square on point unit on top. This way you can be sure you aren’t sewing over the tip and losing the point, just like we did last week. Follow the pattern directions for sewing and pressing the rows to create 5 of Block 2.
All Done For Now
Now, take your right hand, pass it over your left shoulder and give yourself a pat on the back because you’re on your way to having all your blocks finished and ready to put together next week! But remember, this isn't a race! We hope you can relax and enjoy the process of creating this beautiful quilt.
Be sure to keep posting pictures of your progress and any questions on the AQS Quilting Project Parade Facebook page using #AQSews. Happy Stitchin’, quilters!


