


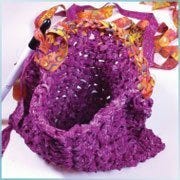
Freestyle Bias Strip Crochet Bag
by Ebony Love, LoveBug Studios
Award-winning quilter Ebony Love is the owner of LoveBug Studios, a
long-arm quilting and quilt design business…Read more about blogger.

There are so many sizes of strip dies, and I feel compelled to own them all. Okay, let’s be honest, my die obsession isn’t limited to just strip dies!
One of the ways I control my die-collecting habit is that I am not allowed to own a die unless I have identified at least two uses for it. The more common strip dies, like 2-1/2" or 1-1/2" are easy, but what can you do with a 7/8" wide strip? That’s the subject of today’s project.
When I was younger, crochet used to be my very favorite hobby, but I had to give it up when I developed carpal tunnel in my left hand. That should tell you how often I used to crochet!
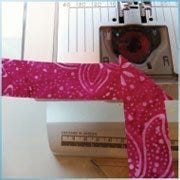
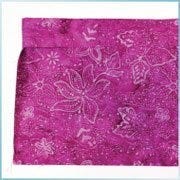
When I set eyes on the 7/8" strip cutter, I knew immediately that I would have to dust off my crochet hooks and come out of retirement to crochet fabric. The strip cutting was so fast that I ran out of batik fat quarters before I was ready to stop cutting!
The trick to making great fabric strips for crochet is to actually cut them on the bias. This may sound like more trouble than it’s worth, but the fantastic thing about bias strips is that they don’t fray. That will keep your bag looking fabulous for years rather than hours.
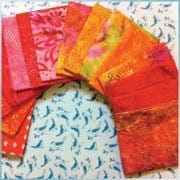
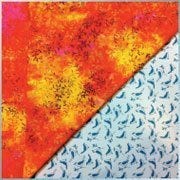
This project tutorial is going to be a little bit different, in that it doesn’t teach you how to crochet, nor does it teach you how to make either bag exactly, but hopefully you’ll get enough information to make your own fabulous crochet bag. This technique is really about creating your own style of bag. For fabric, I recommend batiks, solids, or hand-dyes because the color goes all the way through, but if you choose a print instead, you’ll probably get a really neat effect as the fabric twists during crochet.
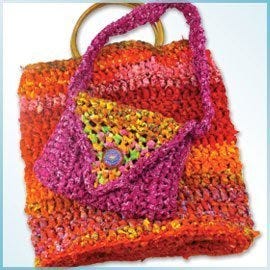
The larger bag in this project (17"W x 16"H x 4"D) took a total of six yards of bias-cut strips. There were 16 fat quarters, two half-yard pieces, and a one-yard piece. The smaller bag (10"W x 7"H) took 2-1/2 yards of fabric; two fat quarters for the flap, 1-1/2 yards for the main body, and 1/2 yard for the strap. Fabric crochet takes a lot of fabric!
When using the 7/8" bias strips, I prefer to use a Hook Size P. If you used narrower strips like 3/4" (that’s another favorite strip cutter) you can drop to a Hook Size N.
Watch this video to learn how to cut bias strips!
Materials:
- Lots and lots of fabric!
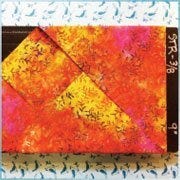
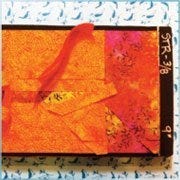
- Studio Strip Cutter-7/8"
(Super Long Cut – 50017) - Crochet Hook Size P
- Large eye yarn needle
Tip: Fat quarters are easier to work with than yardage, but you don’t get strips as long as you might want, and you’ll have more seams.
Typically, when we cut bias strips, we use perfect squares, but to work with fat quarters and get the most use from them, we need to fold them a little differently.
Start with one corner, and fold it up on the diagonal to meet the other edge.
This fold is now your straight edge. Take that fold and align it on your strip die. (You are drawing registration lines on your dies now, aren’t you?)
Fold the fabric so that the outside blades are covered, and you have something that resembles a lopsided envelope. Fat quarters create six layers of fabric here.
Tip: See how my folds extend to the edge of the die board? If you are a little more generous when you fold the fabric on the outside edge of the die, you’ll get usable strips rather than scraps!
Stack more fat quarters on the die. It’s ok to overlap your fat quarters here; just stagger them so they aren’t fully on top of one another. You will have 12 layers of fabric in some areas, but it’s okay for this project, because we’re using these for crochet, we can relax the rules a little bit!
Tip: Use a new mat when cutting more than 10 layers. If your cutter won’t turn through the extra layers, don’t force it.
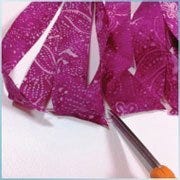
Now you have a bunch of bias strips, and they need to be joined together to give you one continuous length. A lot of crochet tutorials will show you how to make a slit and loop joint, but I find that method overly time-consuming. Take advantage of the angled ends, and stitch them together instead!
Roughly match the angles so the strips are at 90 degrees to each other. You’ll have little triangles peeking out above and to the side; stitch together with a 1/4" seam and a short stitch length.
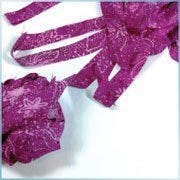
Chain-piece all your strips together, then cut them apart between stitches.
I don’t worry about cutting off the points or pressing the seams; you can do that if you choose.
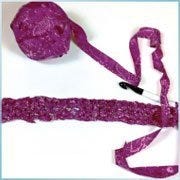
Starting at one end, wind your fabric into a ball.
This will keep your fabric from tangling as you
work with it.
Tip: Make these fabric strips ahead of time, and wind them into balls. You can store these balls in decorative baskets, and use them to liven up your living space. It’s a great way to disguise your
stash too!

Now you’re ready to start your bag!
We’ll walk through how I made the little bag. It is made from a rectangle that’s turned on its side.
With your P hook, chain (ch) 25. If you fold this chain in half, this is how deep your bag will be, so chain more if you want a deeper bag.
Skip the first chain, then single crochet (sc) in each chain across. Ch 1, turn, then sc in each ch across. You have two rows of sc.
Ch 2, turn, then double crochet (dc) in each sc across. Ch, turn; then dc in each dc across.
This is the pattern that I chose for my bag—you can do whatever you want!
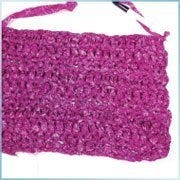
Continue working this pattern until the bag is as wide as you want. I repeated the pattern three
more times.
As you crochet, you’ll come across seams, just keep stitching! Also, don’t worry about how the fabric is twisting or folding. Remember, they won’t fray (except at your seams) and the different folds and twists make your bag unique.
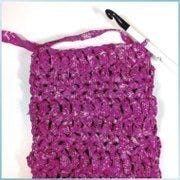
To form the bag, fold your rectangle in half, and
slip stitch through both layers to close the side
of the bag.
Tie off, leaving a long tail for weaving in later; then repeat on the other side, using slip stitches to close the other side of the bag.
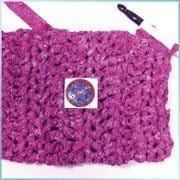
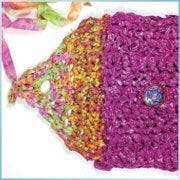
Decide how you want to close the bag. I chose this fabulous Czech glass antique button as a bag closure, so when I make the flap I need to make sure to leave space for a button hole.
To add a flap, chain on to the bag, then work a sc evenly across the rows.
I’m using a contrasting color here for the flap to really show off that button!
To work this flap, I did several rows of sc, then
I started reducing each row to make it taper to
a point.
I pinned my button temporarily to the outside of the bag, so that as I worked my flap, I could determine where the button hole would be. If you use a smaller button, and use dc instead of sc, your button might fit between stitches.
In my case, I had to ch 2, and skip a sc before continuing to reduce across. I had to redo the last several rows of the flap a few times before I got it right, so don’t be afraid to pull out your work and start the section again.

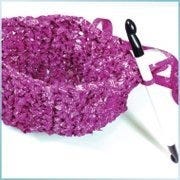
To make the strap, slip stitch onto the top side of the bag, then slip stitch across three stitches to form a foundation for the strap.
Ch 2, then dc in each slip stitch across. Ch 2, then dc in each dc. Repeat until the strap is the length you want.
To attach it to the other side of the bag, use slip stitches in the opposite top side. Tie off.
To finish the bag, I went back to the fabric used in the main body of the bag, and I worked sc around the flap. This defines the flap better and gives it a more finished look.
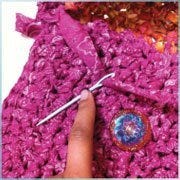
You probably have several long tails from tying
off; use a large plastic yarn needle to weave in
the ends.
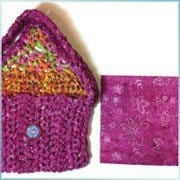
If you want to line the bag, measure the outside width of the bag, and add 1/2". This is your
lining width.
Measure the height of the bag, then double it and add 3".
Cut a piece of fabric to these dimensions. In my case, I cut a piece of lining 11" x 18".
Fold the lining in half, stitch up the two sides using a 1/4" seam allowance, then fold down the top of the lining approximately 1-1/2". Press.

Insert the lining into the bag and pin into place. Hand-stitch the lining into place using
matching thread.
Tip: If the lining is a little too big or a little too small, you should be able to stretch or compress your crochet to fit. That’s also a great thing about using bias strips—they are very forgiving!
Admire your handiwork, and enjoy your
crochet bag!
Watch Video:
AccuQuilt Studio Smaller-Sized
Strip Cutters (3/4" - 2")
Watch Video:
Do you quilt like crazy?


About Blogger:
Award-winning quilter Ebony Love is the owner of LoveBug Studios, a long-arm quilting and quilt design business. She publishes her patterns and offers die cutting services under the brand Quilt Possible!, and is also the publisher and editor-in-chief of a new digital publication, Blocks to Die For!, especially for fabric die-cutting enthusiasts. Ebony is recognized as one of the leading experts in fabric die cutting techniques, and she regularly produces free videos featuring tips & techniques for getting the most out of your dies. You can find dozens of her videos on YouTube under the username “LoveBugStudios” or in AccuQuilt’s video library.
Studio Dies

Studio Strip Cutter-7/8"
Save 25%
Use Code BLOG45

Save 25% on All Studio
Strip Cutter Dies
Use Code BLOG45
GO! Projects

GO! Madras Bag
Save 20% on
Project Dies
Use Code BLOG46

