


It seems like just last month that we were heading into 2023 and five quilt-alongs with AQS, and it’s time for us to move towards the finish line for our final project of the year. Today, we’re going to be talking about sewing our blocks together for the top and adding the border along with some ways to quilt and bind your finished creation.
Lay Out Time
Unless all your blocks are identical, now’s the time to decide on how you are going to arrange your blocks! You can do this on a design wall if you’re lucky enough to have one, but I’ve been known to use the floor, the kitchen island, the dining room table and even my bed to lay out quilts.
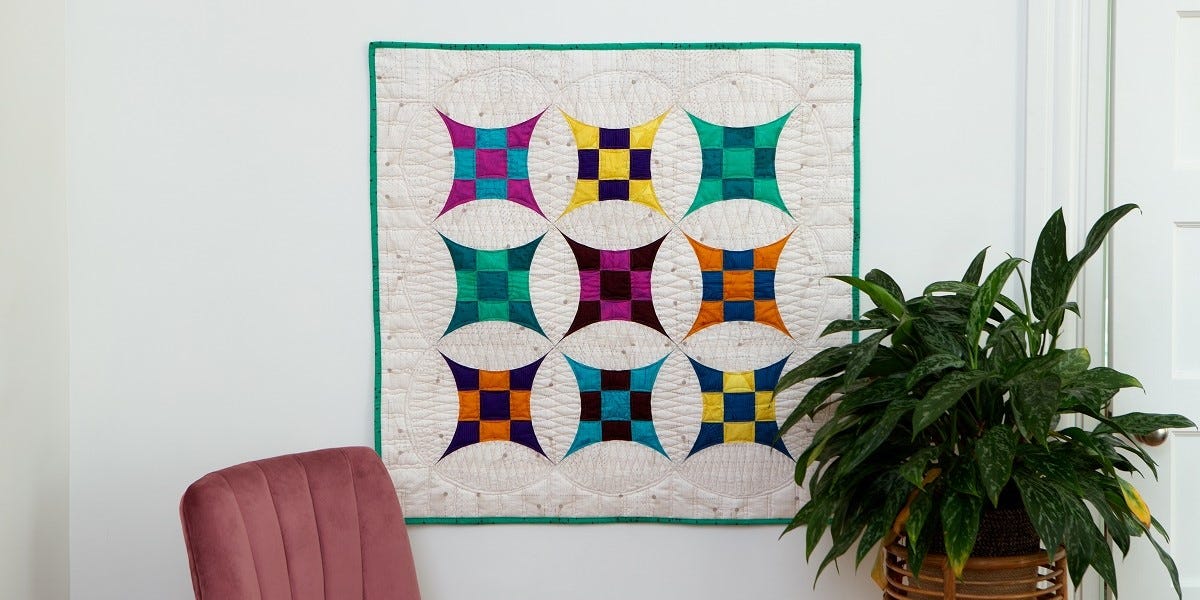
The pattern calls for 3 rows of 3 blocks, but I think that both AccuQuilt Cutting Expert Pam Heller and I are going to enlarge our quilts to include more blocks. Pam wants to have a bigger quilt, and me? I just love making these blocks and I’ve been collecting fabric for this project for over a year, so I’ve got plenty of options.

The start of Erica's layout on her design wall
Row, Row, Row
Once your rows are sewn together, I suggest pressing the seams open due to the bulk at the corners. If you prefer to press them to one side to "nest" them, that's another option, but with the seams meeting together, I do suggest pressing them open.
When your rows are all sewn together, go ahead and press those seams open and give the entire a top center a good press. Our next step will be measuring the quilt for borders, so it’s a best practice to have it pressed out well.
Now is also the time to decide on your border. The pattern uses a 4 ½” wide cut strip for the border of the background fabric, but you can always personalize your quilt with changing up the border. I can’t wait to see what you all come up with in your quilting heads!

Press seams open between blocks.
Measure Twice - or Thrice!
You know the old saying about measuring twice? I say to measure 3 times, at 3 points before cutting your border strips – on either side and the middle of your quilt. Then, match up the middle of the strip with the middle of the quilt side, and the ends with the ends. This will insure a straight and flat quilt, what we all want, right?
Finishing Steps
Once your top is complete, your next step is quilting! If you are following the pattern, the size will work well for quilting on your regular sewing machine, if you want. There are so many options for quilting this that I suggest you sit back, take a look at your quilt top and let it “talk” to you. Maybe you want straight lines? Maybe some custom quilting or feathers in the background, or something fun in the border? Hmm, how about echo quilting?
Of course, you can always “quilt by check” and take your finished top to your favorite long arm quilter, too. I recently picked up my GO! Rainbow Morning Star quilt from the quilter and dropped off the GO! Shoo Fly Spin quilt at the same time! How ever you choose to quilt your top, you’ll need to make decisions on your batting and backing as well.

Erica's GO! Rainbow Morning Star Quilt on the long arm.
I’ll be using white batting for mine because the natural batting would give my white background a yellowish tint when quilted.
Not sure what to put on the back? The first question I always ask myself is how the quilt will be used. If it’s going to be a wall hanging, table runner or bed quilt, I will choose cotton. If it’s going to be a throw quilt, I often choose something soft and fuzzy like Shannon Cuddle or Fireside by Moda.
Next, I shop my stash! I’m so happy that more and more quilters are piecing backings together and using more than one fabric. Remember, using up your stash sets you free to shop for more fabric!
The Final Frontier
Binding, quilters, don’t forget your binding! Whether you cut your binding at 1 ¾”, 2 ¼” or 2 ½”, there’s a die for that if you have a GO! Fabric Cutter. With my top being so scrappy, I’m planning to pull the last of my fabrics together when I’m done and do a scrappy binding.
When I don’t make a scrappy binding, I like to cut my binding out at the same time that I cut my quilt out. That way, it’s all done and waiting for me the minute my quilt is ready for it, and my quilted tops don’t have to sit and wait for me to cut the binding.
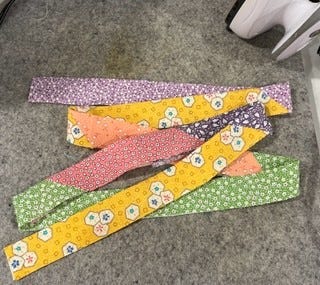
The start of Erica's scrappy binding.
That's It!
And just like that, you’re done! We hope you’ll post pictures of your progress on the AQS Quilting Project Parade Facebook page, no matter what stage you are in. Be sure to use #AQSews in the description of your picture so we can all share together. Keep posting because next week we’ll be having our show and tell show and blog to finish off our final AQS & AccuQuilt-along for 2023.


