

Hi! It's Kristina Brinkerhoff from Center Street Quilts.
With summer in full swing, our family has been wanting to spend more time outside enjoying the warm weather.
Since I can't bring my sewing machine with me everywhere, I've been looking for portable hand sewing projects to quickly grab when our family is heading out the door for some fun.
AccuQuilt English Paper Piecing
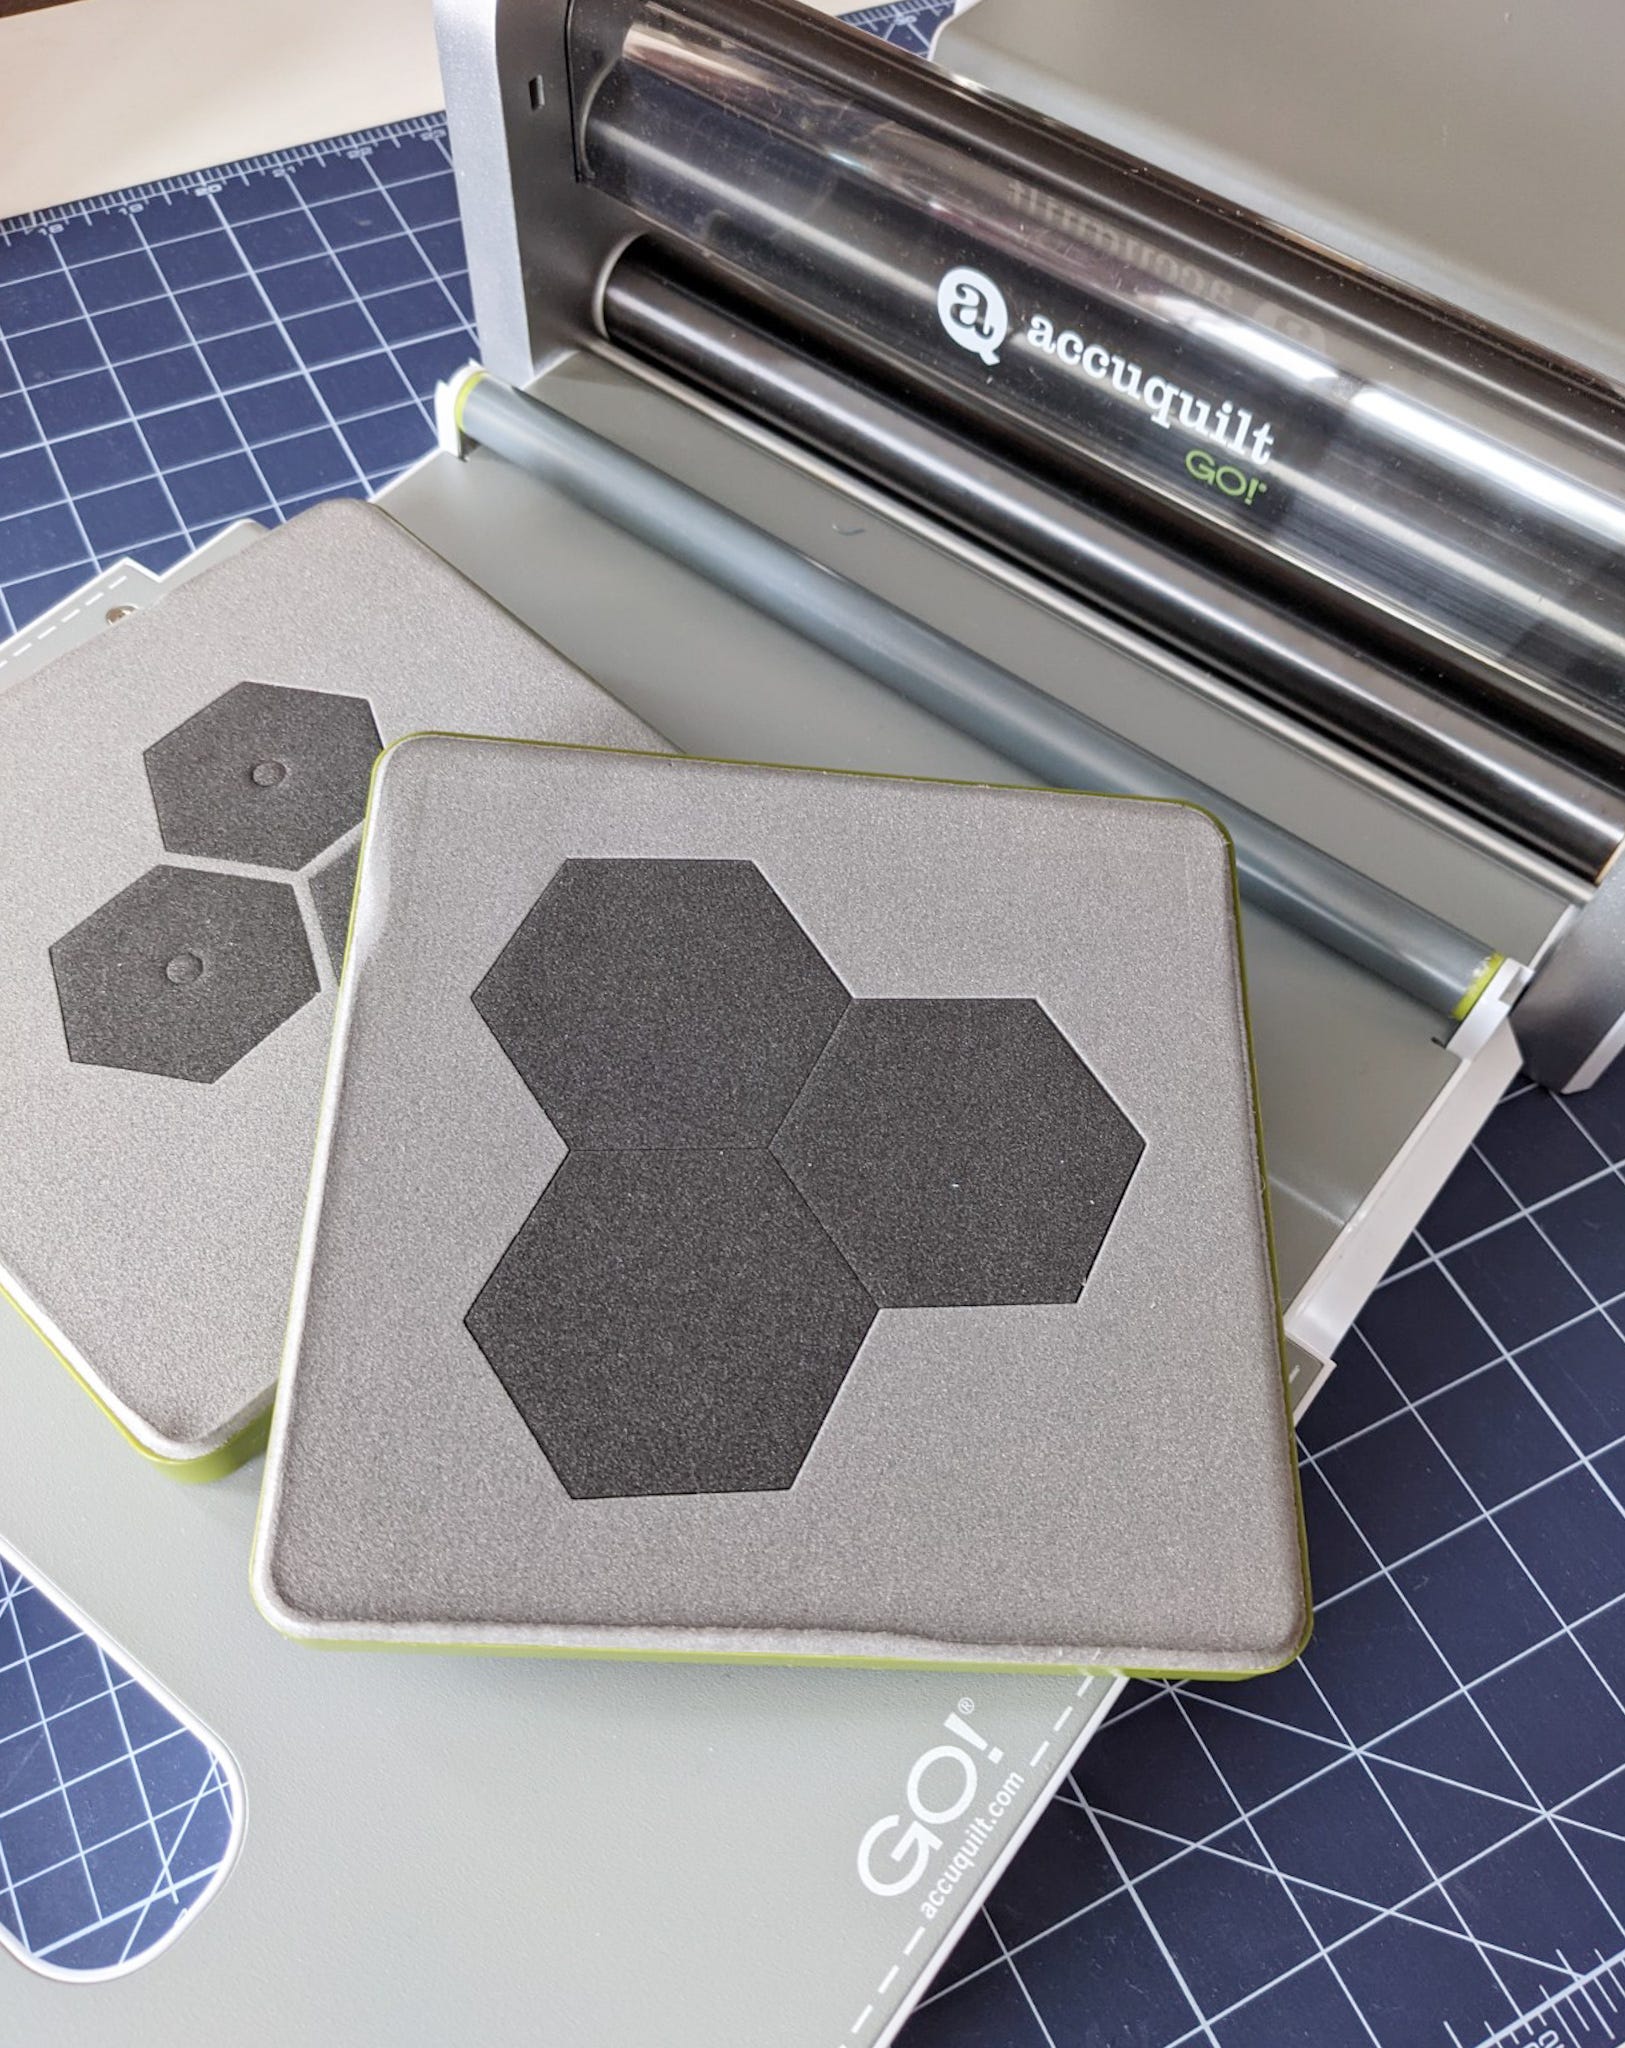
English Paper Piecing (EPP) projects are perfect for this! And to help the prep work go faster, I've been using the AccuQuilt GO! Qube English Paper Piecing Set.
The Qube EPP set has four shapes (hexagon, half-hexagon, triangle, and diamond) with dies to cut both the paper templates and fabric for each one!
You are truly able to quickly, and accurately, cut as many paper and fabric shapes as your heart desires.
With this new Qube set, I decided it would be fun to play around with the EPP shapes and create my own EPP block design.
EPP Quilt Design & Quilting Tips
Today, I'll show you how to make this colorful design, but also give some quilting tips for creating your own EPP blocks with a GO! Qube EPP Die set.
Materials Needed:
- Cardstock
- Black fabric
- Two shades each (light and dark) of Red, Orange, Yellow, Green, Blue, and Purple (I used the vibrant Spectrastic by Giucy Giuce for Andover Fabrics)
- AccuQuilt GO! Qube English Paper Piecing Die Set #55825
- Thread or Glue for basting
- Thread for hand sewing (I prefer Bottom Line thread or Aurifil 80wt)
- Needle (many EPP'ers like Milliner needles or Clover Gold Eye--but you can use any thin, strong needle you have on hand).
Steps:
If you're new to English Paper Piecing, AccuQuilt has some excellent tutorials in their video library - including Hexagon Garden FREE Pattern Tutorial that goes over all the basics of making an EPP project.
1. Use the four paper dies to cut out paper templates (you can use up to two layers of cardstock at a time). For this specific EPP block, you'll need (7) hexagon, (6) half-hexagon, (24) triangle, and (6) diamond shapes.
While I'm cutting the paper pieces, I like to cut a bunch of extras for future projects.
2. Use the four fabric dies to cut out your fabric pieces. You'll need: (7) black hexagons; (1) half hexagon and (1) diamond from each of the light shades of fabric (six total); and (4) triangles from each of the dark shades of fabric (24 total).
I obviously went a little overboard with cutting my fabric, but that's half the fun, right?!?

3. Pair up the paper templates with cut fabric pieces and baste the shapes. I've done both thread and glue basting and for this project. I preferred glue basting. Some of the pieces (I'm looking at you, triangles) are really pretty small.
Pro Tip: I found that glue basting was very fast and efficient for smaller pieces.
Pro Tip: After basting (whether it's thread or glue basting), I like to quickly press the pieces with a hot iron to help the fabric crease where it's folded over the edge of the paper template. This seems to help the fabric take the shape of the paper template better and causes less wiggling around when sewing the pieces together.

4. Once all of the pieces are basted, lay out your pieces as shown below. It will give you a visual of where everything goes and will help you verify that you have the correct number and color of pieces.

5. Now we get to sew them all together! One thing that's fun about EPP is that there isn't one right order to sew the blocks together. I'll share how I sewed mine together, but you might find a way that works better for you--and that's great!
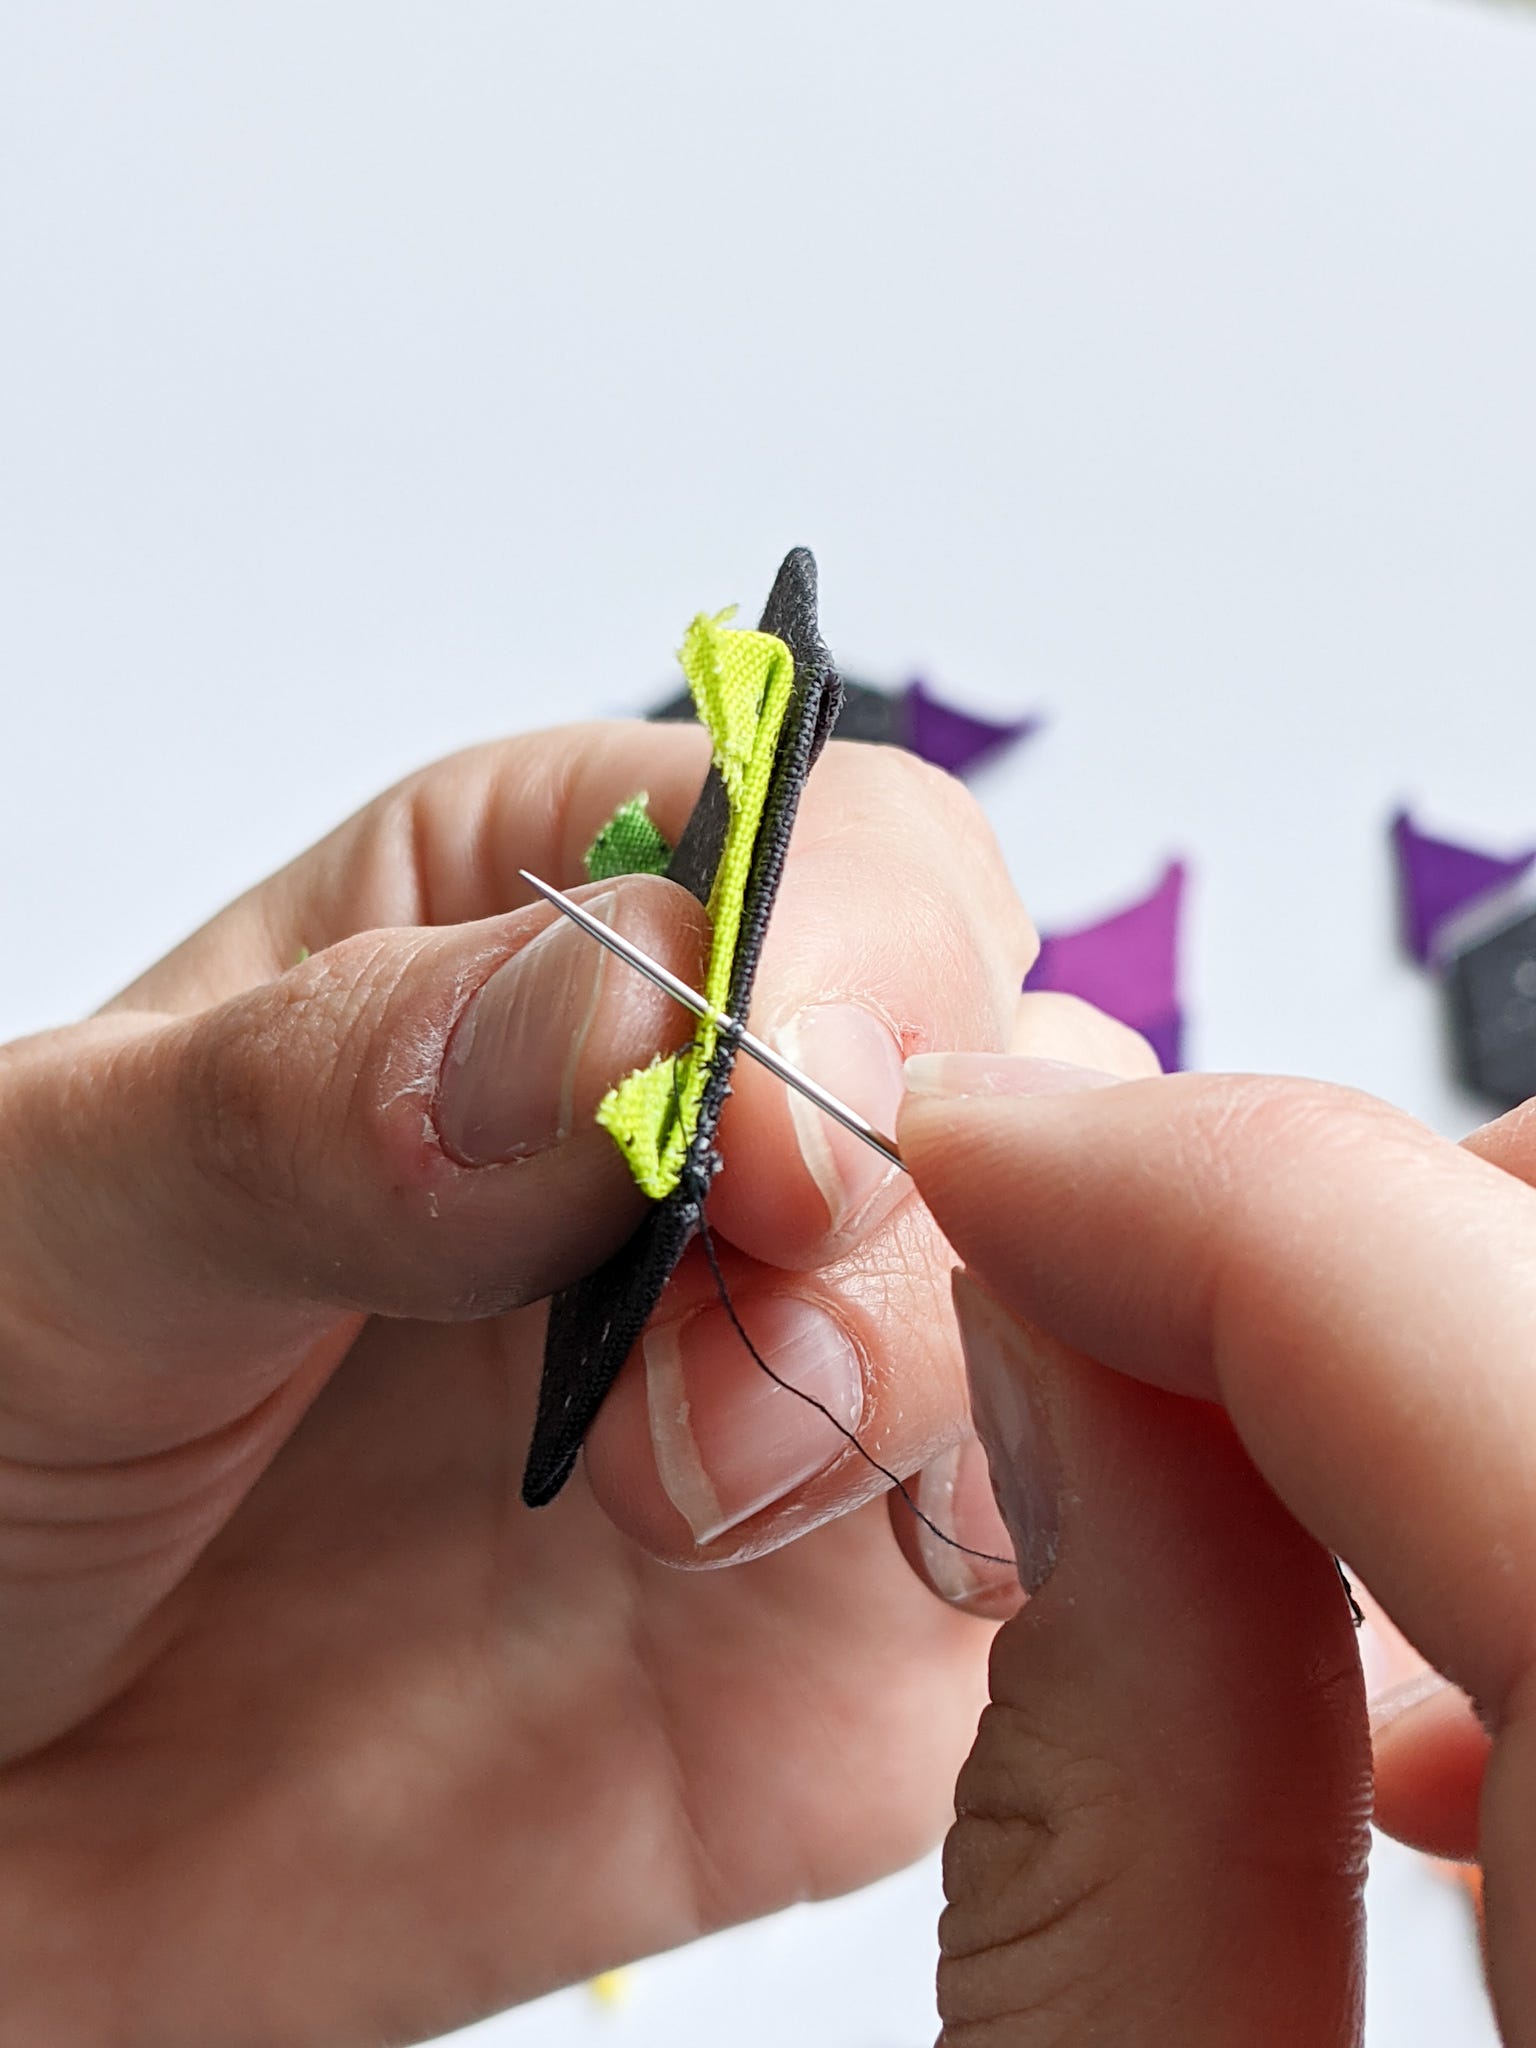
I started by sewing the half-hexagons to the center black hexagon. Place one of the half-hexagons right sides together with the black hexagon, lining up their edges.
I like to sew my EPP pieces together using a tiny whip stitch in a coordinating thread color.
Pro Tip: As you sew the half-hexagons onto the black hexagon and each other, you might need to bend or manipulate the growing block or paper template pieces in odd ways. It's definitely fine to put creases in the paper templates.
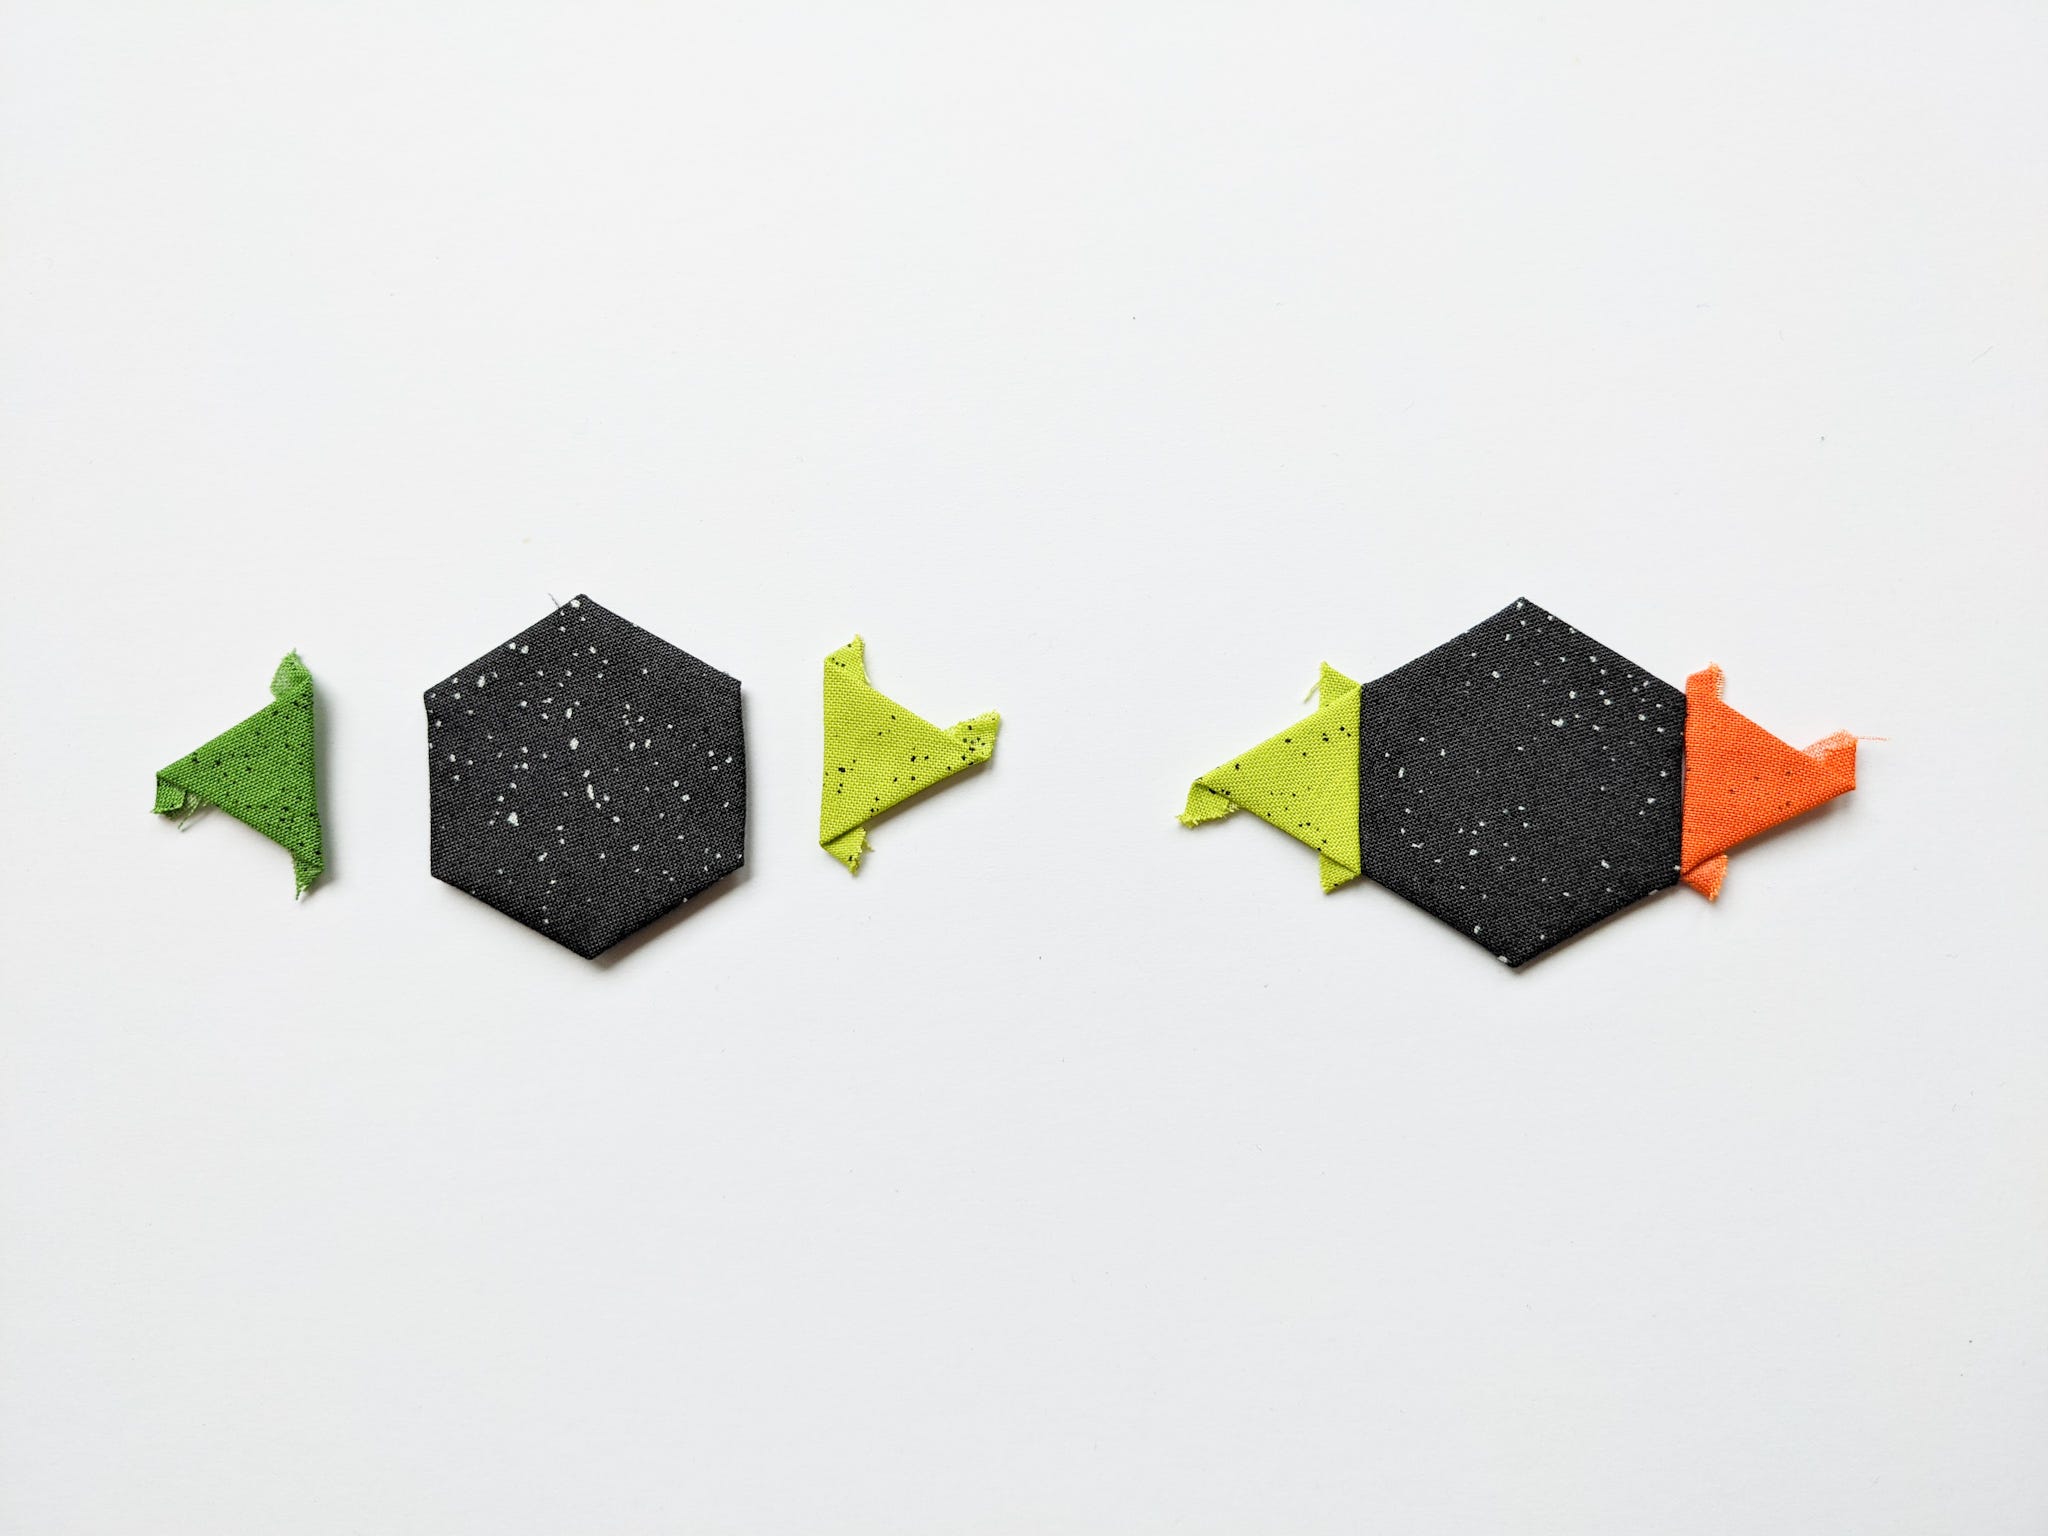
6. Gather a diamond and two triangles of the same color (they should be different shades, though) and sew them together as shown to create a large triangle.
Repeat with the remaining colors to yield six large triangles - one of each color.

7. Keeping your block laid out and following the image below, take the outer black hexagons and sew the remaining triangles onto them.
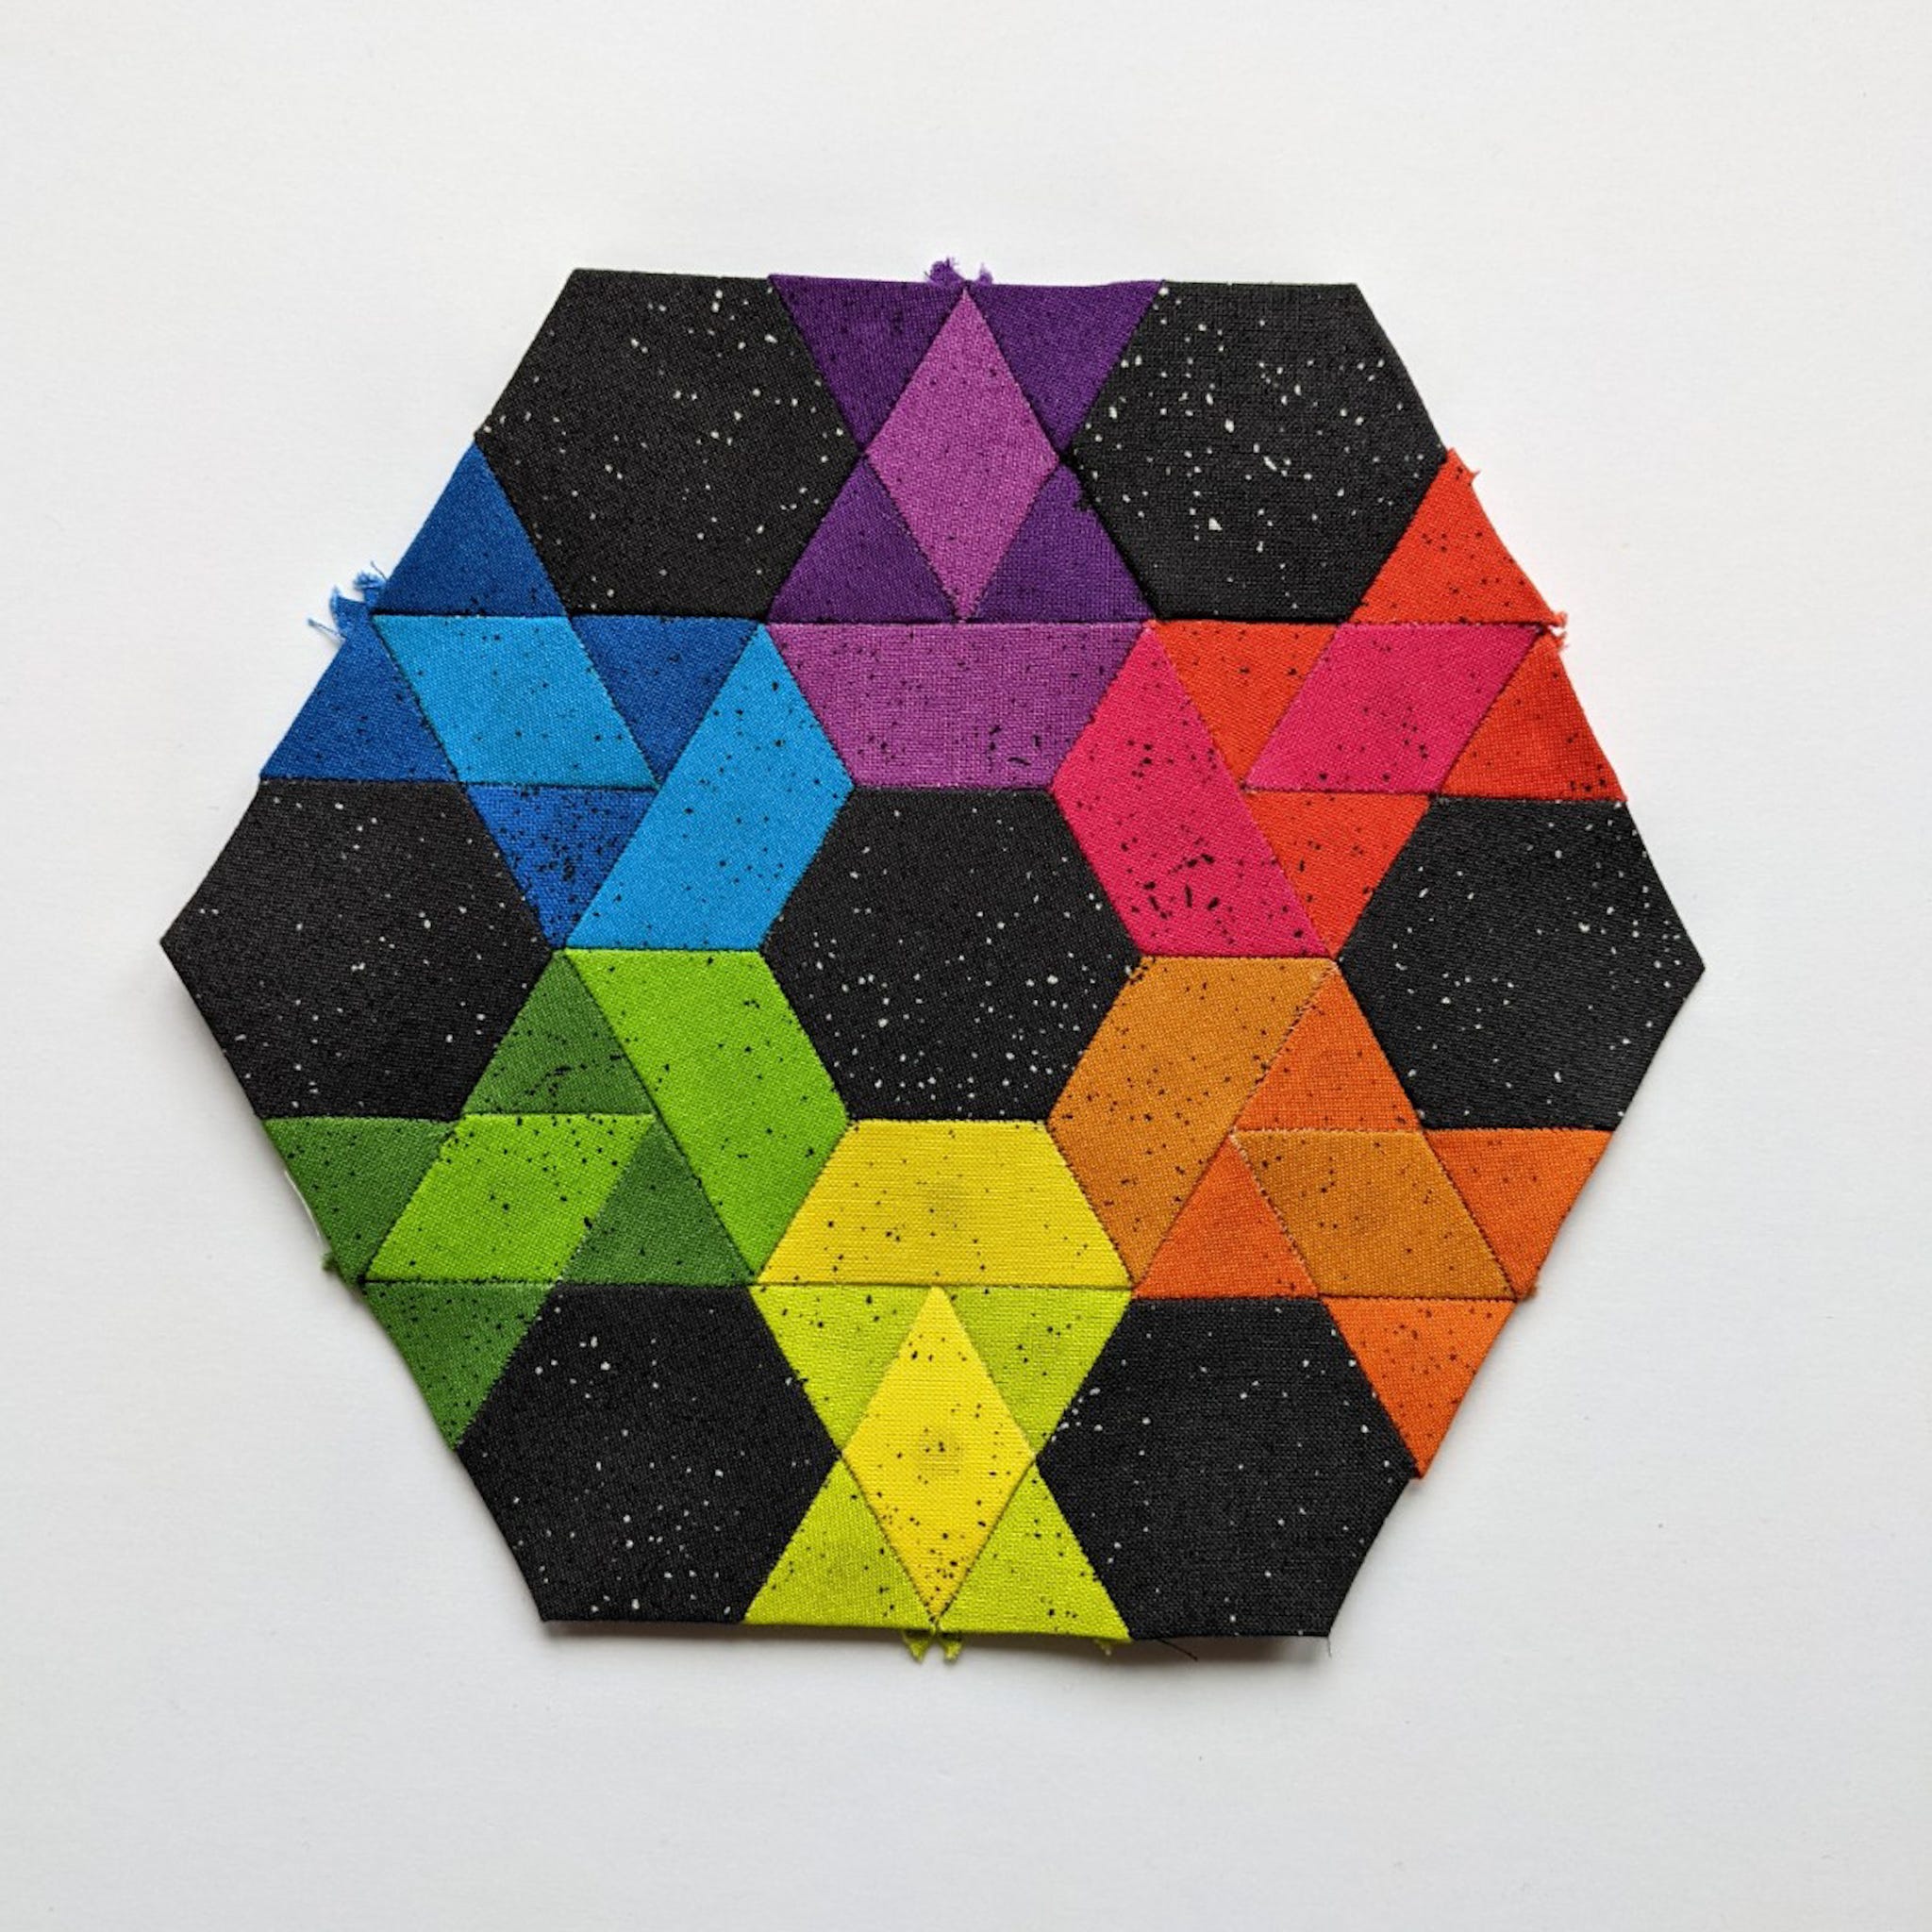
8. Sew the large triangles onto the center black hexagon + half-hexagon unit then attach the outer ring of black hexagons.

9. The block is completed! Yay!
You can use your new EPP block for a number of projects: mini quilts, wall hangings, hot pads, pouches, pillows, tote bags, etc.
Just remove the paper templates, applique it onto a base fabric, and go from there.
Now that I've shown you my own block design, I'd love to see you create your own!
You don't need any fancy computer software - just the GO! Qube English Paper Piecing Die Set.
After you cut out a handful of paper templates, play around with different block designs by placing the paper templates on a flat surface.
EPP geometry is extremely gratifying and, with this Qube set, you even get to skip the tedious part of painstakingly cutting intricate shapes over and over again!
That's a definite win in my book!

If you make your own EPP Block design using this tutorial, please share the photo on social media using the hashtag #AccuQuilt and don't forget to tag @centerstreetquilts and @AccuQuilt so we can see your fun creation!


