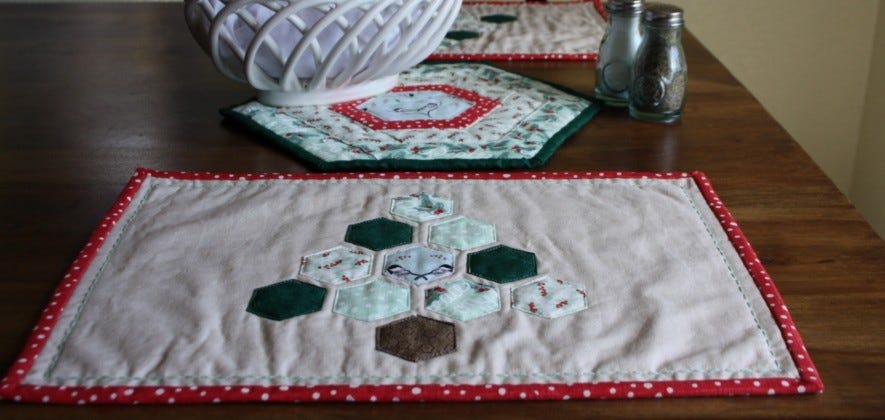
Hi there! I'm Erin from Avery Lane Sewing and I'm back today to share this cute and modern Holiday Hexagon Placemat project, which utilizes an easy-to-do hexagon appliqué technique. This is a great way to use scraps and a great quilt pattern for beginners!
This method is much less time intensive than the traditional method of sewing all the hexagons together by hand and much easier to do than sewing the hexagons together by machine. Instead, the hexagons are basically sewn on as appliqués. I'm a huge fan of appliqué and this technique gives the same neatly finished edges as the traditional turn under and stitch appliqué method, without as much work. Alternatively, I think a raw edge appliqué technique would be just as cute and would make this an even faster project to complete.
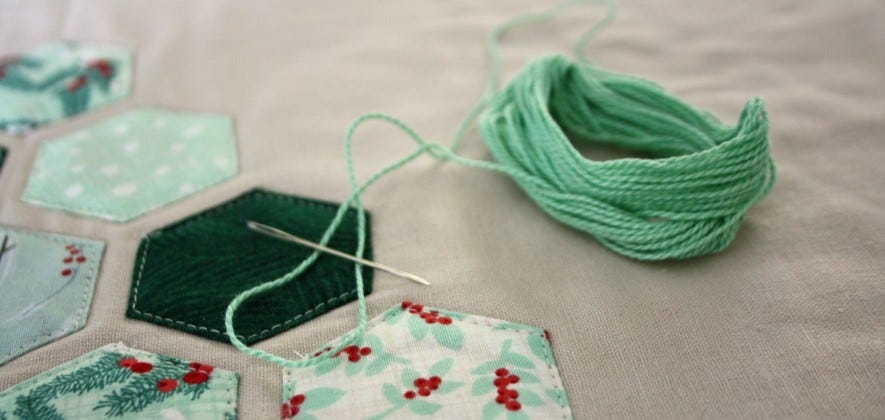
I have my hexagon supplies in a little container that easily travels with me, so I can hand baste my hexagons at soccer practice, music practice, or while sitting with the kids as they're doing their homework after school. Each hexagon only takes a few minutes to fold, clip, and hand baste. Using the AccuQuilt GO! Fabric Cutter, I can cut out a large supply of hexagons in a matter of minutes and be out the door to soccer in no time.
For the matching Hexagon Log Cabin hot pad/table topper, visit my website. It's also super quick to stitch up.
Holiday Hexagon Placemat Quilting Tutorial
18" x 12" finished
Supplies Needed:
- AccuQuilt Cutting Die: GO! Hexagon-1", 1 1/2", 2 1/2" #55011
- Wonder Clips (binder clips or paper clips may also work)
- Hexagon templates (1" sides), or cardstock to create your own using the AccuQuilt Cutting Die
- Hand sewing needle
- Fabric glue stick
- Matching thread
- Pearl cotton embroidery floss
- Embroidery hand sewing needle (one with a wide eye for the embroidery floss)
Fabrics needed for each placemat:
- Hexagons: scraps or fat quarters
- Top: 1 fat quarter of natural linen (or solid colored quilting cotton fabric will also work)
- Backing: 1 fat quarter
- Batting: 18.5" X 12.5"
- Binding: 75"
Cutting Instructions:
Top: 18" X 12"
Batting: 18.5" X 12.5"
Backing: 19" X 13"
Hexagons:
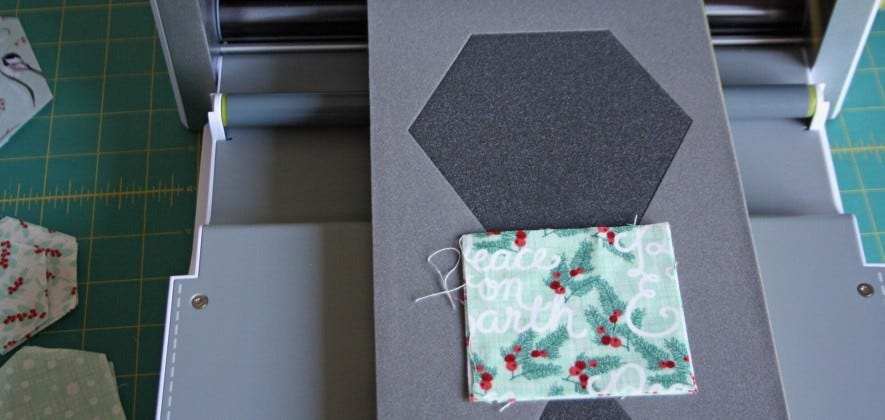
1. Cut strips 3.5" wide from from fat quarters, or 3.5" squares from scraps. I made stacks of 6 fabric squares.
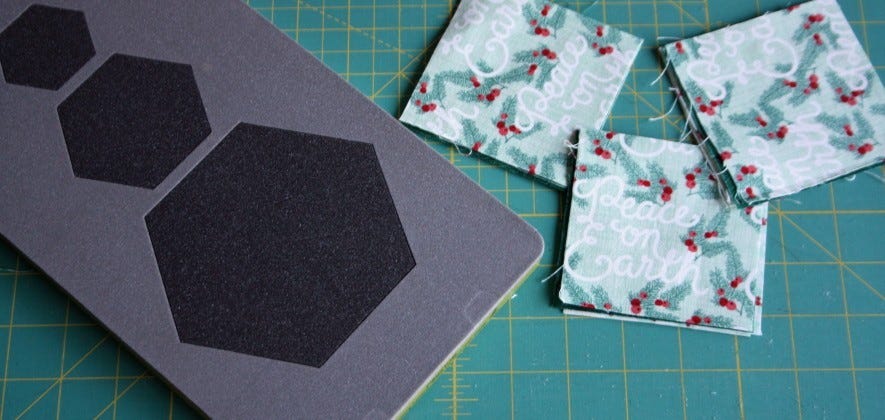
2. Arrange the fabric onto the medium hexagon on the AccuQuilt GO! cutting die.
3. Place the plastic cutting mat on top and cut out a bunch of hexagons. You need 10 hexagons for the tree and 1 for the trunk.
For an even easier and faster project, do raw edge appliqué hexagons!
Fuse 2.5" squares of fusible web to the wrong side of the fabric. Trim the fabric to the fusible web.
Use your AccuQuilt cutter to cut out the hexagons using the smallest hexagon shape.
Continue to follow the instructions starting with the "making the placemat" section. Fuse the hexagons in place, by peeling off the paper backing and pressing them in place with an iron.
Sewing Instructions
The medium size hexagon on the GO! Hexagon-1", 1 1/2", 2 1/2" die is the perfect size for my June Tailor plastic hexagon templates (1" sides). If you don't have hexagon templates, the smallest hexagon on this AccuQuilt Hexagon Cutting Die is also the perfect size for templates. You could use it to cut templates out of cardstock. A punched hole in the center will be helpful when removing the templates in Step 4.
Baste the Hexagons
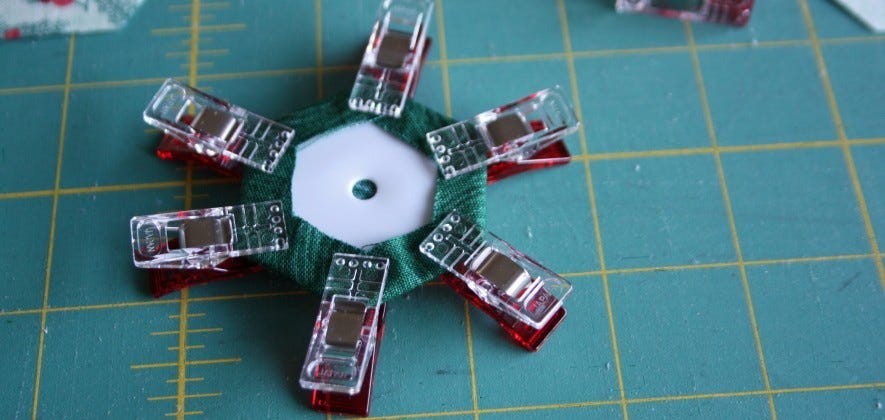
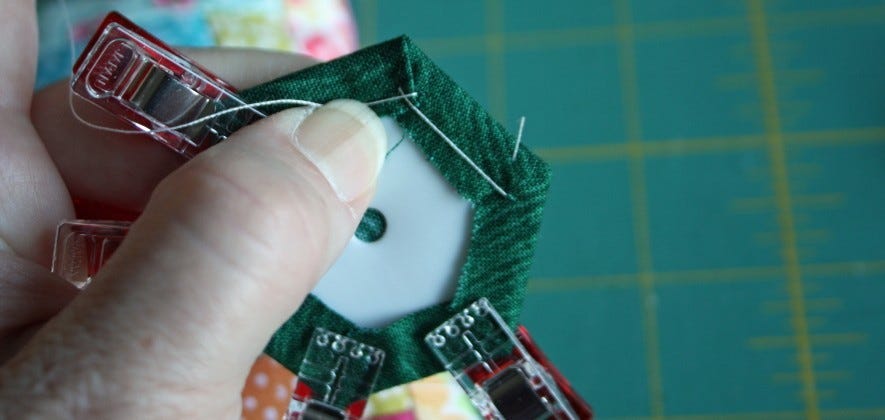
1. Fold the hexagons onto the templates with the right side facing out and use wonder clips to hold each corner in place. I place the flat side against the folds on each corner (the clear side of the wonder clip). This helps to pre-press the corners, making hand sewing the basting stitches much easier to do.
2. Use a needle and thread to baste each corner, making a tiny stitch at the corners. As you remove each clip, hold the folds at the corner in place with your thumb.
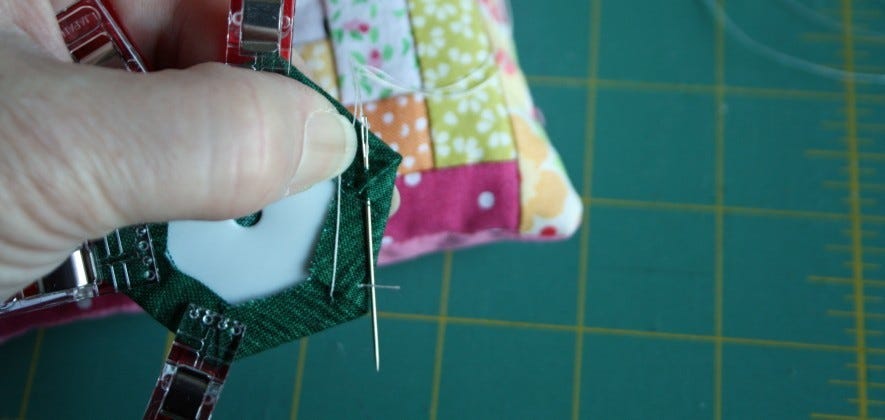
After your first corner, you can also tuck the thread under your thumb, keeping it taut as you work the tiny stitch in the next corner.
Note: If using paper templates, make sure you don't stitch through the paper.
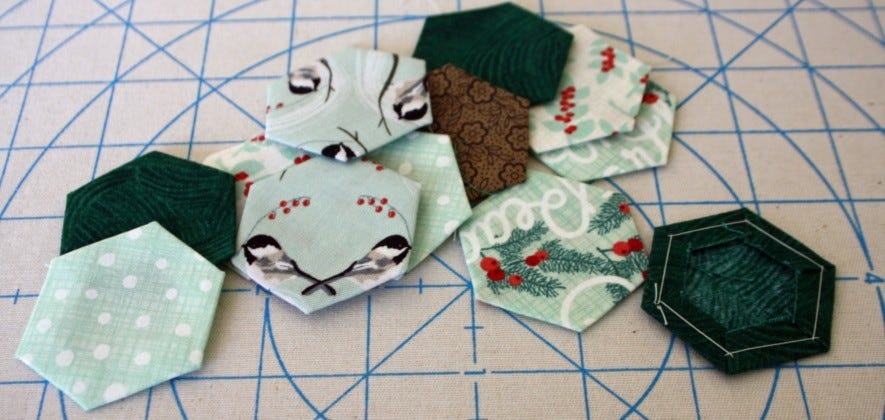
3. Repeat Steps 1 - 2 for each hexagon. You'll need 10 hexagons for the tree and 1 hexagon for the trunk for each place mat.
4. Lightly press the hexagons with an iron.
5. Carefully remove the hexagon templates from each hexagon, without distorting the corners. You may need to remove the basting stitches in order to get the templates out. I prefer to leave the basting stitches in place and have not had trouble removing the templates with the basting stitches still in place.
A hole in the center of the templates can be helpful when removing the templates. Remember to save the paper templates for your next hexagon project. [Believe me--there will be more hexie projects in your future once you see how fun and easy they are to do!]
6. With a hot iron, press the hexagons on both the wrong side and the right side until they are nice and flat, with crisp edges and corners. If needed, use a spray starch or starch alternative to help the hexagons keep their shape.
Making the Placemat:
1. Fold and press the linen fabric piece to find its center.
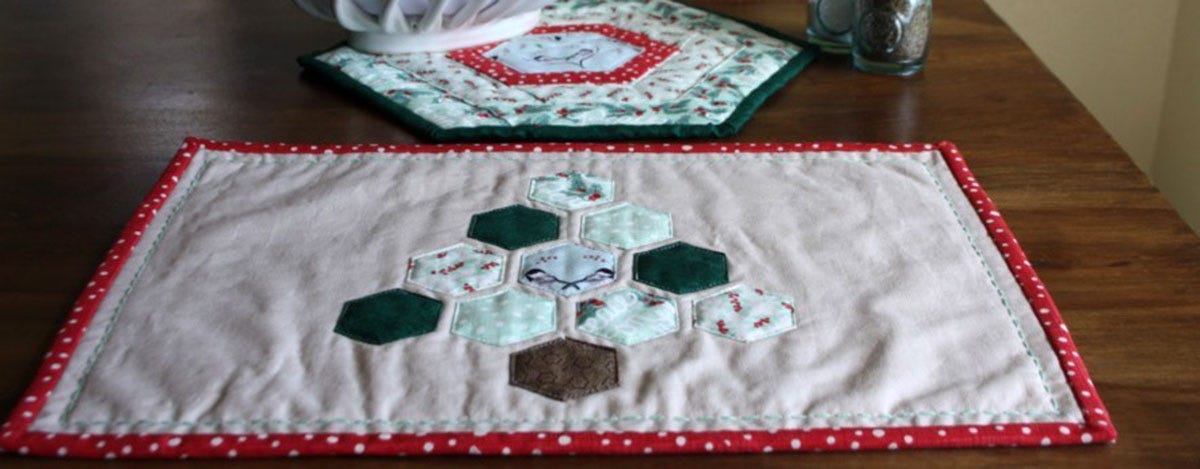
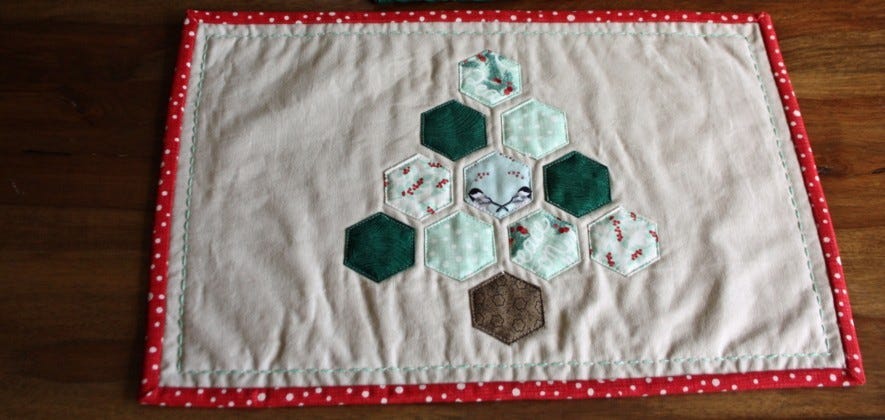
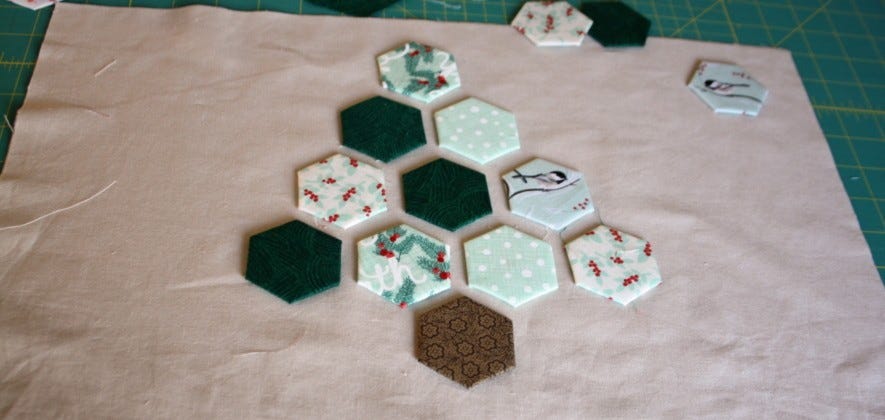
2. Arrange the hexagons onto the right side of the linen fabric piece, placing the trunk at the center and 1.5" from the lower edge. I love the look of borders around hexagons, so I placed them with 1/4" gap in between each.
3. Once you are happy with the placement, use fabric glue on the wrong side of the prepped and pressed hexagons to keep each one in place on the right side of the top fabric.
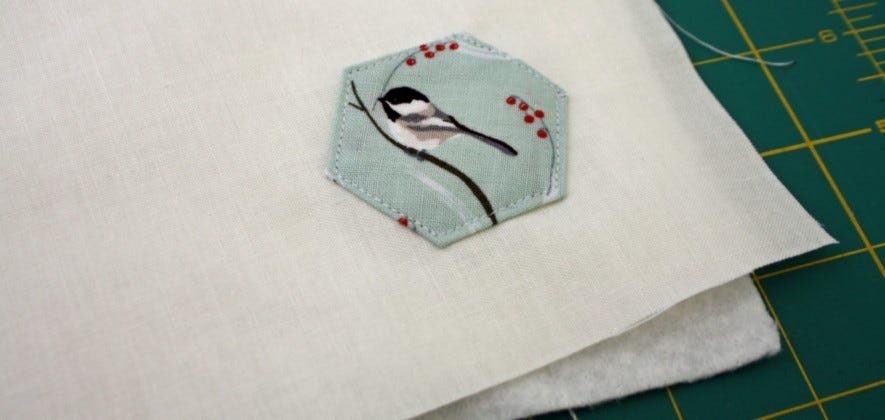
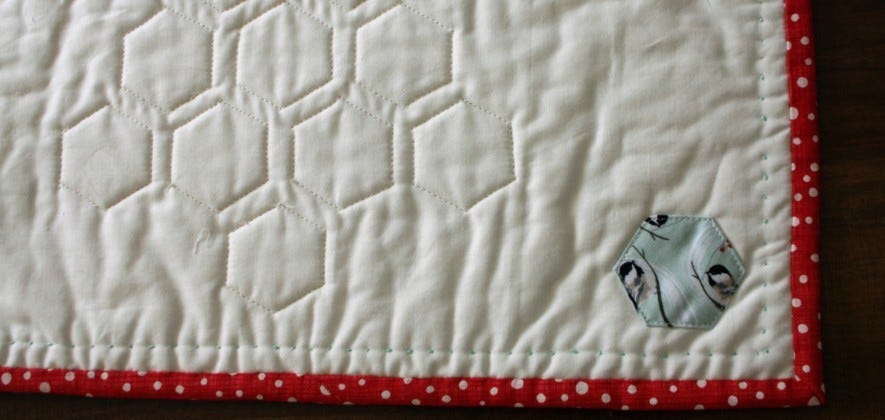
Optional: I had a couple extra hexagons, so I glued and stitched 1 onto a corner of each of my backing fabric pieces.
4. Make a quilt sandwich by layering the backing, batting, and top fabric together. Use basting adhesive spray or pin the quilt sandwich together.

5. Sew all the hexagons in place, 1/8" from the edges, sewing through all the layers (top, batting, and backing fabric).

6. Use pearl cotton embroidery floss and hand sewing needle to big stitch around the perimeter, 3/4" from the raw edge.

7. Square up the placemat and bind it using your preferred method.
The back looks kind of pretty, too!
If you are sewing these as gifts, as I am doing, you may need to be prepared to gift them quickly--before someone in your family sees them and wants them for her own, like my youngest daughter did. Looks like we will be making more cute hexie placemats for our own house!