Hi, quilters! Laura here from Orange Blossom Quilts with a fun block for you!
When the warm winds of March begin to roll in and the spring bulbs start to peek their first leaves through the leaf litter, I long to see the green of a new field of grass or smell the glorious scent of clover wafting on the breeze. March always seems like a green month to me, even when we lived in Minnesota and didn’t see anything green until May. By the middle of March, I am fully ready for spring.
I designed this “Lucky Charms” Shamrock block to be the perfect way to celebrate the green of spring and some fun St. Patty’s Day shenanigans. First, I gathered and sorted my green scraps. You will want a variety of greens. The block is the prettiest when you vary the color.

Below is the palette I pulled together for my Lucky Charm Shamrock block. In fact, when you start cutting your mini charms, you may end up with more than enough for one block! If you need more help than what I have below, here is a full printable pattern for this cute Lucky Charms Shamrock block.

Dies Needed
- GO! Strip Cutter-2 1/2" (3" Finished) 3 Strips Die
- GO! Qube Mix & Match 4" Block
- GO! Square-5 1/2" (5" Finished) Die
- GO! Half Square Triangle-4 1/2" Finished Square Die

Cutting & Assembly Instructions
PRO TIP: When cutting the “E” squares, cut strips on the GO! Strip Cutter-2 1/2" (2" Finished) 3 Strips Die, turn them 90 degrees and cut the strips into 2 1/2” squares. If you do not have this die, you can use Shape 1 from the GO! Qube Mix & Match 4” Block. This die is also convenient if you have smaller scraps.

1. Using your GO! Fabric Cutter, cut the following pieces:

**The Shamrock Star Center Background Triangles need to be cut by hand, but if you have a GO! Strip Cutter-1 1/2" (1" Finished) 5 Strips Die, you can use that instead.**

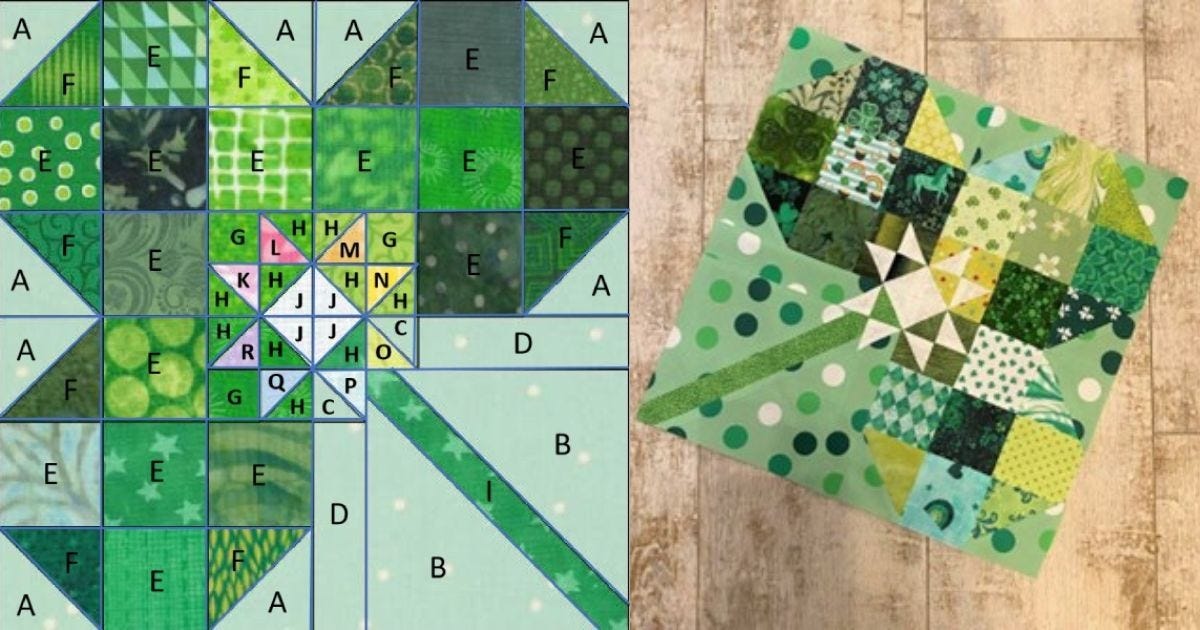
2. Create three shamrock leaf sections first. All three of the leaves are the same layout. Be sure to properly place the colored points of the center star in color order. For each shamrock leaf, you need:
- Five "E" squares
- Three "F" triangles
- Three "A" triangles
- One "G" rectangle and three "H" triangles - all in on color
- One "J" triangle
- Two colored triangles ("K" & "L;" "M" & "N;" "Q" & "R")
NOTE: One "G" square should be the same fabric as three "H" half square triangles, so there are three different fabrics. See the diagram below. There is one extra "H" triangle that should match with the stem ("I").
Here is the Shamrock leaf layout:

3. Sew in the following order:
- Step 1: Sew “H” to “J” and the two colored half square triangles. Press the seams.
- Step 2: Sew the three units from the first step together with one “G” square into a 4-patch. Press the seams.
- Step 3: Sew the three “A” units and three “F” triangles together. Press the seams.
- Step 4: Sew one “E” between two of the units from the third step. Press the seams.
- Step 5: Sew three “E” units together in a row. Press the seams.
- Step 6: Sew the final third step unit to the left side of the last “E” square. Press the seam.
- Step 7: Sew the second step unit to the right side of the sixth step unit. Press the seam.
4. The shamrock leaf is complete and measures a 6 1/2” square. Make three shamrock leaves.
5. Now, you can create the shamrock stem. Using the “I” square and the two “B” triangles, create the stem. Using an erasable pen, mark a diagonal line on the “I” square.
6. Using the same pen, mark 1/2” on either side of the center diagonal line. Line up one "B" triangle with one of the lines 1/2” away from the center.

7. Sew the triangle using a 1/2”seam allowance. Press the "B" triangle into the corner.
8. Trim away the “I” square from the underside of the “B,” leaving a 1/4” seam allowance.
9. Repeat this with the second “B” triangle in the opposite corner. The stem section is complete and should measure a 5 1/2” square.

10. Create the three half-square triangles. Sew “H” and “J” together. Sew “C” to “P.” Sew a second “C” to “O.”
11. Sew the "C" & "P" square to the end of one “D” strip. Sew the "C" & "O" square to the end of the second “D” strip.
12. Finish the stem section of the block following the diagram shown here:

13. Join the three Shamrock leaves and the Shamrock stem to form the block. The block should finish to a 12 1/2” square.

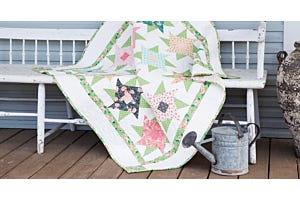
Your block can be combined with the GO! Ohio Star-12" Finished Die to create a lovely early spring table runner.

You can also add a little more St. Paddy’s Day fun with the GO! Shamrock Die. I use Hotfix Adhesive fusible to attach my applique shamrocks.

This fun and festive table runner will brighten any table with a warm spring welcome.

Everybody’s a little Irish on St. Patrick’s Day, right?