888-258-7913



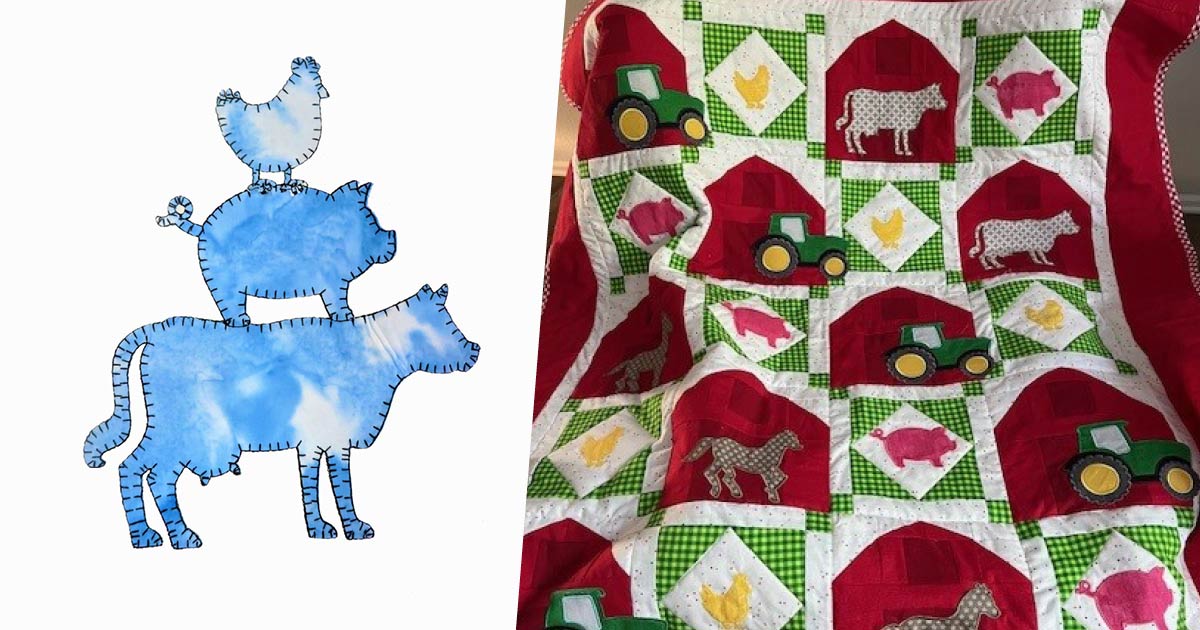
AccuQuilt is the GO!® to way to cut quilts accurately, quickly and safely, but did you know that it’s also the best friend that any embroidery machine can have? Whether you’re a quilter or not, if you have an embroidery machine you get extra value with every applique die you buy. How? Free downloadable embroidery designs, that’s how!
These applique designs are available in most machine formats and offer basic, outline embroidery in three different stitches – satin, blanket and motif. Match this up with perfectly cut applique shapes and you have a winning combination that will give you professional-looking results every single time.
The Basics
AccuQuilt’s free, downloadable embroidery designs are available for all the non-designer dies – and some of the latest licensed designer dies as well. You can find them all on AccuQuilt.com under “Embroidery”. Here you’ll find page after page of not only the free, basic designs but also more complex designs that are available for purchase. I’ll be talking about those in an upcoming blog post, today is all about the basics.
-
 Fall Medley Applique 3 Embroidery Single Design by OESDSpecial Price $3.39 Regular Price
$3.99You Save $0.60 -
 Fall Medley Applique 2 Embroidery Single Design by OESDSpecial Price $3.39 Regular Price
$3.99You Save $0.60 -
 Fall Medley Applique 1 Embroidery Single Design by OESDSpecial Price $3.39 Regular Price
$3.99You Save $0.60 -
 Fall Medley Applique Embroidery Collection by OESDSpecial Price $8.49 Regular Price
$9.99You Save $1.50 -
 GO! Liberty Bell Single Design Embroidery by V-Stitch DesignsSpecial Price $5.09 Regular Price
$5.99You Save $0.90 -
 GO! Jingle Bell Candy Canes Single Design Embroidery by V-Stitch DesignsSpecial Price $5.09 Regular Price
$5.99You Save $0.90 -
 GO! Christmas Bell Single Design Embroidery by V-Stitch DesignsSpecial Price $5.09 Regular Price
$5.99You Save $0.90 -
 GO! Candy Cane Love Single Design Embroidery by V-Stitch DesignsSpecial Price $5.09 Regular Price
$5.99You Save $0.90 -
 GO! Candy Cane Double Single Design Embroidery by V-Stitch DesignsSpecial Price $5.09 Regular Price
$5.99You Save $0.90 -
 GO! Bulb Bunch Single Design Embroidery by V-Stitch DesignsSpecial Price $5.09 Regular Price
$5.99You Save $0.90 -
 GO! Bell with Bow Single Design Embroidery by V-Stitch DesignsSpecial Price $5.09 Regular Price
$5.99You Save $0.90 -
 GO! 2 Bells Single Design Embroidery by V-Stitch DesignsSpecial Price $5.09 Regular Price
$5.99You Save $0.90 -
 GO! Jolly Medley Set Embroidery by V-Stitch DesignsSpecial Price $15.30 Regular Price
$18.00You Save $2.70 -
 Feathered Friend 3 Embroidery Single Design by OESDSpecial Price $3.39 Regular Price
$3.99You Save $0.60 -
 Feathered Friend 2 Embroidery Single Design by OESDSpecial Price $3.39 Regular Price
$3.99You Save $0.60 -
 Feathered Friend 1 Embroidery Single Design by OESDSpecial Price $3.39 Regular Price
$3.99You Save $0.60 -
 Feathered Friends Embroidery Collection by OESDSpecial Price $8.49 Regular Price
$9.99You Save $1.50 -
 GO! Jolly Medley Embroidery DesignsSpecial Price $0.00 Regular Price
$22.00You Save $22.00 -
 Jolly Holiday Snowflake Embroidery Single Design by OESDSpecial Price $3.39 Regular Price
$3.99You Save $0.60 -
 Jolly Holiday Holly Embroidery Single Design by OESDSpecial Price $3.39 Regular Price
$3.99You Save $0.60

The combination of perfectly cut shapes and these basic designs will throw the doors wide open to invite your creativity in. You can create so many different projects, even with just one applique die. Think about it – an easy way to make matching shirts or sweatshirts for your family and friends, to personalize Quilt-As-You-Go and pre-made projects and a way to add detail and flair to quilting projects. Sound good? Let’s get started.
Pick Your Die
With so many wonderful applique dies to choose from, this might be the hardest part of the entire project! There are alphabet and number dies, holiday dies, flowers, animals and more. For this blog, I’m going to use one of my personal favorites, the GO! Farm Animals Medley. I recently used this die with the GO! Tractor die on a project for my grandson.
-
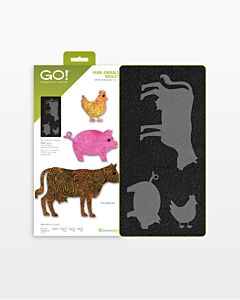 GO! Farm Animals Medley DieSpecial Price $79.99 Regular Price
$94.99You Save $15.00 -
 GO! Farm Animals Medley Embroidery DesignsSpecial Price $0.00 Regular Price
$22.00You Save $22.00

GO! dies will cut all different kinds of fabrics and materials, but for basic applique with the embroidery, I suggest sticking with cotton for getting started. You will want to press a fusible product, such as Hot Fix or FuseMe onto the wrong side of your fabric before cutting it on the die. You can cut up to 4 layers of fused cotton at a time with GO! dies.

Tip: Some applique shapes are directional, like the body of the sewing machine. To have the shape face the opposite direction, you’ll want to cut your shape with the right side of the fabric facing down instead of up!
Download Your Design
The key here is to log into your account on AccuQuilt.com before you download your embroidery design! Once you’re logged in, type the name of the die, in this case I typed in the word farm. This will open a pop-up window, and in the bottom right corner, click on View All. Scroll down the page to the free GO! Farm Animals Medley Embroidery Designs and click on that.


The next steps for downloading and saving may depend on the device that you are using. Because the file has so much information, it will be “zipped”. Be sure your computer is able to “unzip” these files. Open the downloaded file and you will see the three stitches listed plus the document that will list details on the design. Under the listing for each stitch will be the list of all the different formats for you to choose from. If you do not know what format your embroidery machine uses, check your machine manual or call your machine dealer.
I like to save my designs to my laptop, then copy them onto my flash drive. With some embroidery machines, you can simply connect your laptop to the machine if you wish.
Now it’s GO! time!
Hoop it Up
The next step is to hoop your stabilizer and background fabric. I like to cut my background and stabilizer to approximately the same size, and large enough so I will have 1” – 1 ½” extra all around the hoop.
Attach your hoop to the machine and load your flash drive and pull up the embroidery design per your machine’s instructions.

Stitchin’ Time
The first thing your machine will stitch out is an outline or placement stitch. If your design includes just one shape, like our little pig, you will just have the one step. If our design includes additional shapes, the following steps will repeat until complete, building from the bottom up.
Once the placement stitch is finished, you can remove the hoop from the machine and lay it on a pressing surface. Be careful not to disturb the hooping – it’s vital to leave the stabilizer and background fabric in the hoop, undisturbed during the entire embroidery process.

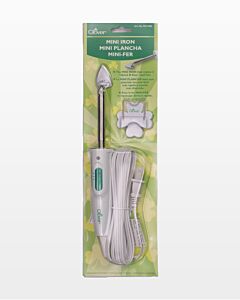
Peel the paper backing from the fusible on the back of your shape and very carefully place it exactly within the placement stitch. Take your time, your patience will be rewarded. Once it’s perfectly placed, press the shape down. I like to use a small iron for this.

Now return the hoop to the machine. The next steps will be a tack-down stitch and/or your selected stitch around the shape. Some design stitches would not cover the placement stitch, so don’t panic if you don’t see one happening. You can use matching or contrasting thread, that’s all up to you. You may also see areas that the design skips over. This simply means that there will be another shape laid over this area.
It really is that easy! Be sure to refer to the directions that you downloaded with the design if you have questions along the way. When the design is completed, you can remove the project from the hoop and trim the background to the desired size.
Want to see this process in action? Check out this video showing the process, step by step.
If you’re looking for more embroidery videos, check AccuQuilt.com, our Facebook page or our YouTube Channel. Be sure to watch for my next embroidery blog in a few weeks as we head into February, which is National Embroidery Month. Next time, I will be taking your through using some of the more complex designs that are available for you to purchase. Until then, happy stitchin’!
-
 GO! Bunches of Baskets Baby Quilt PatternSpecial Price $0.00 Regular Price
$2.99You Save $2.99 -
 GO! Supernova Wall Hanging PatternSpecial Price $0.00 Regular Price
$2.99You Save $2.99 -
 GO! Fox Read Me A Book Pillow PatternSpecial Price $0.00 Regular Price
$2.99You Save $2.99 -
 GO! Baby Zoo Animals Die (Die to Try, February 2026)Special Price $79.99 Regular Price
$94.99You Save $15.00