
Hello! It’s Erin Harris from House on Hill Road here to share my latest AccuQuilt project with you today.
I was pretty excited to work with the 12” Qube . This set of cutting dies is extremely versatile and includes the building blocks that allow you to make 72 different 12” blocks. Amazing, right? Over the next three months, I am going to show you how to use the Qube dies to make a throw-sized medallion quilt. I’ll start this month off with a tutorial for the central medallion and the first border, adding more borders in my next two posts. By the time the quilt top is finished, I’ll have used all of the 12” Qube dies!
Let’s get started!
For the Center Medallion and Border 1, you’ll need:
GO! Qube Mix and Match 12" block - for this part of the quilt, you will need the 3” half square triangle die, 3” square die and the 3” x 6” rectangle die
Fabrics as indicated

Cutting the Medallion and Border 1

1. Using the 3” half square triangle die, cut 16 green half square triangles and 16 white half square triangles.

2. Using the 3” square die, cut 1 plaid square and 8 orange print squares.

3. Using the 3” x 6” rectangle die, cut 4 teal floral rectangles and 8 navy dotted rectangles.
Sewing the Medallion
1. Sew each green triangle to one white triangle for a total of 16 half square triangle units. Press the seams towards the green. Set 4 half square triangle units aside for Border 1.

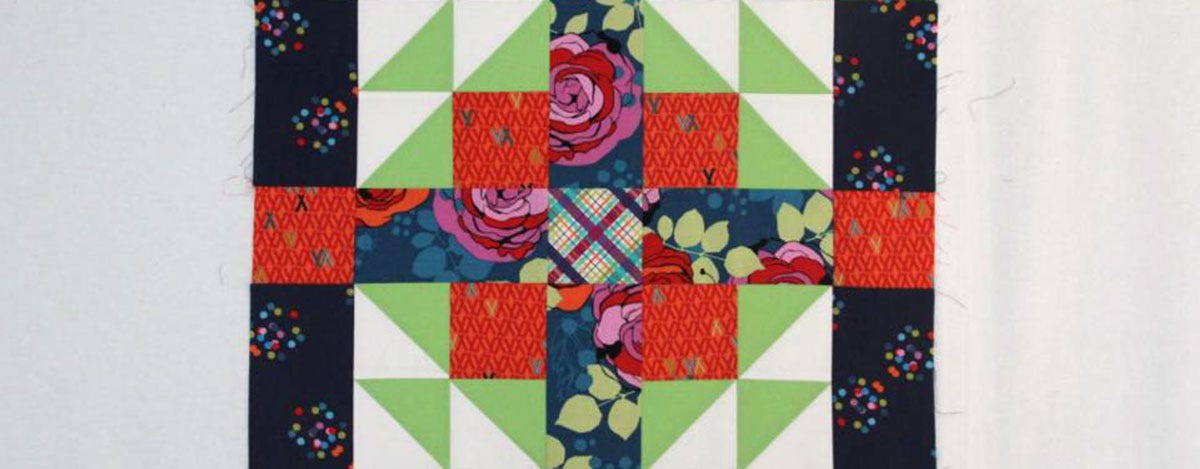
2. Layout the Medallion as shown, in three rows. The top and bottom rows should have three half square triangle units and one orange square on each side of a teal floral rectangle. The center row should have two teal floral rectangles separated by the plaid square. Double check that all of the fabrics are in the correct position.
3. For the top and bottom rows, sew two half square triangle units together. Sew each remaining half square triangle unit to an orange square. Press the seams in opposite directions so they nest easily and sew these two units together.

4. Sew the three blocks in each row together, pressing the seams towards the teal rectangles.

5. Sew the rows together and press well.
Sewing Border 1

1. Arrange the Border 1 pieces around the Medallion as indicated in the photo.

2. Sew the navy dotted rectangles to opposite sides of each orange square. Press the seams towards the navy dotted rectangles.
3. Sew one half square triangle unit to left and right sides of the top and bottom rows. Press the seams towards the navy dotted rectangles.

4. Sew the side borders to the left and right sides of the center medallion. Press the seams towards the borders.
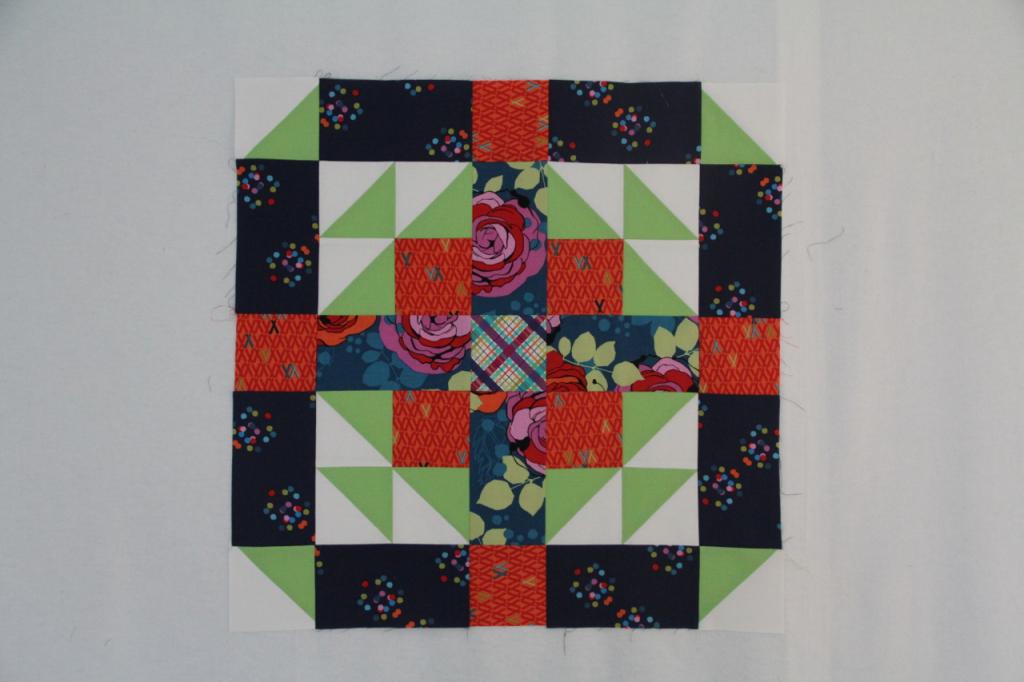
5. Sew the top and bottom borders to the medallion. Press the seams towards the borders.
Your center medallion and first border are complete! See you here next month with more borders to add to the quilt top.


