This is Marjorie Busby from bluefeatherquiltstudio.com, and I love, love, love the GO! QUBE. My first reaction was, “Why would I need this when I already have almost every die that AccuQuilt makes?” The answer was obvious before the package was hardly opened. With the QUBE, everything needed is at your fingertips. Cutting the exact number of pieces for each block is a breeze. It is like the BOB dies, except that there are an infinite number of blocks that can be made using this one set of dies. And best of all, the 4 x 4 patch blocks can be made in any size: I chose the 9" QUBE and love that I can make 4 x 4 patch blocks in that size. It opens up a whole new world of cutting for me. The more time I spend with it, the more I love it for both piecing and embroidery.
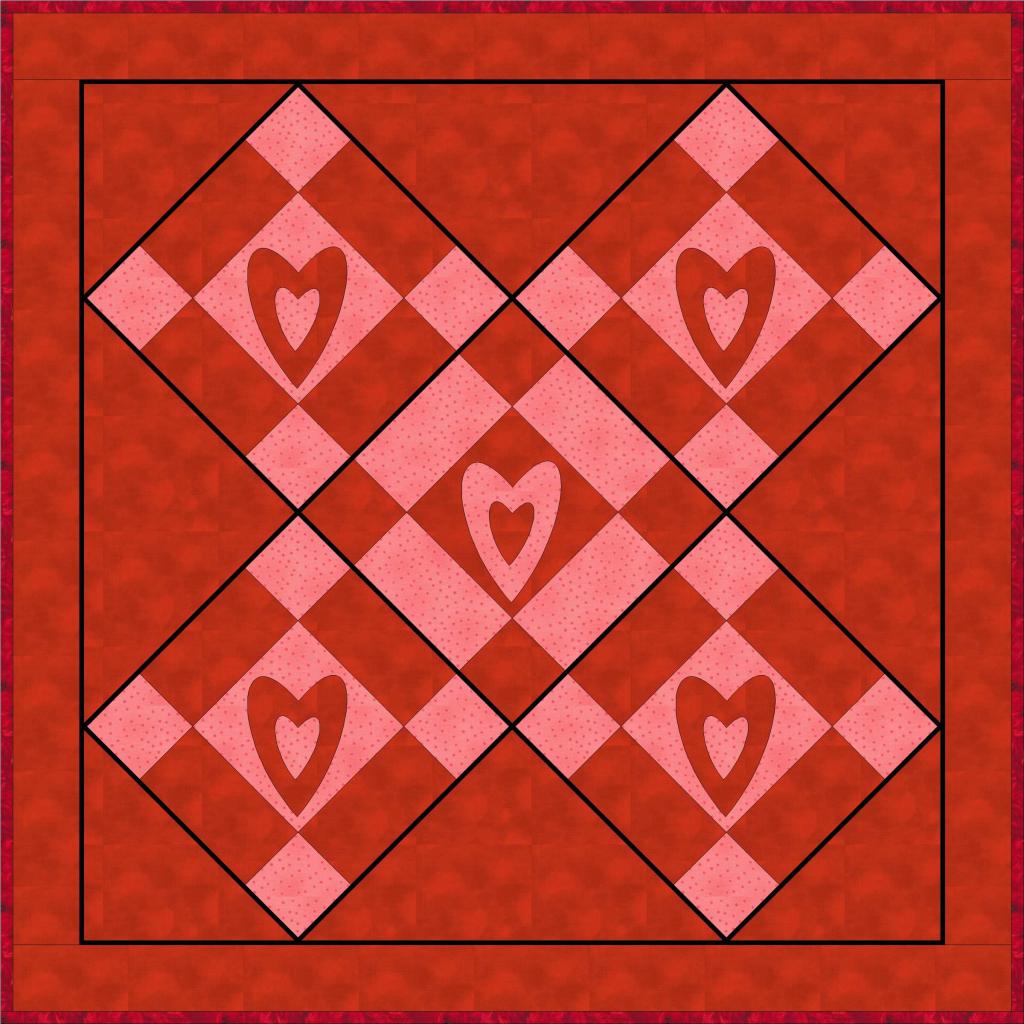
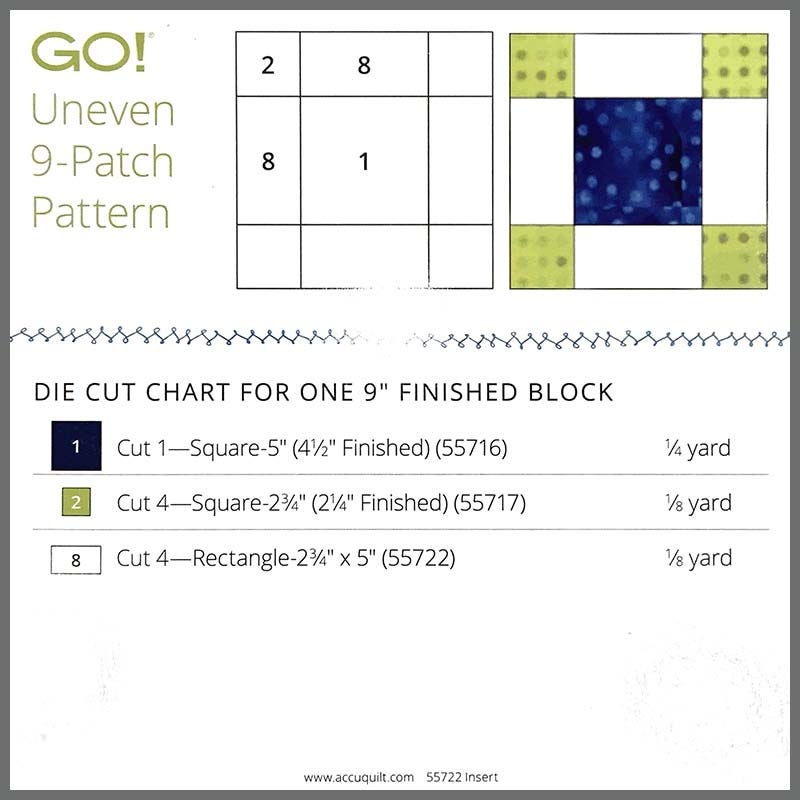
Valentine’s Day is almost here, so my first project with the GO! QUBE® is a little table topper / wall hanging in luscious, rich red and pink fabrics. I chose the Uneven Nine Patch block pattern that is included with the die set and the Queen of Hearts applique die and the Queen of Hearts Machine Embroidery Set. The quilt was designed in Electric Quilt Software using an on point layout and a positive/negative color scheme with the blocks. This is one of the quickest projects I have completed.
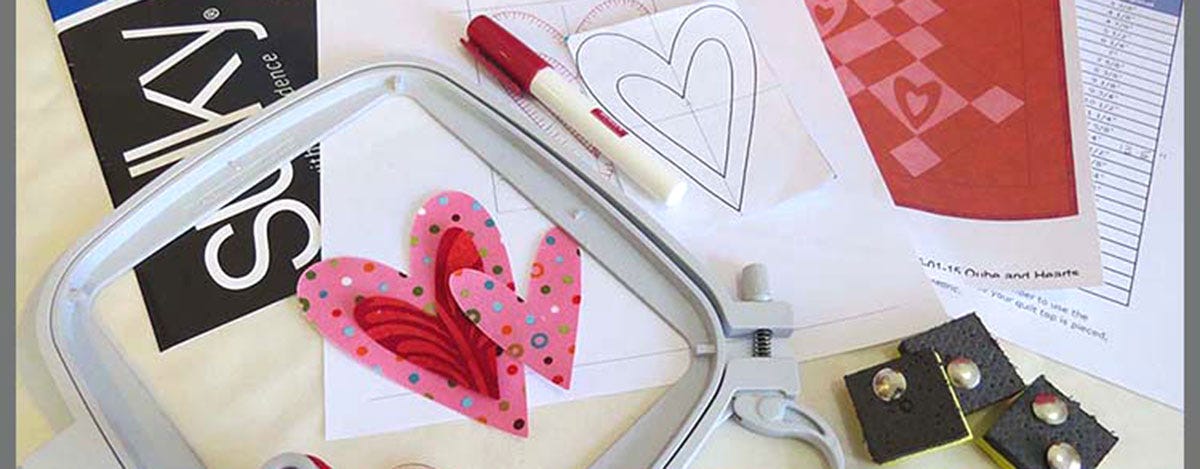
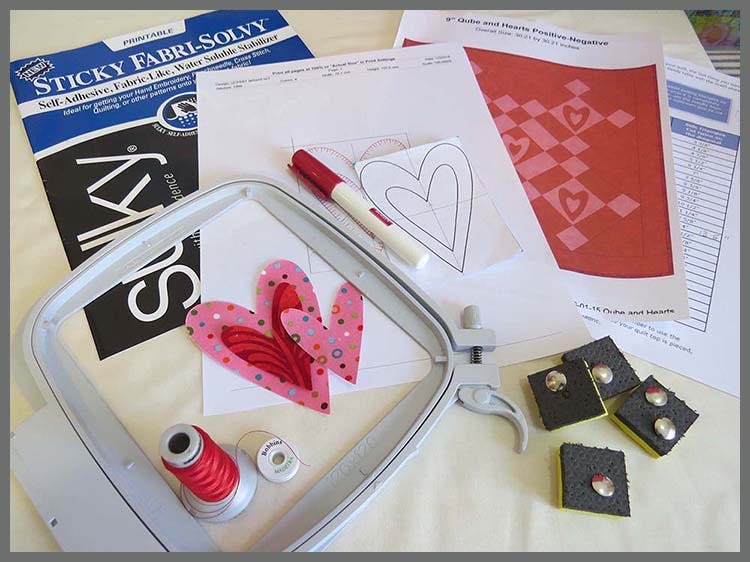
Supplies and Equipment Needed:
GO! QUBE®, GO!® Queen of Hearts applique die, and GO!® Cutter
GO!® Queen of Hearts Machine Embroidery Set
GO! Strip Cutter-2 1/2" Die for border and binding
Embroidery Machine
Coordinating Embroidery Thread and Bobbins
Queen of Hearts Machine Embroidery Set
Sticky FabriSolvy or tearaway stabilizer and spray adhesive
Fabric for Quilt Blocks and Applique
Lite Steam-A-Seam2 or Glue Stick for securing applique shapes to background
Water Soluble Marking Pen
Thumb tacks and Tack Anchors
Cutting Instructions for Corner Triangles and Side Triangles:
Corner Triangles: Cut two squares 7.25 inches and cut once on the diagonal.
Setting Triangles: Cut one square 13.5 inches and cut twice on the diagonal.
1. Piece blocks as per instructions in QUBE. Piecing the blocks is easy and complete instructions are included in the QUBE die set. The set includes cards with the block instructions with one side of the card showing the pieces to cut and the other side of the card showing how to piece the block. And I love that the instructions for pressing are included as pressing each block as it is made is one of the cornerstones of good quilt piecing.
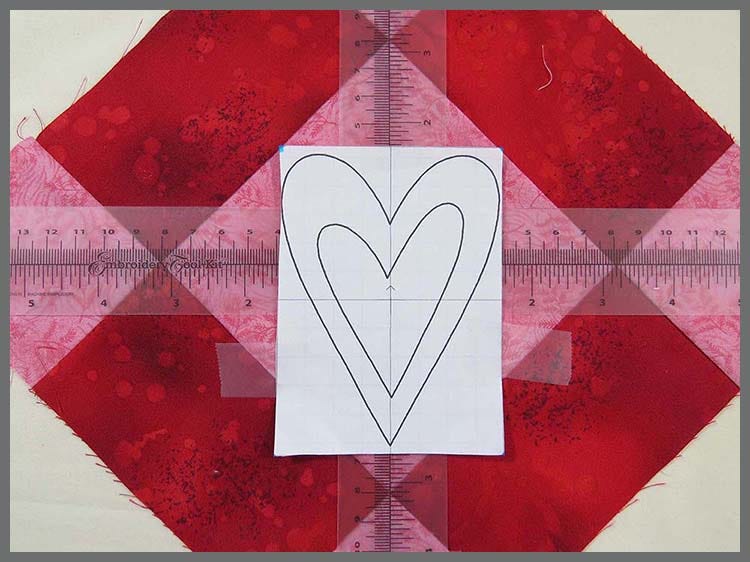
2. Print templates and mark embroidery placement on block. Templates are included in the machine embroidery set to be printed for marking placement of the embroidery design. Once the template is printed, draw a rectangle around the block using the graph lines on the page and cut the template out with scissors.
Using a ruler, find the vertical center of the quilt block where the embroidery will be stitched. Place the template, centered, over this ruler and mark the four corners of the template using a water soluble marking pen.
As you can see, the heart is not centered horizontally because of its elongated shape. Placement of the heart on the block is personal preference.
3. Hoop stabilizer, stitch basting stitch for alignment, and insert thumbtacks. In this step, one of the features of the embroidery machine is used. All embroidery machines will stitch a basting stitch that is just outside of the stitched embroidery design. This basting stitch will match the rectangle shape of your template.
Hoop the stabilizer and remove the release paper by scoring it and pulling it off the sticky stabilizer. Mount the hoop onto the machine and stitch the basting stitch onto the stabilizer.
Remove the hoop from the machine, turn it over so that the back is facing you, and insert thumb tacks into the four corners of the basting stitch.

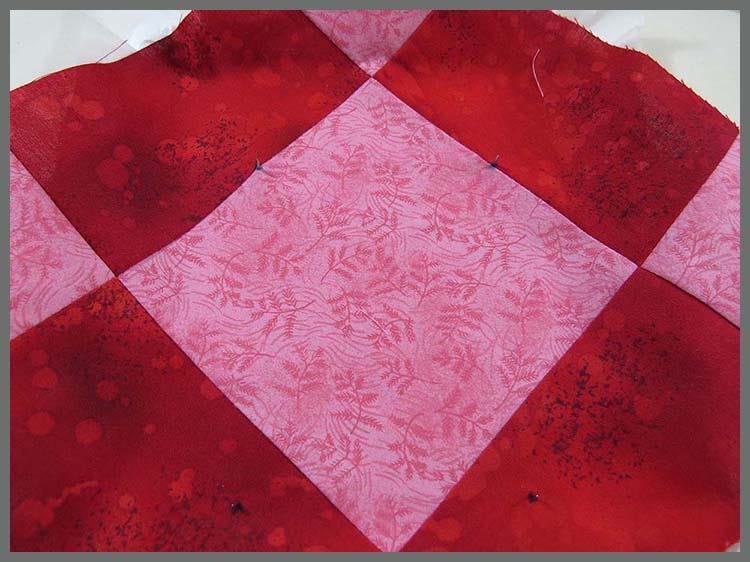
4. Align quilt block with thumb tacks and secure to embroidery hoop. In this photo, the water soluble corner marks are aligned over the thumb tacks and the block fabric is lightly pressed with the fingers to secure it to the sticky stabilizer. When the block fabric is secure, remove the thumbtacks and mount the hoop onto the machine to stitch the embroidery.
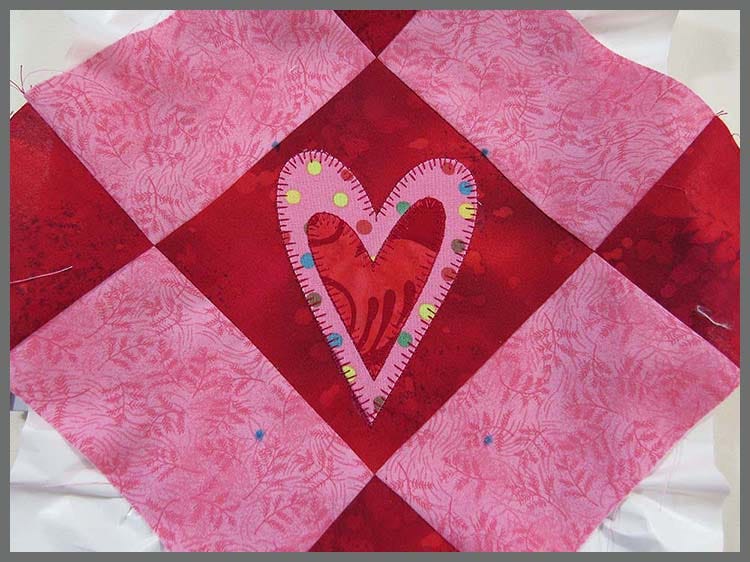
5. Complete embroidery stitching. This is the way your embroidery will look when the stitching is complete. Complete all embroidered blocks.
7. Assemble quilt using embroidered blocks. You're ready to assemble the quilt according to the diagram below using the embroidered quilt blocks and the setting and corner triangles. I used the 2.5-inch strip die to cut a border and binding for this quilt.