
Hi! It’s Jen Strauser from Dizzy Quilter. I hope you are staying healthy and safe during these strange days. Today is Log Cabin Day and it got me thinking: I recently received the Log Cabin Block on Board, and I wanted to see what I could do with it beyond the traditional log cabin block. To celebrate the day, I'm going to share with you what I came up with!
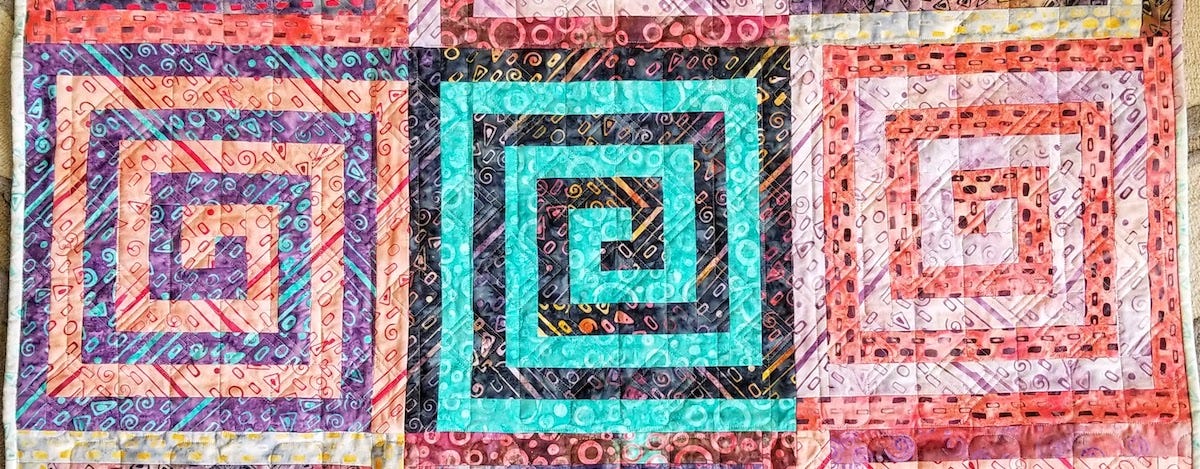
My first project is this greek key block. I love how different it looks from the traditional log cabin, but it uses exactly the same pieces. For this project, you can use as few as two fabrics, and as many as 18. Each pair of fabrics should be auditioned for contrast. As you can see with my quilt, if the contrast between the two fabrics in the block isn’t high enough, they can look a little muddy.
The finished quilt is 36½” x 36½”.
Dies Used
- GO! Log Cabin 12" Finished (55349)
- GO! Strip Cutter-2½" (2" Finished) (55017 or 55014)
Fabric requirements
- 18 - ¼ yard cuts
- ⅜ yard fabric for binding
- 44” square for backing
- Batting
For this project I used 18 different fabrics from the Primo Collection by Ebony Love for Island Batik.
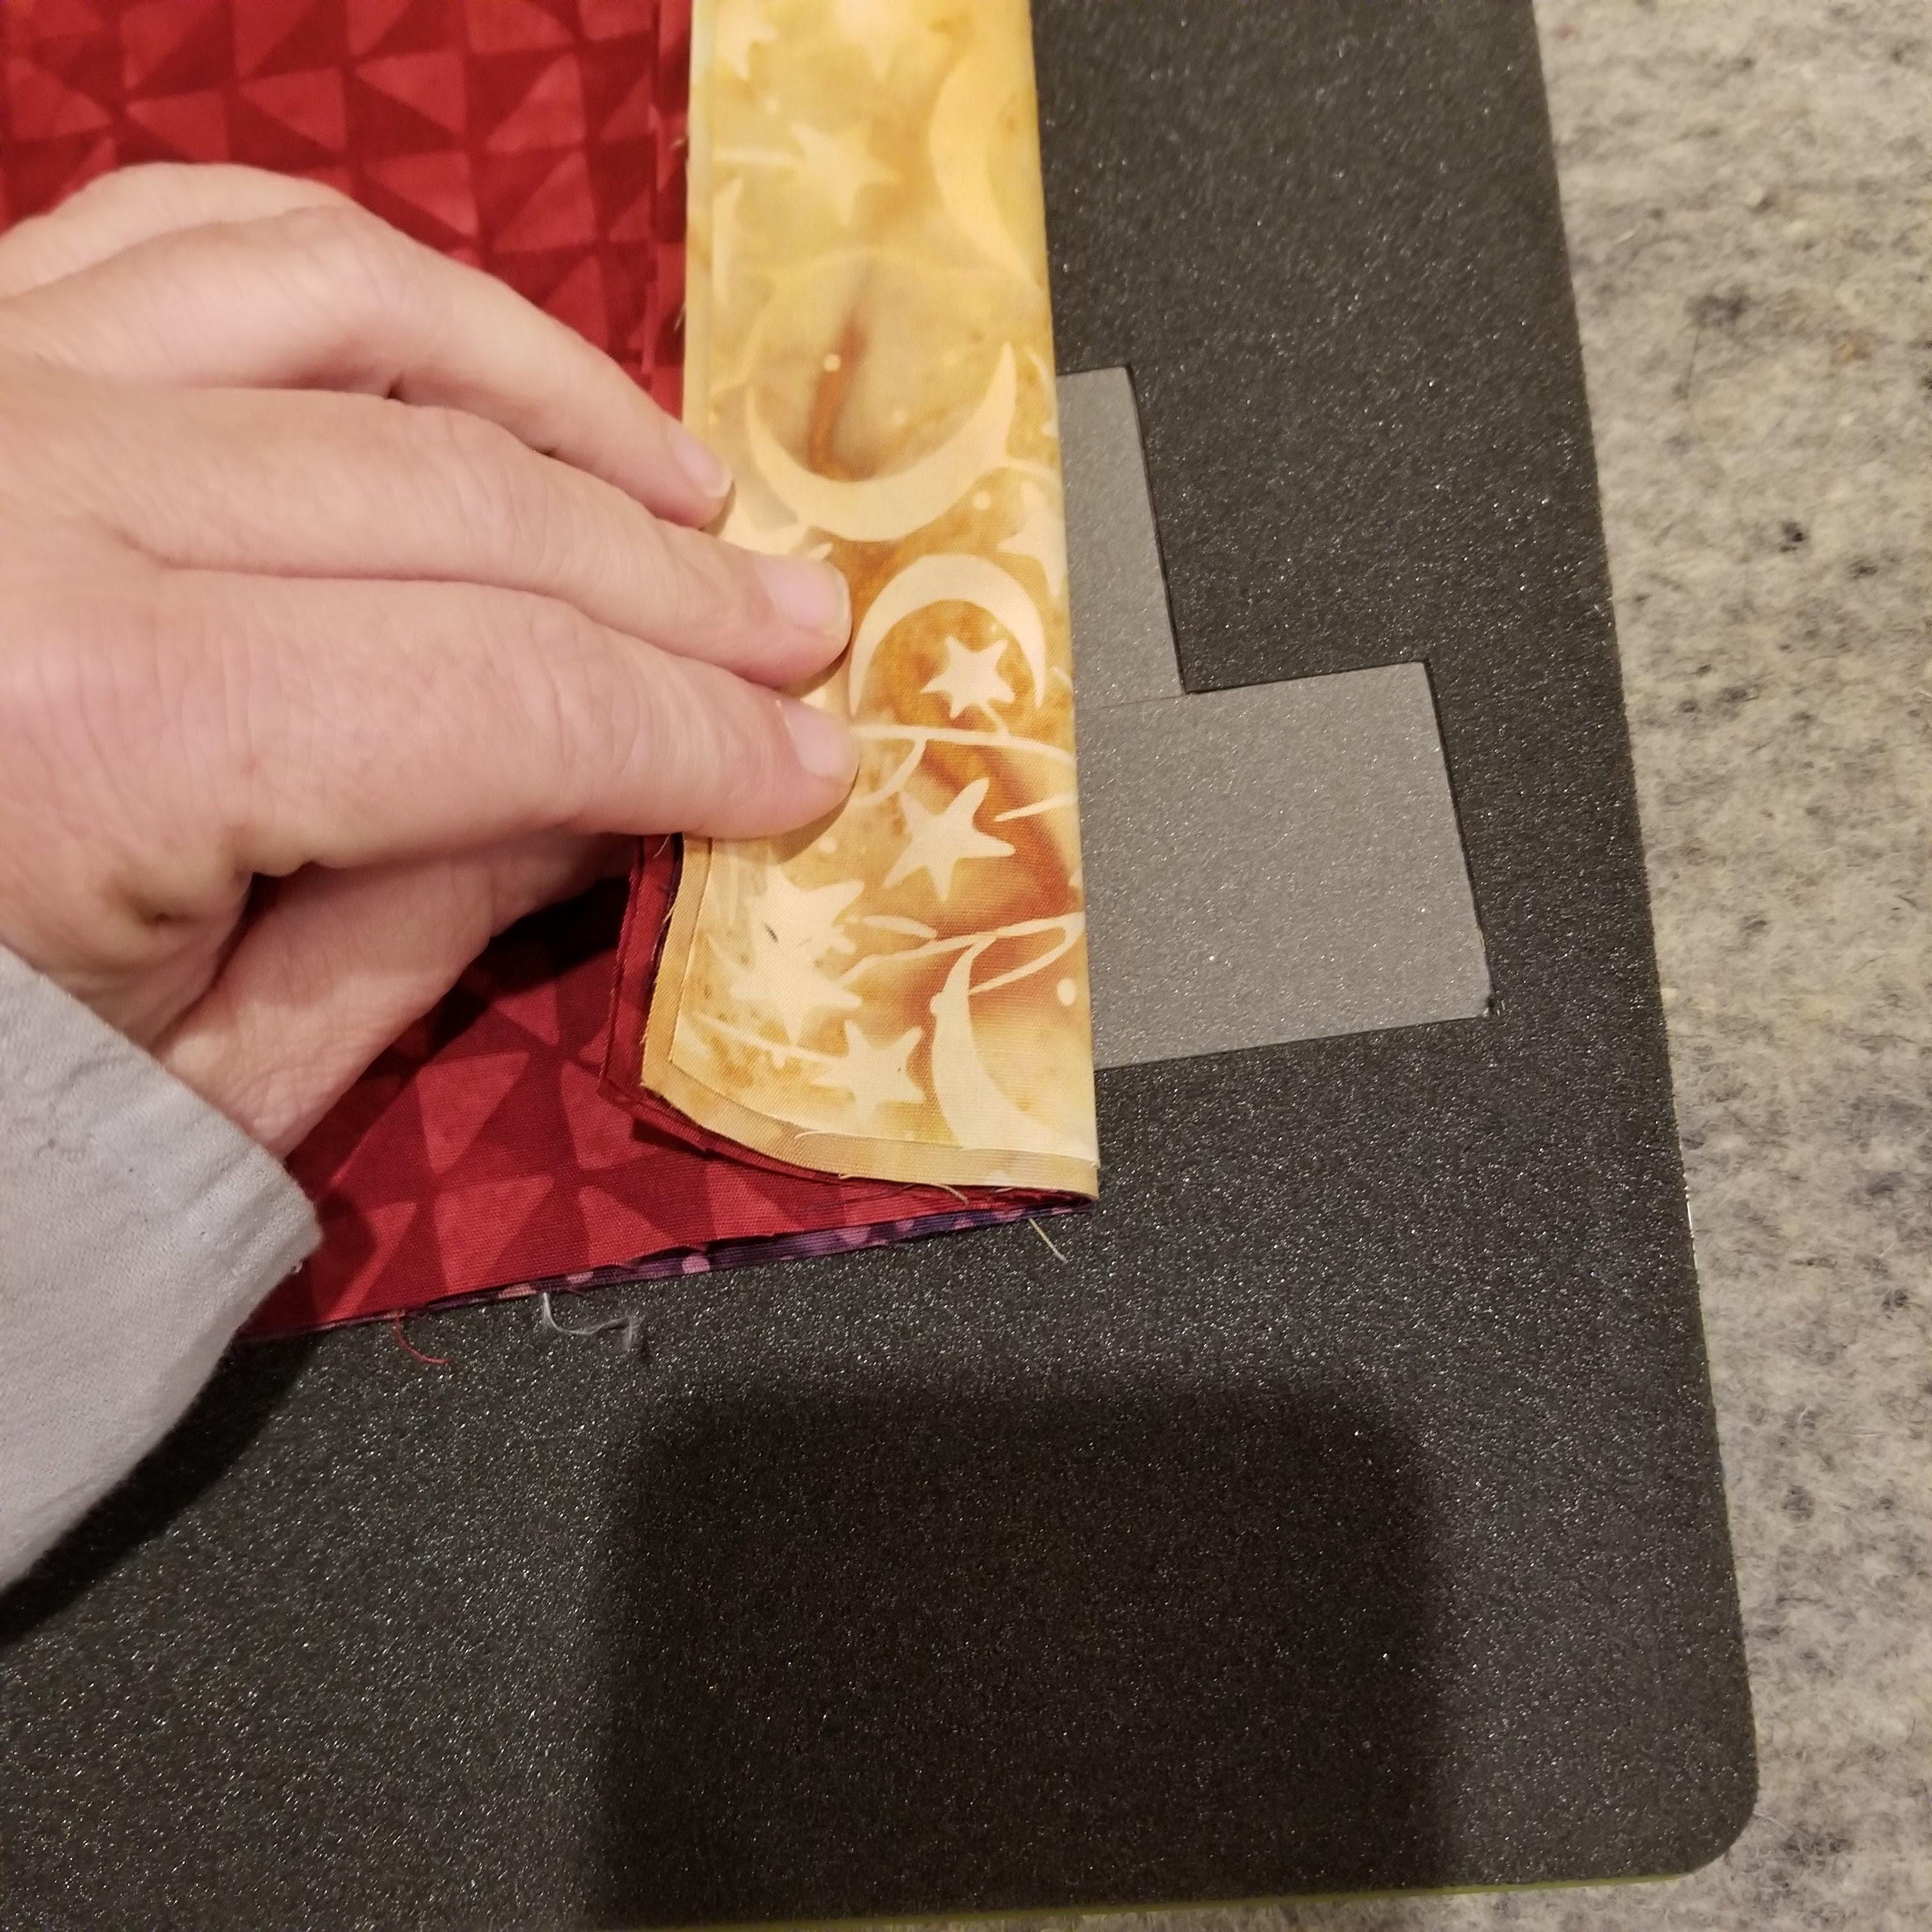
Once you’ve got your chosen fabrics assembled, press them, and pre-cut into 7” x 24” pieces. I like to stack them up in pairs. I like to keep everything in order to minimize confusion at the sewing machine.
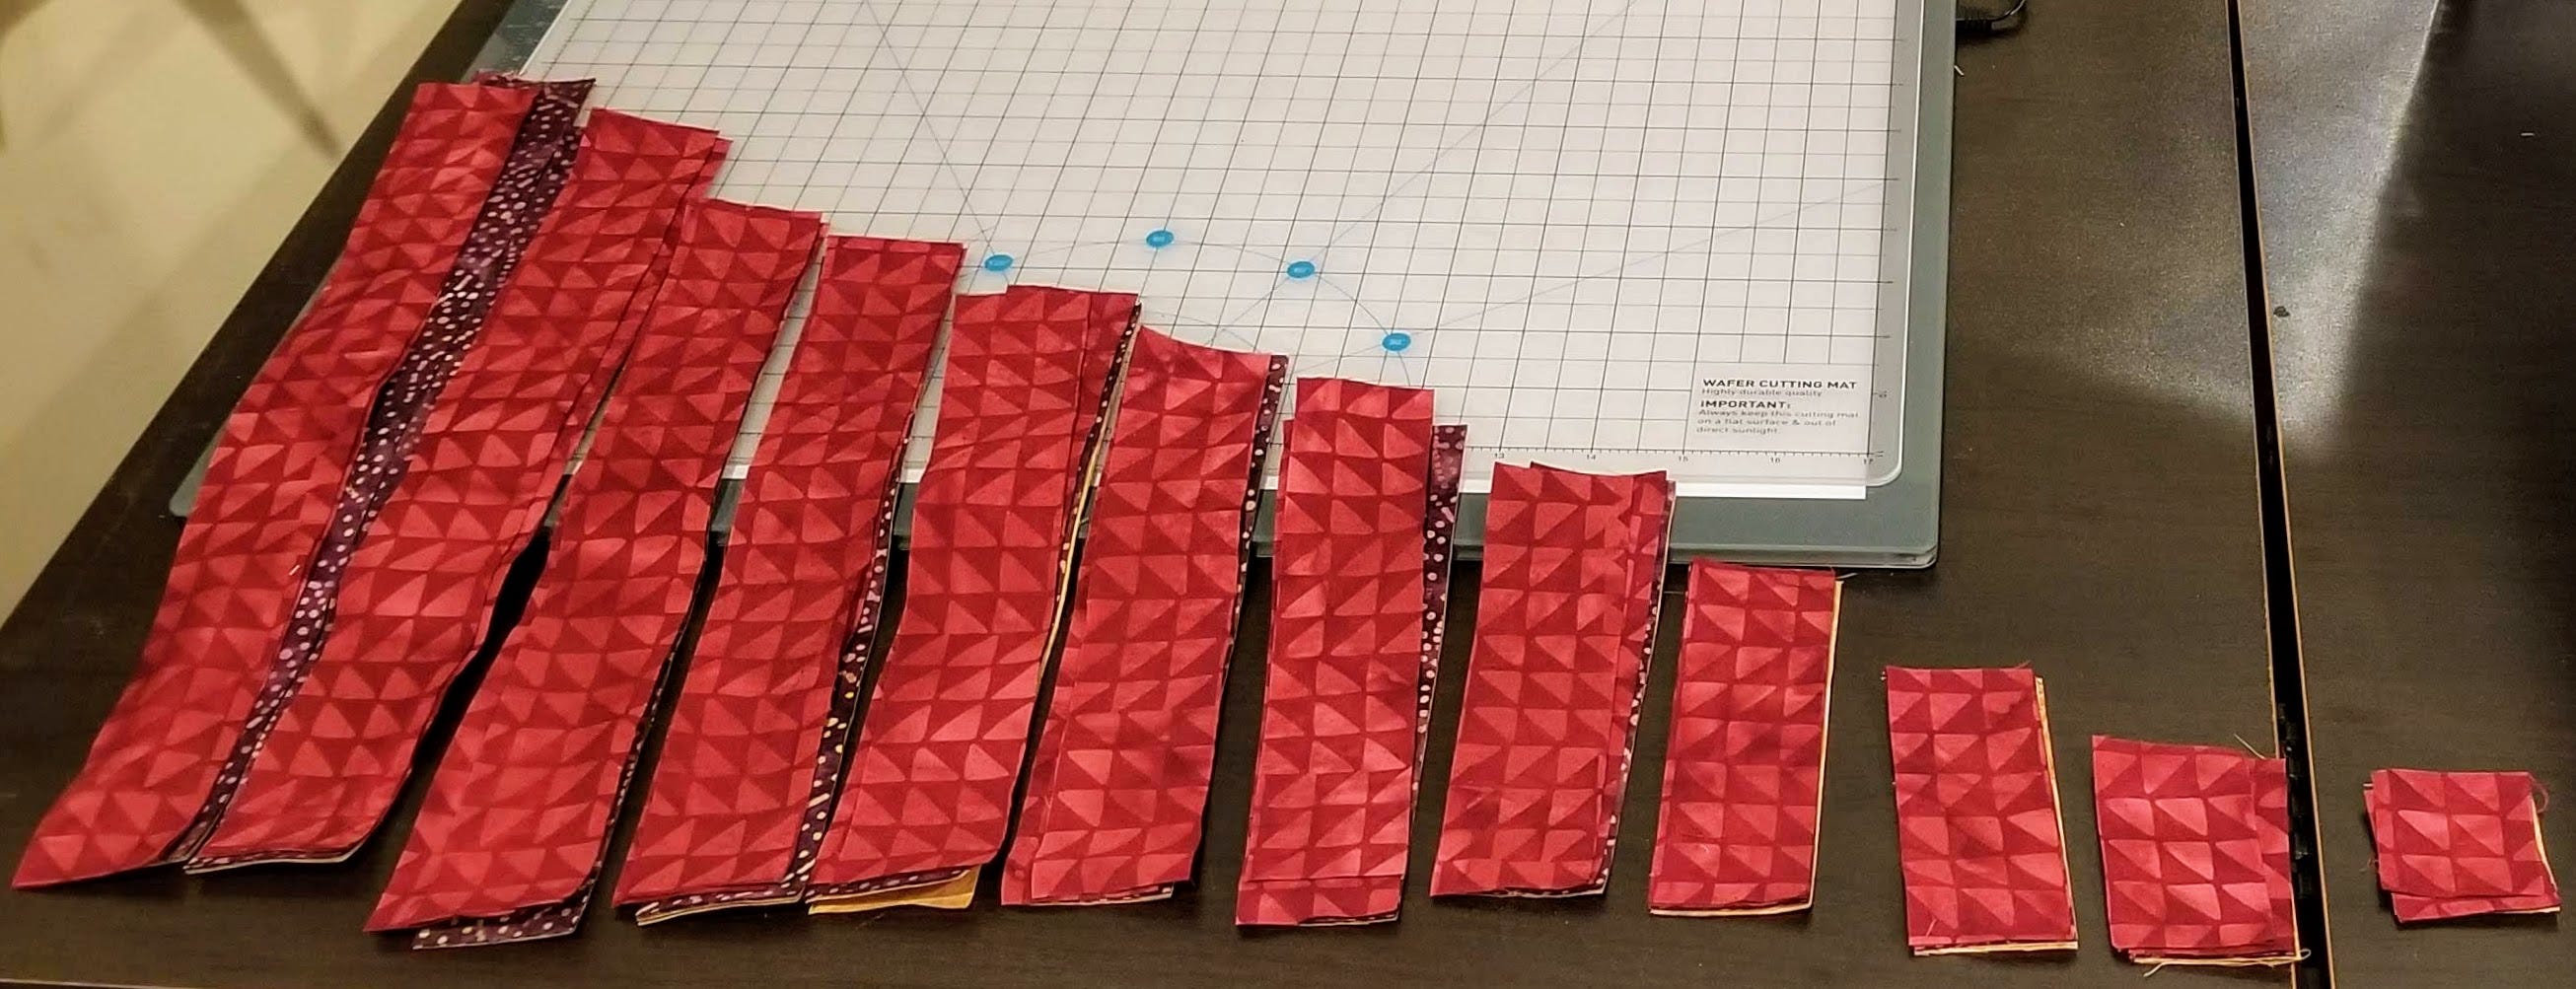
Layer up to 6 pieces at a time on your GO! Log Cabin die, and run them through your AccuQuilt system. Make sure to align your straight of grain properly to minimize distortion.
Stack all of your pieces up, in order of size and in order of stitching.
I’ve put together a block diagram. In the diagram, “L” indicates light fabric, “D” indicates dark fabric. The number corresponds to the finished length of the log. So, 1 L is the 1½” square of light fabric.
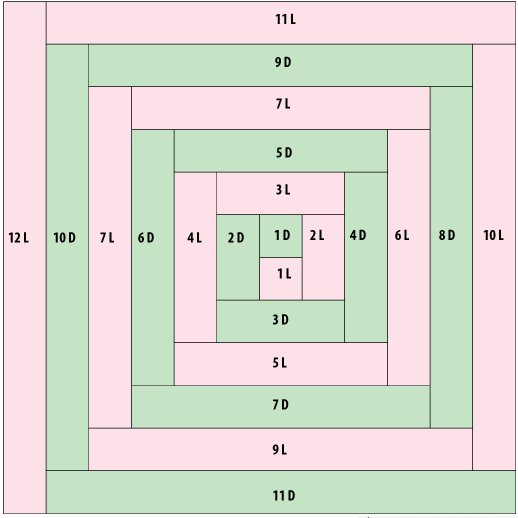
Following the diagram, stitch your pieces together, starting with 1L + 1D. Press after each seam is stitched. I press my seams open. For me, open seams make for really accurate, flat blocks. Frequent pressing, along with an accurate ¼” seam allowance will make for really square log cabin blocks.
To make sure all of your blocks “spin” in the same direction, make sure you always assemble them the same way. I did this by always turning the block clockwise each time I added a pair of “logs”.
Notice that you will only use one of the 12½” strips on your block. This is not a mistake. You have a couple of options here. If you use all of the strips, your block will not be a square. If that works for you, stick it in there. Your quilt will be longer than mine. Or, you can sew the leftovers together into a rectangle, and use them for the label. Or just toss them in the scrap bin.
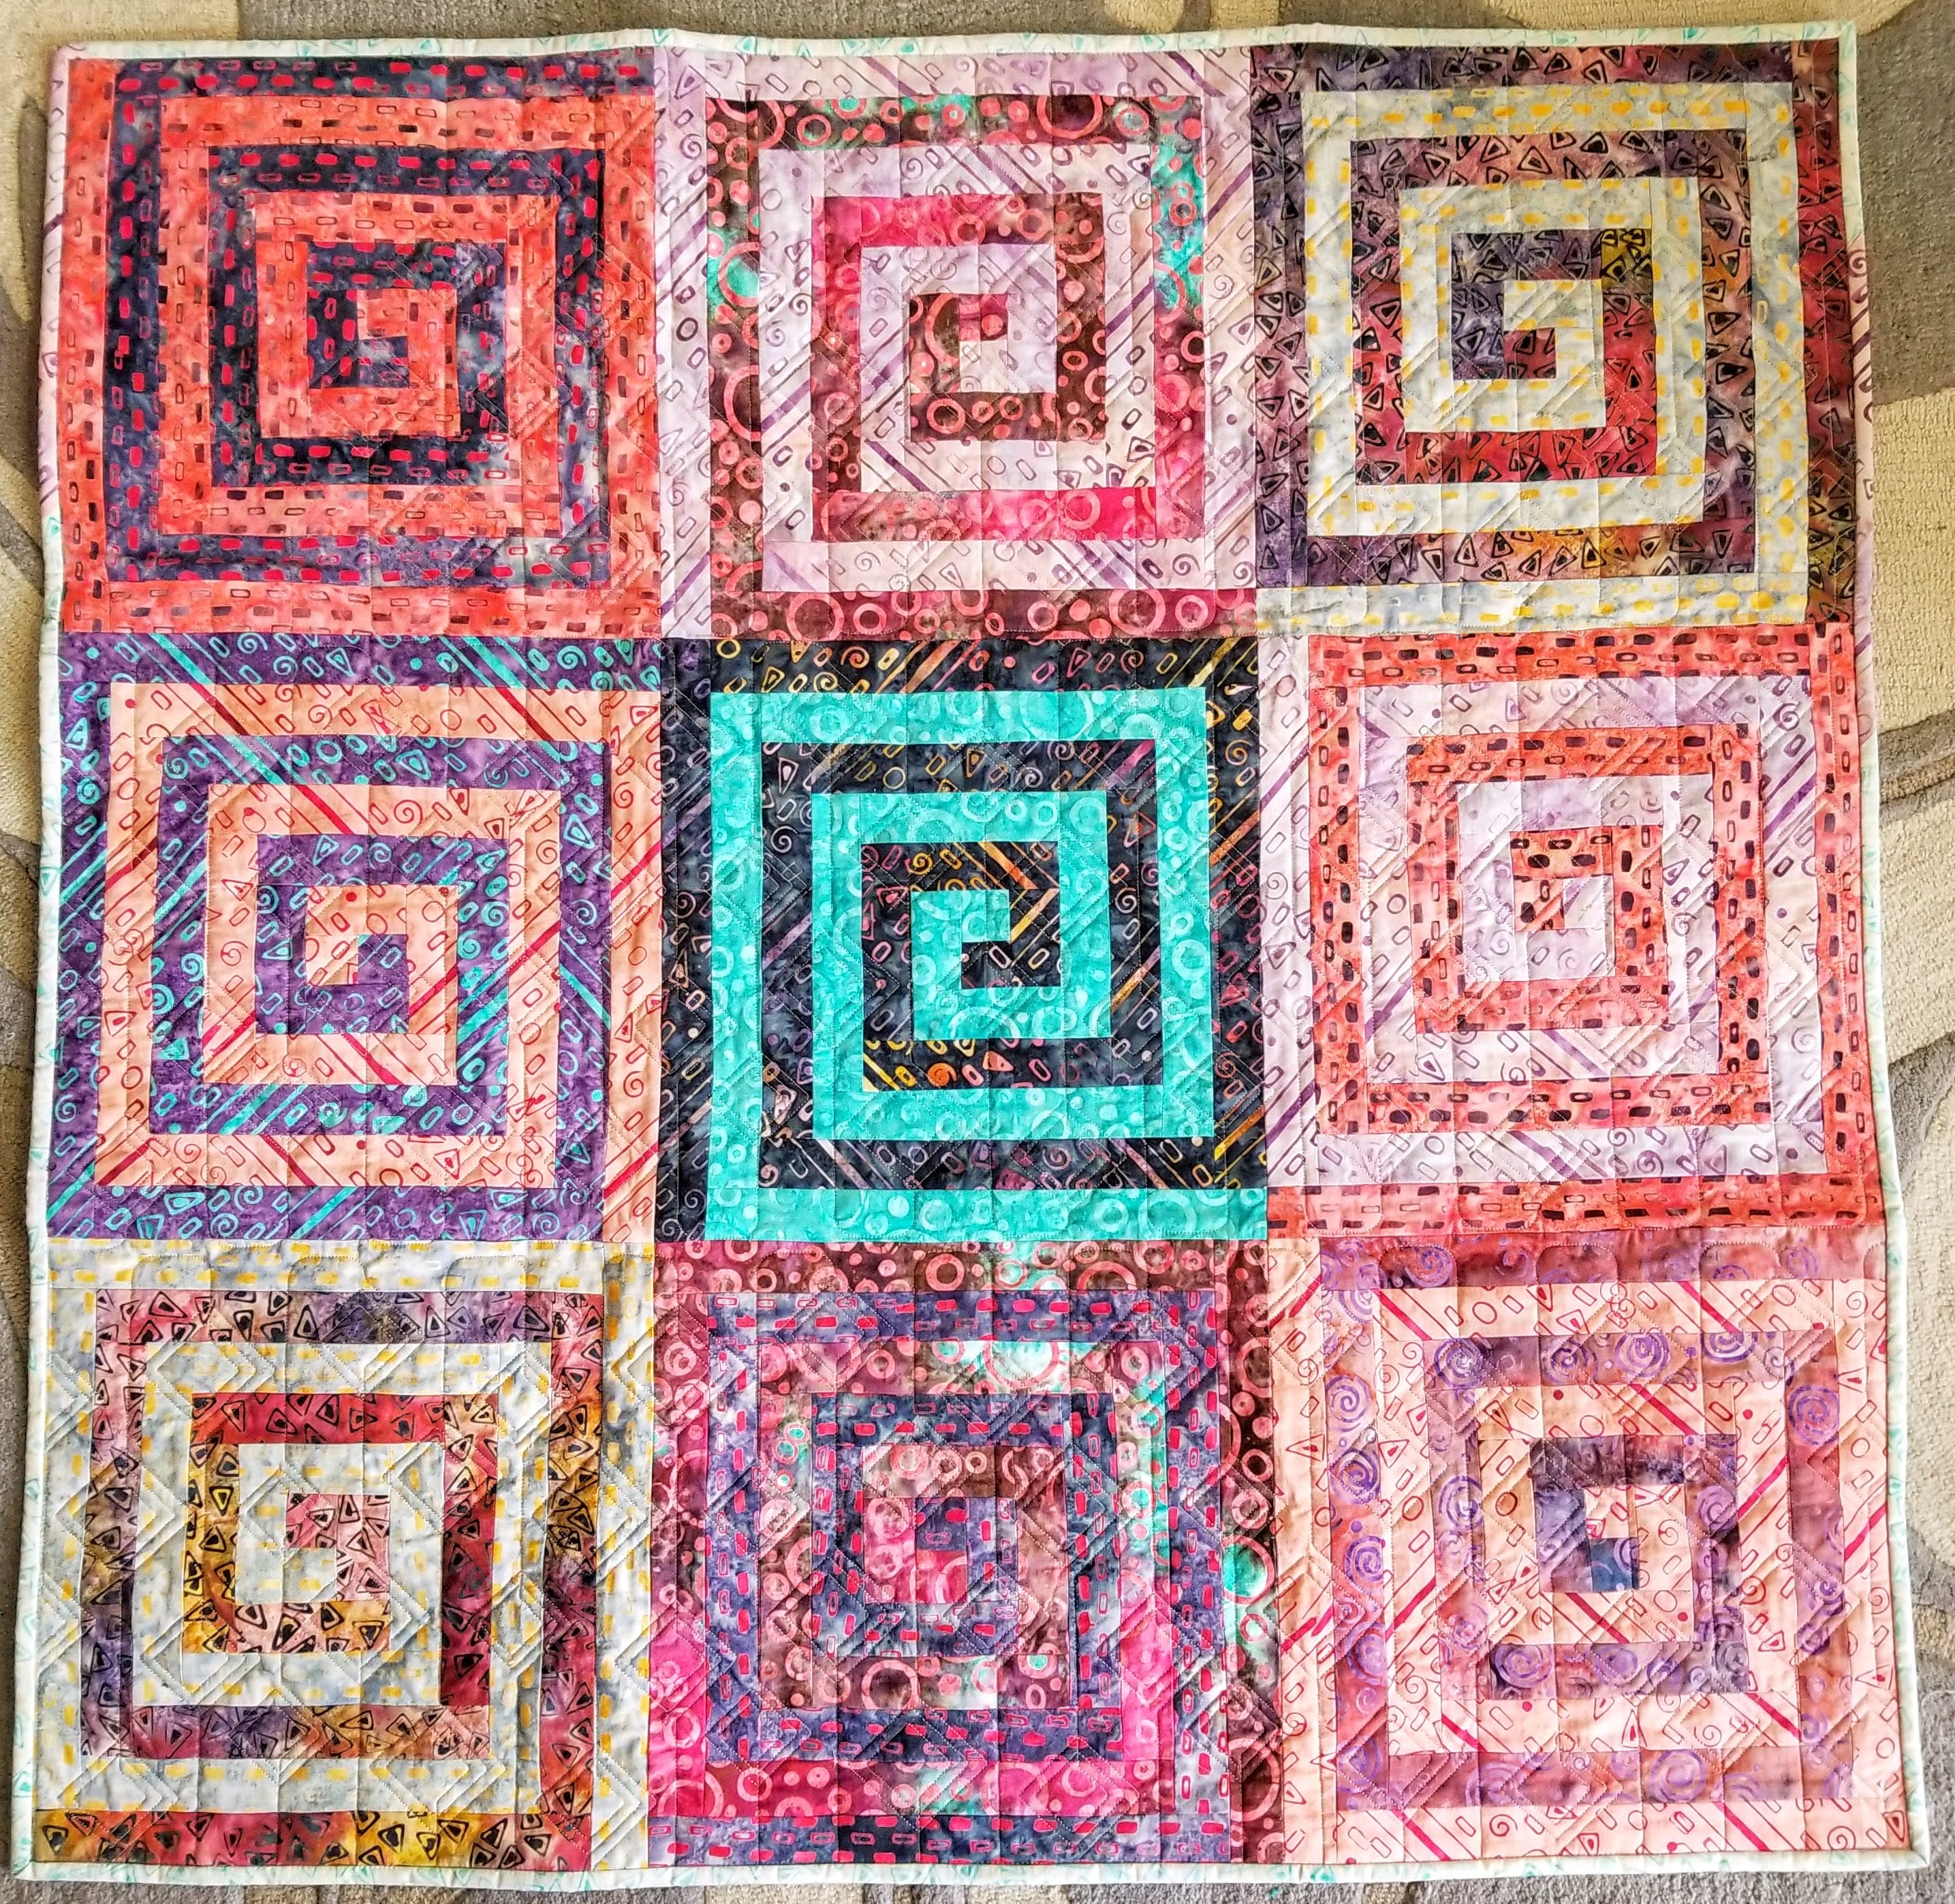
Once all of your blocks are pieced, lay them out so you can see how the colors play together. You can spend hours moving them around, or you can just stitch them together in three rows of three blocks.
Layer, quilt as desired, bind and enjoy. I am lazy, so I use my longarm to quilt most projects. If you are not blessed with a longarm, I would suggest straight lines running diagonally across the quilt. With a busy pattern like this one I save my energy and just get her done. I save my fancy quilting for quilts with negative space.
Happy quilting! If you follow my instructions, be sure to share and tag me on social media alongside @AccuQuilt. I love to chat about quilting. I'm @jenstrauser on Instagram.


