


Welcome back, AccuQuilters! It's Lori from Lori Miller Designs bringing you a fun tutorial for a cheery table topper.
Bright and happy, this topper uniquely combines two of your favorite GO! Block on Board (BOB) Dies to create a stunning new block design. This is a quick project you can stitch up this summer, so grab your quilting friends, some cool refreshing drinks and snacks, and have a breezy day of stitching!
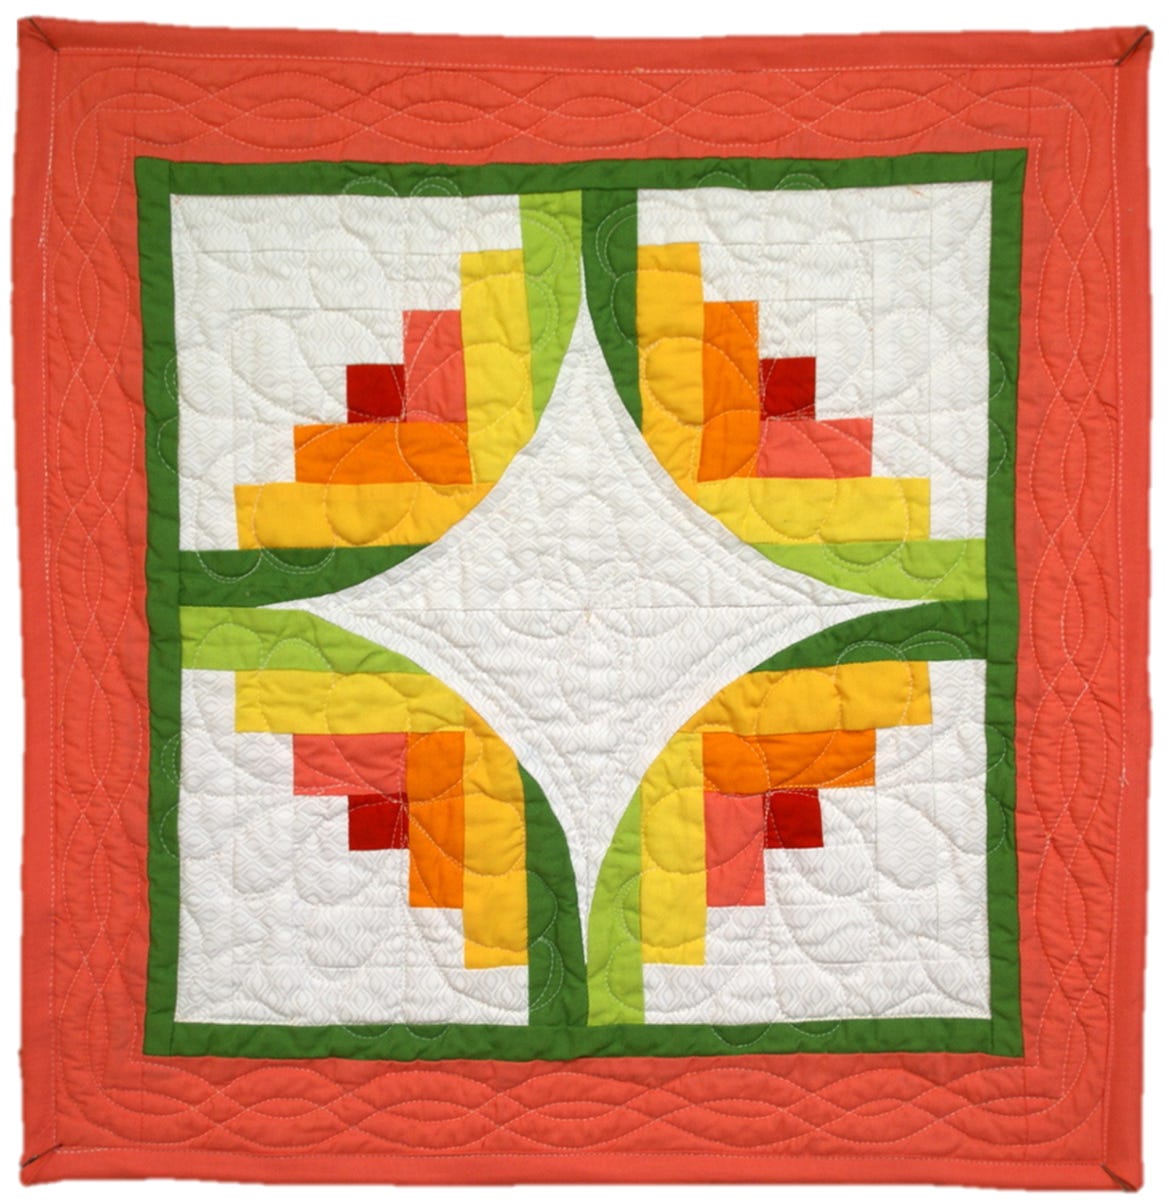
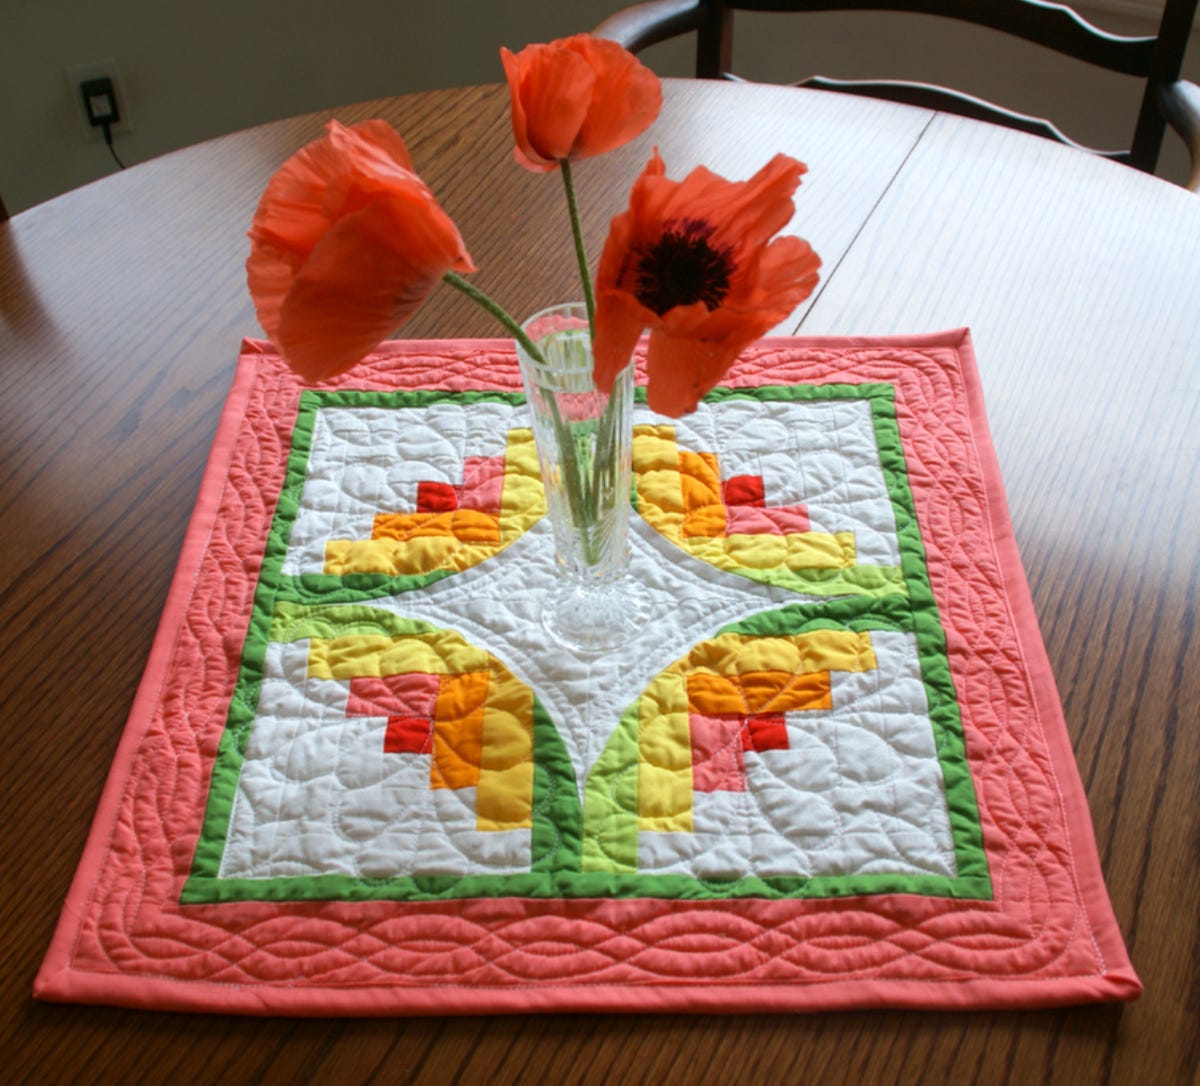
How to Create A Curvy Log Cabin Table Topper
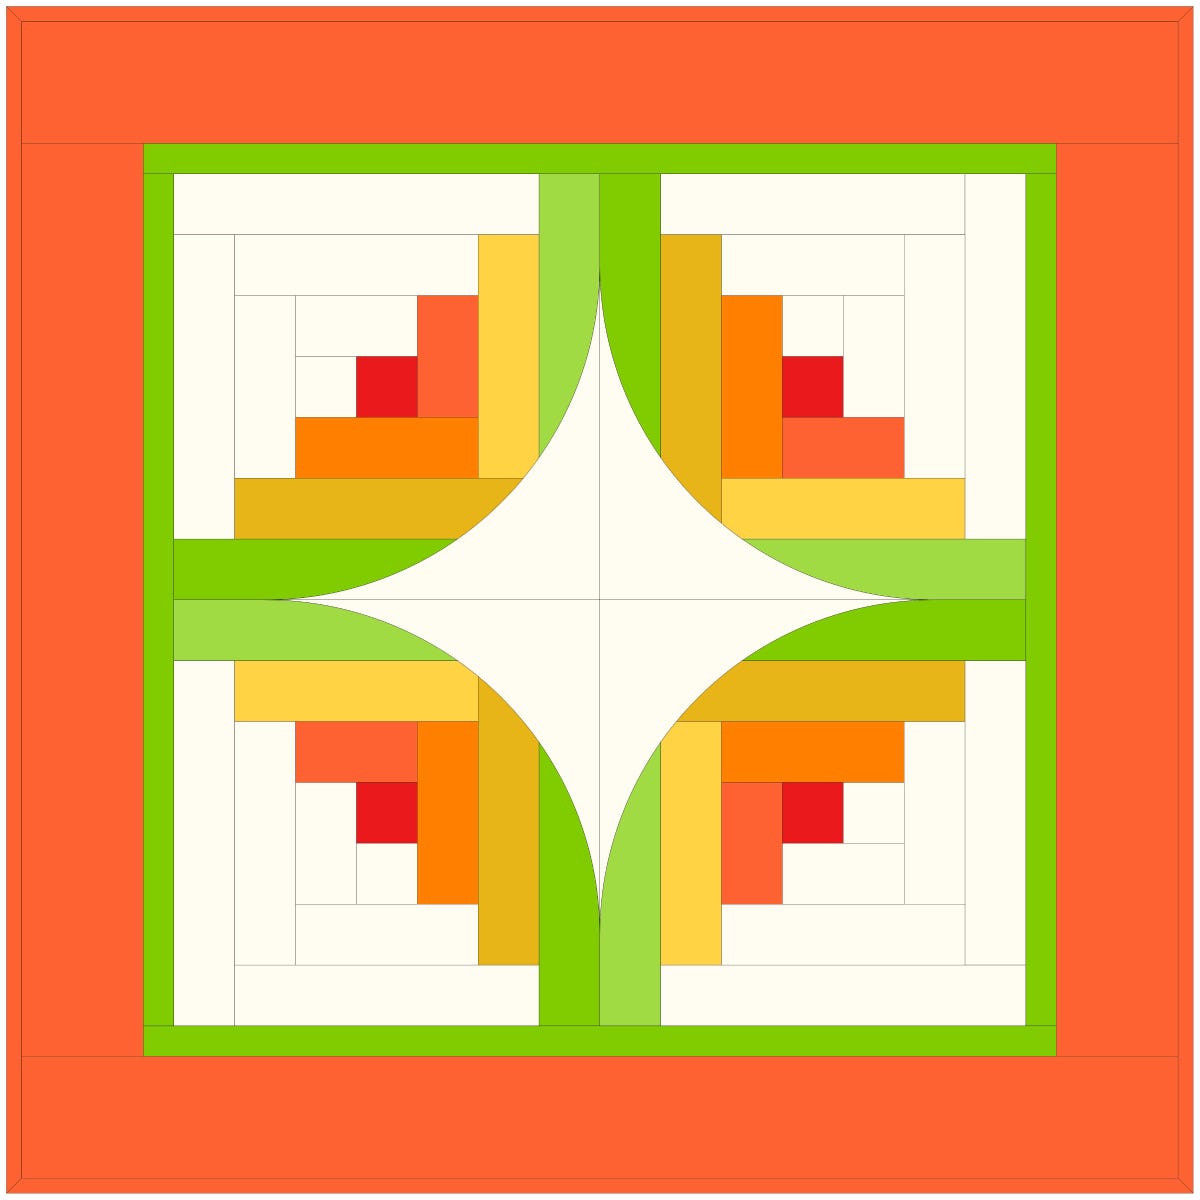
Most of you know I am an EQ8 super-fan, so I am sharing my design above from Electric Quilt 8 (EQ8) Quilt Design Software. This software made it so easy to play with the colors and to draw out this curvy block to create an 18 1/2'' x 18 1/2” finished table topper.
Dies Used
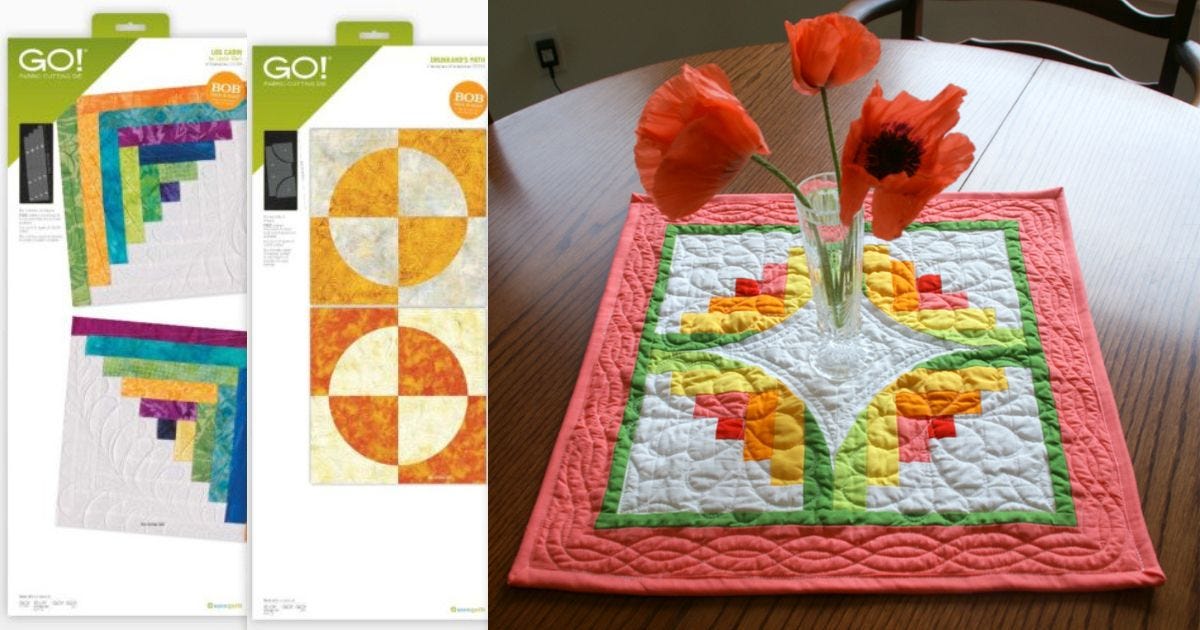
- GO! Log Cabin-12" Finished Square by Leslie Main Die
- GO! Drunkard's Path-7" Finished Die
- GO! Strip Cutter-1”, 1 1/2”, 2” (1/2”, 1”, 1 1/2” Finished) Die
- GO Strip Cutter 2 1/2” (2” Finished) 3 Strips Die
- GO Strip Cutter-2 1/4" (1 3/4" Finished) Die
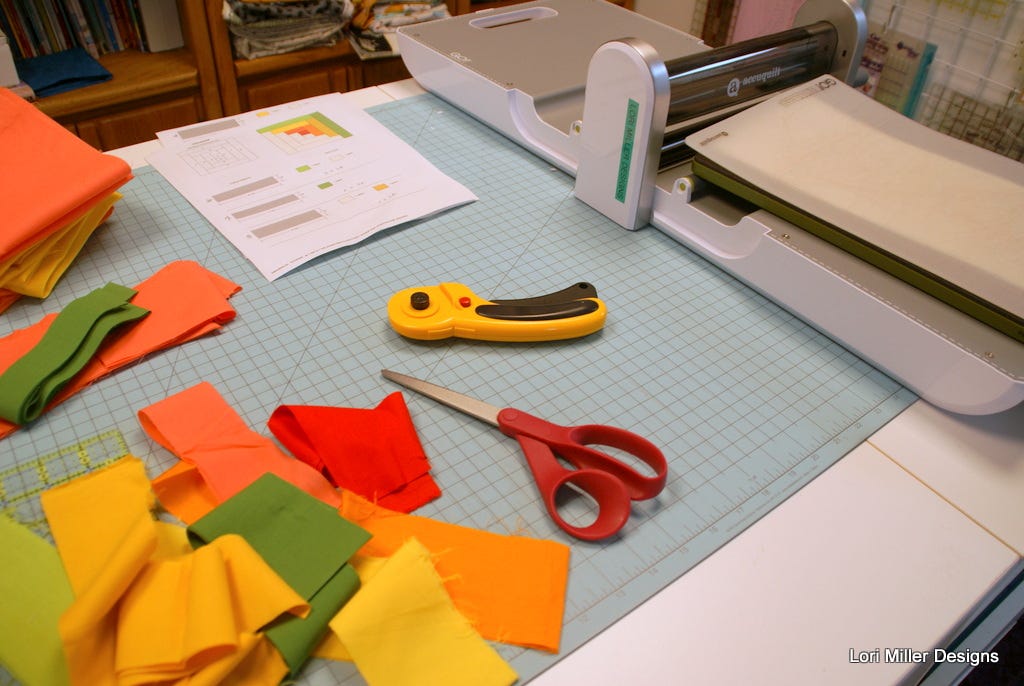
- Fabric scissors
Materials Needed
- 1/2 yard of background white fabric
- 1/8 yard of red fabric
- 3/4 yards of coral fabric for strips, border, binding, and backing
- 1/8 yard of orange fabric
- 1/8 yard of yellow fabric
- 1/8 yard of orange yellow fabric
- 1/8 yard of yellow green fabric
- 1/4 yard of green fabric for strips and border
- 8 1/2 x 11” of cardstock paper
- Water-soluble fabric marker
- 20 1/2” square of batting
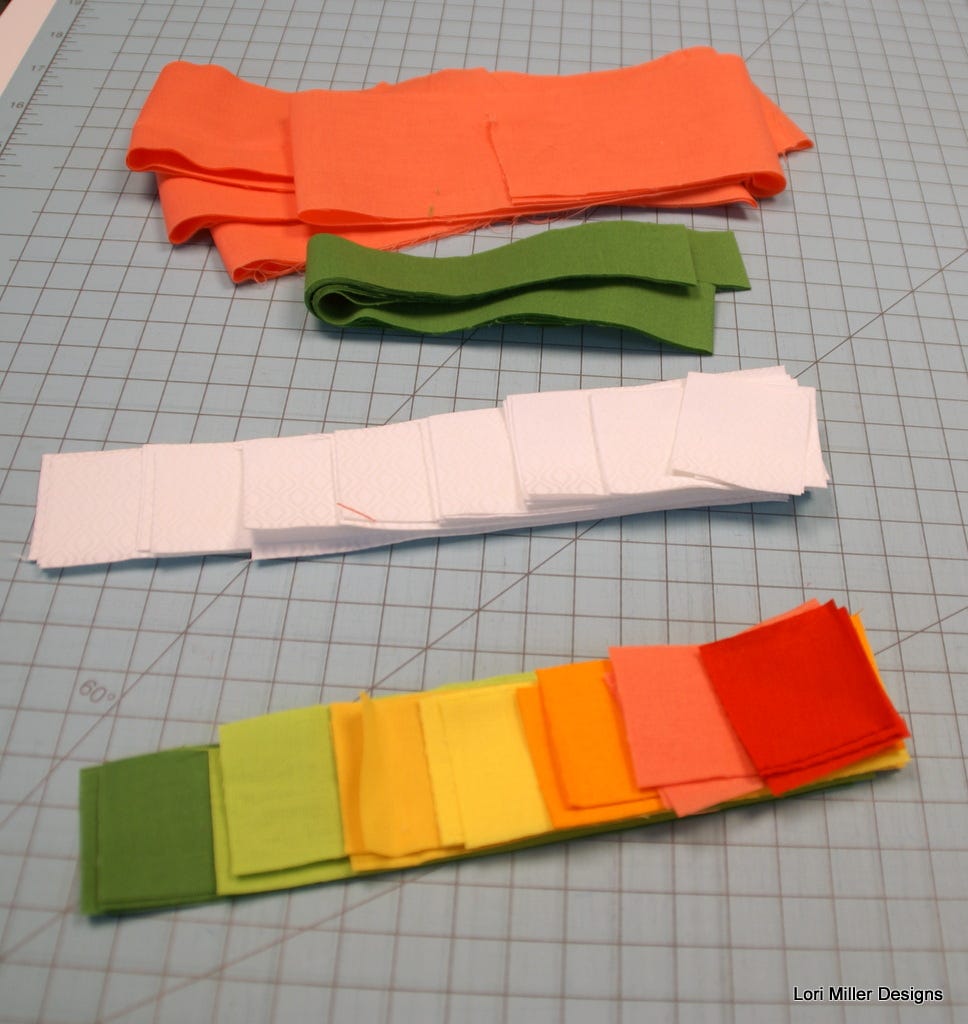
Cutting
Follow the table below to cut out the necessary pieces.
| Fabric | Shape/GO! Die | Cut |
|
Red |
Log Cabin - Shape 1 |
One strip: 2’ x 8”. Then, subcut four strips for Shape 1. |
|
Coral (for backing) |
N/A |
One strip: 21” x Width of Fabric (WOF). Then, subcut a 21” square. |
|
Coral (for binding) |
GO! Strip Cutter-2 1/4” (1 3/4" Finished) Die |
Two strips: one 2 1/4 ” x WOF strip AND one 2 1/4” x 28” strip. Use the rest of the fabric from the backing strip for the remaining pieces. |
|
Coral (for the border) |
GO! Strip Cutter-2 1/2" (2" Finished) 3 Strips Die |
Four strips: one 2 1/2” x 28" strip. Then, subcut two 2 1/2” x 15 1/2” strips. Next, subcut two 2 1/2” x 16 1/2” strips. |
|
Coral |
Log Cabin - Shape 2 |
One strip: 2” x 14”. Then, subcut four strips for Shape 2. Trim the remainder to a 2 1/2’ strip and add to the binding strips. |
|
Orange |
Log Cabin - Shape 3 |
One strip: 2’ x 16”. Then, subcut four strips for Shape 3. |
|
Yellow |
Log Cabin - Shape 4 |
One strip: 2” x 20”. Then, subcut four strips for Shape 4. |
|
Yellow Orange |
Log Cabin - Shape 5 |
One strip: 2’ x 24”. Then, subcut four strips for Shape 5. |
|
Yellow Green |
Log Cabin - Shape 6 |
One strip: 2” x 28”. Then, subcut four strips for Shape 6. |
|
Green |
Log Cabin - Shape 7 |
One strip: 2” x 32”. Then, subcut four strips for Shape 7. |
|
Green (for the border) |
GO! Strip Cutter-1", 1 1/2", 2" (1/2", 1", 1 1/2" Finished) Die |
Two strips: 1” x WOF. Subcut one of these strips into two 1” x 14 1/2” strips. Subcut the other strip into two 1” x 15 1/2” strips. |
|
Background White |
Log Cabin - Shapes 1-6 |
One strip: 7” x WOF. Fanfold 10” and subcut four sets of shapes 1-6. Just lay the strip over shapes 1-8 for easier cutting. There will be a few extra shapes that you will not use. |
|
Background White |
7" Drunkard's Path - Shape B |
One strip: 9” x WOF. Fanfold 10” and subcut four strips for shape B. |
Sewing the Blocks
To assemble the log cabin block, follow the instructions below.
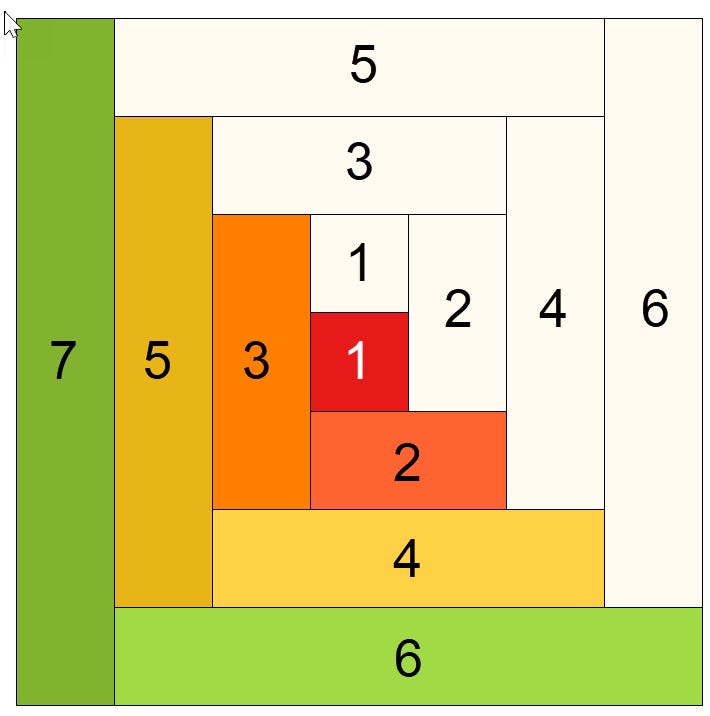
1. Using the fabric colors and block layout above, piece together the log cabin blocks.
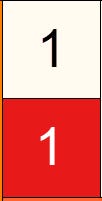
2. Begin by sewing the light background shape 1 to the red shape 1.

3. Add the light background shape 2 to the right side.

4. Add the coral shape 2 to the bottom.
5. Continue working your way around the log cabin in number order, finishing with the green Shape 7.
6. Make a total of four log cabin blocks.
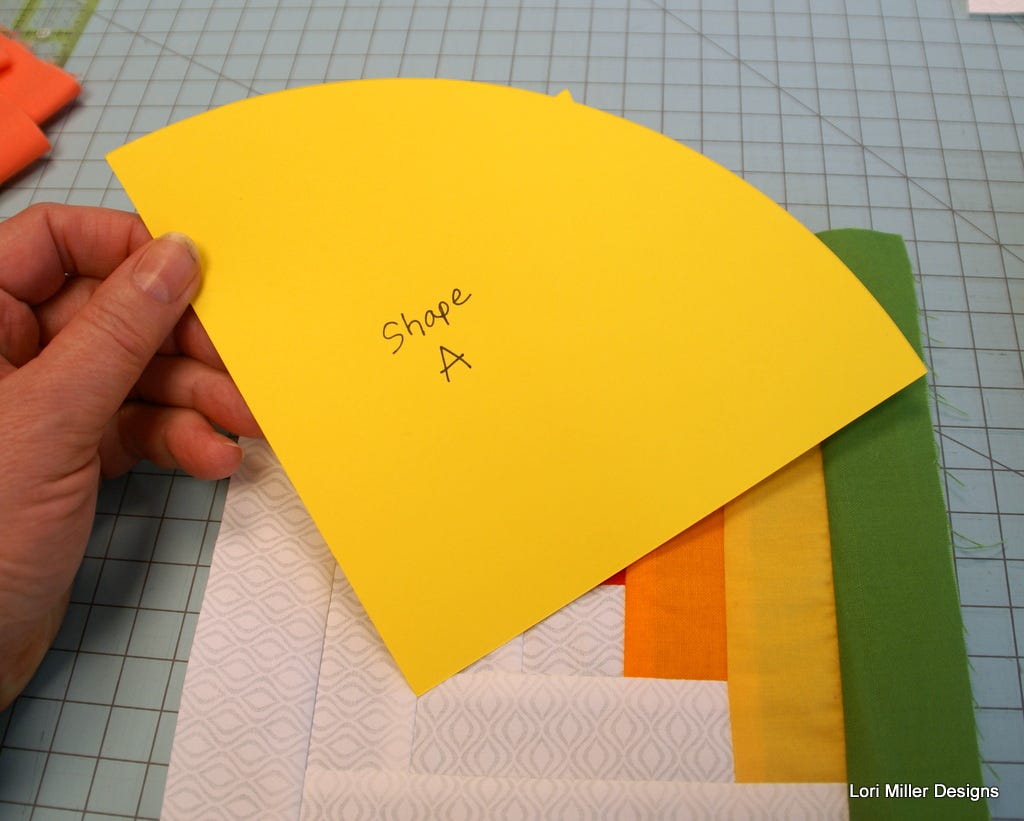
7. Use the piece of cardstock paper to cut out shape A from the GO! Drunkard’s Path-7" Finished Die.
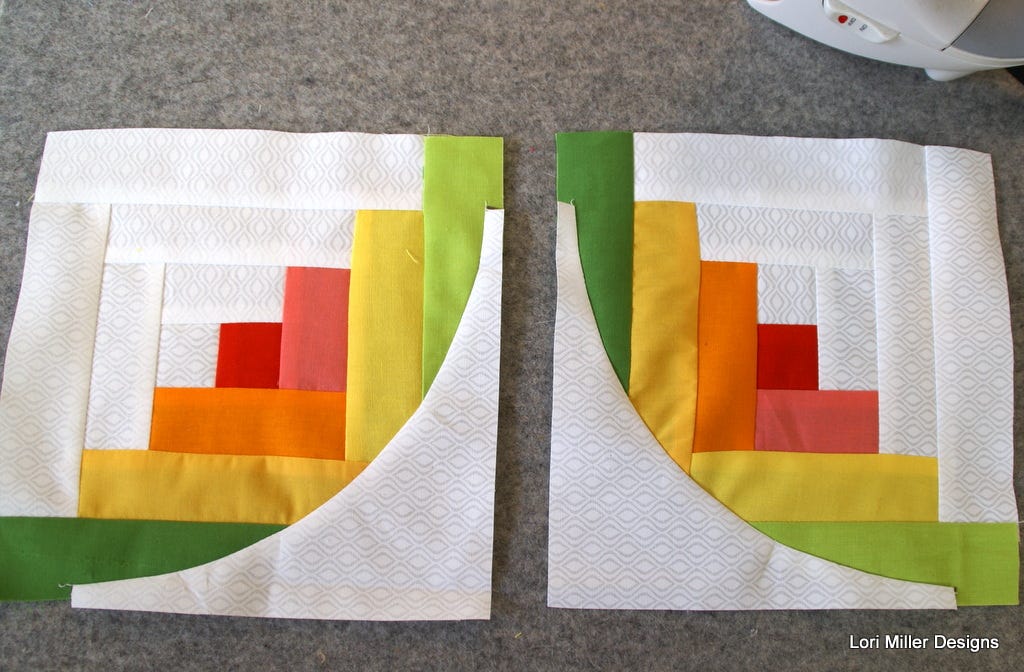
8. Layout the log cabin block with the light background portion to the left and the bottom facing right side up.
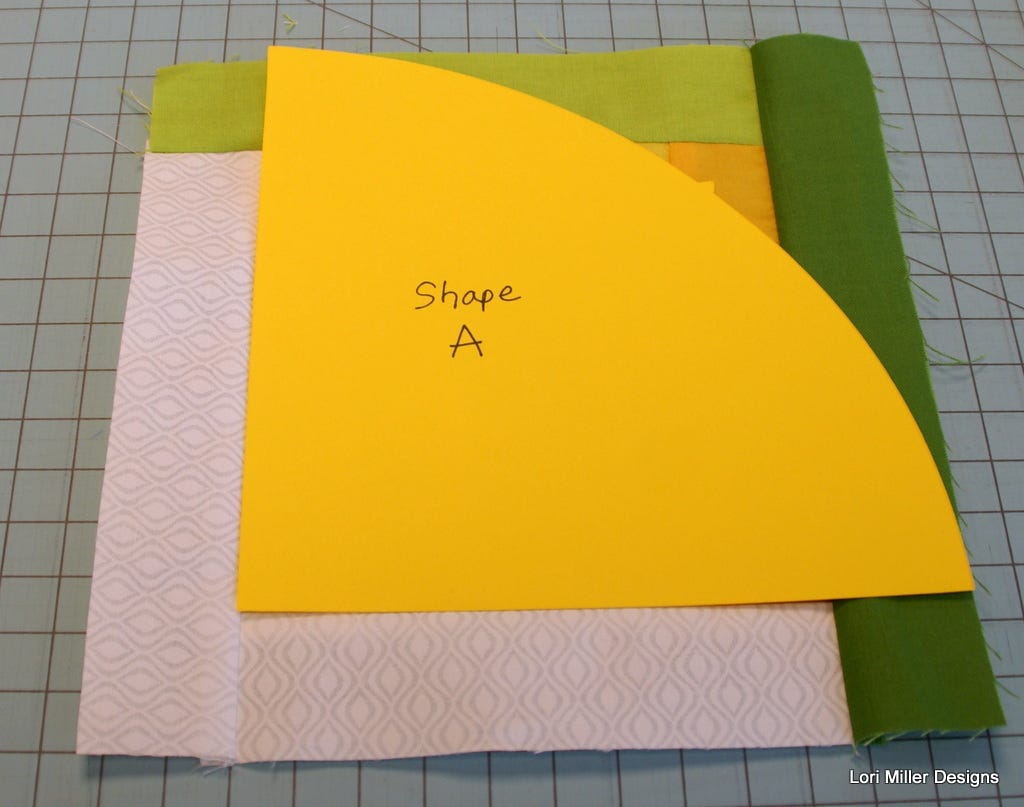
9. Carefully lay the cardstock template over the log cabin block where the corner is aligned with the last row of logs and the curved points are touching the outside of the block.
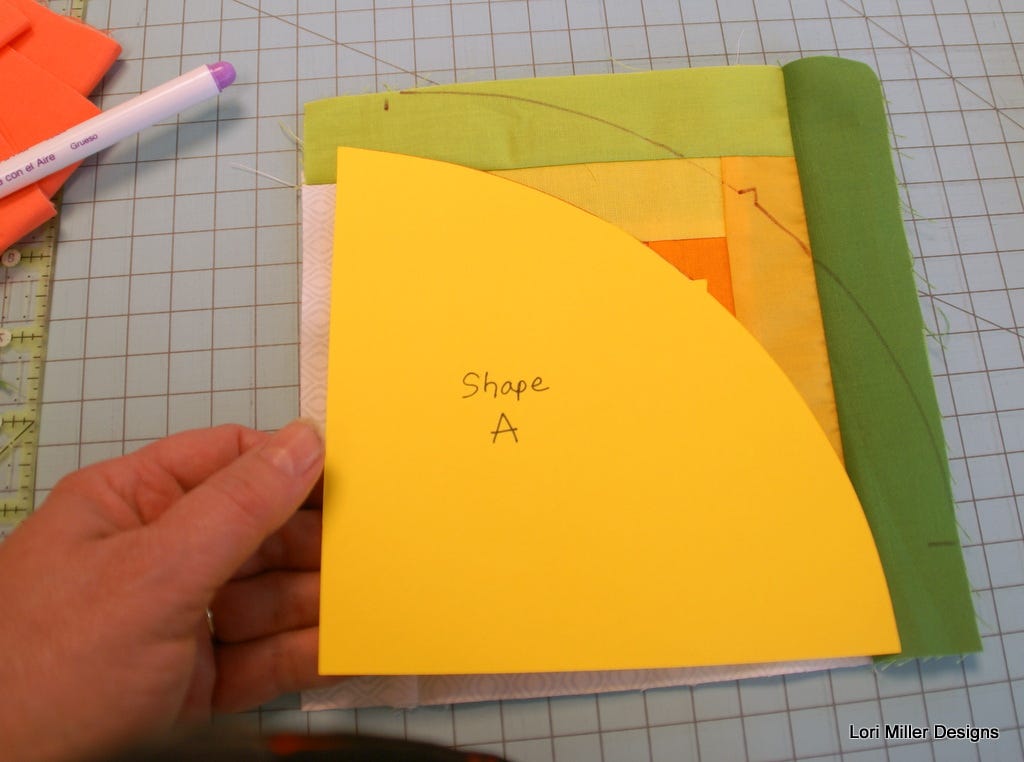
10. Using a water-soluble marker, mark the beginning and ending of the arc shape and draw around the arc.
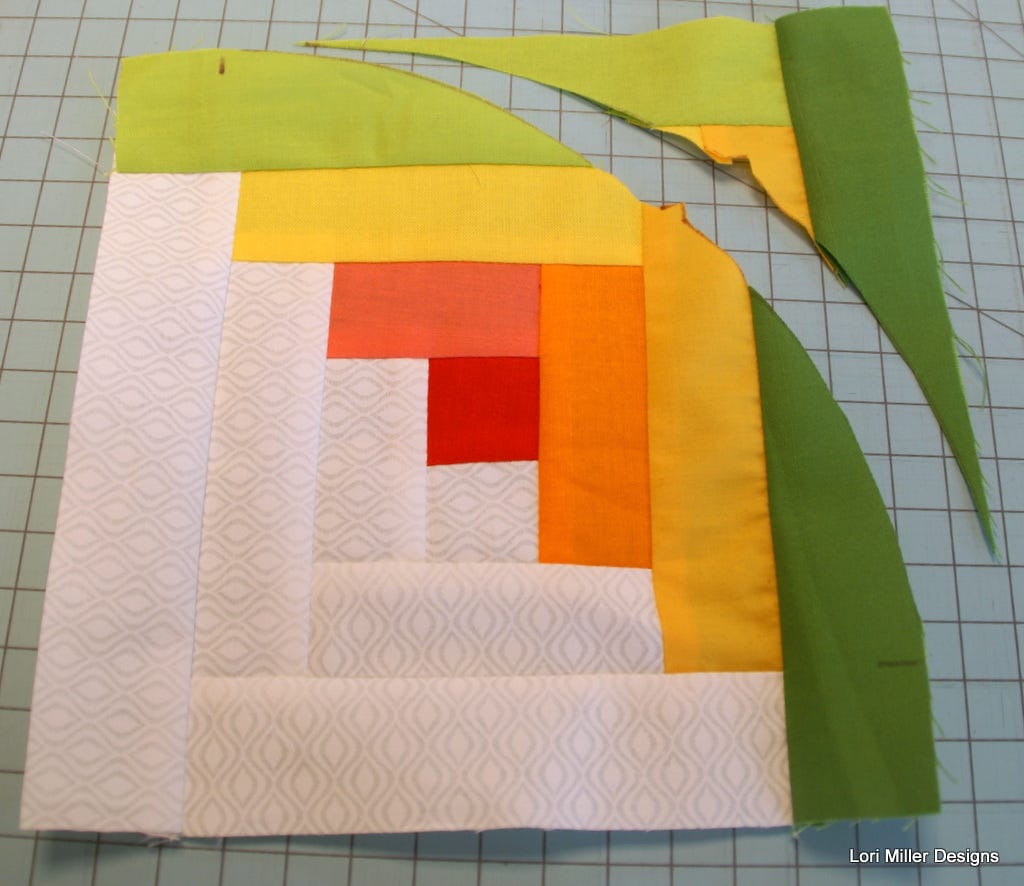
11. With your fabric scissors, carefully cut around the arc, including the center reference tab.
12. Use the same steps to cut out the curve shape on all of the log cabin blocks.
- Set them aside once this is completed for all four blocks.
13. Grab the white background Drunkard’s Path B shapes.
- We need to make a few adjustments to create the white centers for the topper.
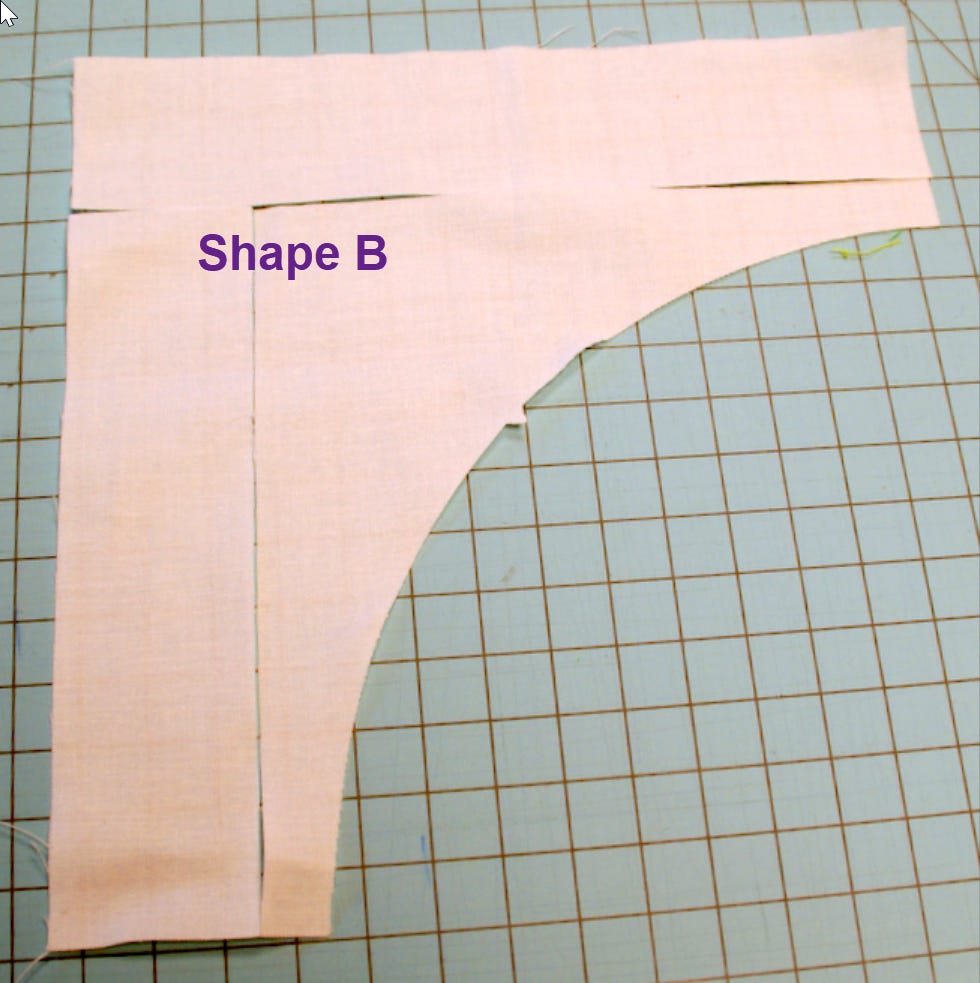
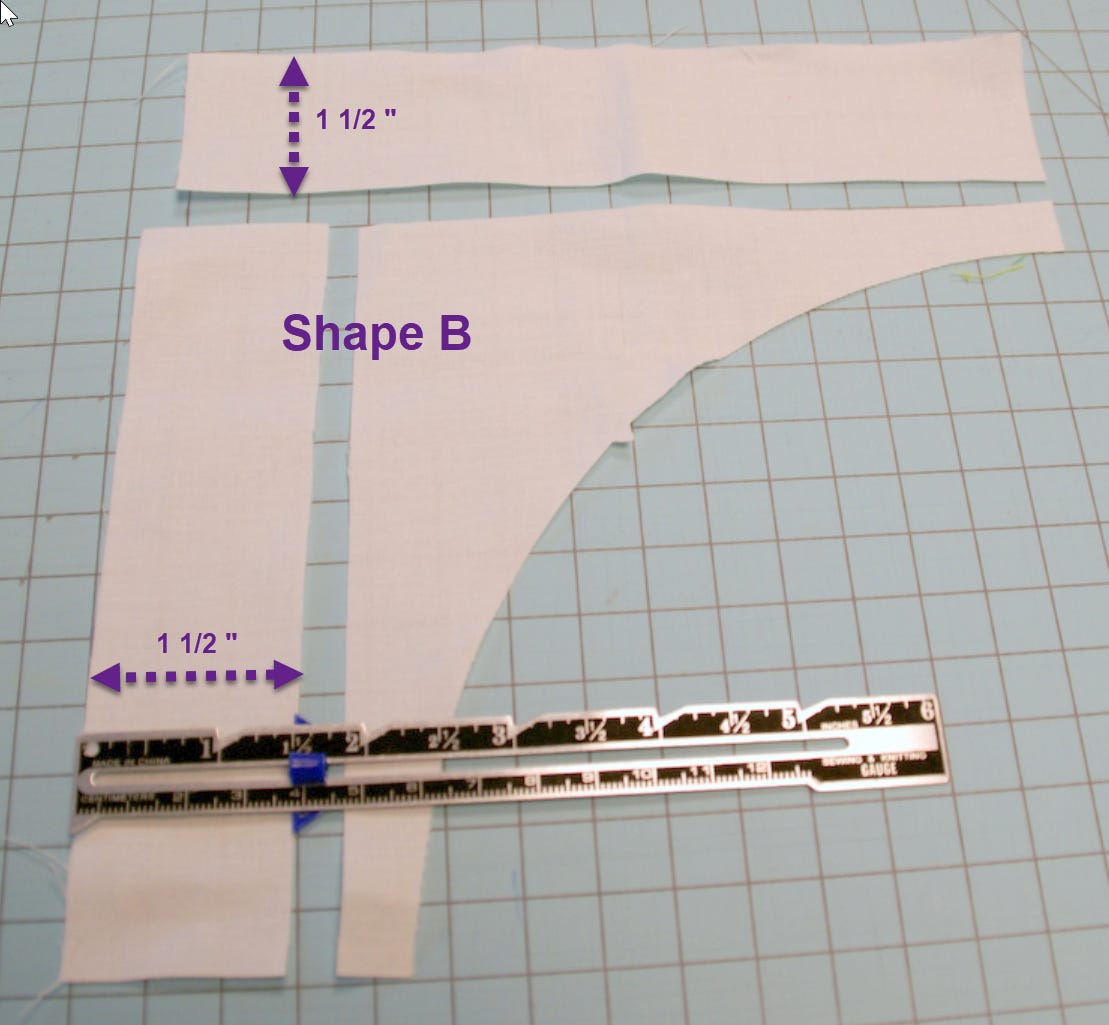
14. Cut off 1 1/2” from each side of the Drunkard’s Path shape B (as shown above).
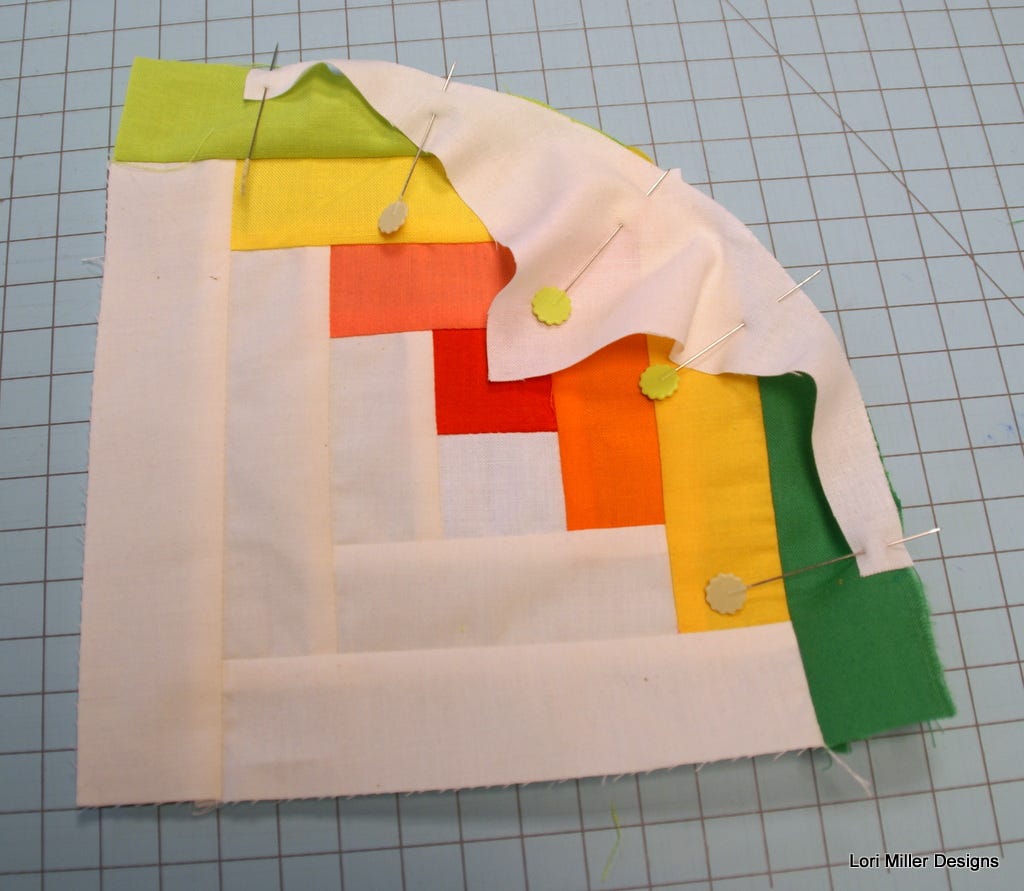
15. Pin the white background Drunkard’s Path shape B to the log cabin block with right sides together.
- Use a lot of pins to ease the shape B to the curves.
- Pin the beginning and end, aligning the marks you made with the template and aligning the center reference tabs.
16. Press.
17. Add the Drunkard’s Path shape B pieces to each of the log cabin blocks.
Finishing Up
To assemble the table topper, use the following instructions.
1. Arrange the blocks (as pictured above) and sew the blocks together in rows, aligning the seams.
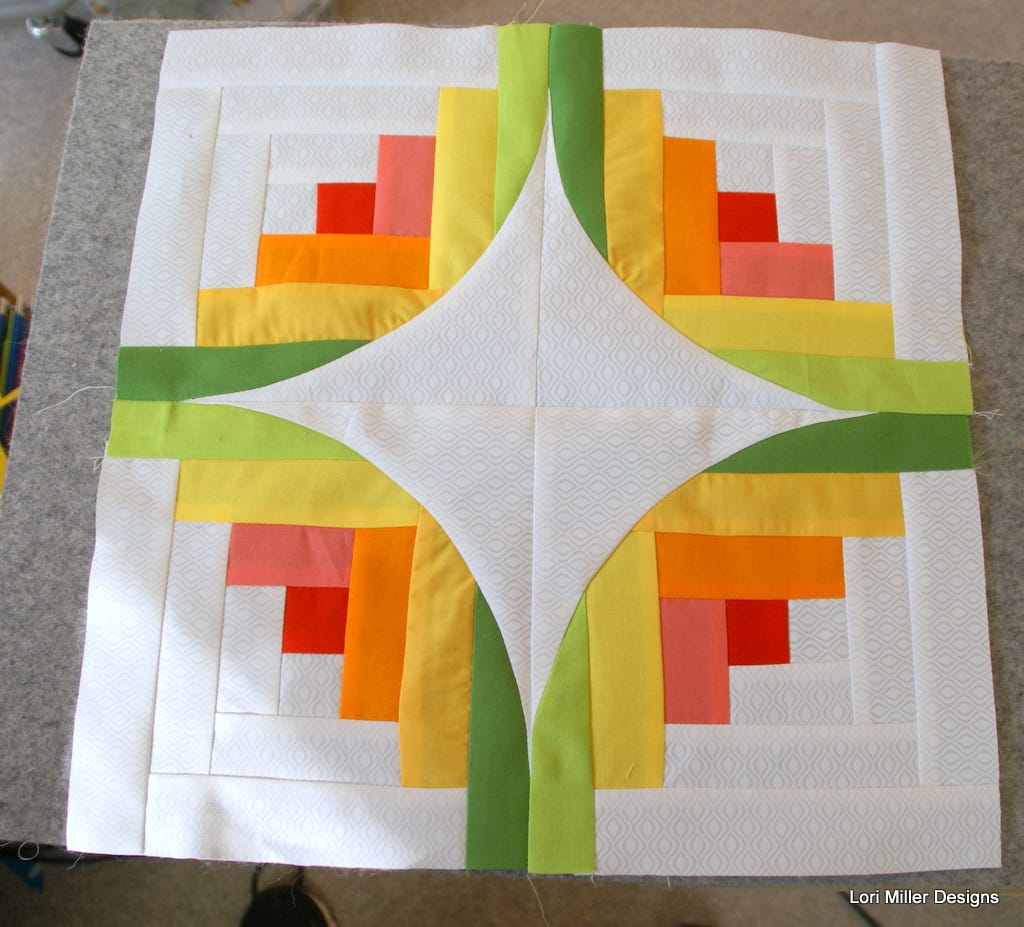
2. Sew the four blocks together (as shown above).
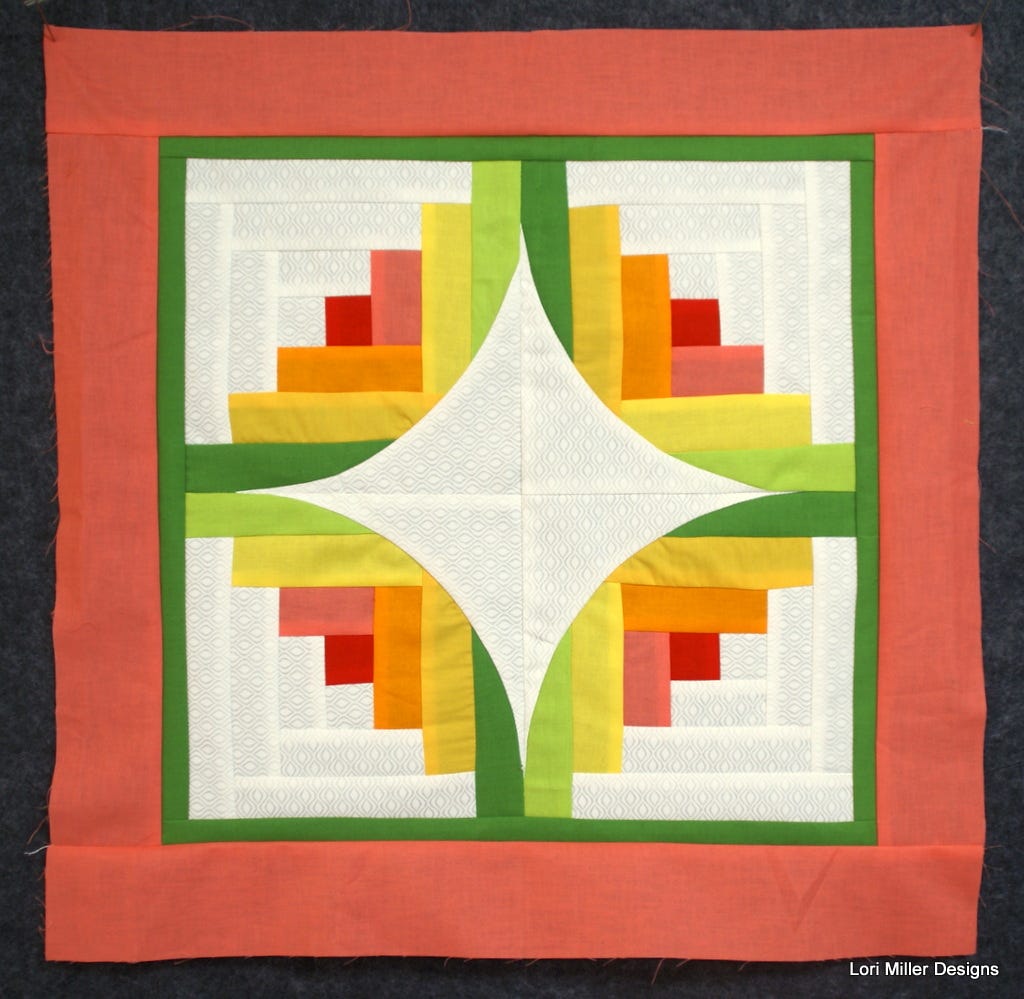
3. Sew the green borders on, starting with the smaller strips on the sides and the longer strips on the top and bottom.
4. Sew on the coral borders, again, starting with the smaller strips on the sides and the longer strips on the top and bottom.
5. To finish the table topper, layer the backing, batting, and pieced top in a quilt sandwich.
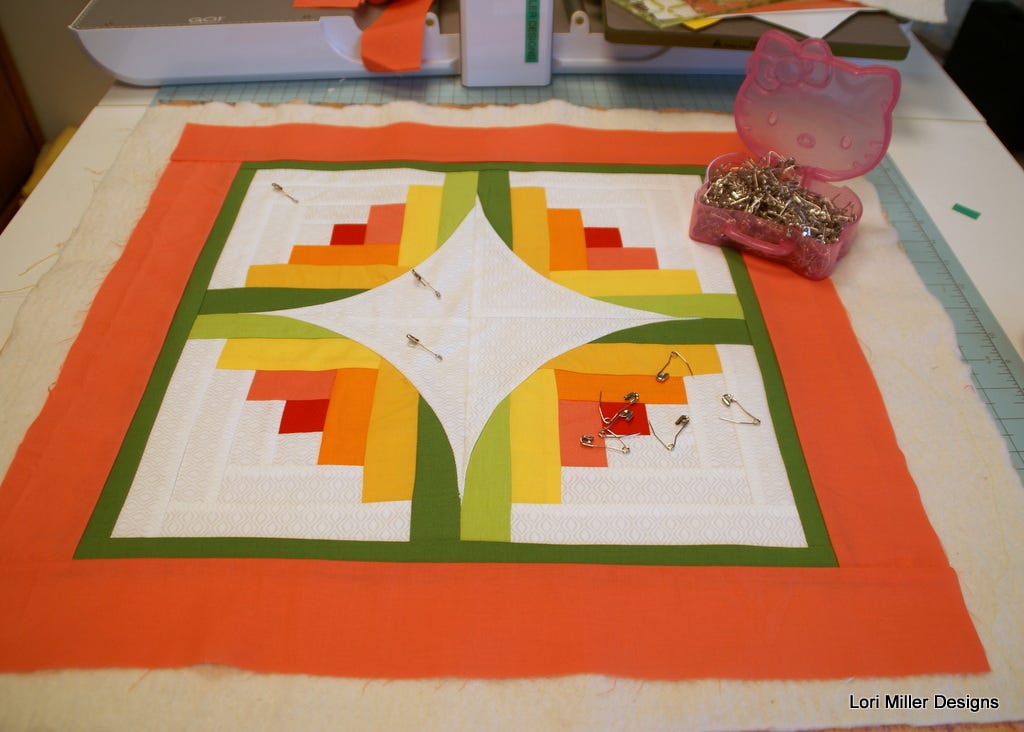
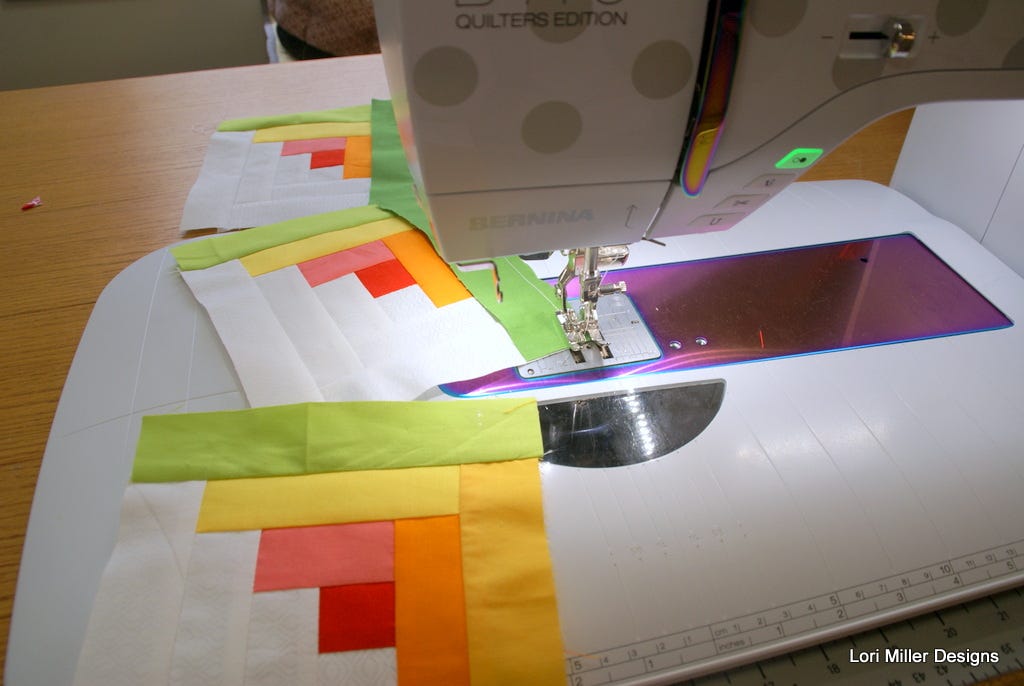
6. Pin the baste (I used safety pins, as pictured above).

7. Quilt as desired.
- I marked my quilt with blue water-soluble marker for quilting and quilted it using my walking foot and some free motion quilting.
8. Bind the quilt using the 2 1/4" coral strips to finish.
Think Outside the Log Cabin!
Wouldn’t this make a fun block for a larger quilt or even a cute tote bag? This would also be a great scrap-buster project to stitch with your quilting friends!
We would love to see your version of the curvy log cabin table topper! Please share your photo with the hashtag #AccuQuiltBuilt and don't forget to tag @lorimillerdesigns and @AccuQuilt on social media so that we can enjoy your great creation!


