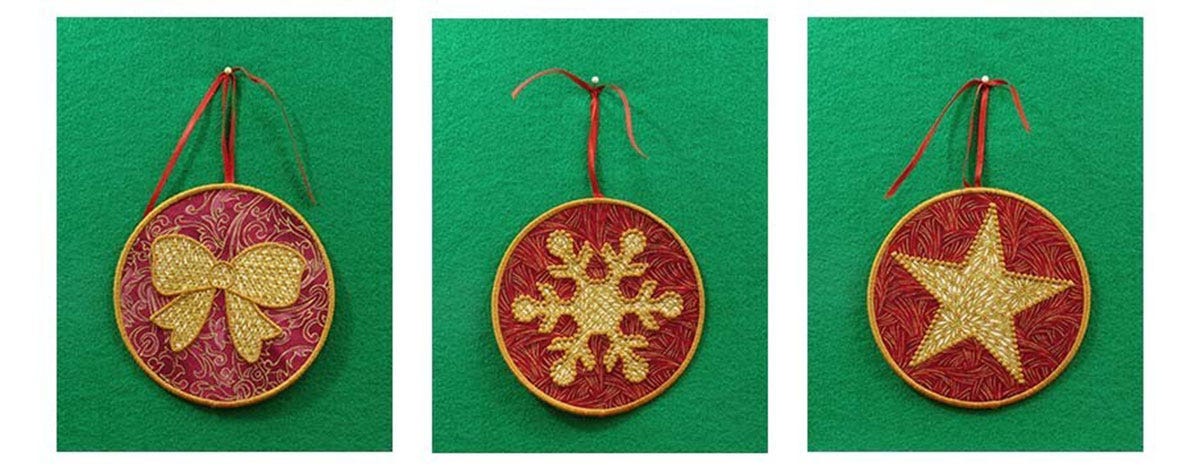
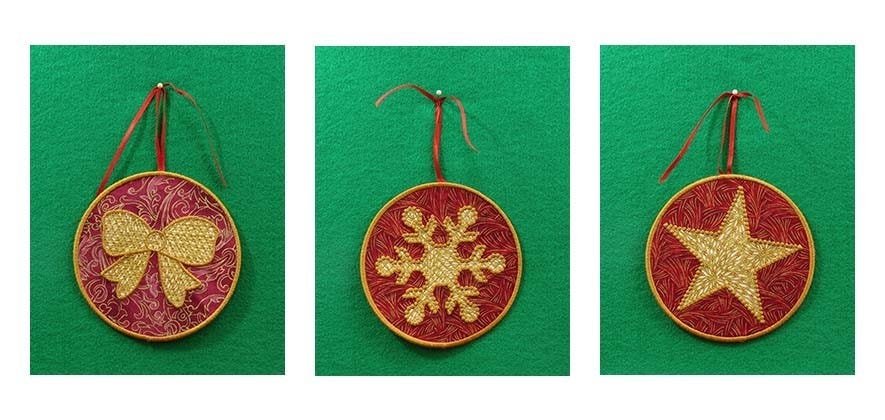
Hi, it's Marjorie Busby from bluefeatherquiltstudio.com here, with some quick ideas for holiday stitching. Making in the hoop machine embroidery ornaments is a great way to give a personalized gift and can be used as ornaments as well as gift tags. They stitch up quickly and use relatively small pieces of fabric. Stitching them is similar to making fabric postcards, but with a different shape and a holiday theme. Last month I posted about using the Holiday Circles 2 Machine Embroidery Designs to make a table topper. This month, the same set is used to make holiday ornaments.
After testing multiple methods for making these, I want to encourage you to use the supplies suggested and to stitch in the order suggested. With all the trials of fabric combinations, I had 'Goldilocks' ornaments before coming up with the right combination of interfacing, stabilizer, fabric, and thread. They all look good in the end, but the ones with interfacing and stitched with a double layer of stabilizer have much nicer satin stitches and hold their shape much better.
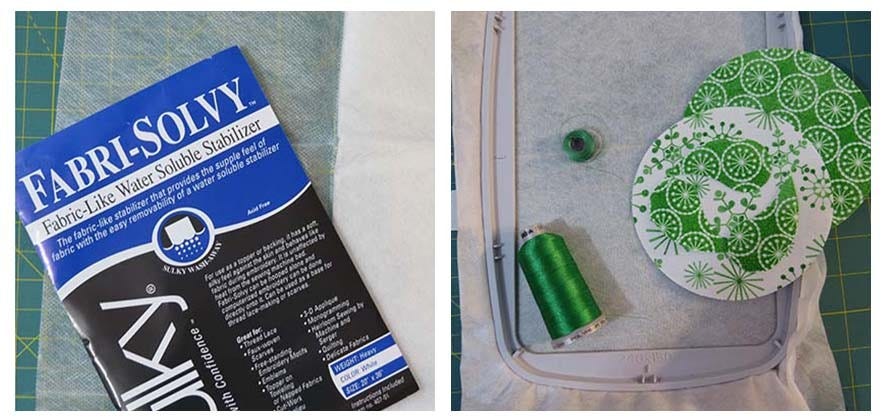
Working with water soluble stabilizer has some unique characteristics. One cannot use wet glues, water, or heat with these stabilizers. The fabric shapes for the ornament and applique have to stick to the stabilizer without melting / dissolving it. That is why the Lite Steam A Seam2 (Lite SAS2) fusible is an important part of the combination. This fusible product is “repositionable” which means that it will stick to the stabilizer without using a wet glue or heat activated fusible. A glue stick can be used, but must be used carefully to preserve the integrity of the stabilizer.
Fabric Selection and Preparation:
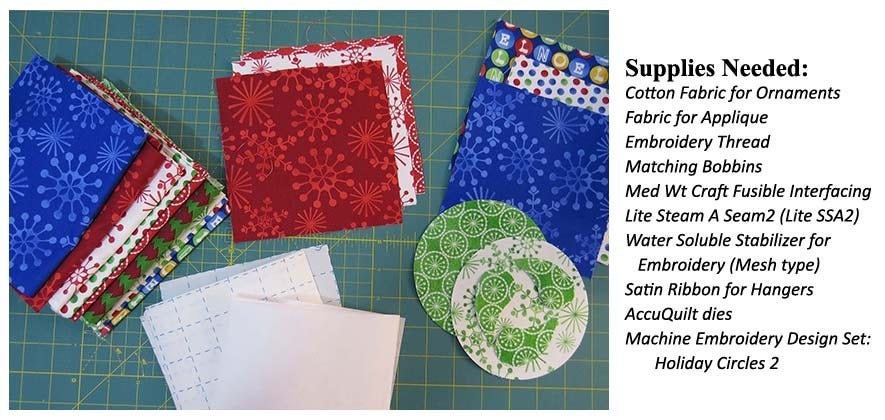
Select fabric for front of ornament, back of ornament, and applique. Cut these fabrics into six inch squares. Also cut six inch squares of fusible interfacing and Lite SAS2 as shown in the photo.
Fuse interfacing to the wrong side of the fabric square for the circles. Then fuse Lite SAS2 to the interfacing on those squares. Leave the paper attached to the squares. Using the AccuQuilt GO! cutter and GO! Circle die, cut 5 inch circles. You can layer two prepared fabric squares on the die, but my preference is to cut one at a time because of the layers of interfacing, fusible, and paper.
Applique Preparation:
Prepare GO! die cut appliques shapes by fusing Steam A Seam to wrong side of applique fabric. With Lite SAS2, you will remove the paper from one side of the fusible, gently finger press the sticky side onto the back side of the fabric making sure that the fabric is smooth against the fusible, then press lightly with a hot iron. Without removing the second layer of paper, cut the applique with the selected dies.
Hoop the Stabilizer:
Use two layers of water soluble mesh stabilizer in the embroidery hoop (see photo above). The extra layer of mesh stabilizer is needed to provide stability for satin stitches of the ornament. Satin stitches always need a good stabilizer. Remember, water soluble stabilizer must be kept away from water and heat.
Stitch the Embroidery:
The stitch files that are used for the ornaments were designed to be stitched onto a fabric base rather than an in-the-hoop project. To make the ornament, you will rearrange the embroidery stitch sequence so that
a) the front circle is placed onto the stabilizer (Color 1 in the sequence)
b) then the applique is stitched onto the front circle (Colors 3 and 4 in the sequence)
c) then the back circle is attached and the satin stitch is completed Color 2 in the sequence)
This may seem complicated, but each design has only four colors, so it is quite easy to advance your machine to the correct color in the steps below and complete the stitches. Please follow the instructions below carefully.
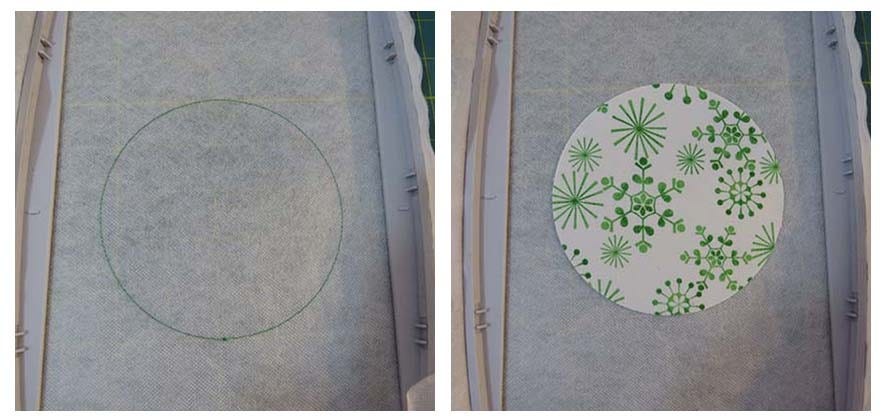
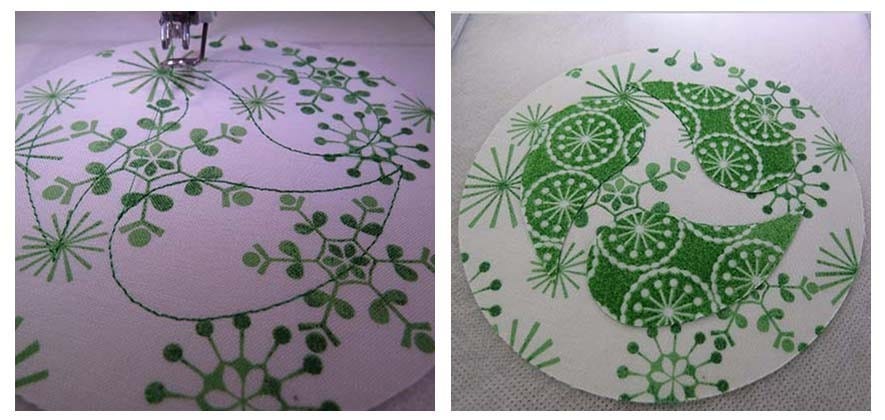
Step 1 (Color 1): Stitch the placement line (Color 1) for the circle onto the hooped stabilizer. Remove the hoop from the machine and adhere the cut circle for the front of the ornament onto the placement stitches. Mount the hoop back onto the machine.
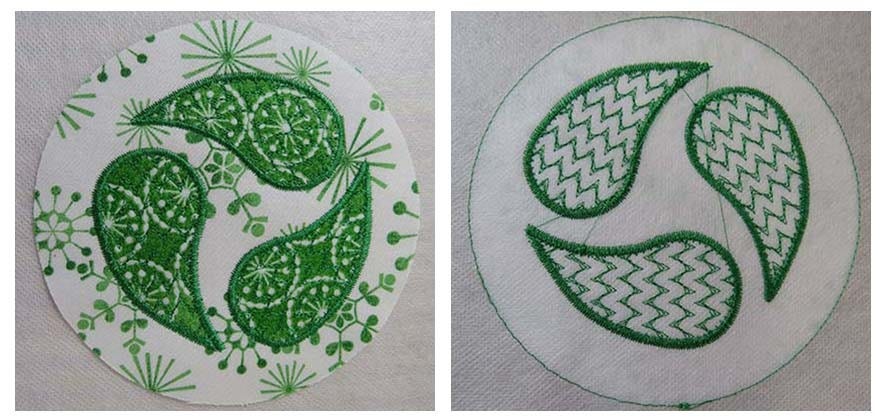
Step 2 (Advance to Color 3 in the embroidery stitch sequence): Stitch the placement line (Color 3) for the applique. Remove the hoop from the machine and adhere the applique shape just inside or on top of the placement lines. Mount hoop back onto the machine.
Step 3 (Advance to Color 4 in the embroidery): Complete the decorative cover stitches for the applique. When this is finished, your machine will tell you the embroidery is finished. But you still need to add the fabric circle to the back of the ornament, add the ribbon to use as a hanger, and to stitch the satin stitches around the ornament.
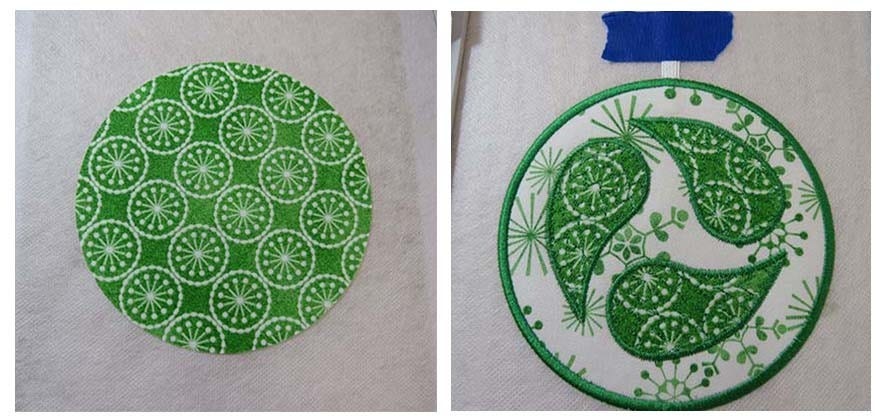
Step 4 (Advance to Color 2 in the embroidery): Remove hoop from the machine. Remove the paper from the fusible on the back circle. With the back side of the embroidery hoop facing you, place the circle just over the placement lines that were stitched in Step 1. This will make a solid fabric cover over the applique stitches. Turn the hoop over so the applique is facing you and press gently but firmly so that the circle on the bottom is firmly adhered to the stabilizer. At the very top of the circle, pull the top circle back slightly, place a folded ribbon underneath the circle and press to secure the ribbon between the circle and the stabilizer. You can use Painter's tape or other tape to secure the ends of the ribbon out of the way of the stitching. Take the hoop to the machine and stitch Color 2—the tackdown and satin stitches. The tackdown stitches are a light zigzag and will secure the two circles together while the decorative satin stitches are completed.
Step 5: Remove water soluble stabilizer and complete the ornament.
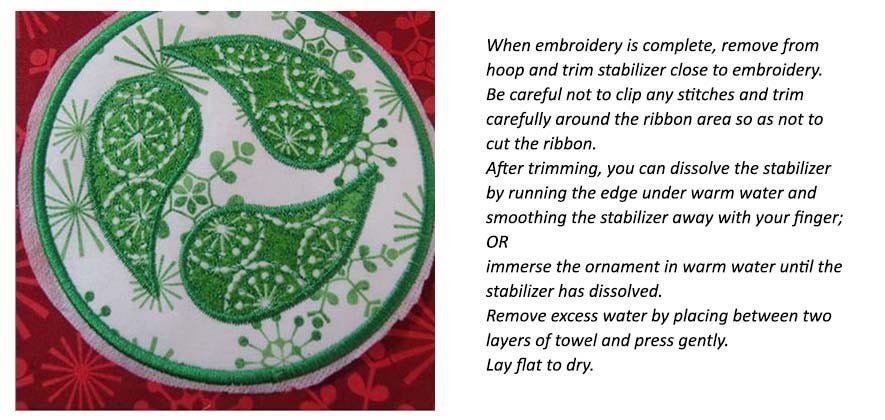
Step 6: Press and Finish the ornament.
When your ornament is dry, it will seem a little "warped" because of the layers and stitching. Use a hot iron and pressing pad and cloth to press the ornament. Be sure to turn the ornament so that the front is facing the pressing pad and the pressing cloth completely covers the ornament. Use steam or a slight spritz of water and press holding iron over the ornament until it is flat and ready to use. Press ribbon if needed.
Enjoy and have fun with some of the options below!
1. Use felt rather than fabric for the circles. Felt will not require the interfacing, but does quite well with the fusible for holding the shape in place while stitching.
2. Try hot fix crystals for embellishing your ornaments.
3. Use a plain fabric back circle and fabric marker to write a special holiday message to the recipient.
4. Use Glitterflex vinyl instead of fabric for the shapes.
5. Try other machine embroidery designs. Look for designs that have a satin stitch edge and have a simple outer edge shape like the circle. The tree on the Holiday Medley die would work well.