

Quilt Project Planning
I began my quilting journey in 2015 and my love of quilting continues to grow. At this point, it is a GIANT part of my daily life. Due to that, I tend to have more than one quilt in progress at a time. Now, we won’t even begin to speak of the UFOs (unfinished objects) that pile up as a side effect of almost every workshop that I attend! To help avoid confusion, let's say we are discussing WIPs (works in progress).
At this point in my quilting journey, many of the projects I take on are brand affiliate projects that I can plan ahead for. Examples of my projects are quilt-alongs, in which I need to complete a block (or a few blocks) at a specific time within the project timeline. Some of them last for a month, a few weeks, or even a full year.
Since I love the ease and accuracy of using my AccuQuilt GO! Fabric Cutting System, I have over 100 dies. My planning process for each project includes analyzing which dies I will need and cutting out all the blocks for the project. If I don’t already have what I need, of course, I order more dies from AccuQuilt!
.jpg)
As a part of the planning process, I read through all the project instructions and begin converting the rotary cutting instructions into die-cutting instructions. In order to do this, I look for the finished piece sizes.
The pattern instructions will require something like cutting 2 7/8” squares, sewing a diagonal line and cutting the excess, and leaving 1/4” from the sewn line. However, if you keep reading, after trimming the blocks down, it will say something like, “Your finished block should be 2 1/2 inches” and then something like “Create 4.”
This would mean that I can use one of my 2 1/2” half square triangle dies, sub-cut the fabric to the size of the die, place both fabrics over the dies with right sides facing up, and cutting the number of finished blocks required by the pattern.
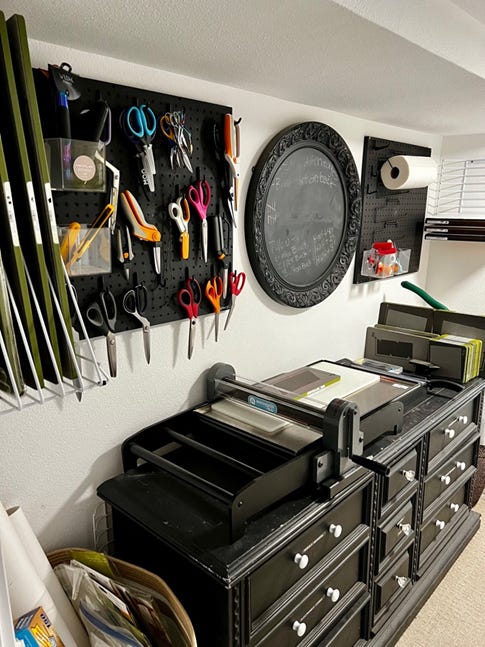
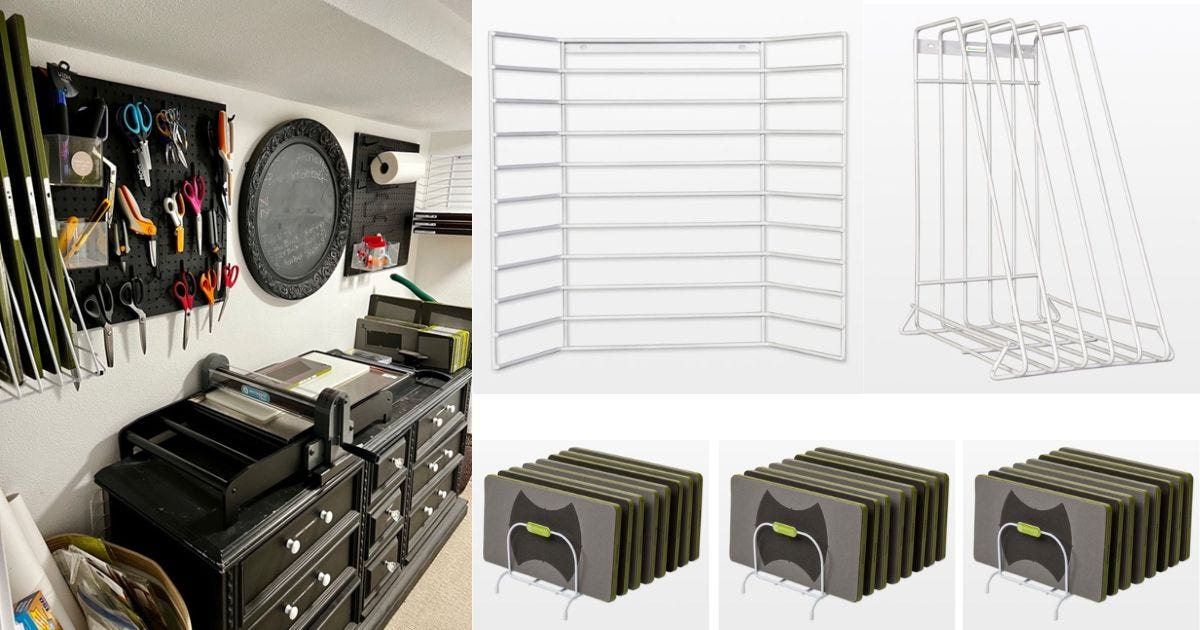
The next thing I do is remove the dies from their long-term storage on my shelves and move them closer to my fabric cutter. Since I own a Studio Fabric Cutter, I have a dedicated space in the hallway leading to my sewing space. My sewing space is downstairs in our daylight basement. In the hallway leading here, there is a small section that was perfect for a low, narrow dresser as a little station to use for all my cutting needs.
I have a couple of pegboards hanging on the wall, to store all my scissors, rotary cutters, and paper towels. I also have a round chalkboard that I use for quick notes. To the right of my cutting dresser, I have a large woven basket that I use to hold all my GO! Cutting Mats.
Since I also like to sew garments from time to time, I have another woven basket to the left of my cutting dresser to hold rolls of pattern paper, freezer paper, tracing paper, etc. I also keep all the original plastic wrappers for my dies, so I keep them in this basket until the dies are ready to go back to their long-term storage on my shelves.
A More Organized Die Storage Space
Typically, as I worked through projects, I started to stack dies (vertically of course) next to my fabric cutter.

Now, enter AccuQuilt Die Storage Solutions! There are multiple options based on your die sizes, and one option which is great for almost all die sizes.
I found the perfect location (above the dresser) on either side of the pegboards to hang a couple of storage racks. On one side, I hung a Wire Storage Rack - Holds 10 Studio Extra Long Cut Dies, and on the other, I hung a Wire Storage Rack - Holds 5 GO! Strip Cutters, GO! Big Dies or Studio G, SG or SLC Dies.
The strip die size is great to keep the most common strip dies I use for quilt binding and bias tape, my 2 1/2” strip die and my 2 1/4” strip die. That leaves me with three spaces for other GO! Big Dies that I want to keep in rotation.
The GO! Die Storage Rack is perfect to place on top, at the far end of the dresser. I use it to store all of the smaller dies I tend to use frequently, like my GO! Half Square Triangle-3" Finished Square Die. I use this die often to miter the ends of my binding - as Pam does in her awesome YouTube tutorial on creating mitered corners.
At the end of my quilt along or whatever the project may be, I return the die to its plastic sleeve and cardstock cover to keep it protected. Then, I place it back on the shelf, with the label facing outward so that I can easily find it again when it’s time for the next project that needs it.
While I’m in the midst of completing multiple projects, I always have my storage racks handy to keep the most needed dies next to my fabric cutter - ready for me to use!

GO! Organize Your Sewing/Quilting Space
Quilting and sewing spaces can easily become cluttered due to all of the necessary materials. Like Kimberly, you can keep your storage area for quilting and sewing supplies neat and organized by using AccuQuilt Die & Storage boxes, racks, totes, and cabinets.
Using these organizational methods, you can save time and quilt more.


