
Feature photo by GO! Getter Lori J. Miller of @lorimillerdesigns
How to Organize Your Sewing Room
-
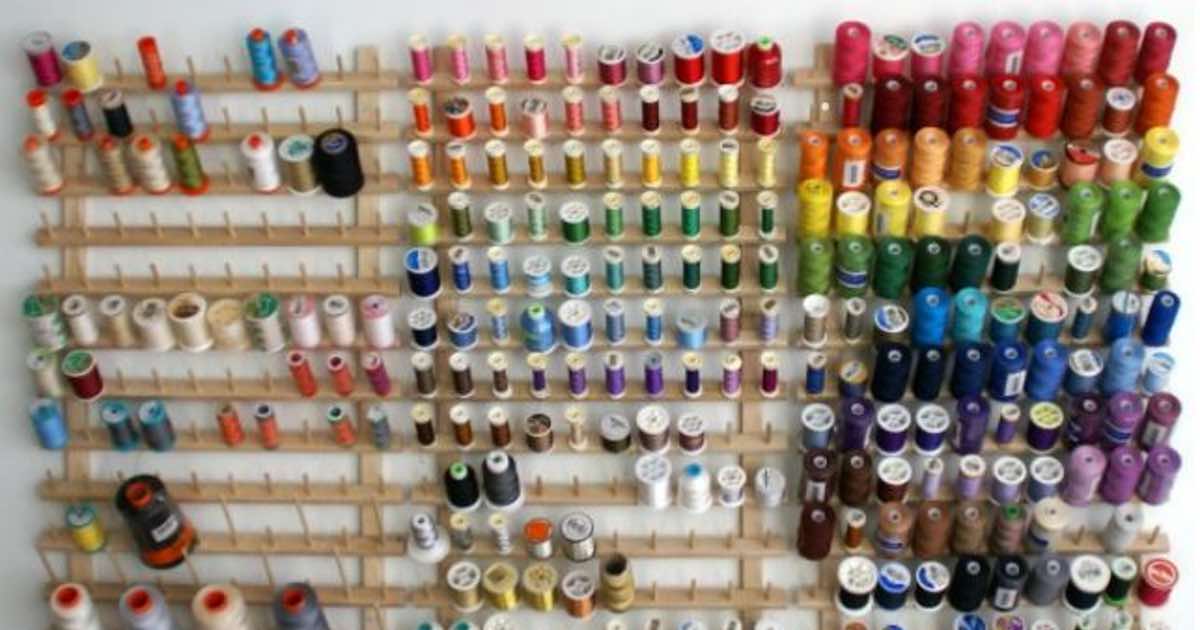
Organize your thread.
Quickly organize your thread by treating yourself to a wooden thread rack. Sort your thread by color so you can quickly find the thread for your next project.
If you have a lot of different types of thread, you can use separate racks (or one large one) to keep them separate. One rack can be for piecing, one for machine embroidery spools, and another for machine quilting thread.
-
Take a die inventory.
Many AccuQuilt users keep a spreadsheet and/or use AccuQuilt’s free app to keep tabs on their dies. By using a spreadsheet, you can easily store notes or personalized data on each die and sort your collection in any way you want.
Using the app will help you track your dies too! Items that are ordered when you are logged in will automatically be added to your list; however, you can add anything you have purchased from local retailers or received as gifts as well!

You’re ready to start organizing those dies once everything is in your app.
Pro Tip: Having all your dies in the app means that you have your inventory on hand whenever you visit the quilt store or retailer. This comes in handy when you see a new fabric you love, but don’t have a project for…yet!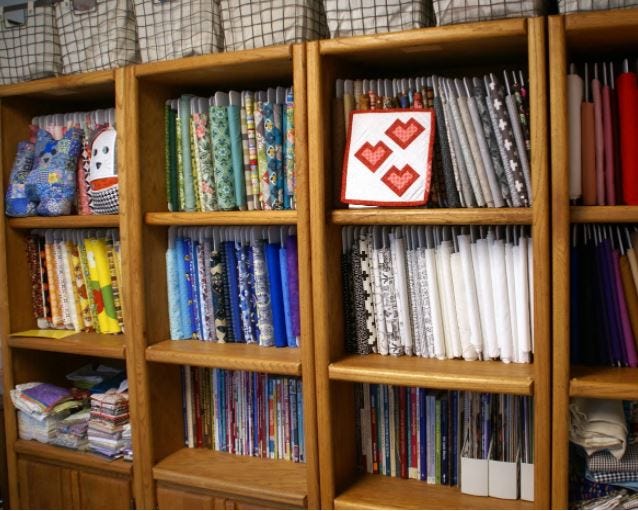
Photo by GO! Getter Lori J. Miller of @lorimillerdesigns
-
Organize your fabric.
People like to organize their fabric in different ways, and it just depends on what kind of space you are working with. One option is to use shelving. You can organize your mini bolts and precuts on shelves (and by color or theme).
Pro Tip: Another great feature of this solution is that you can also store your books and magazines here (or use magazine holders). Shelving is a great way to organize and maximize your space!
Pro Tip: Large pieces of fabric, a yard or more, can be kept on poster board then stored in large cabinets. Stack them (by color, of course) like books on a shelf. Then, you can easily view and select the fabric you need for any project.
Another popular option is to store your fabric in totes. We recommend that you use clear totes if you use this method. Using clear totes allows you to easily spot what you are looking for without having to dig through each tote. Or label them with a colored sticker that matches the fabric inside.Pro Tip: You can use clear totes to organize your thread/yarn by color too!
.jpg)
-
Store and organize your dies.
Once you have your die inventory done, you can move right along into organizing your workspace for your projects! AccuQuilt has some great options for storing your cutters and dies.
You can keep your sewing area organized and your dies within reach with AccuQuilt’s GO! 6” x 6”, 6” x 12”, or 10” x 10” Die Storages. These GO! Die storage systems fit perfectly on a shelf or counter and keep everything smartly organized and protected from accidental damage.
They come with labels so you can quickly identify the contents and they are compact! That means you can easily stack them on any shelf or counter to maximize your space.
You also have some other options, such as a wire storage rack, which can hold up to five GO! Strip Cutters, GO! Big Dies, or Studio G, SG, or SLC Dies! There’s also the compact GO! Die Storage Rack. This storage rack will help you keep up to eight GO! Fabric Cutter dies and mats neatly organized.

If you’re looking for a nice workspace and storage solution, then AccuQuilt also offers the perfect solution for you: the GO! Quilt Block Center Cutting Cabinet.
This is my personal favorite because of all of the features it offers. First, the cutting cabinet will be delivered to you fully assembled - so you don’t have to fuss over putting it together.
That’s always a huge benefit for me! Nobody likes being bent over instructions. Plus, I find that assembling things is getting more challenging after hurting my back.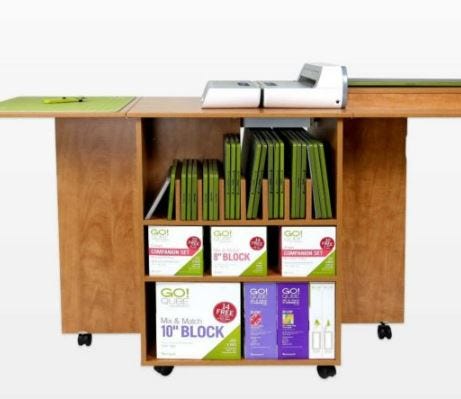
Another great feature is it has plenty of workspace for your GO! or GO! Big fabric cutter and it comes with an extension shelf that will support your dies as they exit the cutter. There’s even enough space to set up a pre-cutting area when you extend the drop leaves! Living in a small house, I need to maximize my space - so this feature is fantastic!
The cabinet also easily stores your collection of GO! Qubes and Companion Sets and has enough room over 30 GO! dies. This is one of the best ways to store, organize and work with AccuQuilt dies and cutters!
And, if you’re like me, you will want this cabinet to match your other furniture. So, you’ll be happy to know that you can choose from three different finishes to match your decor!
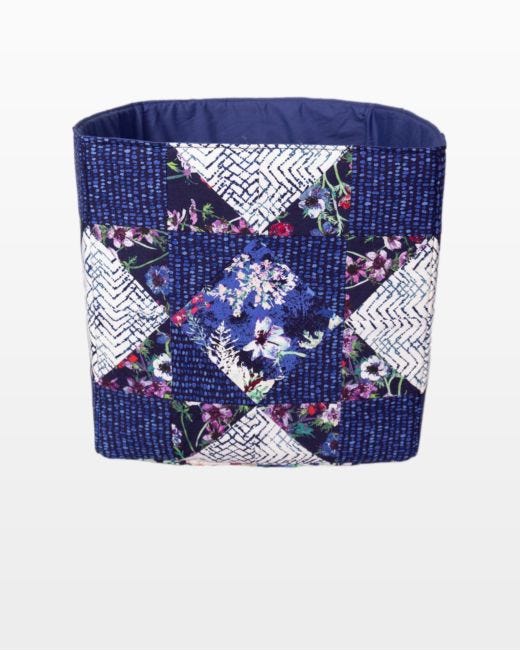
Pro Tip: The GO! Nesting Cubes pattern will take your organization to the next level! These little storage cubes are great for storing fabric scraps, GO! Dies, and other quilting necessities. Plus, they are fast projects to make and could even be made as a gift. Use the GO! Qube Mix & Match 12" Block to make these! They come in three sizes: 12 inches, 9 inches, and 6 inches.
Watch GO! Getter, Carolina Moore, Show You How: -
Label your craft totes.
If you have a lot of storage totes, then remembering where everything is can get a bit tricky. It can be helpful to label them with their contents (whether you use clear totes or not).
There are two popular methods. One is to tape a list onto the outside of each tote that lists all of its contents. Another option is to include a list of special items that you know that you will go looking for in the future.
-
Organize your scraps.
When you use as much fabric as we do, you know that there’s going to be a ton of scraps that will need a home until you’re ready to use them again. So, we’ve compiled a list of clever ways you can store your scraps to get you started on your scrap organization journey!
Prepare Scraps- Cut Scraps: Use your favorite AccuQuilt die to quickly cut your scraps into useable sizes and shapes.
Expert Quilter Scrap Cutting Die Recommendations
Pam, AccuQuilt’s Cutting Expert, recommends using the GO! Log Cabin. It’s her go-to die because it makes a variety of sizes of strips that she then places into sealable bags until she’s ready to use them. Her second favorite die of choice is the half-square triangle (HST). AccuQuilt has an assortment of half-square triangle die sizes to choose from. You can also find them in the GO! Qube Mix & Match Block sets as shape #3 (large HST) and #5 (small HST).
Erica, AccuQuilt’s Corporate Marketing Specialist, likes to use the GO! Square 5” Die, GO! Strip Cutter 2 1/2”, GO! Big Electric Square 10” Die, GO! Log Cabin, GO! Tumbler Die, and the GO! Qube English Paper Piecing – 1” Finished Sides.
Karen, AccuQuilt’s Director of Marketing and 25-year Quilter, says that she really likes using the GO! Qube English Paper Piecing hexagon, which is shape #1 (fabric) and shape #2 (paper), to neatly cut up her “teeny” scraps.
- Sort your scraps: Once your scraps are all cut down you can then separate them by size and color. This will help you when you move on to organizing them for later use.
- Iron: If you find that your scraps were folded up in weird positions from being stored improperly for too long, then you might want to opt into ironing them before placing them in their new home. This will make starting your next project that much easier.
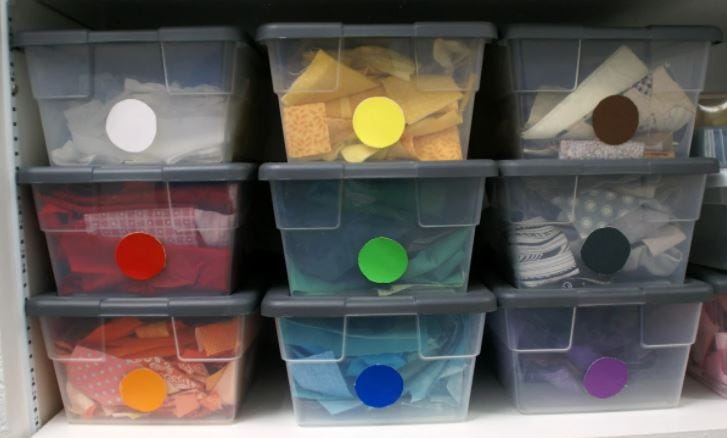
Photo by GO! Getter Lori J. Miller of @lorimillerdesignsOrganize Your Scraps
- Store your scraps in labeled or clear boxes.
Pro Tip: Protect your scraps from dust by ensuring they are covered. Also, keep them away from light. Fabric will fade when exposed to light sources so keep this in mind when storing. If you have a window that will expose your containers to sunlight, then you may want to use solid containers as opposed to clear ones.
- If you’re low on space, you can use a shoe organizer that hangs on a door. They often use mesh or plastic to hold your shoes, but you can instead fill each one with different scraps. Hang it on the inside of a closet door to protect them from light.
Pro Tip: Another great space-saving option is to use under-the-bed storage for your scraps and other fabric.
- Use Pam’s idea and organize your scraps by color and shape and place them neatly into sealable plastic bags. Then, store them in a solid color storage container to prevent any fading from light exposure.
- Repurpose furniture to store your scraps. You can use a dresser, bookcase, filing cabinet, shelves, etc. You’re only limited by your imagination here. Create sections in drawers using wood or pieces of cardboard. Get creative and find your own personal solutions.
Pro Tip: If you choose to separate any of your fabric using cardboard, then make sure you cover the cardboard with contact paper so that it does not bleed into your fabric and cause discoloration.
- Get creative and get stackable containers to stay organized.
Pro Tip: Use clear plastic shoe boxes to separate and store your scraps by color. They will be big enough to hold a lot of scraps but also save precious space.
Pro Tip: These storage ideas can be used for all kinds of art mediums.
Pro Tip: Use the Nesting Cubes pattern we suggested in idea #4 to store your scraps until you are ready to cut them down into manageable sizes.
Photo by GO! Getter Lori J. Miller of @lorimillerdesigns -
Sort your buttons.
If you own a lot of buttons (like a lot of us do) but have a hard time finding the right ones for your project, then it might be time to organize. Of course, I’m going to suggest you do so by color (there seems to be a theme in this blog post!).
Pick up some cute jars (if you don’t have some lying around), and fill them by color. Place them onto a cute shelf or tabletop for easy access. It’ll make it easier to find the button(s) you need, and it doubles as a cute decoration!
Organize Your Sewing Space
There are so many ways to organize your space that we didn't even mention!
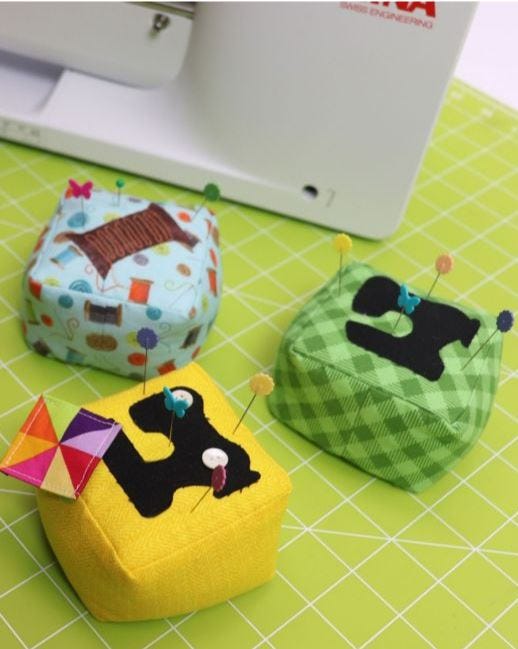
You could DIY a pincushion, put your ribbon on mini bolts to save drawer space, use a bowl cozy as a decorative holder, or even store your patterns in a 3-ring binder!
The time is always right to organize your space so you can work on your craft(s).
Let us know your favorite storage and organization hacks in the comments!


