
Let’s come clean: There is no consensus on washing quilts. Whether to wash them, how to wash them… There are, however, some things to consider that might help guide you the next time you find a hacked-up fur ball on your beloved creation, or discover that your brilliantly placed wall hanging has been a landing zone for kitchen-grease-laced dust all these years.
And if the quilt in question is antique or vintage? That’s a whole ‘nother bottle of soap, sister. Let’s dispense with this category of quilts first: Don’t wash antique quilts. Just don’t. Stop thinking of them as in need of cleaning. Love them as they are, warts and all. If you’ve inherited or purchased something that kicks up your allergies and must be dealt with to stay in your life, you might try the flat chlorophyll treatment (below). Safest bet: Consult a textile specialist or conservationist. The American Institute for Conservation, 1717 K St. NW, Suite 200, Washington, DC, 20006 can give you a list of professional conservators in your area. For newer quilts, read on.
Before the Before
Right off the bat(t) – ha – you should read what Ask Linda has to say about whether or not to wash fabric before using it. Bear in mind that if you shop yard sales or silent auctions or inherit someone’s stash, you’ll need to use her tips to determine whether your “new to you” fabric has been washed or not. Do this before you do anything else cleaning-wise.
If you did choose to wash fabric before using it, you don’t have to worry as much about colors bleeding in your completed quilt, but remember: Fabric is infused with dye and even when dye is colorfast it can continue to fade and bleed over the lifetime of the textile.
Will it? Well, that depends on so many variables, no one can say for sure. Don’t be disappointed if your washed fabric misbehaves when you wash the finished quilt. Washing the fabric before making the quilt provides some protection, but don’t set yourself up for disappointment. See below for testing before wet cleaning. Also: Don’t forget that thread is a dyed product, as are some washable embellishments such as lace and ribbon.
Note: Do not ever, ever, ever, dry clean a quilt. That is, don’t take it to the cleaners who “dry clean” your clothes with fiber-damaging chemicals and solvents (which actually are wet). The cleaning methods discussed here are literally dry (preferred) and wet (last resort), but to avoid confusing you in any way about what “dry cleaning” is for quilts, I’m using the term “not-wet.”
Redefining A “Clean” Quilt
Are you sitting down? Unless you sewed your quilt in a hermetically sealed environment, it’s not clean, even when just finished. Dust, dander, dirt, hair – yours and your pet’s -- dead skin, pollen, lint (the fabric, batting and thread of the very quilt are some of the villains here!) – they’re all in there, embedded, even, in the layers. So is tobacco smoke, kitchen fumes, grease, mold and mildew spores, the lawn mower exhaust from that glorious day you spent quilting on the deck while hubby mowed... (Blecch! Why is it again we make quilts?!) Just how much of this “natural environment” must be eradicated from your three-layer textile depends on who will receive it and what it will be used for.
If this quilt is going on your own bed or wall, you’re probably good with it as is – you may have allergies to all that stuff that’s in there but by now you’re most likely used to it, so you’re OK without washing it. If your creation is going to another home, you probably need to make some effort to spruce it up a bit. See below for not-wet cleaning methods.
Maybe you spilled some of the beverage of your choice on the quilt during construction. Congratulations on not committing Hara-kiri, but no matter who will receive the quilt, now what do you do? Is this quilt going to a baby or toddler? See below for wet cleaning suggestions.
Keeping Quilts Clean in the First Place
During Construction
Go ahead and start sending the bashy emails: The best way to keep your quilts as clean as possible for as long as possible is to keep your pets far, far away from every step of construction. I know you love them! Half the Internet would disappear without Cute Pets Curled Up On Fabric Photos!
But quilters, quilters: All dirt is a magnet for other dirt, and pet hair and dander are no exceptions. Plus, pet hair, when embedded in the weave of fabric, is very hard to completely remove no matter how much you vacuum a finished quilt. Just don’t let the critters curl up on your stash, your partially completed blocks, your ironing board, the huge floor-dragging tail of your basted quilt in your hand-quilting hoop, the loaded quilt on your longarm – Just. Don’t. Let. Them.
And keep the floor beneath your enormous floor-dragging quilt squeaky clean if you, like me, have to haul your hand quilting hoop from one place to another. You’re making your future life easier if you do this.
If you cut the backing generously, once the layers are basted you can wrap the excess fabric over the outer border of your quilt’s front and tack it down, whether you hand or machine quilt. The wrap will get dirty, but it will be cut off once the quilting is completed and you’re read to bind.
Upon Use
For bed quilts: A nifty trick to keep the edges of your finished bed quilt clean is to use a top sheet underneath it. When you make the bed, be sure there is a generous fold-over of top sheet to cover the quilt’s edge as you sleep to protect it from facial oils and beard roughing-up. If your design is such that any edge can be at the head of the bed, this works great; rotate the quilt every week or so so that all edges receive this treatment.
If your design or the quilt size is one-way-only, baste or pin a chin guard along the top edge. This single layer piece of fabric can be a lovely design element to your quilt, just one that you remove and launder from time to time so you don’t have to wash the entire quilt because one edge gets grimy.
Large dog owners may wish to provide additional protection for the drop of the quilt if Fido likes to rub against the bed (I speak from experience). Just pin some washable fabric where the offending activity occurs. Dog muzzle mush is icky in so many (beloved, perhaps) ways – and it’s a nightmare to clean. Prevent it in the first place. Or retrain your dog.
If your pets are allowed on the bed, use a top sheet over the bed to protect the quilt when they are around -- but then what’s the point of making a beautiful quilt in the first place if you have to cover and pin and agonize over their mere presence near your quilt? (Remember – this section is about how to completely avoid needing to clean your quilt in the first place. I love pets, I really do.)
When you store your quilt, to really avoid ever needing to launder it, place it in an acid-free box. If it’s just on a shelf in a closet or displayed somehow for all to see, it’s going to get dusty and you’re consigned to having to clean it using a non-wet method sooner or later.
For throws: Keep the pets off and rotate which edge meets face or hands (oil meets dirt, gets married to the surface, unless you keep interrupting their rendezvous). Shake the dust out occasionally.
If Cleaning Is Required

Let’s say you’ve come to terms with how you handled the fabric in your newly completed quilt. Or one you finished a few years ago and have loved and used. Or your entire home is pet-and-kid friendly and your philosophy of life is, “Use it and love it and if it needs to be cleaned, then, OK! Clean it!” Now it’s time To Wash Or Not To Wash The Quilt.
First Consideration: Why do you want to wash the quilt?
Is it: Stained (unknown origin)? Stained (origin known -- “I saw that! Come back here you…!”)? Smelly? Muddy? Musty? Dusty? Hairy? (Sounding like the Seven Dwarfs here…)
Second Consideration: Is the entire quilt affected or just a spot or two?
If the whole quilt needs help, step to one side for a minute. If you’re only dealing with a spot or small area, think of the quilt as upholstery; you wouldn’t clean a whole sofa if degrimming the arms would do the trick. Try spot cleaning, going from the gentle steps described below up to stronger measures. Stop when you reach the desired result.
If the whole quilt needs help, you will too. Whether you’re dealing with dry issues or wet issues (see below), having one or two other people around to help you lift, move, arrange, vacuum, drape, rinse, etc., will be most welcome. Plan on giving your helpers a nice present – like chocolate – as a thank you.
Third consideration: (This is the biggie.) Does your quilt have dry issues or wet issues?
Dry issues are those that can be resolved by airing out the quilt or vacuuming it. If your quilt has been stained or the victim of some sort of unholy mess, you might be tempted to instantly think “wet clean,” but give dry methods or dry methods-plus-wet-spot-cleaning a chance.
If you’re sure wet cleaning is required, test for colorfastness: Moisten a cotton swab with distilled water and test a small area of fabric like what has been damaged to see if the color(s) bleed. Alternatively, spritz a sample area of multiple fabrics and blot dry with a white paper towel or cloth to check for dye fastness if you don’t know whether or not all of the fabrics have been prewashed.
If the colors bleed, stop thinking that your quilt can be successfully returned to its former cleaner condition. It can’t. Wet cleaning it will make colors run and fade. Live with the stain.
For Dry Issues
Indoors
- Vacuum the quilt. Do this properly, using an up-and-down motion with the soft brush attachment – do not drag the vacuum hose end across the textile. Place an air filter or screen across the quilt to prevent strain on the fabric fibers and threads and to protect any embellishments.
- Air fluff the quilt in the dryer. Great move for a pretty clean quilt going to another home. Avoid fabric softener sheets; they aren’t good for the environment and may leave residues behind that attract future dust and dirt. Eewww. If you’d like your quilt to have a scent, consider using a light mist of an essential oil mixture. (But this isn’t a good idea, really. Oil. Think about it.)
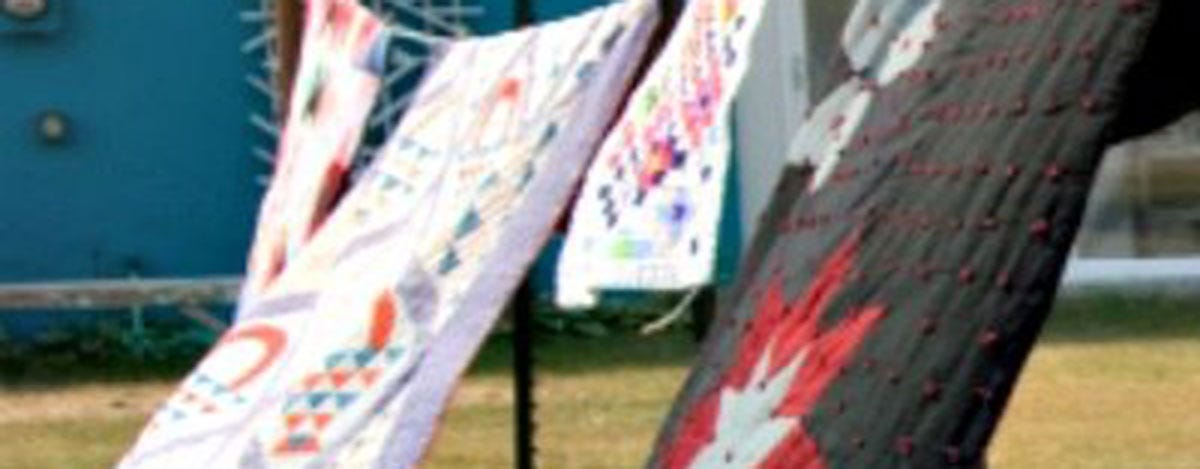
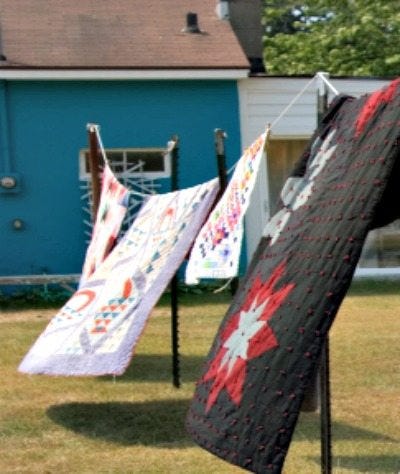
Outdoors*
*Watch the weather, people! A still or very light breeze, low humidity day is de rigeur. Use common sense and avoid pollen season.
- Shake out the quilt. This is so hard because quilts are so heavy – you will need help and please, please watch which way the wind is blowing. A balcony will make this easier, but don’t drop the quilt! You have no idea where that ground below has been.
- Hang or drape it outside to air. Avoid hanging the quilt over a thin rope like a clothesline; the width of a deck rail or fence will put less stress on the quilt.
- Do not beat the quilt, no matter how much you feel like it. Take a chill pill instead. Beating just drives dirt and dust further into the fibers.
- Give your quilt the flat chlorophyll treatment. This is my favorite quilt refreshment technique (it does not clean, per se): On a clear day when the grass is lightly damp (usually this means morning), place a clean dry bed sheet flat on the ground. Lay the quilt flat on the sheet. Cover the quilt with another clean dry bed sheet. Let these layers absorb the freshening power of the grass’s chlorophyll. You will be amazed when you pull up the sheet, quilt, and bottom sheet late in the day. If the quilt feels the least bit damp, use two different clean dry sheets and repeat the layering process (flat, please) somewhere inside your house, preferably with fans moving the air, until the quilt has dried out completely.
For Wet Issues
If you’re sure you want to wet clean your quilt, see above for colorfast testing before your dive in. At least you’ll be more informed about the safety/danger of your next move. At most, this test might change your mind about wet cleaning and send you back to dry methods.
The big exception to the caution against machine washing are baby quilts. They were meant to be loved and used until they fall apart, so go for broke with those. Hygiene rules over posterity.
There is but one truly safe wet-cleaning technique – hand soaking in a tub. Do not use the washing machine unless you’re prepared to repair torn or mangled areas or requilt places where the thread(s) have been pulled out. The single best way to machine wash a quilt is to have used perfect construction techniques in the first place.
In an ideal world you would fill a tub twice the size of your quilt with distilled water; a conservationist would use non-ionic water. You would not use soap at all in the hope that water alone, a powerful solvent in its own right, would float the offending dust and dirt and stains into the water and then be drained away. If soap must be called for, use Orvus®, and as little as possible, because you will be rinsing this quilt repeatedly and it is hard, heavy, time-consuming work.
Seriously, get one or two friends to be with you to lift the quilt out of the water – it will be very heavy and in its weakest state – drain the tub, and then put the quilt back in the empty tub, pressing out as much water as you can. Do not wring or twist! Threads will tear, fibers will stretch, patches will rip, irreparable damage will be done. Rinse repeatedly until the draining water is clear. You will be exhausted and owe your friends a lot.
(Note: There are quilt experts who think that machines are actually easier on quilts than people’s hands and the tub method. If you choose to use your washing machine, select the most gentle options available for soaking, rinsing and spinning; avoid any kind of agitation. A heavy wet quilt in your dryer can cause damage to the drum’s balance as well as ruin the quilt; lay it flat to dry as described below.)
Place the pressed-damp quilt flat on a clean sheet in a room loaded with fans to circulate the air and dry the quilt in as few days as possible.
One Final Word
Quilt labels are wonderful; every quilt needs one. Just don’t trust permanent ink to hold up for generations or to be colorfast. Although thread dye can fade and wash out over time, the stitching will remain, so stitch your labels as well as inking them.
by Andi Reynolds
Following almost five years as the executive book editor for the American Quilter’s Society, Andi Reynolds retired and has resumed the freelance life. She spends her time writing, quilting, cooking, and obeying the commands of her large dogs Lucky and Mousse. Her husband Dennis is the beloved co-leader of the pack. They live in Paducah, Kentucky.
![]()


