
A Bubbles Quilt By Heidi Pridemore and The Whimsical Workshop
This month’s project was made using the AccuQuilt GO! Local Color die #55452 and Atlas collection from Windham Fabrics.
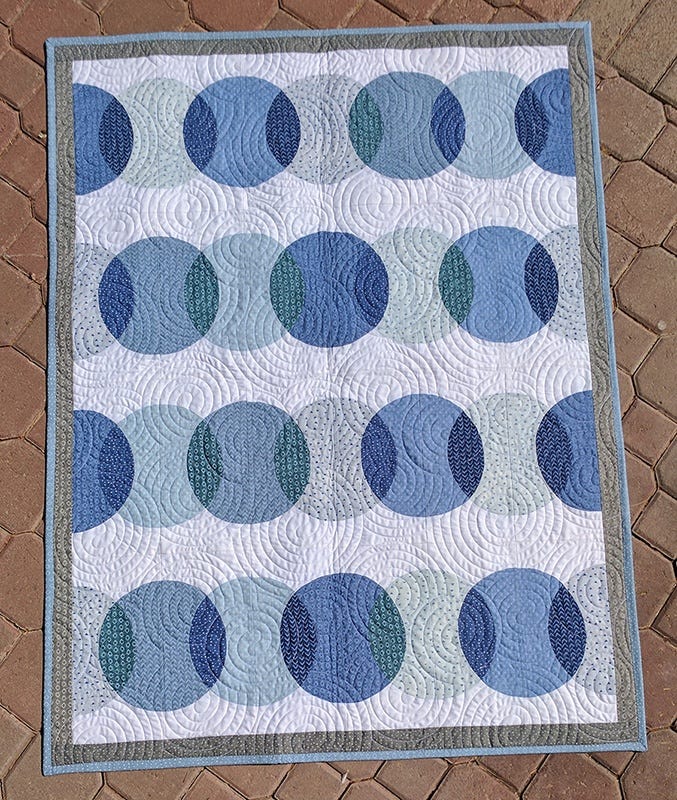
Bubbles Quilt
39” x 51”
Designed and made by Heidi Pridemore
Quilted by Monica Croom
The secret to this project to have a nice balance of values and this group fit the bill. The Atlas collection has the perfect combination of light blues, medium blues and dark blues for this lovely quilt. The GO! Local Color die is great for cutting accurate curved pieces so the pieces of the quilt just pop together.
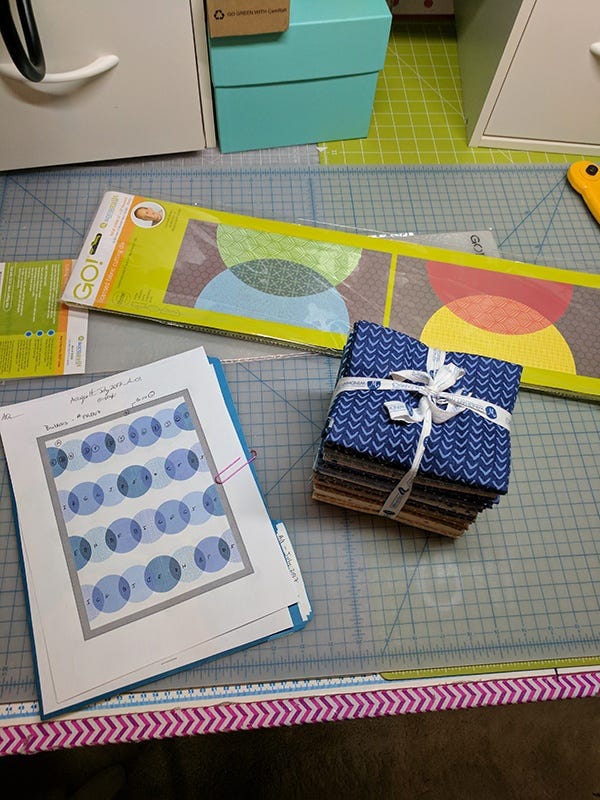
For the project, I used a fat quarter bundle of the Atlas collection from Windham Fabrics along with bright white for the background. I found the instructions on the package for the Local Color Die extremely helpful. So, I recommend referring to these instructions along with our free pattern to cut the listed number of pieces for the project.
The pattern for this month’s project is free from The Whimsical Workshop. You can download the free pattern at www.TheWhimsicalWorkshop.com along with our past free patterns. We have also included traditional cutting instructions for this project in the pattern too.
Next up, is to lay out out the blocks. You can treat this as a scrappy quilt and randomly lay out the blocks or you can plan your top. If you decide to plan the quilt, I recommend a design wall to help with this. I kept things organized by sewing all the light pieces to the background pieces and all the medium blue pieces to the dark blue pieces.
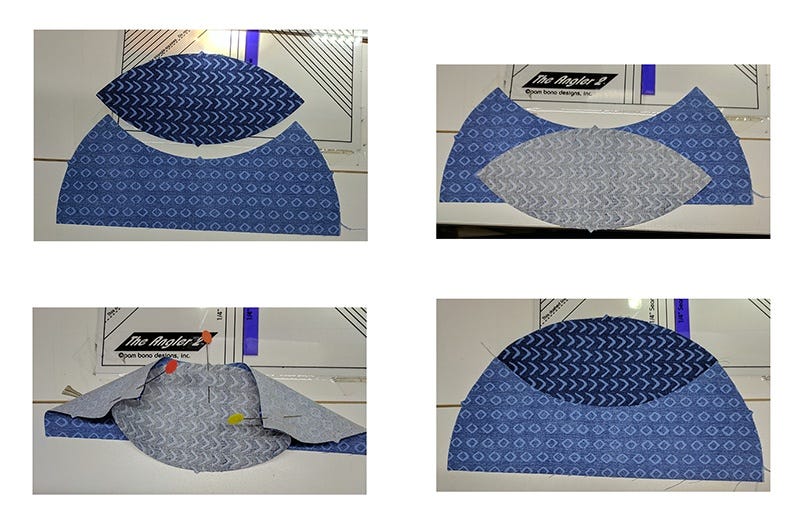
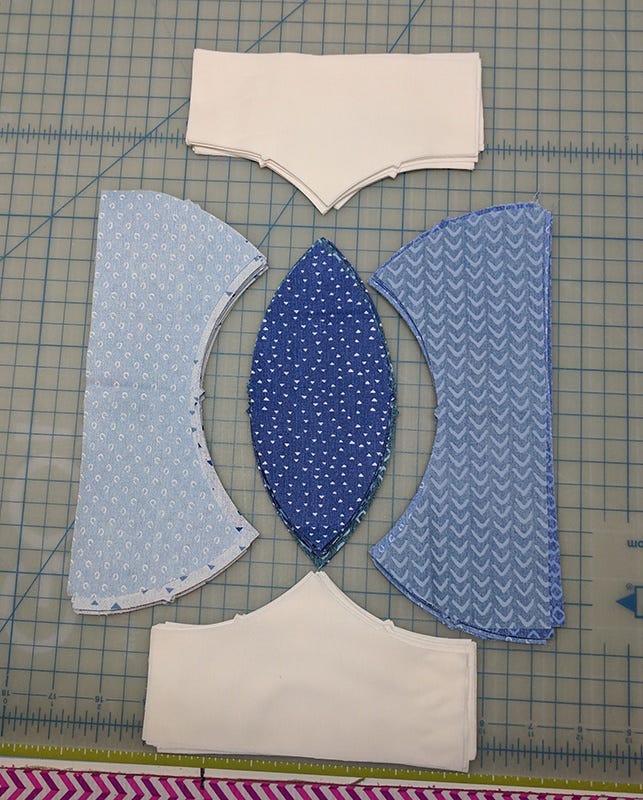
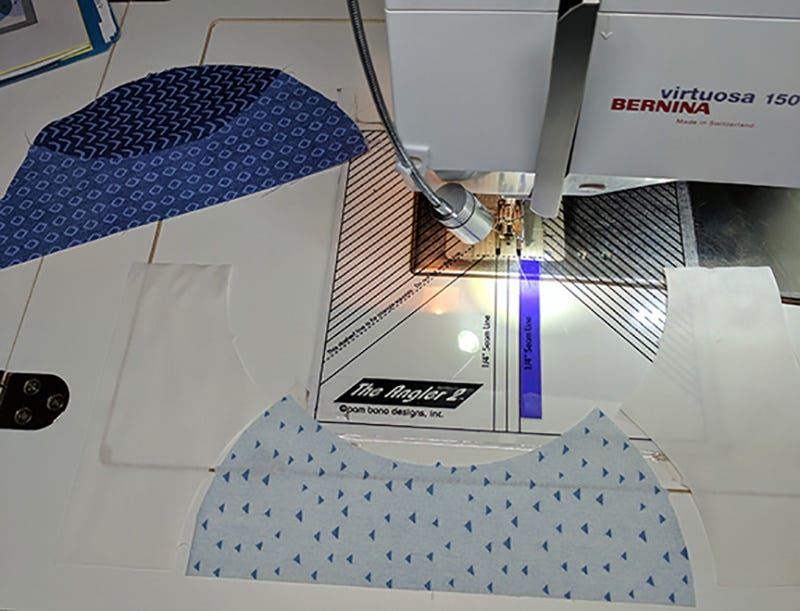
Once you have your pieces cut out, it is time to start sewing curves. While most of the time I dread sewing curves, when I know the pieces have been die cut, I stop worrying about it because the pieces are so accurate and each piece has a little triangle that you can use to align the pieces.
Above I show you how I aligned, pinned and sewed the medium blue piece to the dark piece. Start by aligning the little triangles on the two pieces and pin them together. Then I aligned each end and pinned in place.
I recommend always putting the dark blue piece on the bottom and curve the medium blue piece in place as you sew.
Next up, is to sew one background piece to each end of a light blue piece. Place the Light Blue piece on the bottom when sewing.
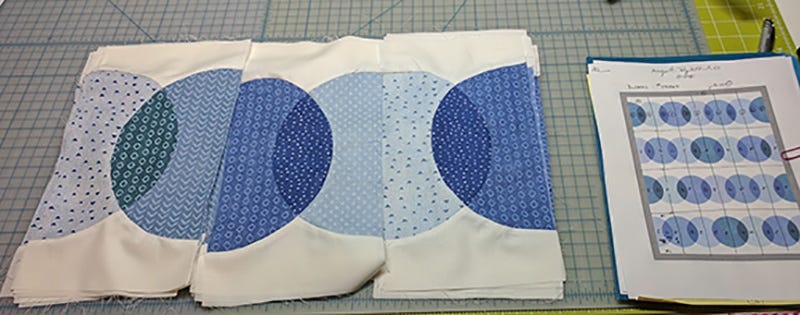
Once the blocks are all sewn, it is time to lay out the blocks. To create the illusion, make sure to match up the Medium Blues on each block or light blues in each block. For my sample I also matched the fabrics together.
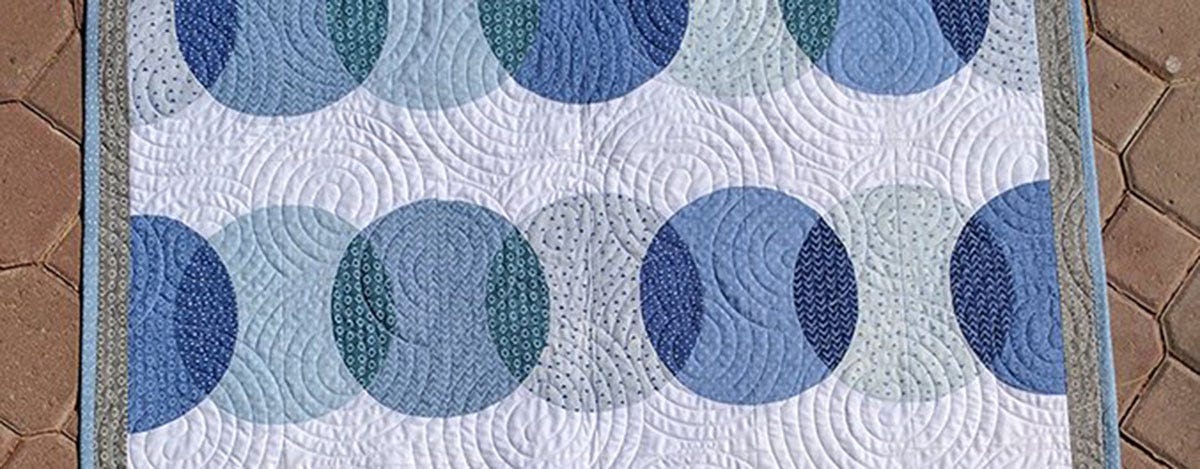
We asked Monica our quilter to quilt the top and she did an amazing job! She created a feeling of movement over the quilt by quilting swirling circles. Hope you have as much fun with this easy project and use up some of your pre-cut packs. As always please send along your projects to us at info@thewhimsicalworkshop.com and we can add you to our bragging rights page on our website.
Make sure to visit my blog each month where I will share with you some tips and tricks on cutting and assembling of the project of the month along with posting the free pattern on our website The Whimsical Workshop. You can also see our pattern and post at www.accuquilt.com.
Until next time…..
Heidi
Visit Heidi Pridemore at The Whimisical Workshop for more patterns.


