
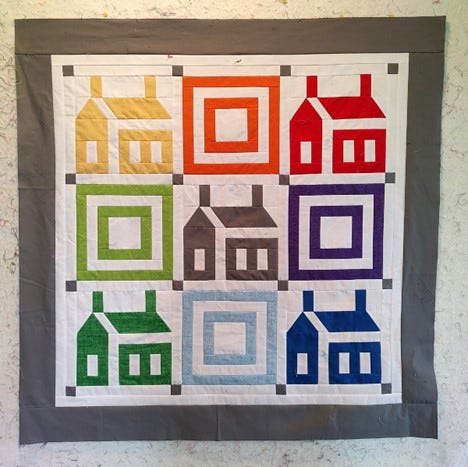
Hi, all! It’s Bea from Beaquilter to show you how to combine a great Block on Board (BOB) die with some GO! Strip Cutter and GO! Square dies to make this fun rainbow schoolhouse quilt!
Follow Along With My Process!
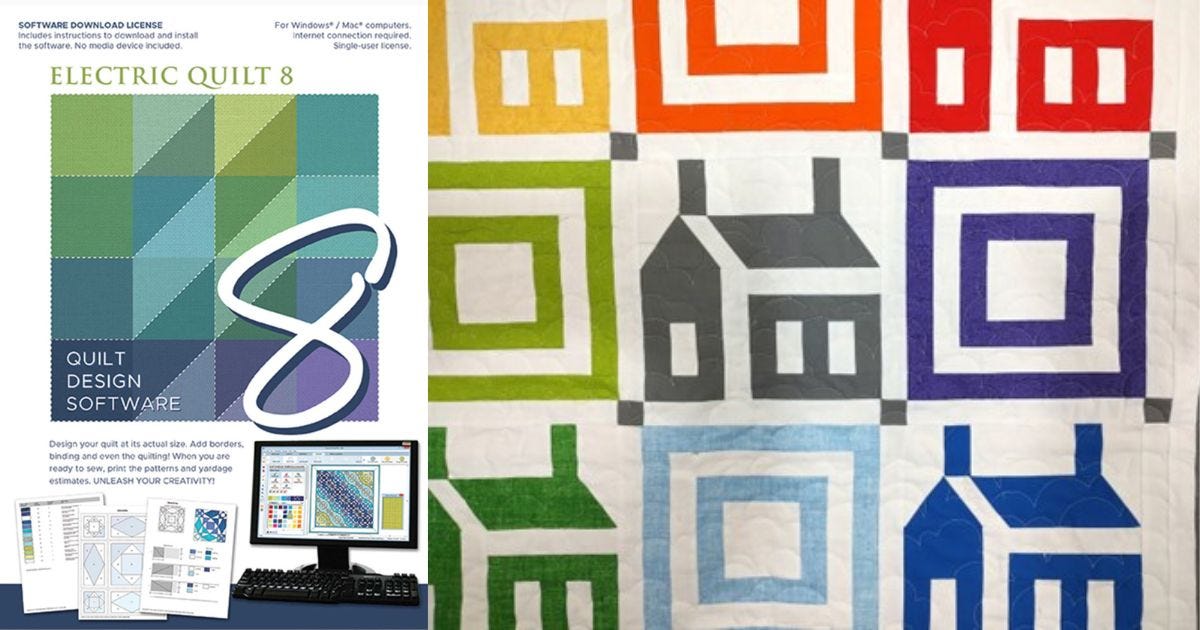
First, I planned my design using Electric Quilt 8 (EQ8) Quilt Design Software.

Based on my design, I needed:
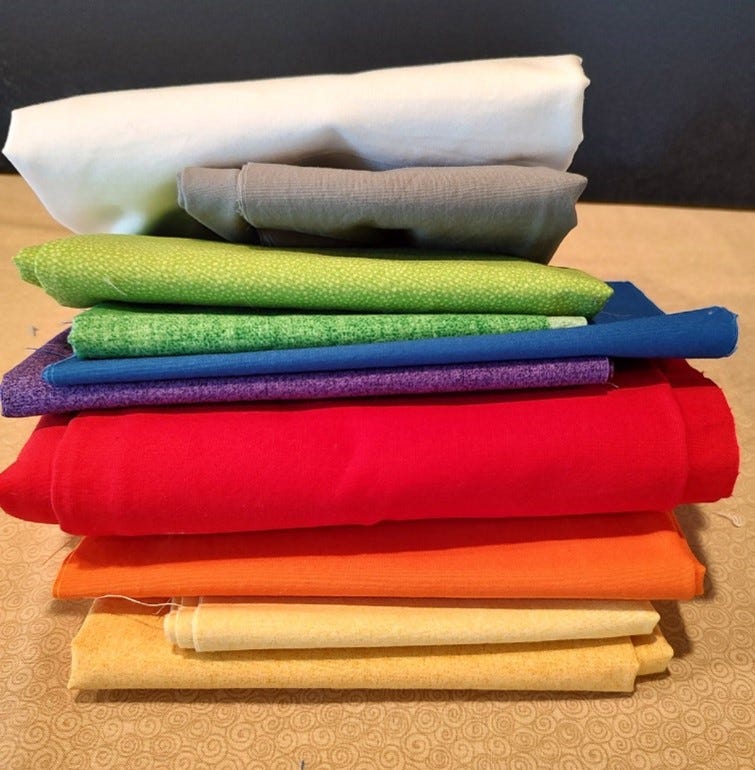
- 1/8 yard to 1/4 yard of fabric per color
- The 1/4 yard of fabric is for the house blocks
- 3/4 yards of gray fabric
- 1 yard of white fabric
This quilt finishes to 39” x 39” and I was able to use scrap yardage that I already had. Plus, I always keep solid white fabric on hand, and I had dark gray fabric from another project.
Materials Needed
To make this quilt, I used the:
- GO! Fabric Cutter
- GO! Schoolhouse-Pieced-9" Finished Die
- GO! Strip Cutter-11/2" (1” Finished) Die
- GO! Strip Cutter-31/2" (3” Finished) Die
- GO! Square-3 1/2” (3" Finished) Die
- Shape 1 in the GO! Qube Mix & Match 6” Block OR Shape 2 from the GO! Qube Mix & Match 12” Block
- GO! Square-11/2" (1”) Finished Die
- You can also use the GO! Strip Cutter-1 1/2" Finished Die or Shape 2 from the GO! Qube Mix & Match 4" Block

Instructions
1. From the four colors for the square blocks, I cut:
- Two 1 1/2” Width of Fabric (WOF) strips
- Then, subcut into
- Two - 1 1/2" x 3 1/2” pieces
- Two - 1 1/2" x 5 1/2” pieces
- Two - 1 1/2" x 7 1/2” pieces
- Two - 1 1/2" x 9 1/2” pieces
- Then, subcut into
2. For the schoolhouse blocks, I was able to cut everything out of a 9” WOF strip, although a 7” WOF strip works too. I only had that in the blue, but some of the cuts were a bit awkward. Luckily, I had plenty of fabric.
3. From each of the schoolhouse colors, I cut out:
- Two shape A's
- One shape B
- Seven shape C's
- One shape D
- One shape F
- One shape H
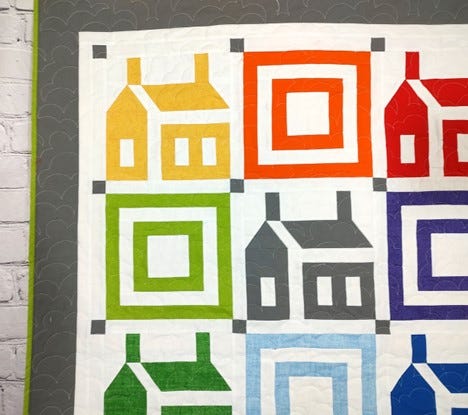
4. Since I had the gray fabric out already, I also cut out 16 of the 1 1/2" squares.

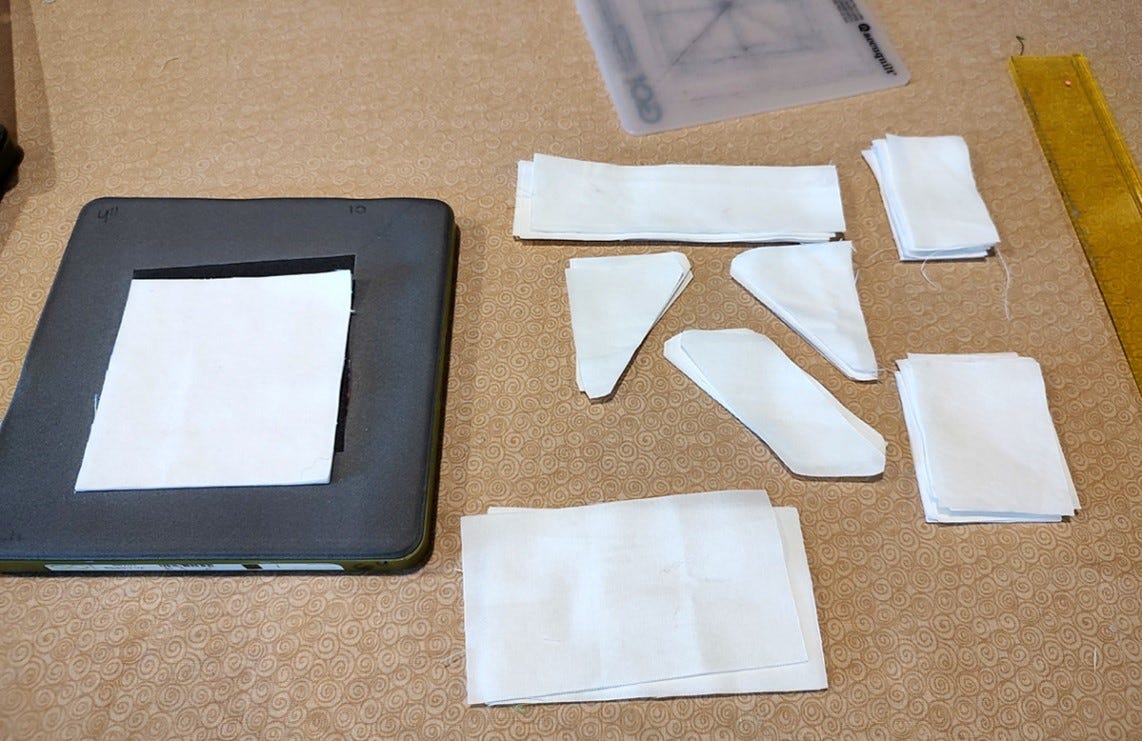
5. With the white fabric, I cut:
- One shape A
- 15 shape C's
- Five shape E's
- Five shape ER's
- Five shape G's
- Ten shape I's
- Five shape J's
6. Again, since I had this fabric color out already, I cut four white 3 1/2" squares.
7. With the GO! Strip Cutter-1 1/2" Die, I cut:
- 13 strips at 1 1/2” x WOF
- Then, subcut into
- 24 - 1 1/2” x 9 1/2” pieces
- Eight - 1 1/2” x 7 1/2” pieces
- Eight - 1 1/2" x 5 1/2” pieces
- Then, subcut into
8. Once I finished cutting these, I had four WOF strips left to use for the inner borders.
9. Then, I started sewing things together. When I sit down to sew, I usually sew as much as possible before I get up to iron because my ironing board is about five feet away - five loooong feet away! Ha ha! I usually work one several projects at once too.
10. Here, I chain pieced all the schoolhouse blocks, following the basic block assembly directions:
- A white shape E to the left of all the shape F's
- A white shape ER to the right of all the shape H's (roof shapes)
- All the white Shape I's together with the shape C's
- Three sets of each color of white and colored shape C's
- A colored and white shape A
11. I kept sewing until:
- All the chimneys were together (shapes I, C, J, C, and I)
- All the roof sections were done (shapes E, F, G, H, and ER)
- Part of the front was completed (shapes C, C, and C with shape D above)
- The side with five shape C's was sewn
- The 3 1/2" white squares were with the 3 1/2” colored rectangles
- Then, the 5 1/2" colored shapes were sewn onto this
- The 5 1/2” white rectangles were with the 7 1/2" white rectangles
- The 7 1/2” colored rectangles and 9 1/2” colored rectangles were sewn together


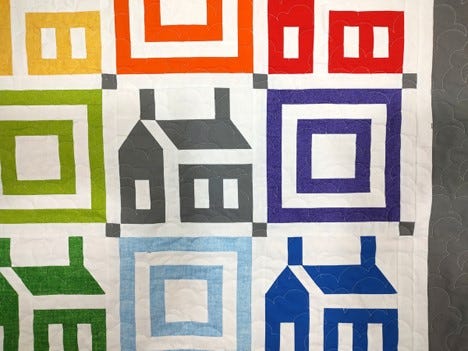
Finally, I had five schoolhouse blocks done, along with four “log” blocks (I don’t know what else to call them - square bullseye blocks maybe?)!
12. I then looked at the EQ design and sewed the schoolhouse and log/bullseye blocks together with a white 1 1/2" x 9 1/2” rectangle between.
13. I also made four sashing strips with white 1 1/2" x 9 1/2” rectangles and gray 1 1/2” squares to go between the rows.

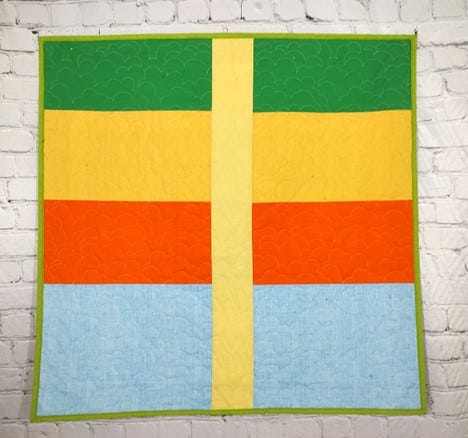
14. I then sewed everything together. This is what the top looks like without a border and then with the border.
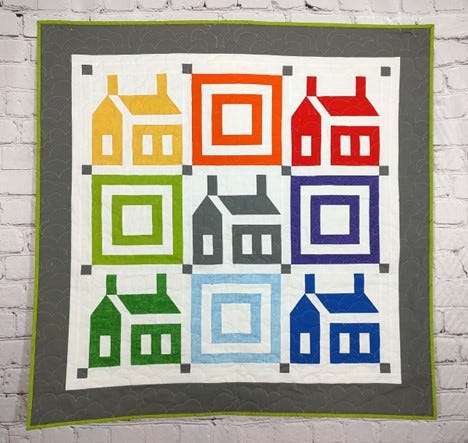
Just like I did with the traditional red and white schoolhouse quilt I made for AccuQuilt for the GO! Schoolhouse-Pieced-9" Finished Die release, I quilted clouds all over it and cut out five 2 1/2” binding strips, so I had the perfect amount of green fabric leftover to do that!
As always, I try to use leftover yardage from the front to make the backing. I ended up using four colors and then added a yellow strip down the middle, even though the top was 39” and the backing was 42”. Since I long arm, I didn’t trust that it was enough to work with, so I added the little yellow strip, but you may not need to do that if you’re using a sewing machine to quilt it.
It’s a fun, cute and colorful quilt!
EQ8 Provides Even More Creative Possibilities
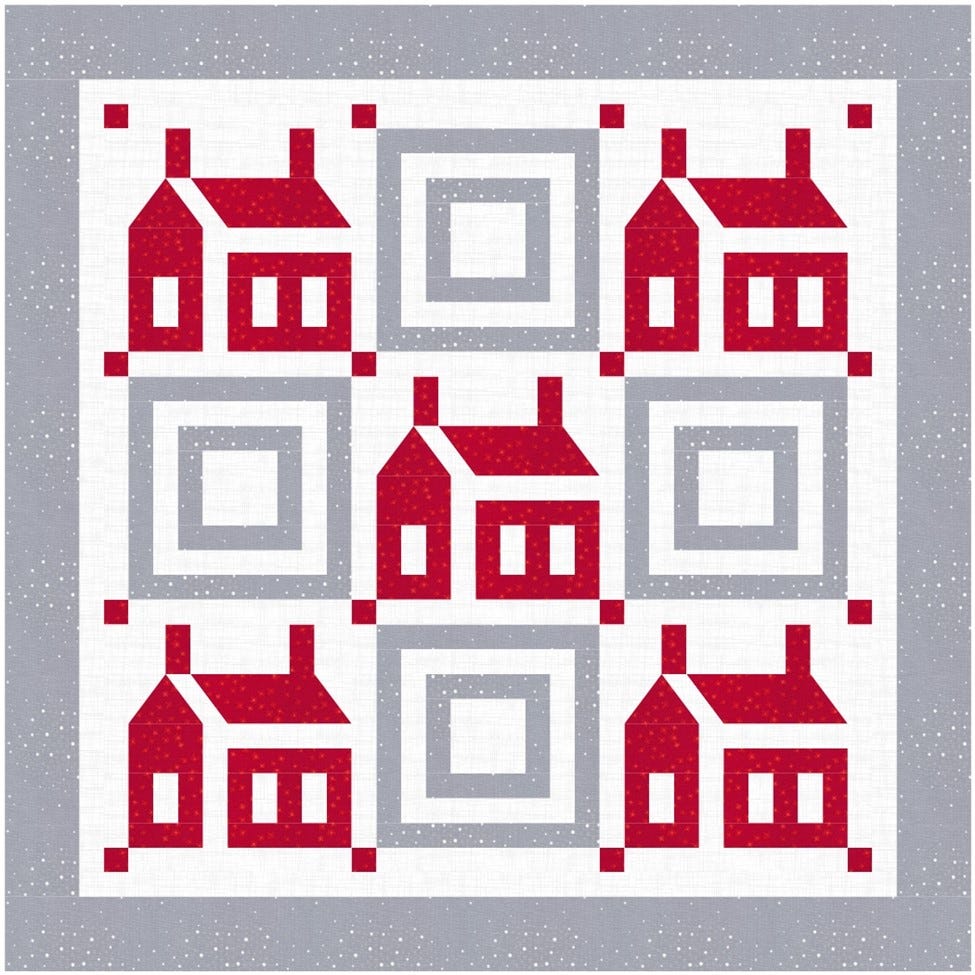
EQ8 is so great to work with that I couldn't stop myself from making other schoolhouse quilt designs! Here’s my schoolhouse quilt in a gray and red version. For this, you’d need about 1 yard of white fabric along with 3/4 yards each of gray and red fabric to make it.
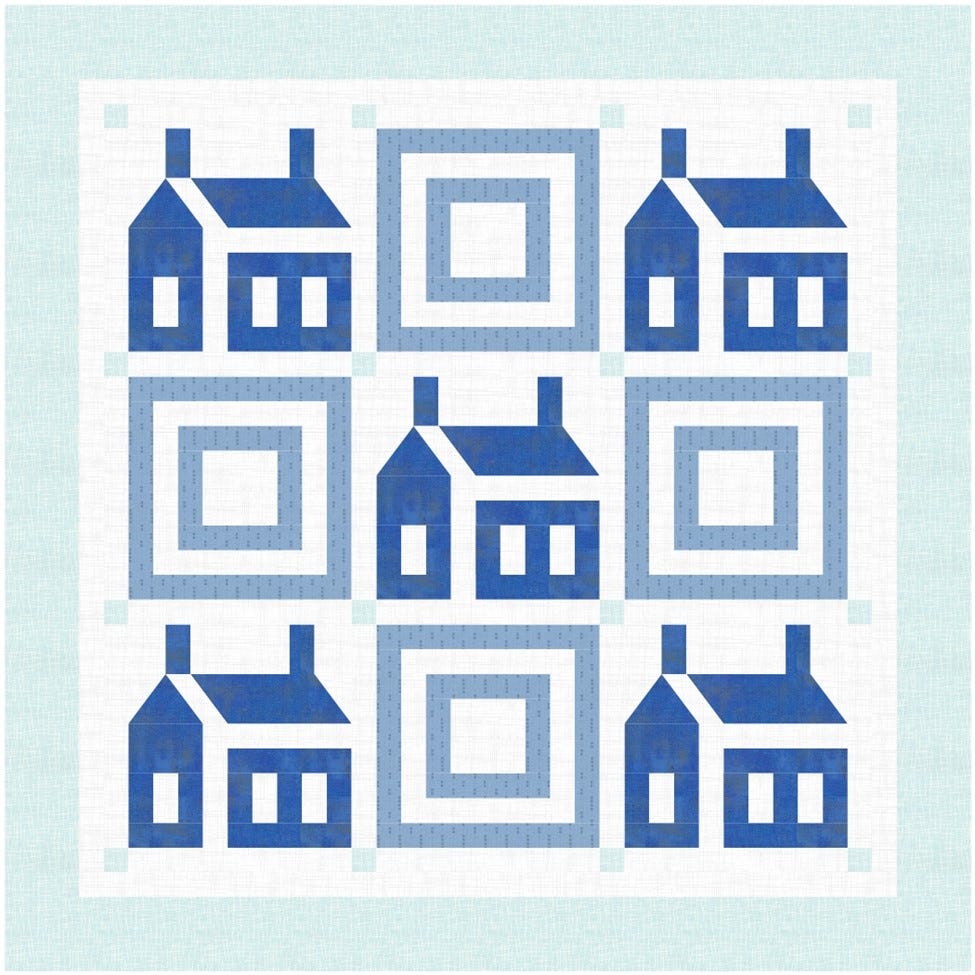
What about a baby blue version? For this one, you'd need:
- 1 yard of white fabric
- 1/2 yard of dark blue fabric
- 1/4 yard of light blue fabric
- 1/2 yard of turquoise fabric
I’d love to see pictures if you make one of these, so be sure to use the hashtag #AccuQuiltBuilt and tag @bealeequilter and @AccuQuilt if you do!


