
Hello, AccuQuilters! It's Lori from Lori Miller Designs with a new and wonderful tutorial.
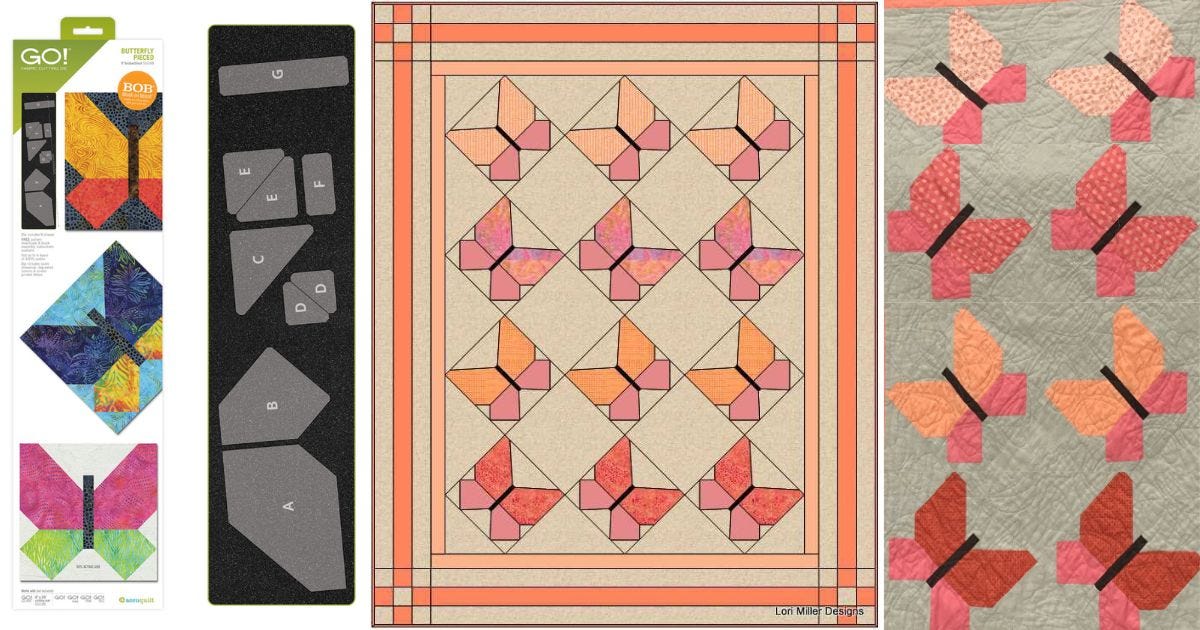
I have always had an affinity to butterflies, especially monarchs. When AccuQuilt launched the GO! Butterfly-Pieced-9” Finished Die, I knew I had to create something cute with it. Since it's now a permanent GO! Die, I thought I'd share my cute creation! This breezy, cozy Flutter By Butterfly Throw Quilt highlights this lovely 9” block perfectly with blocks set on-point. This throw quilt finishes at 54” x 67”.
How to Make the Flutter By Butterfly Throw Quilt
Dies Used
- GO! Butterfly-Pieced-9” Finished Die
- GO! Big Square-9 1/2” (9“ Finished) Die
- GO! Setting Triangles-9” Finished Die
- GO! Strip Cutter–2” (1 1/2" Finished) Die (for border one)
- GO! Strip Cutter-2 1/2" (2" Finished) 3 Strips Die (for border two and binding)
Materials Needed
- 1/4 yard of light orange print fabric for the top of row one's butterfly wings (Shape A)
- 1/4 yard of light coral print fabric for the top of row two's butterfly wings (Shape A)
- 1/4 yard of medium orange print fabric for the top of row three's butterfly wings (Shape A)
- 1/4 yard of dark orange print fabric for the top of row four's butterfly wings (Shape A)
- 5/8 yards of dark coral solid fabric for the bottom of all the butterfly wings (Shape B)
- 1/4 yard of dark brown solid fabric for all the butterfly bodies (Shape G)
- 1/2 yard of light orange solid fabric for the inner border (border one)
- 1/2 yard of medium orange solid fabric for:
- Border two (outer border)
- Nine patch corner blocks
- Binding
- 3 1/4 yards of tan Essex linen (for the background)
- 3 1/2 yards of backing
- 3 1/2 yards of batting
- Coordinating thread
Instructions
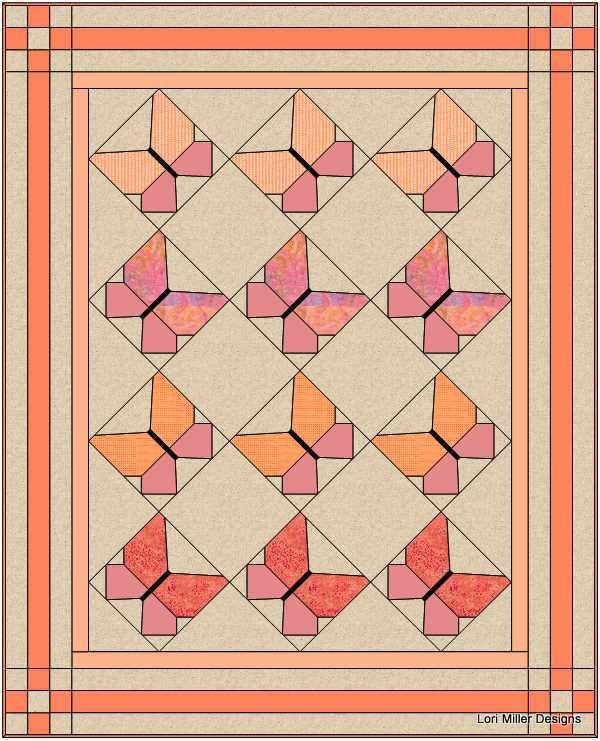
I started creating this quilt by using Electric Quilt 8 (EQ8) Quilt Design Software. I was able to try out different quilt styles, fabrics and colors virtually. I finally settled on this on-point quilt design. I really think the design setting makes the butterflies look like they are fluttering around.

Cutting
1. With the GO! Big Electric Fabric Cutter, start by cutting out all of the butterfly Shape As.
- For EACH of the four top wing fabrics, cut one 7” x Width of Fabric (WOF) strip. Then, subcut three pairs of Shape A upper wings. In other words, you should have
- One 7" x WOF strip in light orange print fabric subcut into six total upper wing shapes
- One 7" x WOF strip in light coral print fabric subcut into six total upper wing shapes
- One 7" x WOF strip in medium orange print fabric subcut into six total upper wing shapes
- One 7" x WOF strip in dark orange print fabric subcut into six total upper wing shapes
PRO TIP: To cut a pair of shapes means that you will have a left and right shape that mirror each other with right sides facing up. Cut your fabric carefully with one piece right side up and one right side down to achieve the pairs of the shape needed.
2. To make the butterfly Shape Bs, cut four 5" strips using the dark coral solid fabric. Then, subcut 12 pairs of Shape B for the bottom wings for a total of 24 lower wing shapes. Note that if you choose a print instead of a solid, you will need to cut half the Shape B's with the fabric right side up and half with right side down as with Shape A to have pairs.
3. For the butterfly Shape Gs, use the dark brown solid fabric to cut two 2” x WOF strips. Then, subcut 12 butterfly bodies.
4. With the tan Essex linen, you'll create the background using the butterfly Shapes C, D, E, and F. Cut all shapes together at once.
- Using four 8” x WOF strips, subcut 24 sets of the combined Shapes C, D, E, and F units
- To make the background 9” squares,
- Cut two strips at 10” x WOF
- Subcut the strips into six squares using the GO! Big Square-9 1/2” (9" Finished) Die
- Cut two strips at 10” x WOF
- Use the GO! Setting Triangles-9" Finished Die to
- Cut three 8” x WOF strips
- Subcut ten side setting triangle shapes
- Subcut four corner setting triangle shapes
- Cut three 8” x WOF strips
5. Use the light orange solid fabric for border one (the inner border) to
- Cut one 9” x WOF strip
- Cut one 3” x WOF strip
- Subcut five 2” strips using the GO! Strip Cutter-2" (1 1/2" Finished) Die
- Subcut two strips 2” x 51 1/2” for the sides
- Subcut two strips at 2” x 41 1/2” for the top and bottom
6. To make border two (the outer border), use the medium orange solid fabric to
- Cut three 8” x WOF strips
- Use the GO! Strip Cutter-2 1/2" (2" Finished) 3 Strips Die to
- Subcut 11 strips at 2 1/2"
- Subcut 20 squares at 2 1/2" for the nine patches
- Subcut 11 strips at 2 1/2"
- Subcut two 6 1/2" x 54 1/2" strips for the sides
- Subcut two 6 1/2" x 41 1/2" strips for the top and bottom
- Use the GO! Strip Cutter-2 1/2" (2" Finished) 3 Strips Die to
- Cut one 6” x WOF strip
- Subcut into six 2 1/2” strips
7. For the binding, use the rest of the medium orange solid fabric to
- Cut two 8” x WOF strips
- Cut one 3' x WOF strip
- Subcut seven 2 1/2” strips
Sewing
To sew the blocks, I used the instructions to sew the 4-color, 9” finished Butterfly-Pieced block that came inside the die assembly instructions.
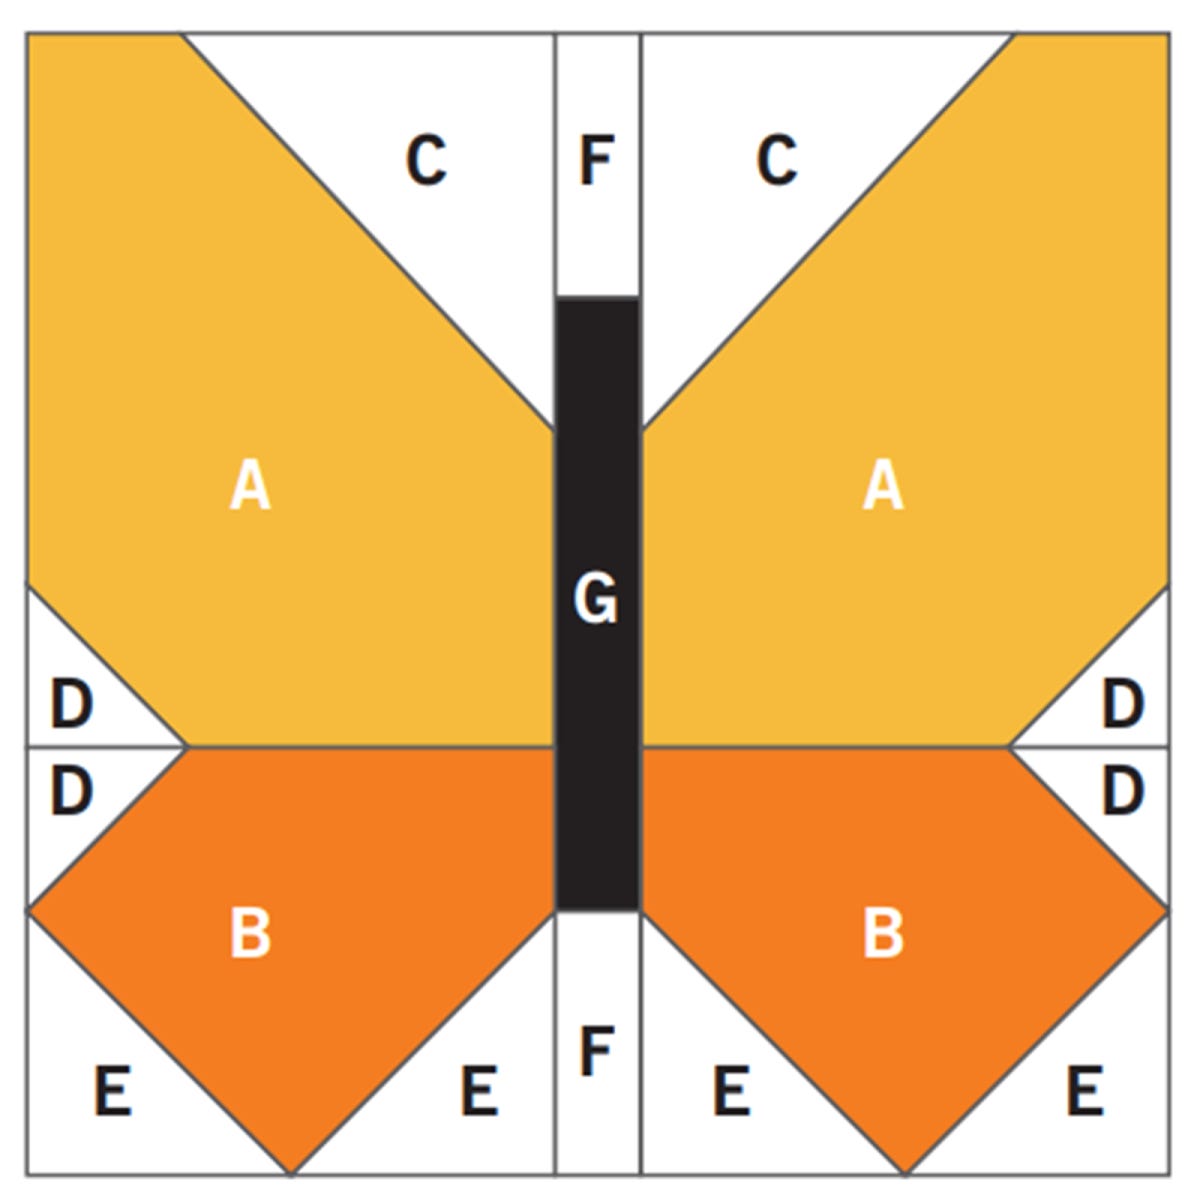
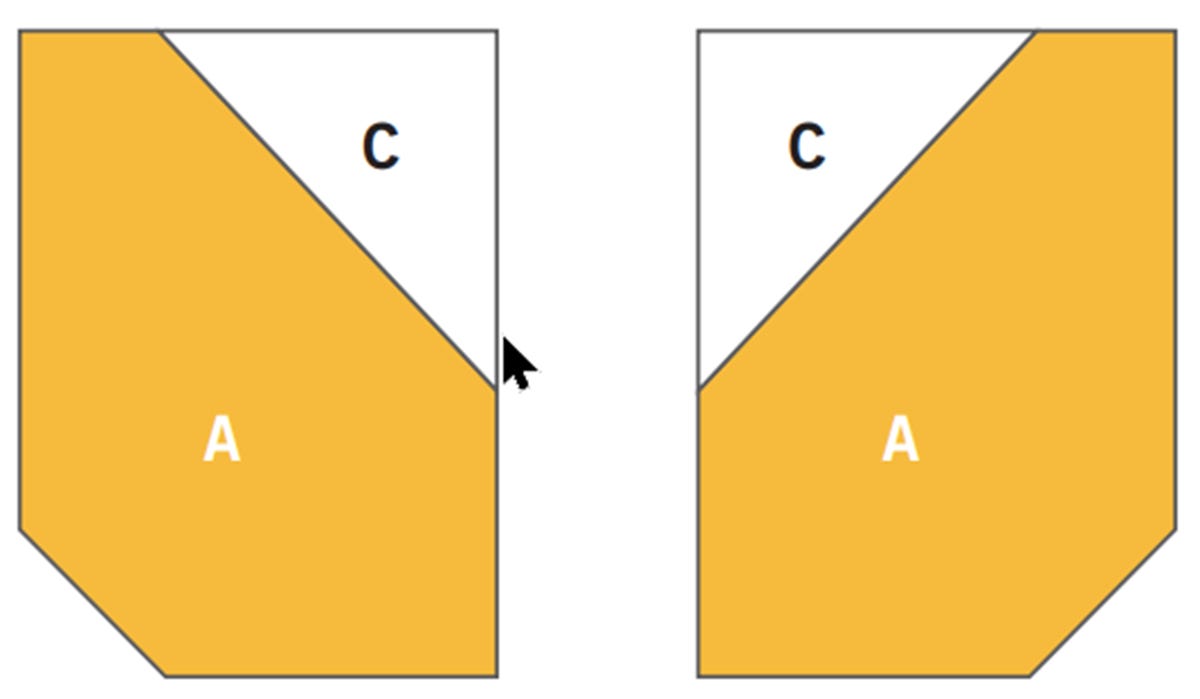
1. Using the cut light orange print fabric pieces, sew shapes A and background shapes C together (as shown below) to create two A/C mirror image units.
2. Sew Shape D to the two A/C mirror image units to make the top of the wings.
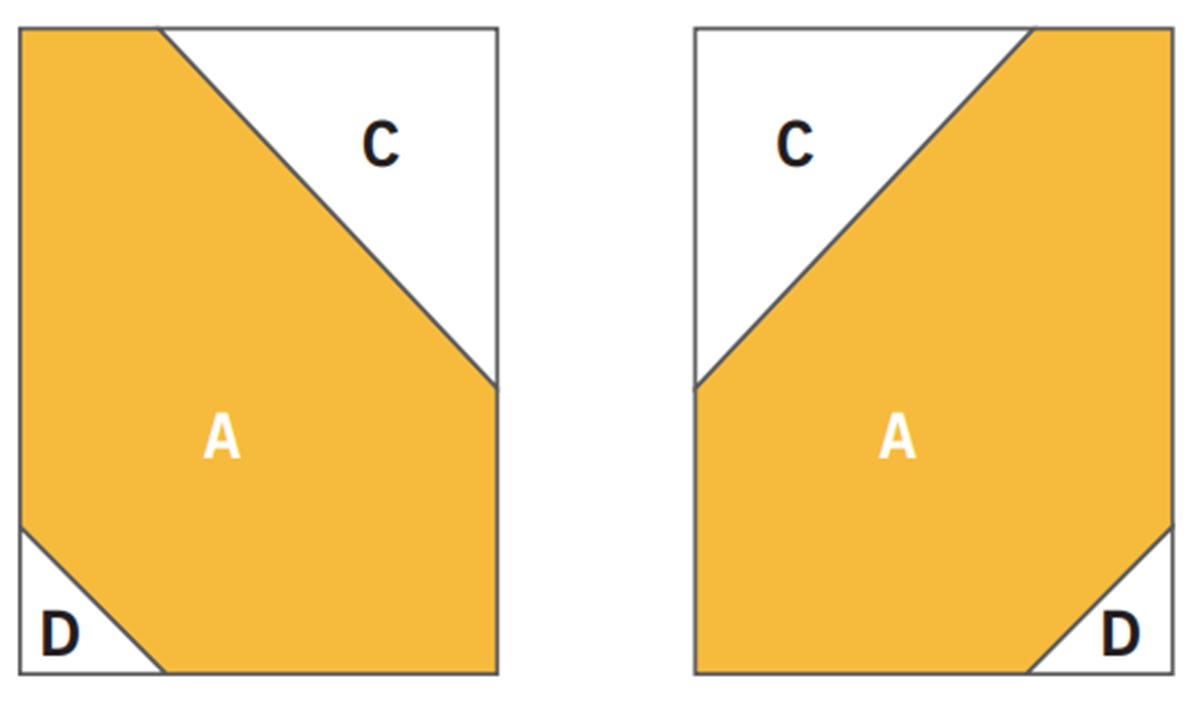
3. Continue to make upper wing units using the light coral print fabric, medium orange print fabric, and the dark orange print fabric so that there are three sets of upper wings for all four print fabrics.
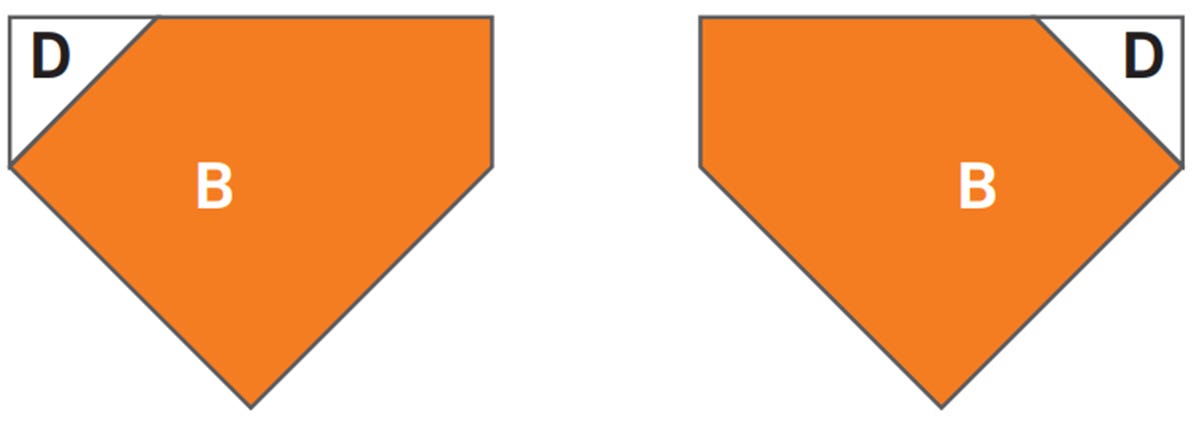
4. Using the cut dark coral solid fabric and background pieces, sew Shapes D and B together (as shown below). Make two D/B mirror image units.
5. Sew the cut background Shape E piece to the D/B unit (as shown below). Make two of these mirror image units.

6. Add another Shape E background piece (as shown below). Make two of these mirror image units to create the bottom wings.
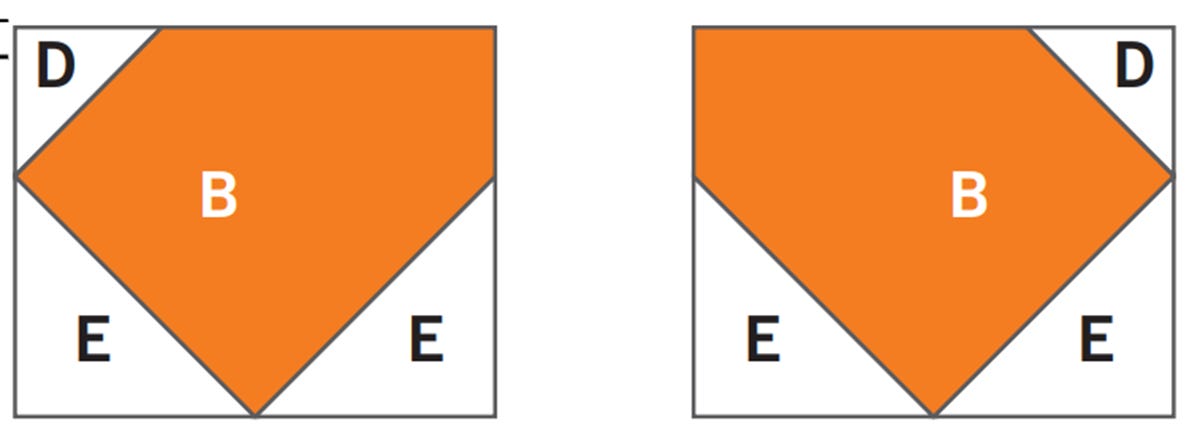
7. Continue to make 12 pairs of the bottom wing units.

8. Sew two background Shape F pieces to a dark brown solid fabric Shape G piece (as shown below) for the butterfly body unit. Make 12 of these units.
![]()
9. Layout and sew the top and bottom wing units together. Sew all of the pieces together in a row to complete the butterfly, which should measure at 9 1/2”.

A finished butterfly block should look like this:

10. Sew together all 12 butterfly blocks.

Assemble the Quilt Top
1. Arrange the quilt blocks, solid background blocks, side, and corner setting triangles (pictured below).

2. Begin by sewing together the blocks into rows diagonally (pictured below).

3. Sew the rows together to create the center of the quilt.
PRO TIP: Since I used linen for the background and it tends to fray, I staystitched 1/8” away from the edge all around the center of the quilt before I added the borders. I also staystitched the edge again after I added all of the borders.
4. For border one (the inner border), sew the light orange solid strips together end to end using a 45 degree seam. Sew the sides first and then the top and bottom of the quilt.
5. Make four nine patch blocks (pictures below) using the background and medium orange solid 2 1/2" squares.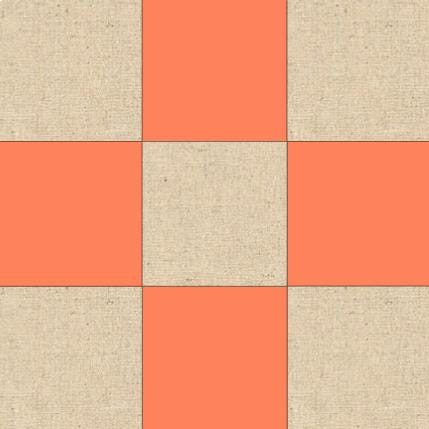
6. To begin making the second border (outer border), use 45 degree seams to
- Sew the medium orange solid strips together end to end
- Sew five background strips together end to end
- Sew another five background strips together end to end
7. Sew these strips together with the medium orange solid strip in the center between two background strips (pictured below).

8. Sew together the medium orange solid and background 2 1/2” square pieces into four nine patch blocks.
9. Sew the nine patch blocks to each end of the top and bottom of the quilt's corners.
10. Sew the side borders onto the quilt before sewing the top and bottom borders.

Finishing
1. Piece together the backing.
2. Create a quilt sandwich by layering the backing, batting, and quilt top.
3. Quilt as desired. I used an allover butterfly quilting motif.
4. Sew together the binding strips.
5. Press in half of the strips the long way and sew onto the quilt to finish.
6. Enjoy your finished quilt! I had mine longarm quilted by my friend, Sue Baker.

Make This Your Next Project!
This Flutter By Butterfly Throw Quilt is beautiful for the summer. It would make a lovely gift for a special little one or any butterfly lover. You can easily make it your own with different fabrics and colors. You can even create a larger version - just add more blocks! Experiment with your design!
Please tag @lorimillerdesigns and @AccuQuilt if you make your own version of this cute throw quilt. We would love to see what you have done, so be sure to include the hashtag #AccuQuiltBuilt as well!


