

Meet Emily, one of our newest GO! Getter team members! In this post, read all about how she and her mom used our AccuQuilt Ready. Set. GO! to create a mini quilt. As Mother's Day approaches, this is the type of quilting story we love to hear. Who do you love to sew with?
Hi There! My name is Emily and I am a 25 year old quilter/sewist with an obsession for fabric and color combos. I began my sewing journey in middle school making costumes for school plays (where precision was least important), but my passion really grew in 2013 when grandma taught me to quilt (where precision is QUEEN). Long story short, I have been completely obsessed with quilting ever since.
Meet all our GO! Getters here!
One of my favorite things about quilting is the immense sense of accomplishment when you sew a seam and then open it up to press and all the points match up perfectly! I really love the accuracy that is required in quilting, but my all-time favorite thing about quilting is pairing up fabrics with different colors and designs. You can see my most up-to-date projects on Instagram @homemadeemilyjane.
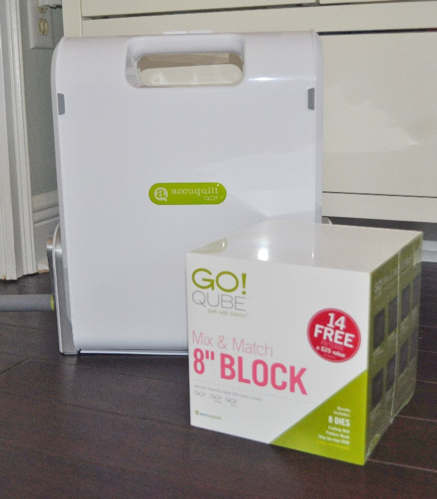
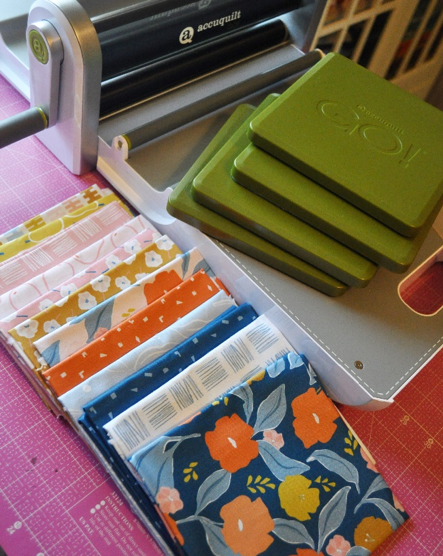
Recently, I was invited to be an AccuQuilt GO! Getter. I jumped at the chance because I am always thrilled to find new ways to increase speed and precision in cutting fabrics for quilts. AccuQuilt had me try out the Ready. Set. GO! which included the 8” GO! Qube Mix & Match Block and GO! Strip Cutter-2½" (2" Finished). This awesome package was incredible and included a ton of block options!
Working with Mom
To be completely truthful, I was a little intimidated when I first got started! To help me out in this new adventure, I invited my mom over to help show me the ropes. My mom (@JaneJustSew) has the AccuQuilt GO! Baby so I knew she’d be a great resource, and as always, we had a ton of fun cutting fabrics for our next projects together. I know not everyone has someone to ask for help, so I’m writing this post to help all of you!
First Impressions
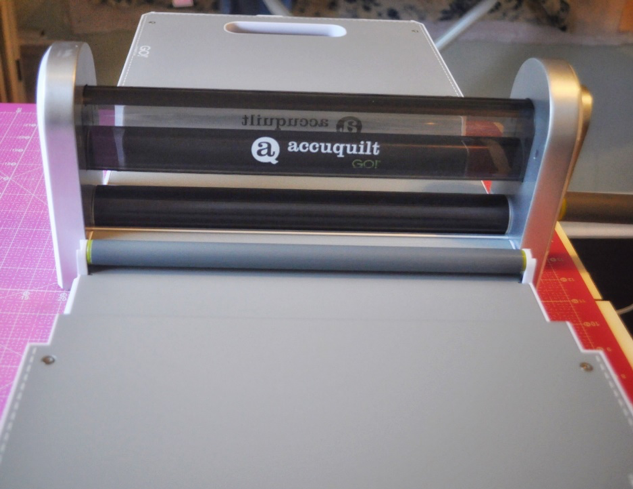
When the FedEx guy dropped the package on my doorstep, my first thought was: “Wow, this box is huge.” Upon opening it, I noticed just how carefully the parcel had been packed. Included in the box was the AccuQuilt GO! fabric cutter (obviously), a GO! Qube Mix & Match 8” block, a GO! Strip Cutter-2½" (2" Finished) which cuts three strips at a time. Also included in the package is a book by Eleanor Burns with hundreds of patterns. The machine itself was heavier and smaller than I expected and it is super heavy duty which is why it weighs quite a bit. But the design makes it easy to store and wonderful to use.
The handle is easy to grab onto, and the machine folds down/out for when you need to use or store it. As far as using the cutter, I am a very visual learner, so it was incredibly helpful that both the book and the dies themselves have TONS of photos. There are word instructions too, of course, but honestly I didn’t even read them because the photos were enough for me!
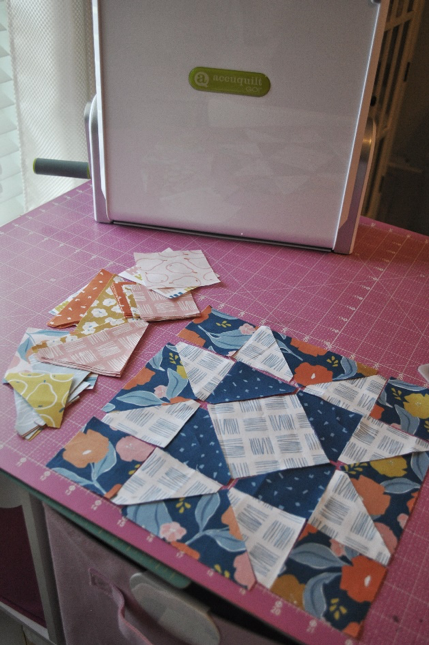
Making a Diamond Star
After glancing through the book a couple times and opening up each die, I finally settled on a pattern to try first: the Diamond Star! This is a free pattern that came in the Qube and calls for three different fabrics and four different dies, so it’s just complicated enough to challenge me on my first time while still being super fun.
Customize your own GO! Qube 8" Diamond Star Throw Quilt Pattern in GO! Quilt.
I decided to make four quilt blocks so I could turn it into a mini quilt/wall hanging/pillow cover, which meant each pass through the machine was four layers thick. They say the machine can cut up to six layers of fabric with total perfection every time. Can you just take a moment to think about how much time it would take to cut six layers of perfect little half square triangles with the dog ears already trimmed for you? This machine does it lickity split and amazingly precise – way more accurate than I could ever get with a ruler and rotary cutter.
This is what you’ll need to do to make your first project:
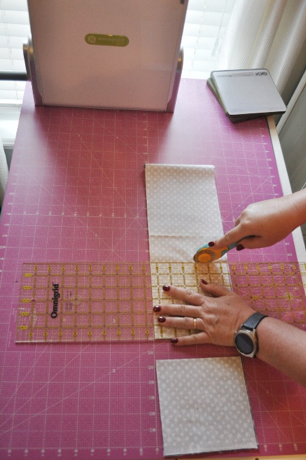
- Pick your fabrics, press them, and stack all on top of each other (I used a Rollakan fat quarter bundle by @figofabrics)
- Trim fabrics to size. My dies were all 6” square, so I cut my fabrics into (roughly) 6” strips to feed through the machine.
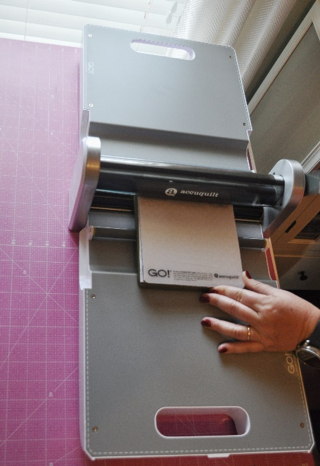
- Put your die on the table, black side up, and then place your fabric stack (up to six layers) and then put the plastic cover on top.
- Glide the positioned unit through the machine, using the crank handle.
- Slide the plastic cover off the fabric and VOILA! you’ve got lots of little, perfectly precise fabrics ready to sew together!
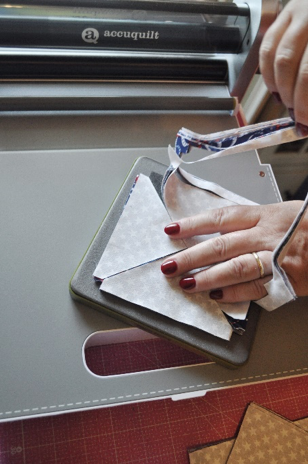
It really IS that easy! When you are done with each of your dies, you can pack them up and store them away in their neat little container until it’s time to make your next project.
Here is a little summary of my thoughts on this machine: It’s great quality, can do just about any design, and is wonderful to use and to store. If you’ve been thinking about getting one, now is the time to do it. Your wrists will really thank you and you’ll have so much free time for quilting since you’ll be saving so much time on your cutting. Many people ask, “Is a cutting machine really worth the money?” And my answer is a resounding “YES!”
If you are price-conscious, feel free to also check out the smaller model AccuQuilt GO! Me which also works with the 8” GO! Qube Mix & Match Block and many of the other dies.

If you want to learn how to make the mini quilt that I made out of my four Diamond Star blocks, stay tuned for my next post! Follow me on Instagram or on my blog Home Made Emily Jane to find out when it’s available!
Did you create something beautiful lately? Share it with us in the comments or on Facebook, Twitter, YouTube, Pinterest, and Instagram. Don't forget to add #AccuQuilt so we can see!


