


Hello! This is Erin from AveryLaneSewing.com and I'm excited to share another quilting tutorial for the AccuQuilt blog. Using the Drunkard's Path quilt block, set on point, I created this modern tulip quilt block. Stacking 3 blocks on top of each other, it makes a very fresh and pretty wall hanging. Our winters are very grey here in the Pacific Northwest, so any sign of spring is very welcome!
This project is a great way to learn to sew the Drunkard's Path block and doesn't take a long time to finish.
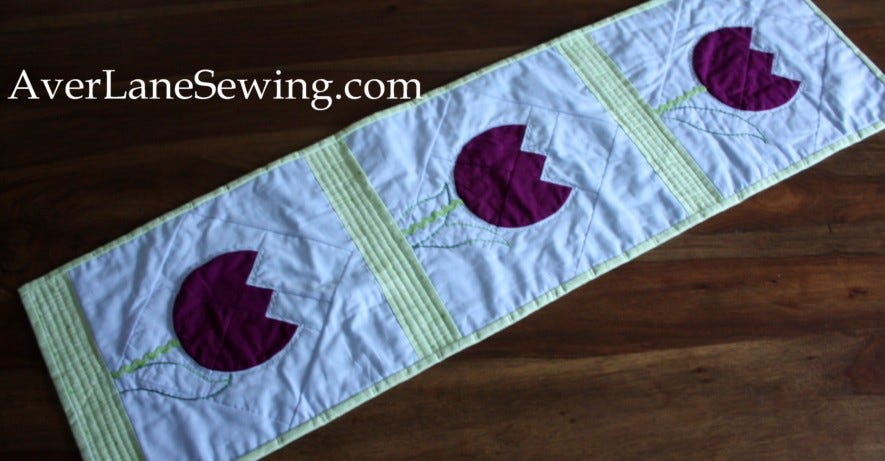
Winter Tulip Mini Quilt
Finished size 12" X 40.5"
Materials
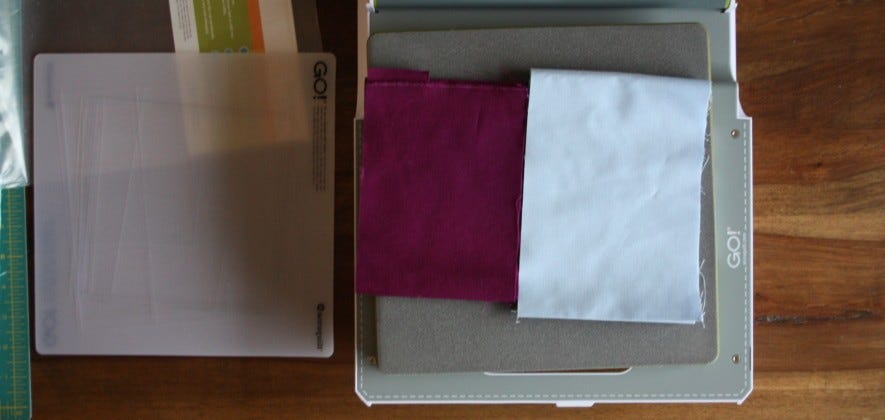
GO! Drunkard's Path-4" finished die #55338
1 fat quarter dark fabric for the tulips
1/2 yard for light value fabric for the background
1 fat quarter of light green for the sashing
1 package medium Rick Rack trim for the stems
Optional: 1 skein of green pearl cotton embroidery floss for the leaves
Backing: 14" X 43"
Batting: 13" X 42"
Binding: 64"
Cutting Instructions
Tulip Blocks:
From the light background fabric and dark fabric, cut 9 of each of the Drunkard's Path pieces using the AccuQuilt Go! cutter.
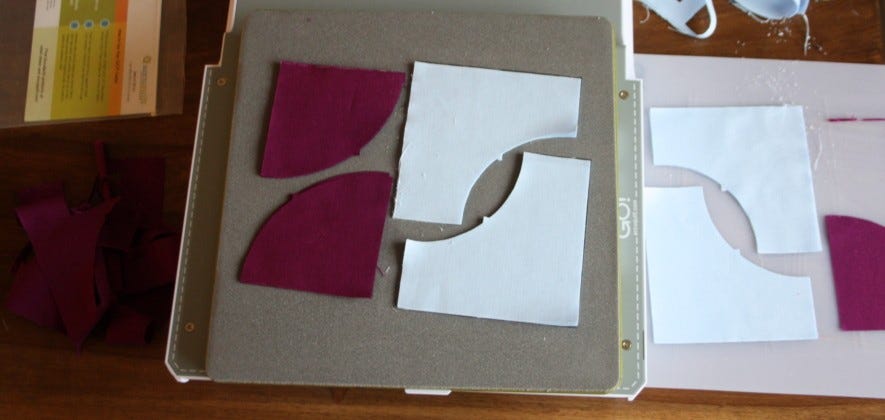
From the dark fabric, cut:
1 3/4" square (3)
From the light background fabric, cut:
1 3/4" X 3 1/4" (3)
4 1/2" X 3 1/4" (3)

Settting Triangles: from the light background fabric, cut 7" squares (2), then cut the squares diagonally for 4 setting triangles
Sashing: from light green fabric, cut 12" X 2 1/2" (3)
Sewing Instructions
All seams are 1/4".
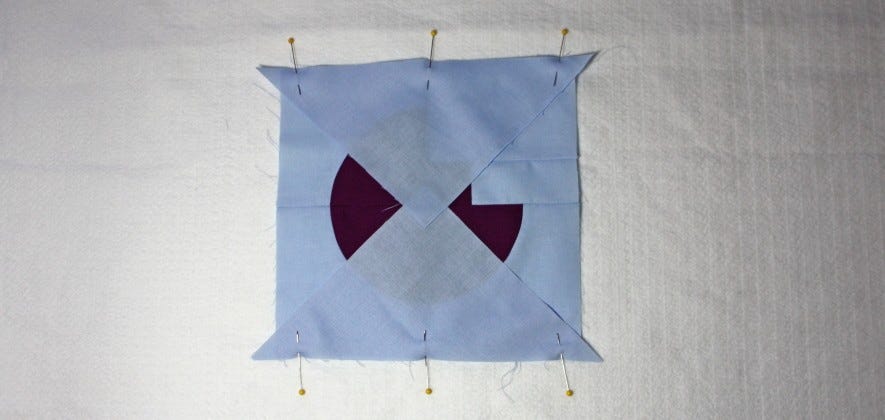
Sew together the Drunkard's Path blocks.
1. Pin the 2 pieces right sides together, matching the center notches together first.
2. Pin at the 2 side edges.
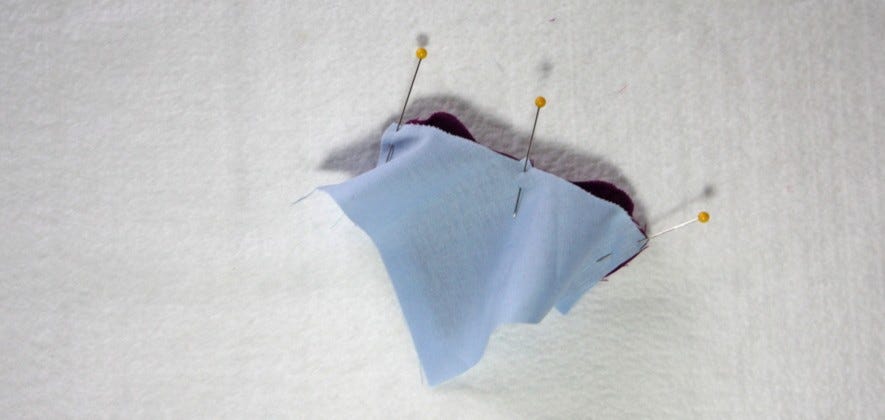
3. Easing and keeping the edges together, pin the rest of the way and sew together.
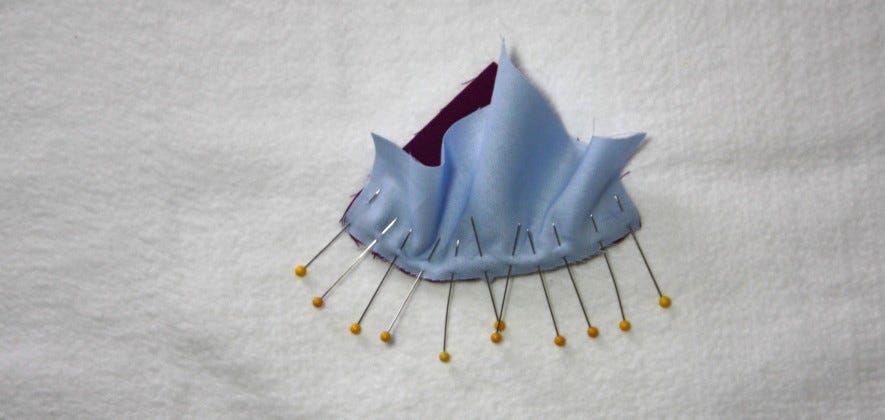
4. Carefully press the seams open.

Sew together the blocks that will be center of the tulips.
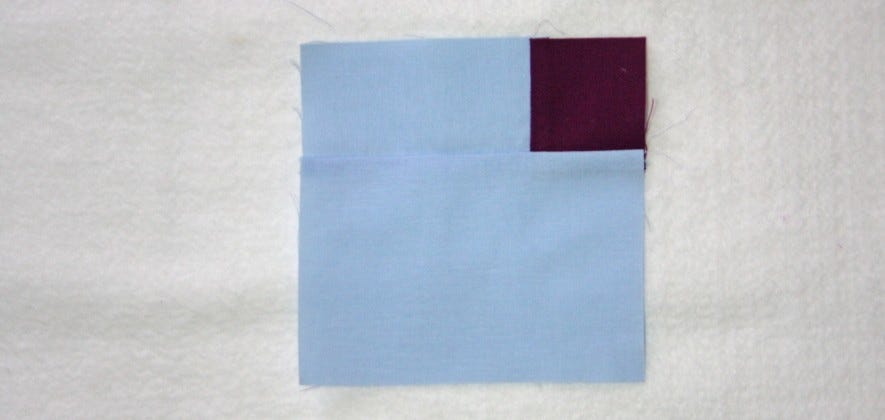
1. Sew the dark square to the 1 3/4" X 3 1/4" rectangle, with right sides together and press toward the dark fabric.

2. Sew the remaining rectangle to this pieced section, with right sides together. Press.
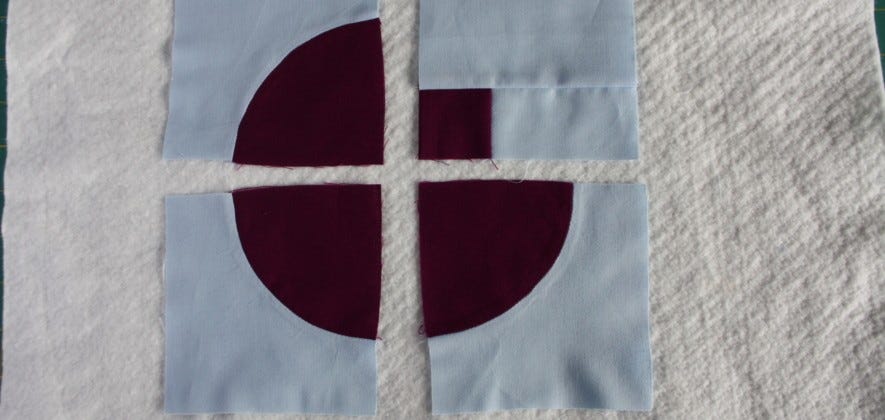
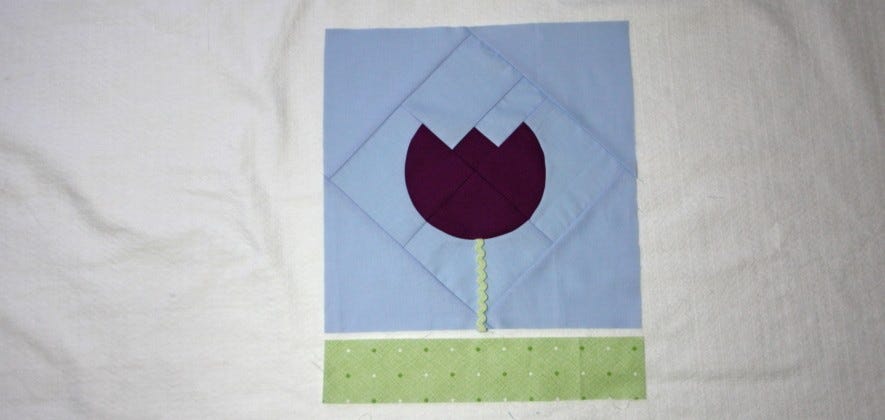
Arrange the Drunkard's Path blocks and center piece blocks to form the tulips.
1. Pin and sew together, with right sides together, and press.
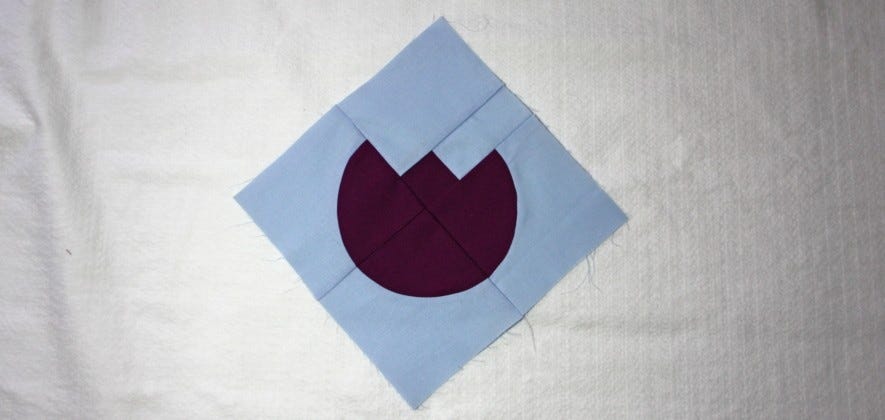
Sew the setting triangles onto the tulip blocks.
1. Pin and sew 2 triangles to opposite sides of the tulip block, with right sides together and the triangles centered onto the tulip block.
2. Press the seam allowances toward the triangles and cut off the "dog ears."
3. Pin and sew the remaining 2 triangles to the remaining two sides of the tulip block, with right sides together. Press the seam allowances toward the triangles.

4. Square up the tulip blocks to 12" squares.
Add the stems.
1. Cut a piece of rickrack the length needed and use anti-fray sealant on the ends.
2. Once the anti-fray sealant is dry, pin and sew the rickrack in place on each tulip block.
Finishing
1. To finish each tulip block, sew a green strip (2 1/2" x 12") to the lower edge, with right sides together, and press the seam allowances toward the green fabric.
2. Sew the 3 blocks together to complete the mini quilt top.
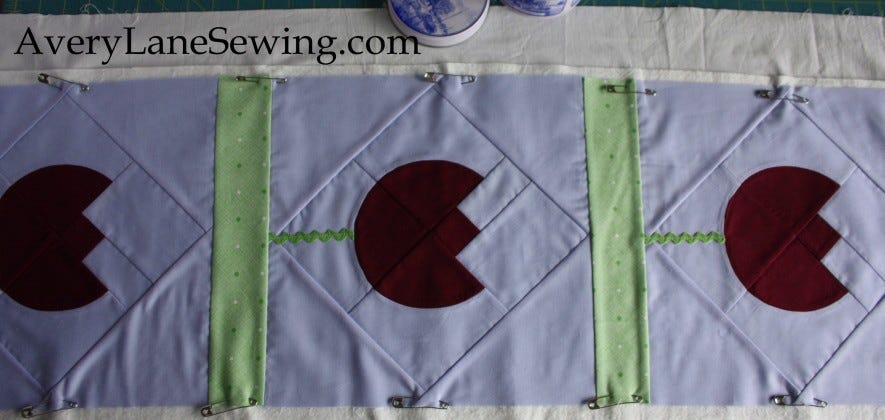
3. Layer together the backing, batting, and tulip top, and quilt it as desired.
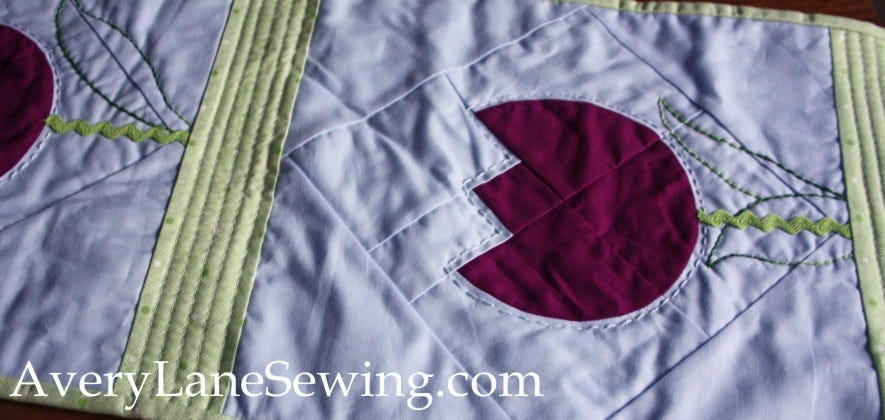
Optional: add a leaf or 2 to the stems, by hand sewing embroidery floss details or a fabric appliqué method. I used peal cotton and hand stitched some leaves. I also outlined my tulips with a big stitch style quilting in pearl cotton.
4. Bind the edges in your preferred method. Remember to add a hanging sleeve before binding if you are adding one.
Your Winter Tulip Wall Hanging is complete! This would make a really sweet table runner, too! Or just sew a single block and make a table topper! Whichever you choose, you'll be ready for those first signs of spring.

I loved doing the Drunkard's Path design using the AccuQuilt GO! cutter. It made the project so much more enjoyable, since I didn't have to cut out all the fussy curved pieces. There are so many layout choices with the Drunkard's Path block...I'm already planning my next project.


