
The Summer months are full of patriotic holidays. From Memorial Day to Independence Day, each gives us a time to remember our rich heritage and show our pride in this great country.
Today (June 14th) is Flag Day. A day to celebrate the adoption of our nation’s flag. In 1777, the Second Continental Congress passed the Flag Resolution which basically stated the official flag of the thirteen United States be thirteen stripes, alternate red and white; that the union be thirteen stars, white in a blue field, representing a new constellation.
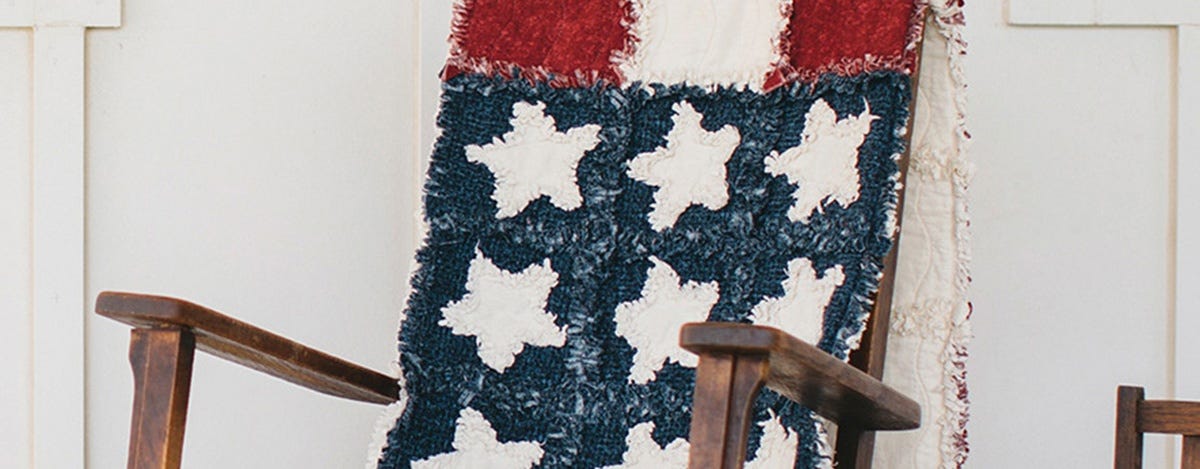
In honor of flag day, make this Studio Raggy Flag Quilt and use it to decorate your porch swing or rockers.

To begin, you will need 2¼ yards of red fabric, 3¼ yards of white and 1⅜ yards of blue fabric, the Studio 2 Fabric Cutter, Studio Rag Quilt-Square-8½" (50287) and Studio Rag Quilt-Star (50187).
- Using your white fabric and the Studio Rag Quilt-Square-8½", cut 9—9" x width of fabric (WOF) strips. Fanfold into 9" widths. Sub cut into 36—8½" Rag Squares.
- Then take your white fabric and the Studio Rag Quilt-Star and cut 3—6½" x WOF strips. Fanfold into 6¼" widths. Sub cut into 18—Rag Stars.
- Next, grab the Studio Rag Quilt-Square-8½" and your blue fabric and cut 5—9" x WOF strips. Fanfold into 9" widths. Sub cut into 18—8½" Rag Squares.
- Finally, cut 8—9" x WOF strips. Fanfold into 9" widths. Sub cut into 30—8½" Rag Squares.
Optional: Center one batting square between two fabric squares. Cut 42—6½" squares of batting using either Studio Square-6½" (6" Finished) (50286) or Studio Square-6½" (6" Finished) Multiples (50070).

Now we are ready to sew. Start by layering two Studio Rag Quilt-Squares-8½" of the same fabric wrong sides together. Layer two Studio Rag Quilt-Stars together right sides up.
Pin layered stars on blue Studio Rag Quilt-Squares-8½" sandwich, centering Studio Rag Quilt-Stars. Topstitch Studio Rag Quilt-Stars just inside fringe. Make 9.
Next, sew 3 to 4 wavy lines through red and white layered squares as shown in square of diagram. Reinforce stitching at beginning and end of each line of stitching.
Now, lay out squares according to diagram.

Next, place a strip of blue painter’s tape 1" to the right of machine needle to use as a guide for sewing the 1" seam allowance. Pin and sew squares together in horizontal rows using a slightly shorter stitch length (2.0). Press seams open.
Pin and sew rows together to complete quilt. Press seams open.
Topstitch 1" around perimeter of quilt. Cut fringe into die cut corner squares as desired to match die cut fringe seam allowances.
Rag quilts are typically laundered to fully “bloom” the fringe. Rag quilts will create a lot of lint so be sure to clean out your dryer lint screen every 10 minutes during the drying cycle.
Now you are ready to let your Raggy Flag Quilt fly!

To download a printed version of this pattern and to view more patriotic quilt patterns, click here.


