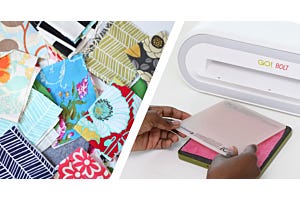
Hi, Marjorie Busby of Blue Feather Quilt Studio, and I'm excited to show you my latest AccuQuilt machine embroidery project, Beach Party Banners and Garden Flags. This is something that had been floating around in my mind for quite a long time and the new appliqué die, GO! Sea Life Medley (55190), sparked the connection. Who doesn't love a little homemade garden decor?
I created a machine embroidery set of quilt blocks and individual machine embroidery designs for this die and used the die and those designs to create some fun garden flags and beach party banners. These are already being used in my garden. And in last month (June), when the grandchildren invited their friends over to celebrate the birthdays of all five children—these banners were perfect for decorating the pool deck.
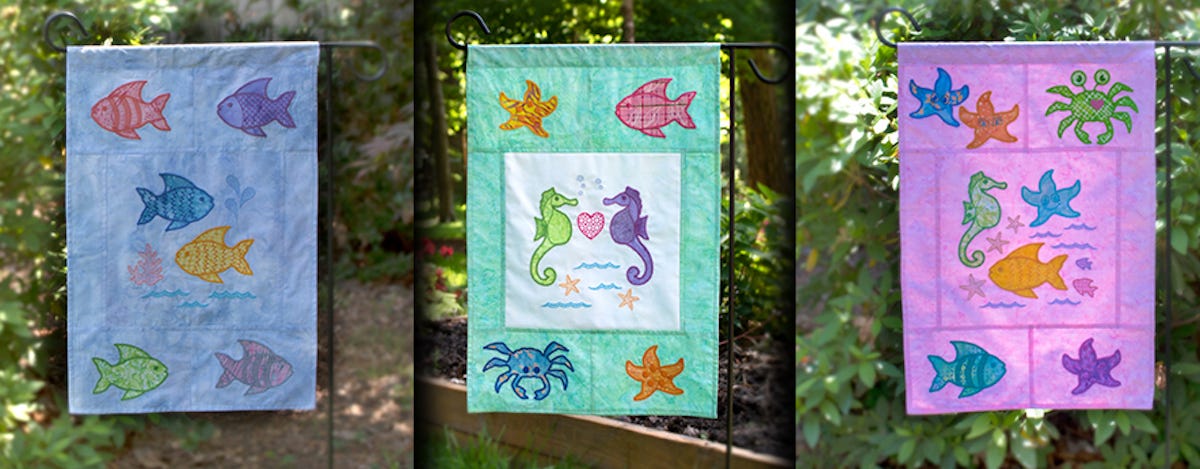
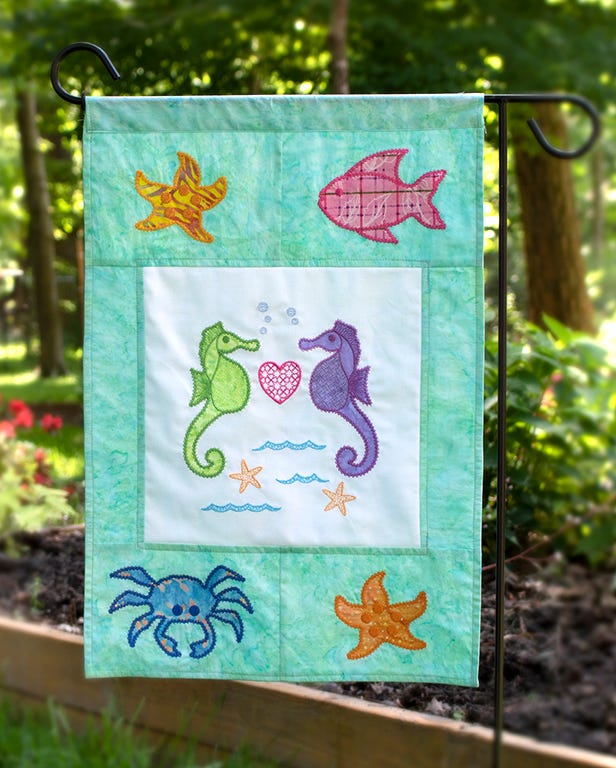
The first flag I made used a light background for the main block and colored fabric surrounding it. After that, the next two flags were made using the same fabric throughout. It's hard to decide which I like best. Which style is your favorite?

Supplies Needed:
- AccuQuilt GO! Sea Life Medley Die(#55190)
- AccuQuilt GO! Circle Die (#55484)
- AccuQuilt GO! Sea Life Medley Machine Embroidery Designs ‘Mega Set’ by Marjorie Busby
Fabric:
- For flag with contrasting block in center
- ½ yard fabric (or two fat quarters)
- 11” square of background fabric
- For flag of a single color
- ½ yard fabric
- 11” square of same fabric for block background
- Assortment of fabric scraps for appliqué that coordinate with background fabric
- Iron on fusible web or water soluble glue stick
Embroidery supplies:
You will need an embroidery machine and supplies, including medium weight tearaway stabilizer, coordinating thread, bobbin thread, and either water soluble glue stick (Elmer’s purple glue stick or a fabric glue stick or pen) OR temporary spray adhesive for fabric (Sulky KK2000).
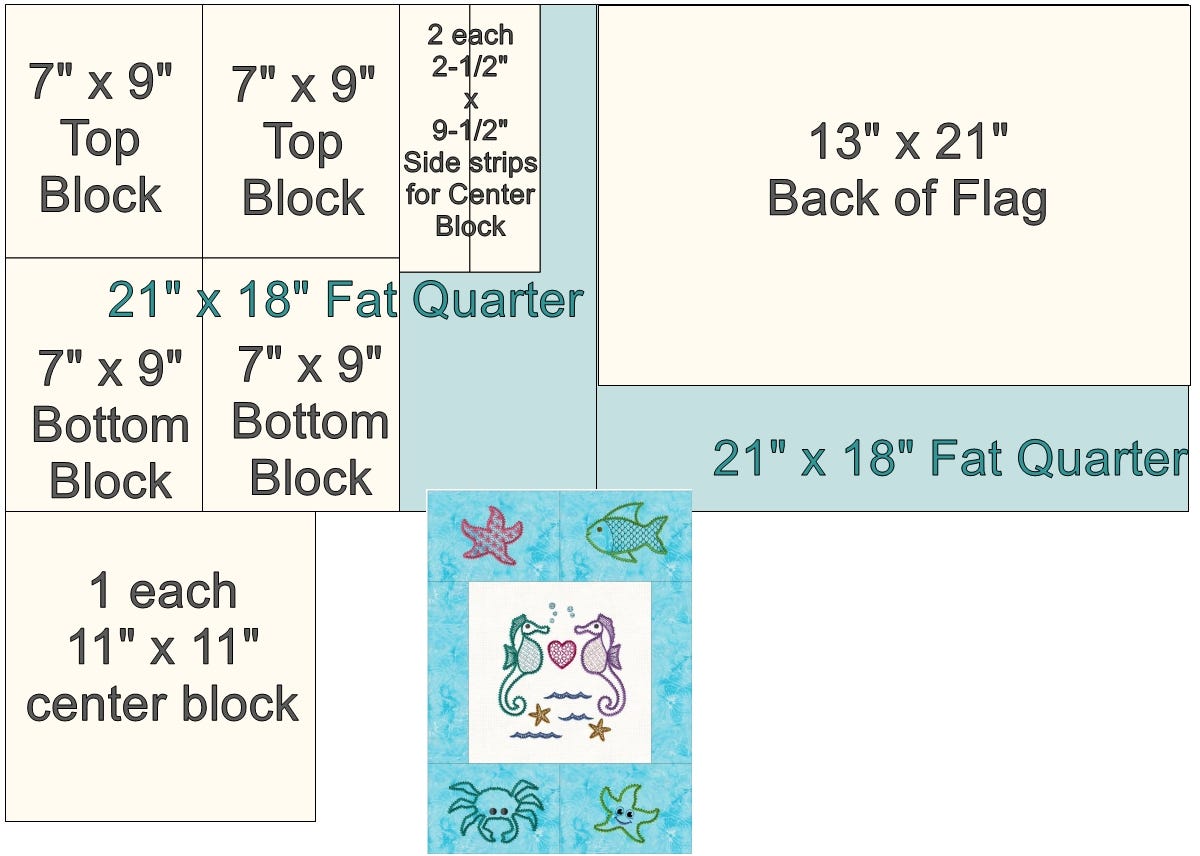
1. Cut fabric blocks and backing for flag
Cut block shapes for flag as shown using ½ yard of fabric or two fat quarters. The cut sizes of the blocks to be embroidered include a margin for adjustment for centering and will be cut to block size after the embroidery is completed. In addition to the ½ yard of fabric, an additional 11” x 11” square is cut for the center block.
2. Prepare and cut appliqué shapes
Follow manufacturer’s instructions for applying iron-on fusible web to wrong side of fabric scraps. If using a glue stick, press scraps well before cutting.
Cut as follows:
Place right or wrong side of appliqué fabric to be cut onto die based on the direction the cut shape will be facing on the finished garden flag. Instructions for cutting are included in the embroidery design set. Shapes can be cut on lengthwise or bias grain and manipulated to fit inside the placement lines.
For shapes cut with fusible web, cut shape before removing paper backing from fusible web. To remove paper from the wrong side of the cut shape, use a large pin or the tip of a seam ripper to score the paper, then peel paper from the back of the shape.
3. Complete Machine Embroidery stitching
Hoop the background fabric. Center it carefully in hoop matching centering marks on hoop to horizontal and vertical center of background fabric. Secure background fabric to the stabilizer in the hoop using spray adhesive or water soluble glue stick.
Before beginning the embroidery, use the basting function on the embroidery machine to baste a rectangular boundary around the embroidery (see below). This will help keep the background fabric in place with the stabilizer during stitching and will assist with trimming blocks to size after stitching.
Glue Method: You can see blue where I used a glue pen just inside the placement lines for the shape. The hoop is placed on a flat surface (ironing pad) to apply the glue. The shape is carefully placed just inside or on top of the placement lines using tweezers or forceps and is then finger pressed into place—a mini iron is used to secure shape before stitching begins.

Stitch embroidery following the step by step instructions provided in the machine embroidery design set.
4. Trim completed embroidery blocks
When the embroidery is complete, remove the fabric from the hoop and use a ruler and rotary cutter to trim the block to specified sizes (as shown in image below) using the basting stitches on the background fabric as a guide for centering the machine embroidery in the block.
- Top and Bottom Blocks: trim to 7”w x 5”h (finished size after sewing 6½” x 4½”)
- Center Block: trim to 9½” x 9½” (finished size after sewing 9” x 9”)
Remove the basting stitches and tearaway stabilizer, the press from back side of embroidery.

5. Make garden flag
Assemble the front of flag as shown in the picture above.
Stitch the front and back of the flag together: Lay the flag front and the flag back with right sides together, matching the sides and bottom edge. The back of the flag is longer than the front and will extend beyond the top of the flag. This extra fabric at the top will be used to make a casing for hanging the flag.
If needed, trim any excess fabric from the sides or bottom of the flag so that the layers lay flat. Stitch the sides and bottom of the flag together with a ¼” seam. Turn inside out and press. Use your fingers to work the side seams into a sharp crease before pressing.
Using the front top of the flag as a guide, cut the back of the flag so that the top extension is 2½”. Press the top extension as shown.

Fold the top extension over and press so the edge of casing just covers the top edge of the front of the flag. Edge stitch the casing onto the flag.
Top stitch ¼” from the outer edges of the sides and bottom of the flag. Top stitch ¼” around the center block of the flag.
The flag is now finished and ready to use in your garden or as a party banner on your deck or porch.
Do your stitching skills help decorate your garden or yard? Show us what you've sewn for your outdoor space on Facebook and Instagram with the #AccuQuilt hashtag! Subscribe to the AccuQuilt blog while you're at it so you can see all the projects the GO! Getters are working on!