


Hi all! Terri here from Lizard Creek Quilting.
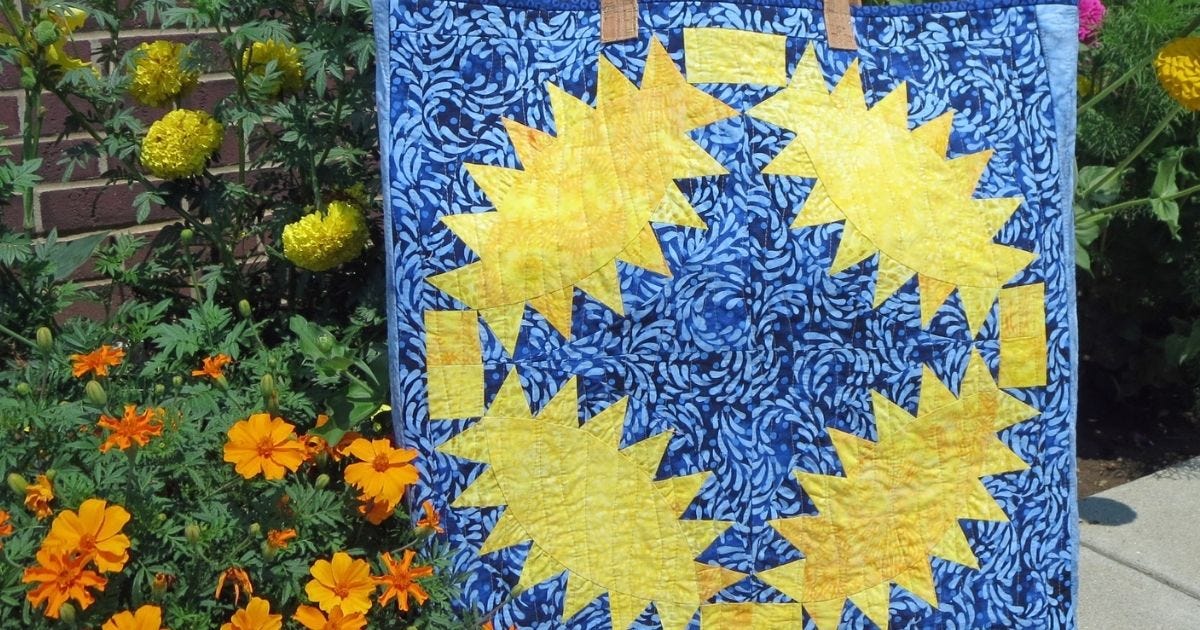
I am looking forward to sharing this happy sunshine tote bag with you. Lately, it seems as I have been sewing Y-seams in every project (here is a great tutorial for sewing Y-seams). So, I was excited to sew the gentle curves using the GO! Pickle Dish 10" finished block die (55539).
Come along with me and let's get started sewing up some sunshine!

DIY Sunshine Day Tote Bag
Dies Used
- GO! Pickle Dish 10" finished (55539)
- GO! Strip Cutter 1-1/2" (1" finished) (55024)
- GO! Strip Cutter 2-1/2" (2" finished) (55014 or 55017)

Materials Needed
- Blue Print--1/2 yard
- Yellow--1/4 yard of 3 different shades
- Light Blue (sides and back)--3/4 yard
- Dark Blue (binding)--1/4 yard
- Lining--1-1/2 yard
- Fabric backed Cork--5-1/2" x 22"-23"
- Batting--2 pieces 23" x 23" and 1 piece 14" x 23"
Cutting
Blue Print:
- Shape C--cut 8, Shape DR and D--cut 8 each, and Shape F--cut 48
- 4 strips 1-1/2" x width of fabric (WOF)
Assorted Yellow:
- Shape A--cut 4, Shape B--cut 8, and Shape E--cut 56
Light Blue:
- 1 sqaure 24" x 24" and 1 rectangle 13" x 24"
Dark Blue:
- 2 strips 2-1/2" x WOF
Lining fabric:
- 2 sqaures 25" x 25" and 1 rectangle 15" x 25"
Fabric backed Cork:
- 2 strips 2-1/2" x 22" - 23"
Pro Tip: The 2-1/2" strip die easily cut through one layer of the fabric-backed cork. When using fabric (other than quilting cotton) always start with one layer of fabric to make sure the cuts are clean.

Pickle Dish Blocks
Use directions on the die packaging or HERE to piece four blocks (10" finished). Chain piecing units will speed up the process.

Curved piecing is easily accomplished when the units are cut accurately and precisely. Pins are optional.

Match the notches, use a stiletto to guide the fabric along, and go slow--it's not a race!!

Tote Bag Units
- Sew together the four Pickle Dish blocks rotating blocks to form a ring. Press seams open. Pin and sew 1-1/2" strips to all four sides to form a 22-1/2" square tote bag front.
- Layer tote bag front, batting, and 25" x 25" lining fabric. Quilt as desired. Trim into 1--22-1/2" x 22-1/2" tote bag front.
- Layer 24" x 24" light blue sqaure, batting, and 25" x 25" lining fabric. Quilt as desired. Trim into 1-- 22-1/2" x 22-1/2" tote bag back.
- Layer 13" x 24" light blue rectangle, batting and 15" x 25" lining fabric, Quilt as desired. Trim into 3--4" x 22-1/2" side/bottom rectangles.

Tote Bag Assembly
The bag will be constructed using Y-seams, and it's going to be simple. The basic idea is just to sew up to the dot, backstitch a couple of stitches to secure, and move on to the next seam.
Mark Dots 1/4" as Follows:
- Bottom Unit--all four corners front and back
- Two side units--bottom two corners front and back
- tote bag front and tote bag back--bottom two corners front and back
Assembly
- Pin and sew tote bag front, two side units, and tote back together. Stop sewing at dot. Backstitch a couple of stitches and cut thread. Make 1 tote bag tube.
- Pin a bottom unit to tote bag tube matching dots. Sew between dots. Backstitching at the beginning and end of each seam.
- Turn tote bag right side out. Press edges to firm up the seam.
- Bind top raw edge with dark blue strips.

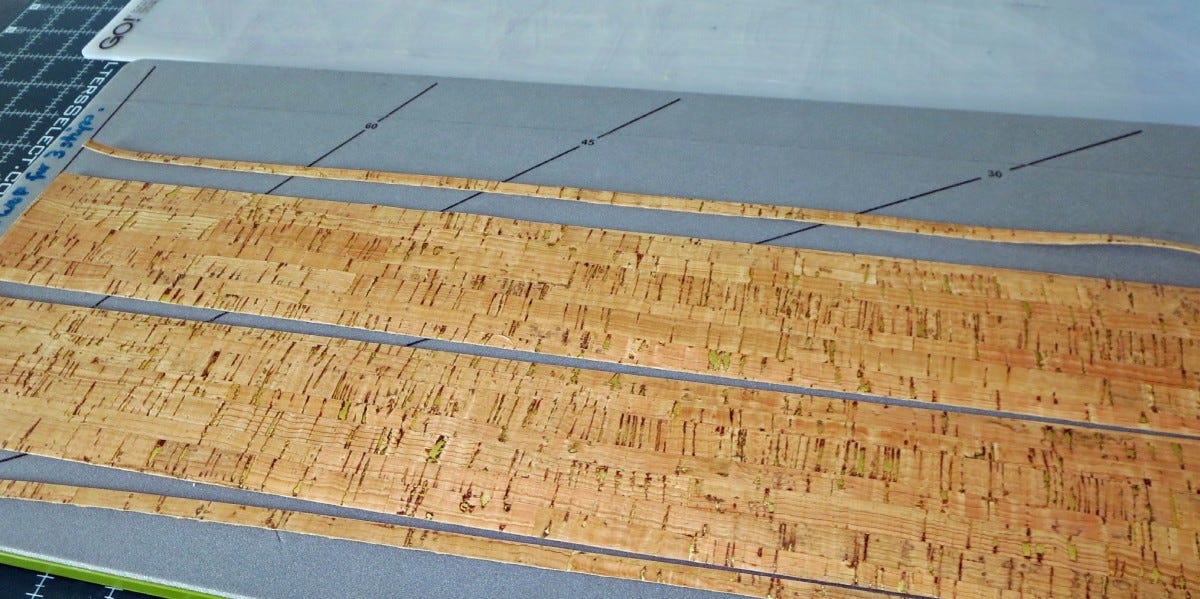
Handles
- Use a fabric marking pen to draw a centerline 1-1/4" in on the wrong side of each cork piece.

- Fold the raw edge up to the drawn centerline. Stitch next to the raw edge using matching thread and bobbin thread.
- Repeat step for other raw edges.

- Adjust handle length as needed to be comfortable. Mark placement on the tote bag. Stitch handles in place.

Pro Tip: Convert any table topper pattern into a tote bag using these instructions. Fill the tote with goodies for a great gift or donation item.
And you're done!
Share Your Projects!
I would love to see your finished project so be sure to share your creations with us on social media. Tag me @lizardcreekquilting and @AccuQuilt on Instagram and always use the #AccuQuiltBuilt hashtag so we can see them!
If you're not on Instagram, share with us on Facebook, too! Give us a follow while you're there and you'll be the first to know what we're making.
Peacefully Quilting,
Terri


