

Hello again, this is Amanda from Larkspur Quilts! Are you ready for a fun and colorful summer project?
Quilting Tutorial Supplies
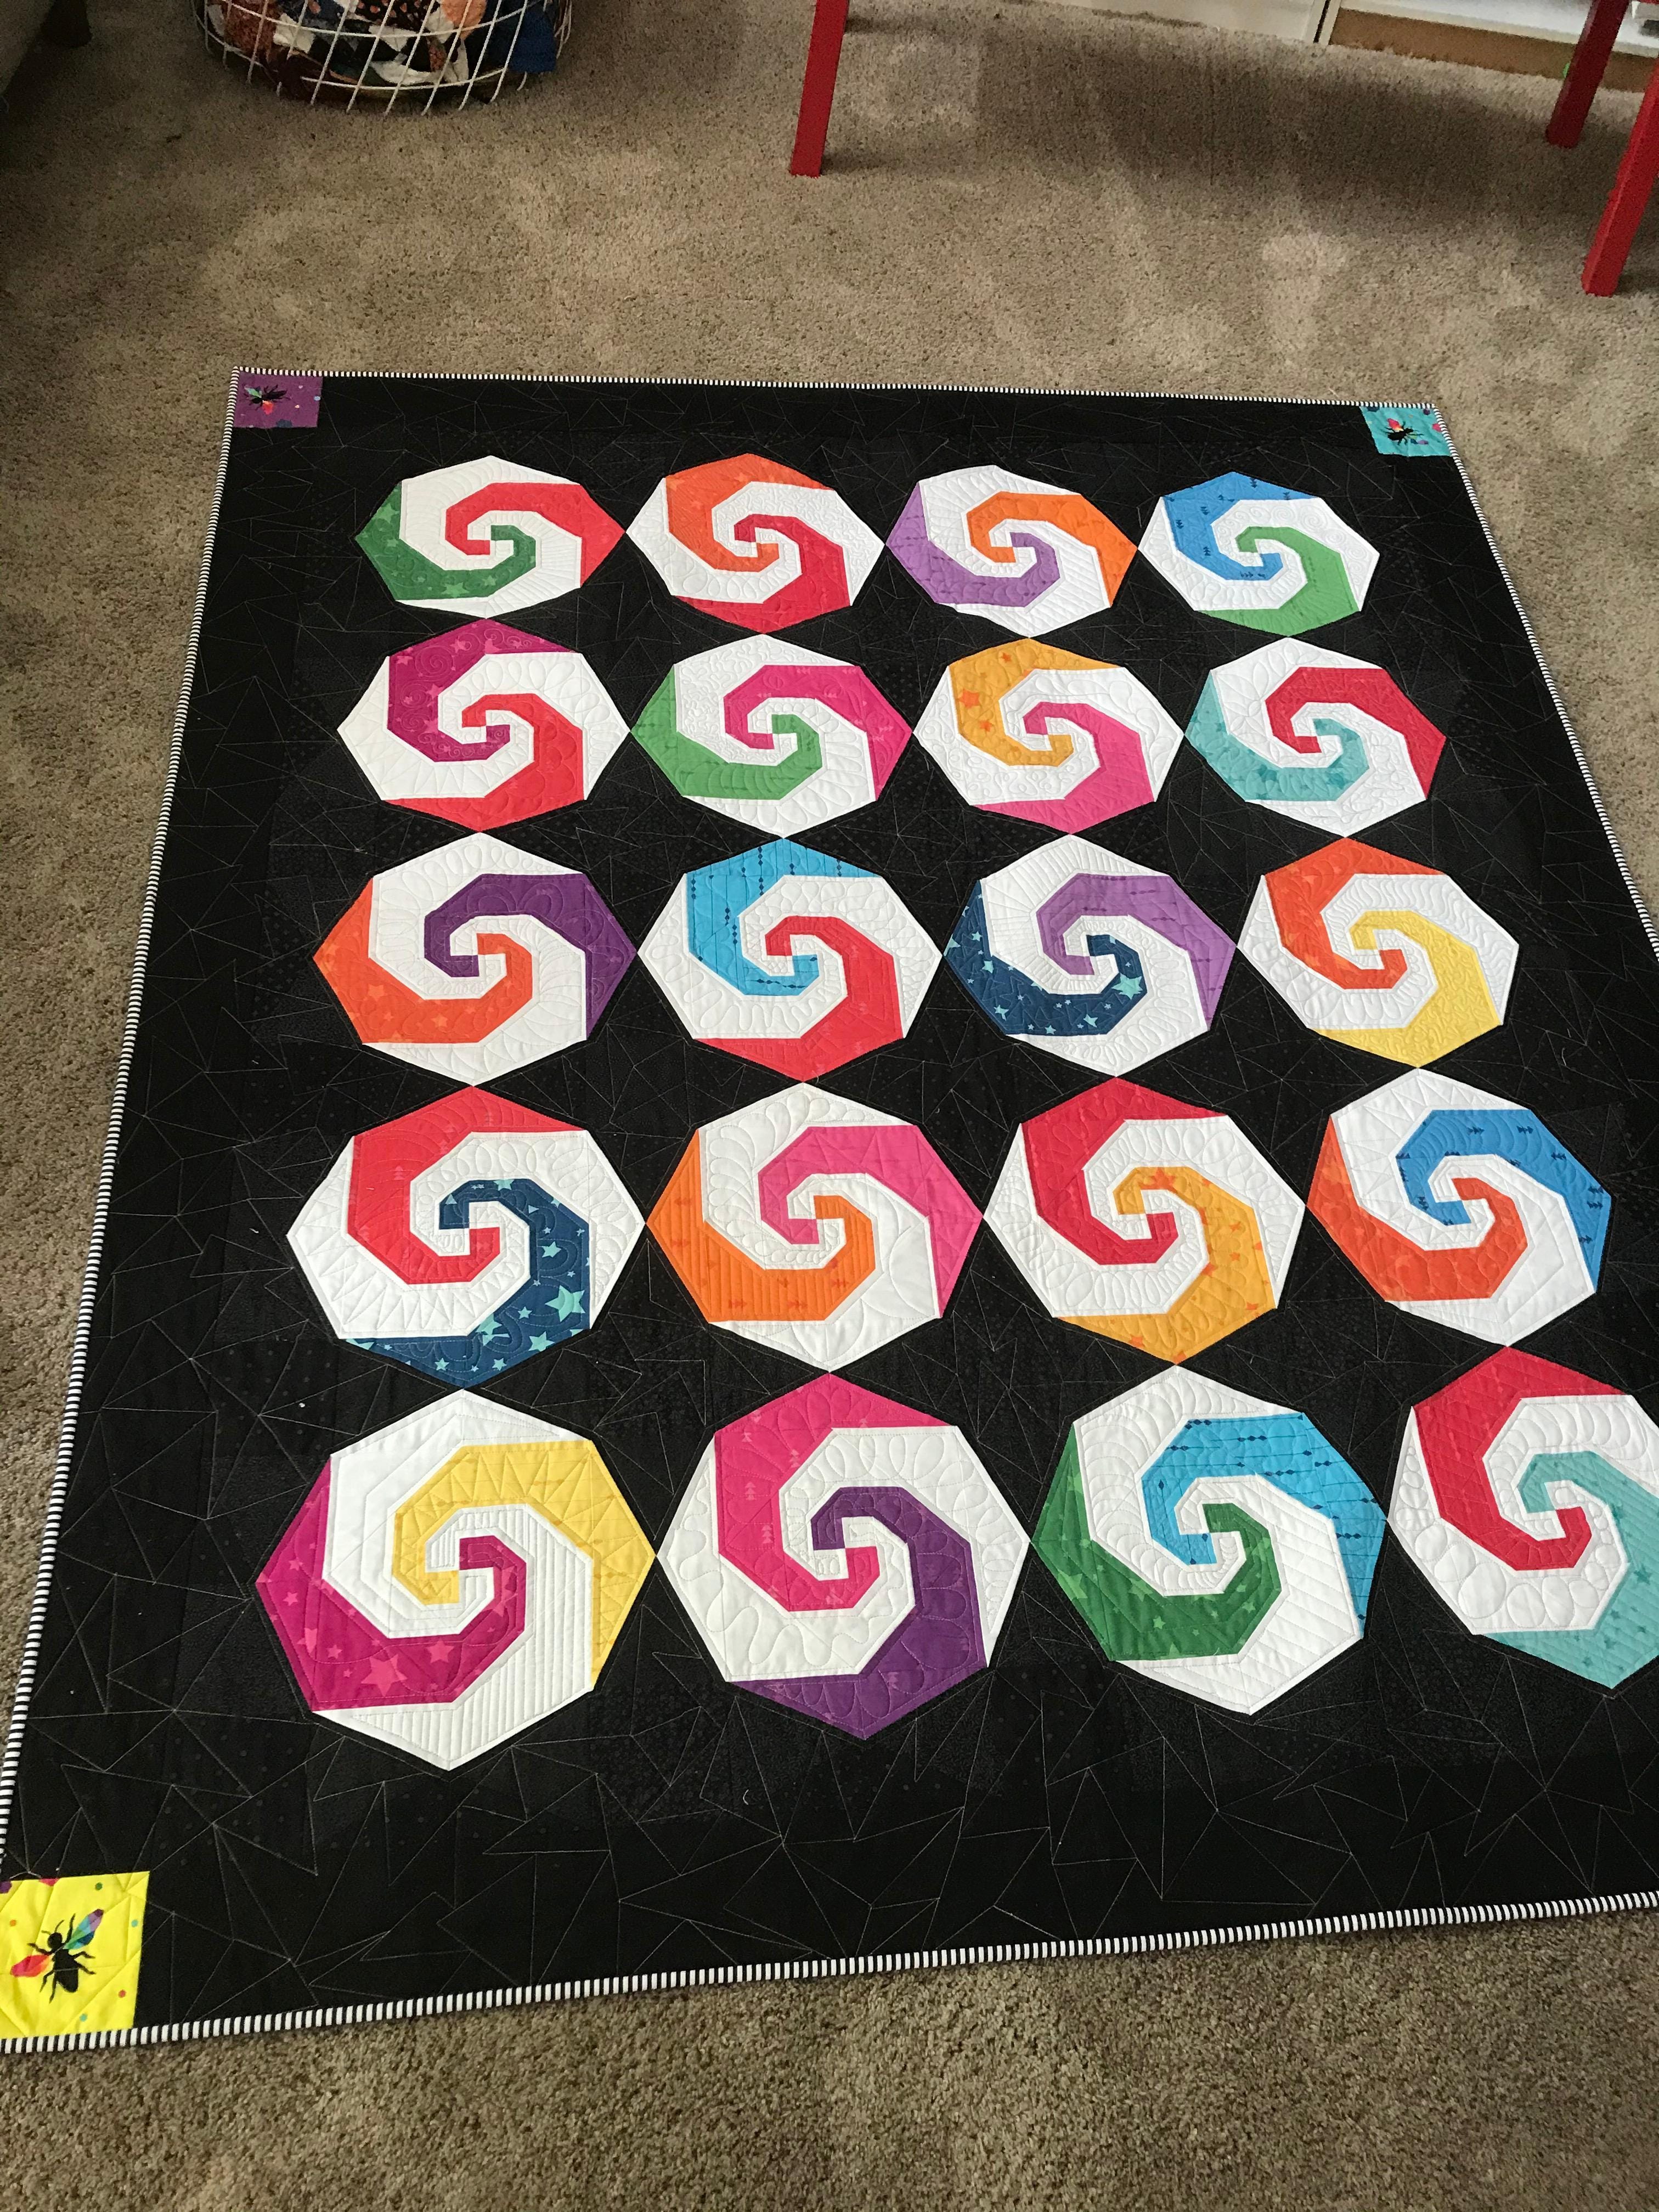
This free Snail's Trail quilt block pattern uses the 8” Finished GO! Snail’s Trail Die, 8” GO! Qube Mix & Match, and the 8” GO! Qube Companion Set-Angles.
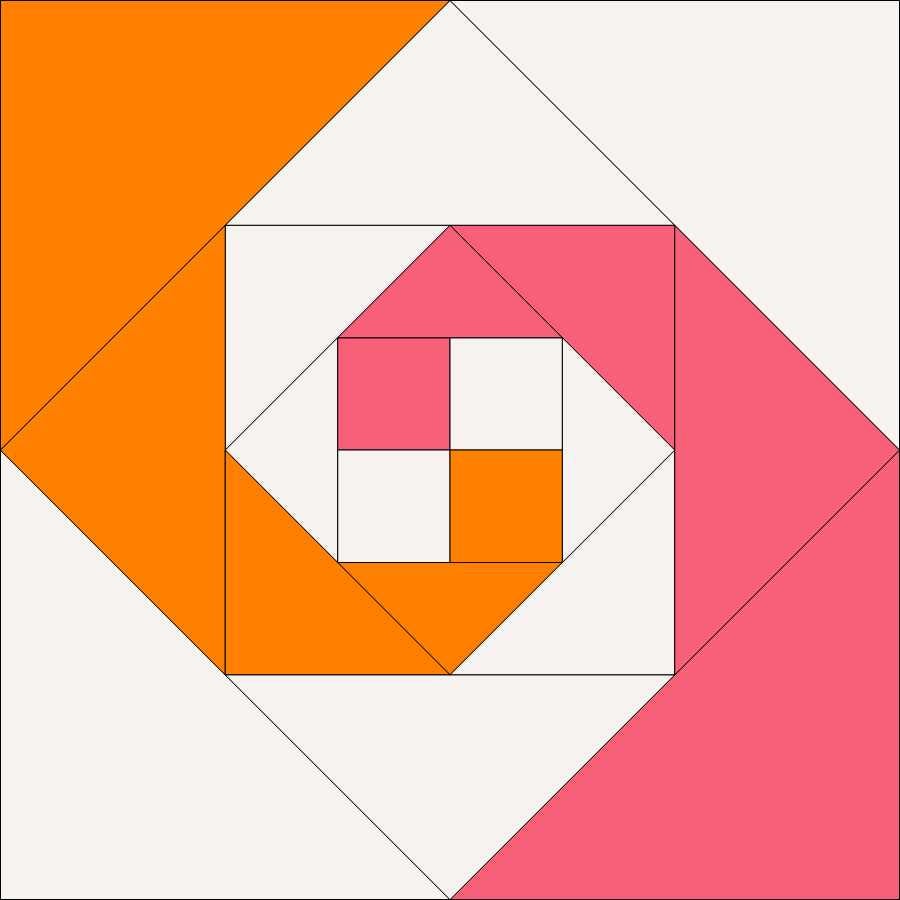
The Snail’s Trail pattern is a Block on Board, and I used the triangle in a square shape to continue the lines, so they look like distinct shapes.
This quilt finishes at 70” x 59”.
Dies Used
- GO! Snail’s Trail-8” Finished Die (55196)
- GO! Qube Mix & Match 8” Block- (55776)
- GO! Qube 8” Companion Set-Angles (55789)
-Triangle in Square-Center-4” Finished square (55753) (Shape #13)
-Triangle in Square-Sides-4” Finished Square (55754) (Shape #14)
- GO! Strip Cutter 4-1/2” (4” Finished) (55054) (For border)
- GO! Strip Cutter 2-1/2” (2” Finished) (55017 or 55014) (For binding)
Fabric Directions
- Black fabric (4 yards total) I used some solids and some tonal fabrics that I had.
- Cut four 5” strips the width of fabric.
- Sub-cut 30 of Shape #1- 4” finished squares.
- Cut two yards of fabric into eight 5” strips the length of fabric.
- Use the Cut & Shift method to sub-cut 98 of Shape #13 Triangle in Square-Centers.
- Cut three 3-1/4” strips the width of fabric.
- Sub-cut 18 sets of Shape #14 Triangle in Square-Sides.
- White fabric (2 yards)
- Cut five 3-1/4” strips the width of fabric.
- Sub-cut 40 sets Shape #14 Triangle in Square-Sides.
- Cut five 10” strips the width of fabric.
- Sub-cut forty sets of Snail’s Trail pieces shapes A-E.
- Colorful pack of 10” squares** (you will need at least two squares per color)
**I used the Create-Layer Cake by Quiet Play for Riley Blake
- Sort pack and choose one 10” square from 20 different colors of fabric.
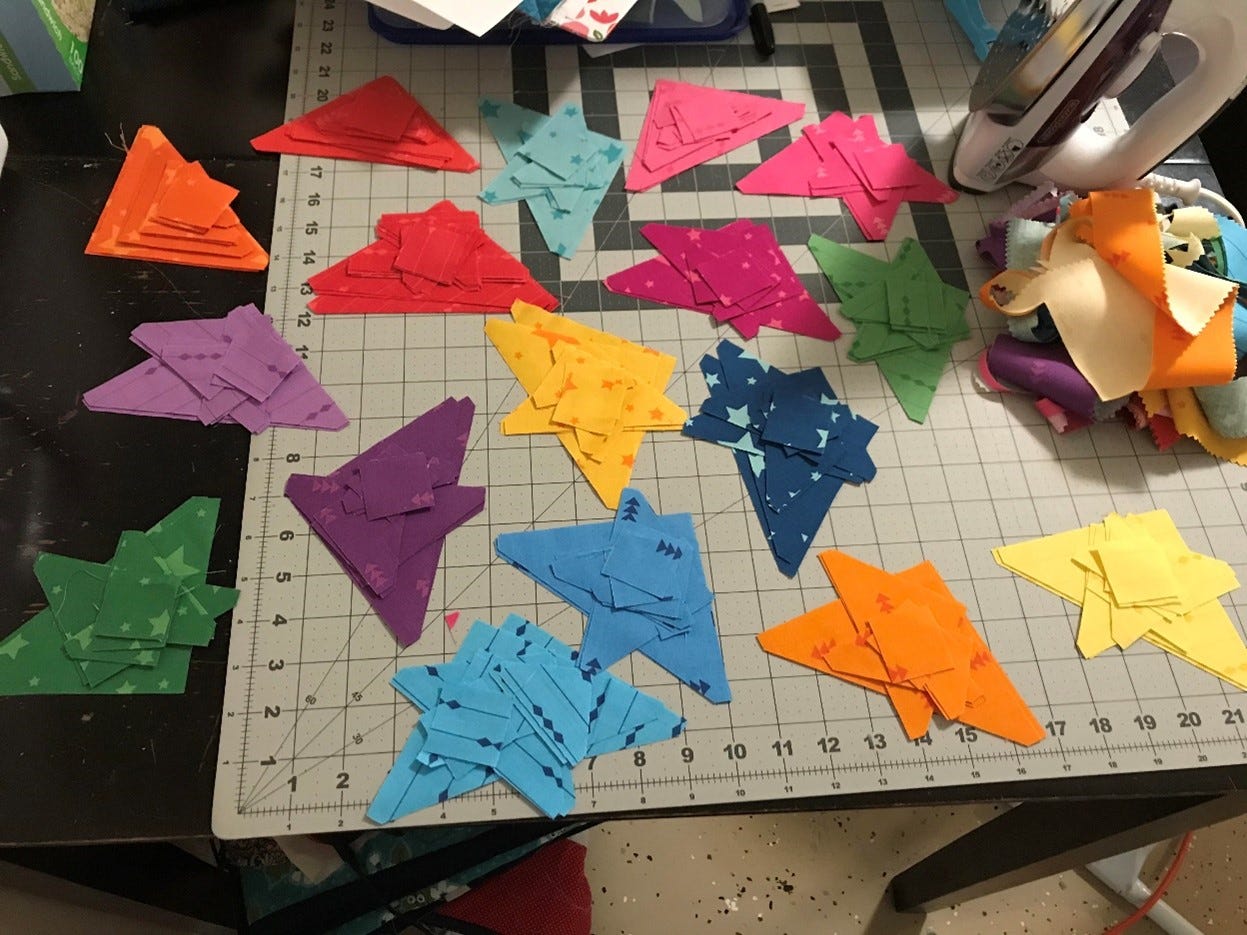
- Sub-cut 40 sets of Snail’s Trail pieces - Shapes A-E. You should have two of each shape A-E in every color (see picture below).
- From the second 10” square, the same colors that you cut the snail’s trail pieces, cut two sets of Shape #14 Triangle in Square-Sides. When you do this, cut one set with fabric face up, and one set with fabric face down.
- Binding: ½ yard black and white striped fabric cut into six strips using the 2-1/2” strip cutter.
- Batting: 78” x 67”
- Backing: 82” x 71”
Free Snail’s Trail Block Pattern
Sew Snail’s Trail blocks according to die instructions. Make 20 Snail’s Trail blocks.
1. Layout your blocks on a design wall or a flat surface with about 5” of space in between for the sashing. If you are like me and space is a precious commodity in your sewing area, I just worked on 1-2 rows at a time.
2. I took every other Snail’s Trail block and rotated it 90 degrees for variety.

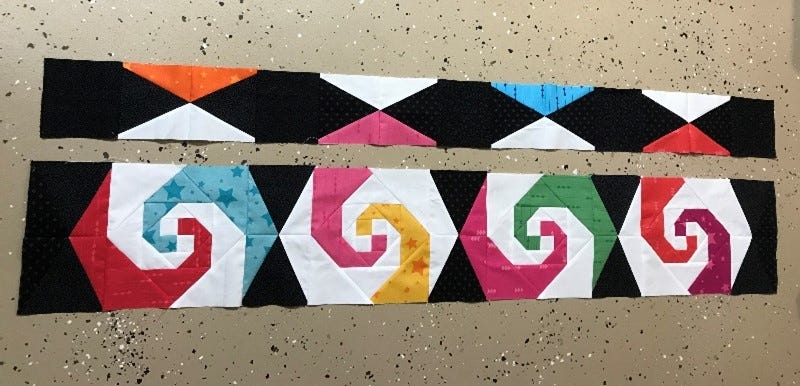
3. Lay out the triangle in square-centers, and then match the Triangle in Square-Sides with the corresponding colors of the Snail’s Trail blocks. Also, notice the 4-1/2” squares as part of the sashing.

4. For the top and the sides of the quilt you will use the black Triangle in Square sides on the edge.
5. I sewed the blocks together in a 4 x 5 layout, with the sashing, and then added a 4-1/2 black border cut with the 4-1/2” strip cutter die.
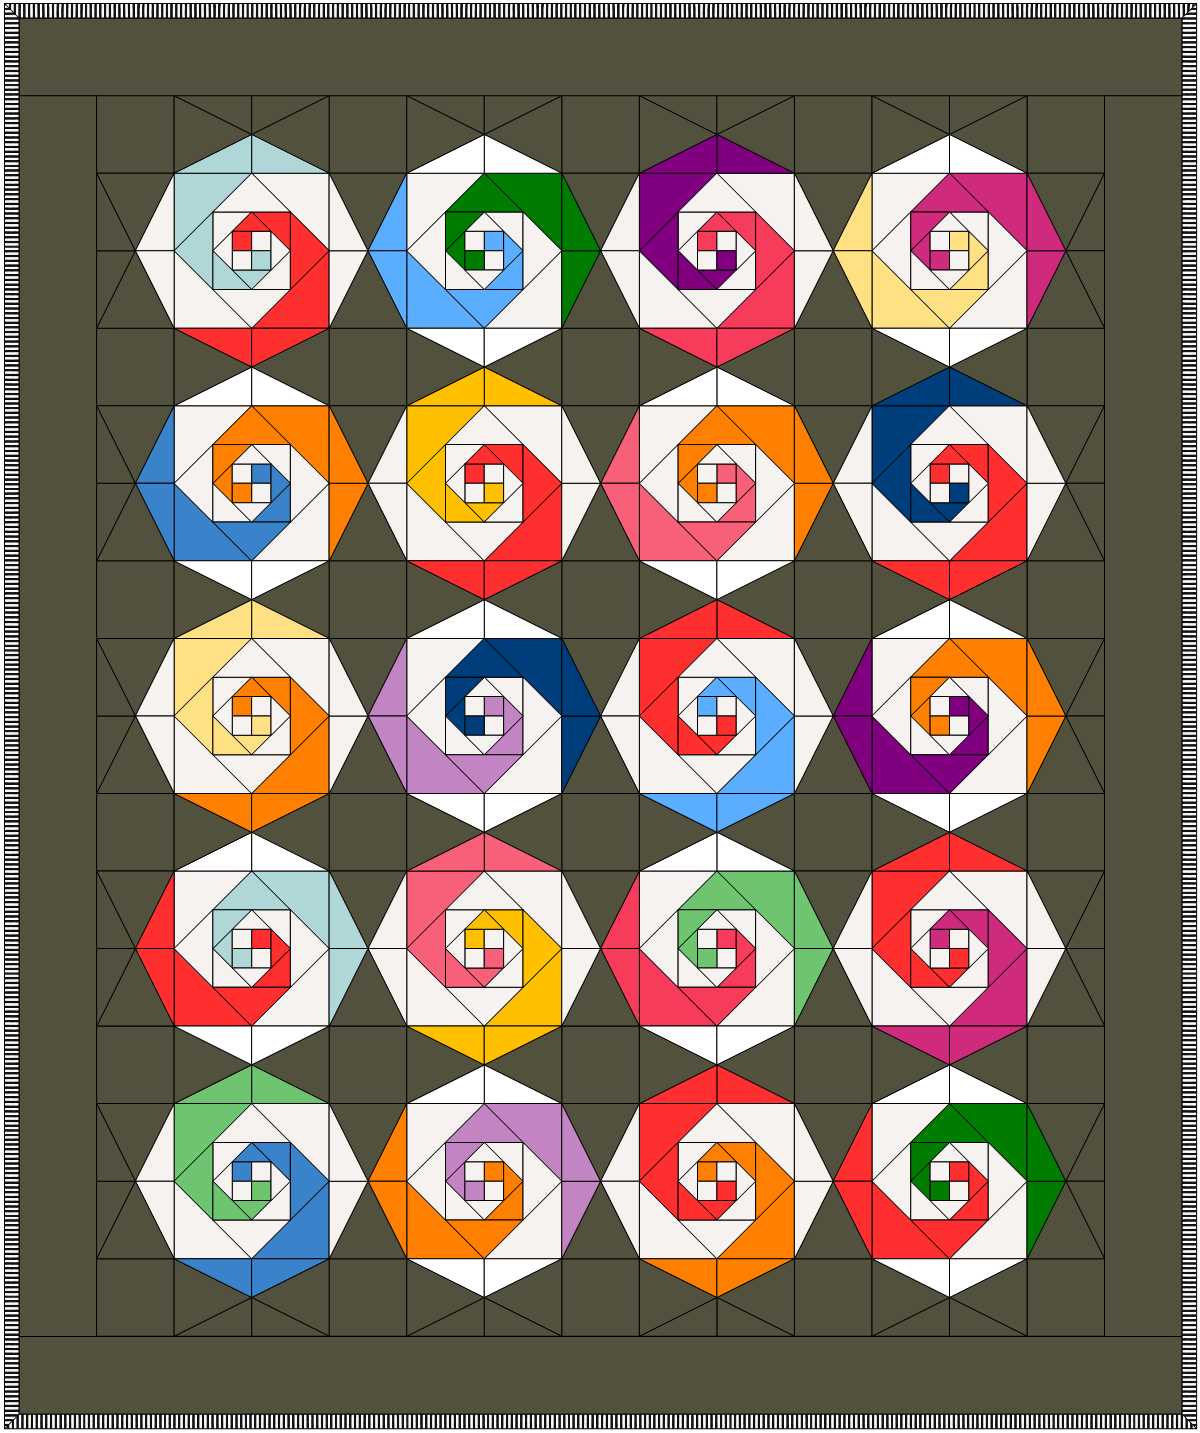
6. I added squares in the corners that I fussy cut from the extra squares in this layer cake, and black and white thin striped binding.
You could customize this project with a name or a phrase. Maybe…"You’re Getting Very Sleepy"?
I hope that you enjoy making this quilt! If you do make this quilt, please share the photo on social media using the hashtag #AccuQuilt and don't forget to tag @larkspurquilts and @AccuQuilt so we can see your fun creation!


