


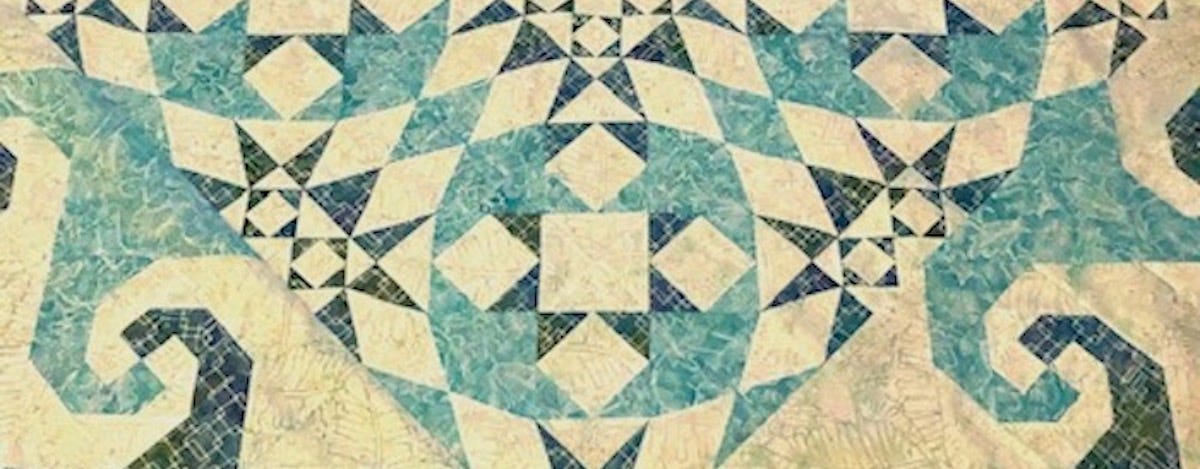
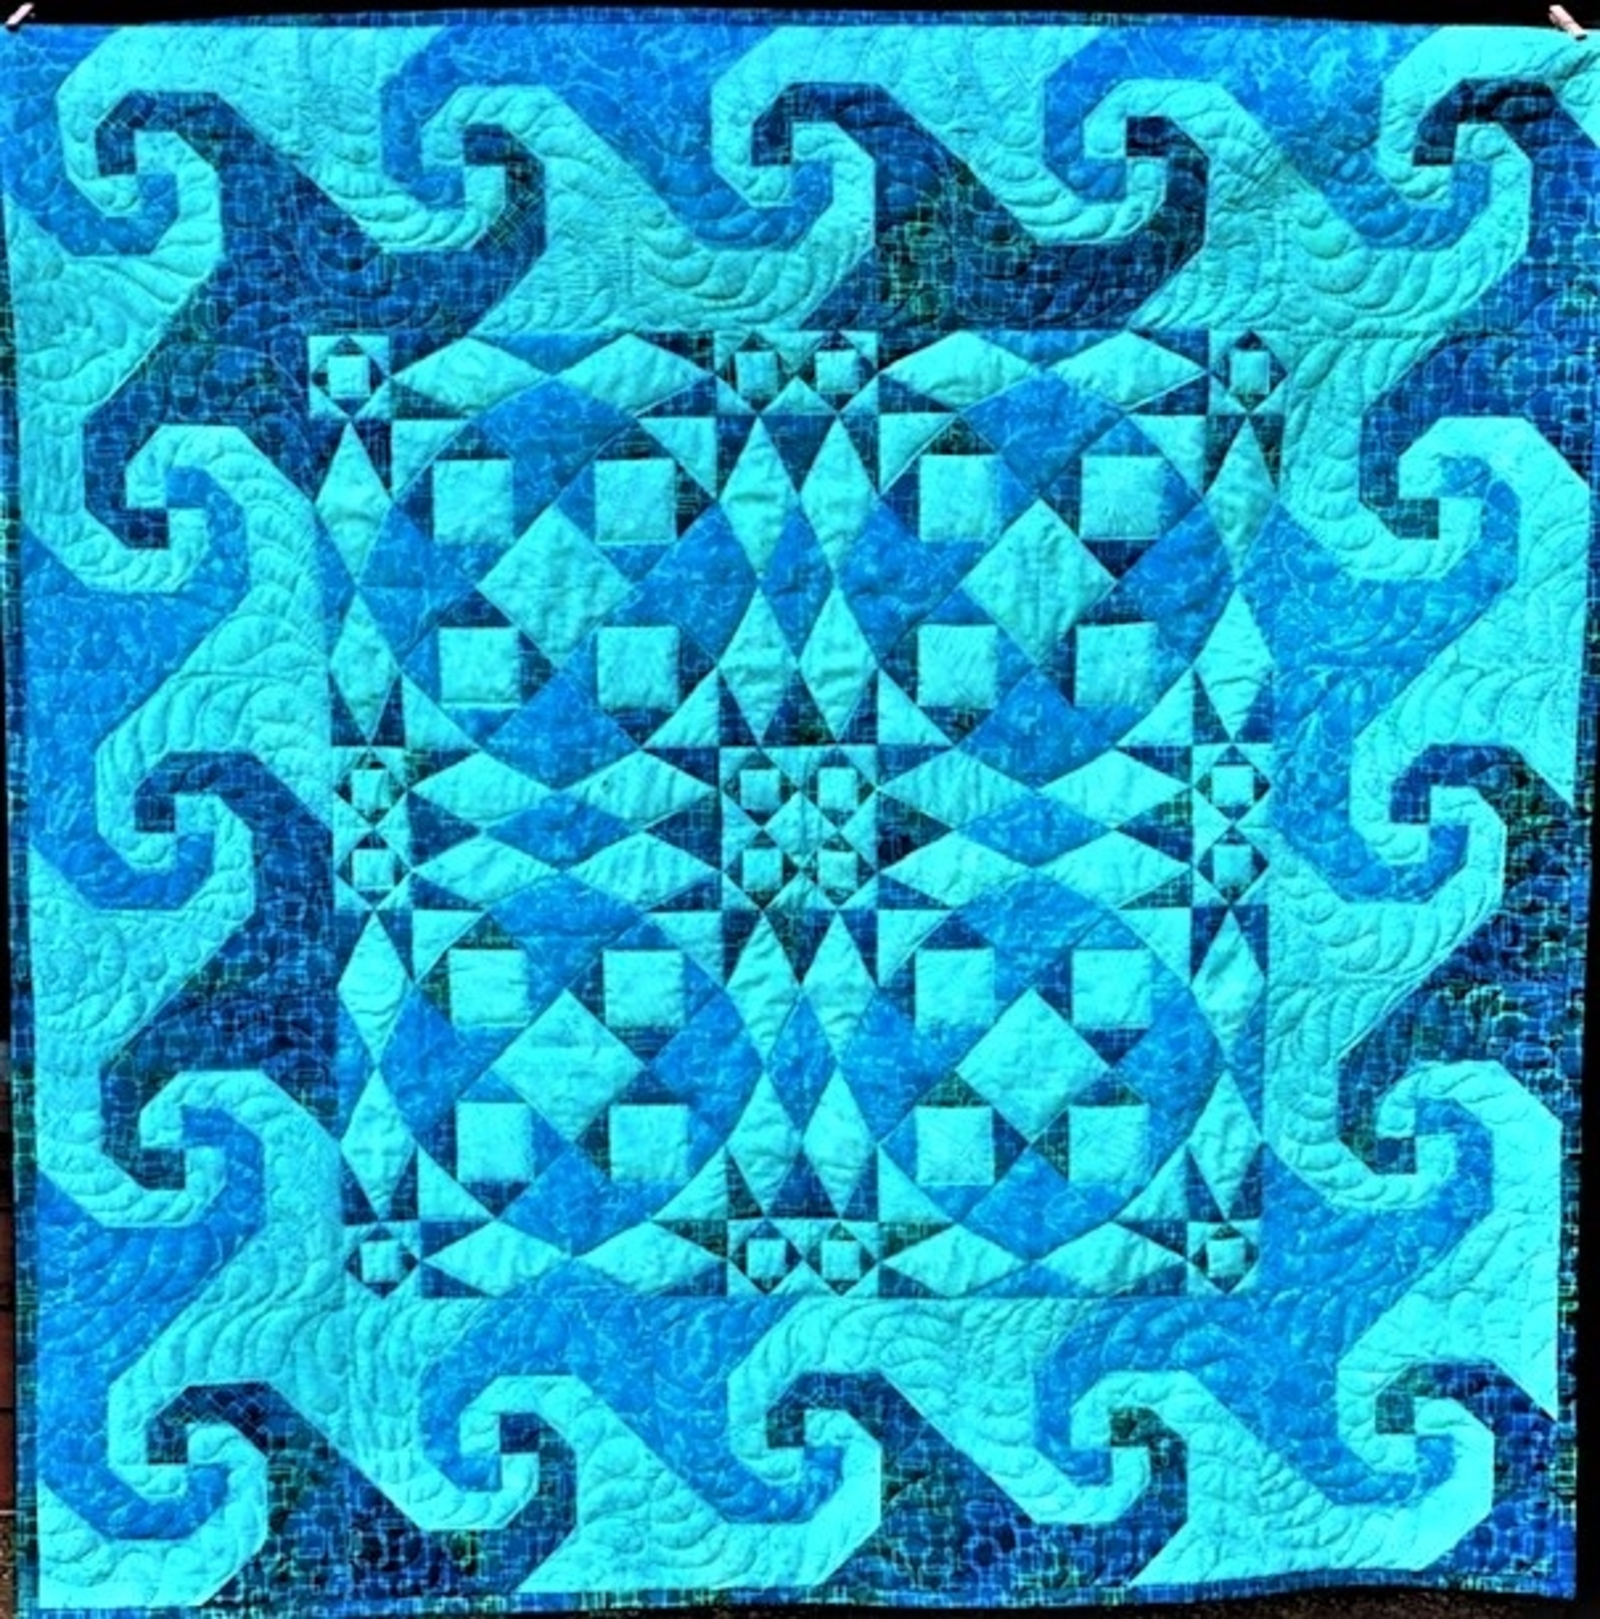
Hello everyone, it's Denise from For the Love of Geese. First let me say, “OMG, I love this die.” Okay, with that said, I recently got the GO! Storm at Sea die (55221) and immediately thought, "this needs a Snail's Trail." The resulting design is what I'm calling the Tidal Wave Storm at Sea!

Tidal Wave Storm at Sea
60 x 60
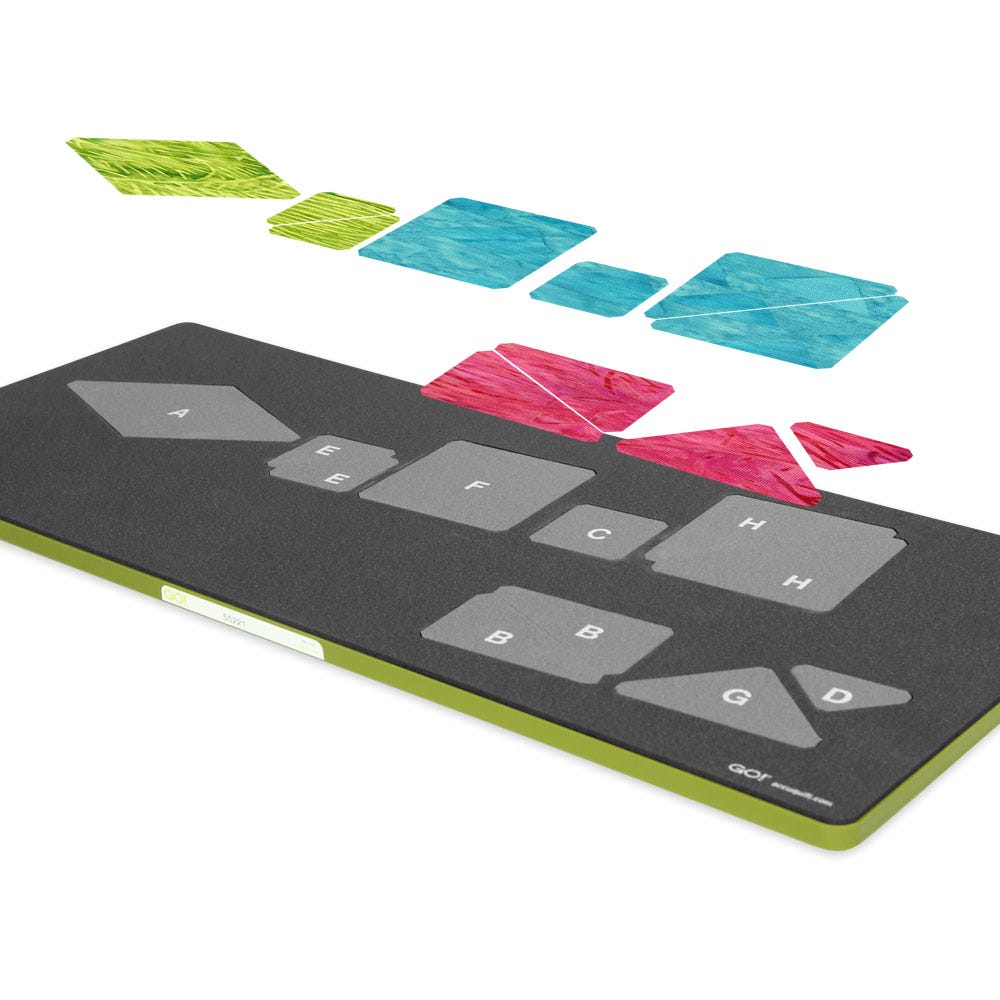
All AccuQuilt Block On Boards® (BOB®) include every shape needed to make a quilt block on one individual die. If you have ever made a Storm At Sea quilt you know the struggle of cutting and piecing every patch precisely and just how much time is required to do so. As with all AccuQuilt dies, you can cut up to six layers of fabric in one pass. That's six blocks cut perfectly with no shifting of fabric, no dog ears and patches that fit perfectly. After working with this die, it will be my new go to block for a quick last minute quilt!
The hardest part in making this quilt is using an accurate ¼” seam. If your seam is a little off, the block will be off, too. AccuQuilt recommends pressing the seams open and it really does make a difference. One final suggestion: press down with your iron instead of sliding it over the fabric. That will reduce stretch and distortion.
With that said let's jump right in and get started.
Fabric
- 4 yards of light
- 2 yards medium
- 2 yards dark
- ½ yard for 2½” or 3” binding
Dies
- GO! Storm at Sea die (55221) for the GO! or GO Big
- GO! Qube Mix & Match 12” Block (For the Snail's Trail)
- GO! Quarter Square Triangle-6” Finished Square (shape 4)
- GO! Half Square Triangle-6” Finished Square (shape 3)
NOTE! If you have the GO! Big, you can use the GO! Snails Trail-12" Finished die (55460).
Storm At Sea 16 blocks
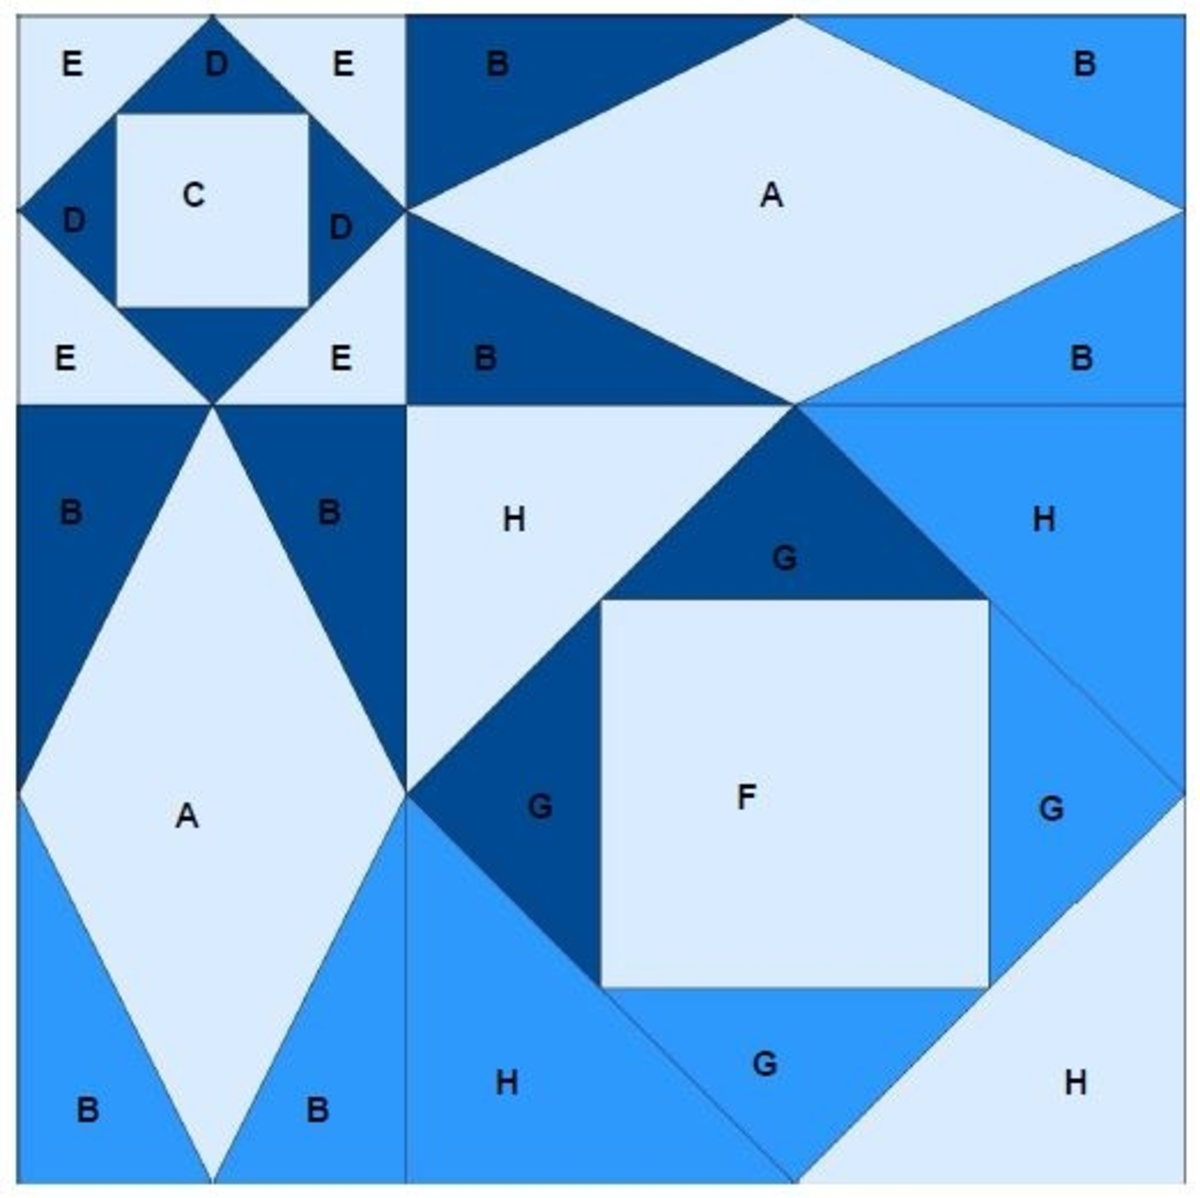
Diagram 1
You will need to make 16 nine inch finished blocks like the one shown above in Diagram 1. Refer to this diagram for color placement when building your block.
For each block, cut:
- A- 2 light for each ¼ block
- B- 4 medium and 4 dark for each ¼ block
- C- 1 light for each ¼ block
- D- 4 dark for each ¼ block
- E- 4 light for each ¼ block
- F- 1 light for each ¼ block
- G- 2 medium and 2 dark for each ¼ block
- H- 2 medium for each ¼ block and 2 light for each ¼ block
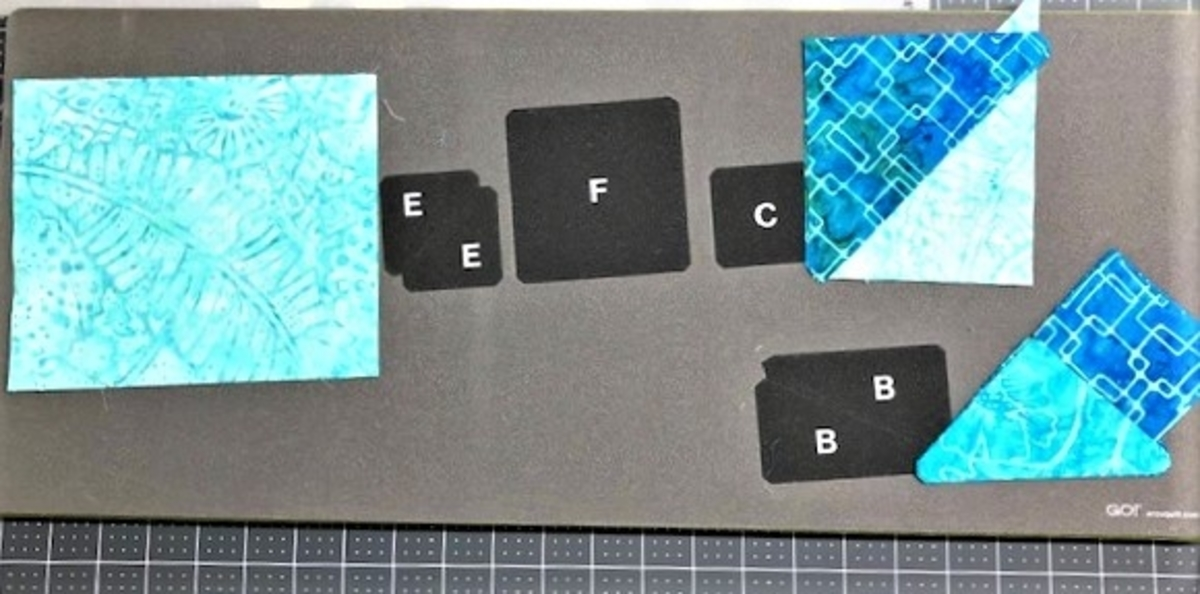
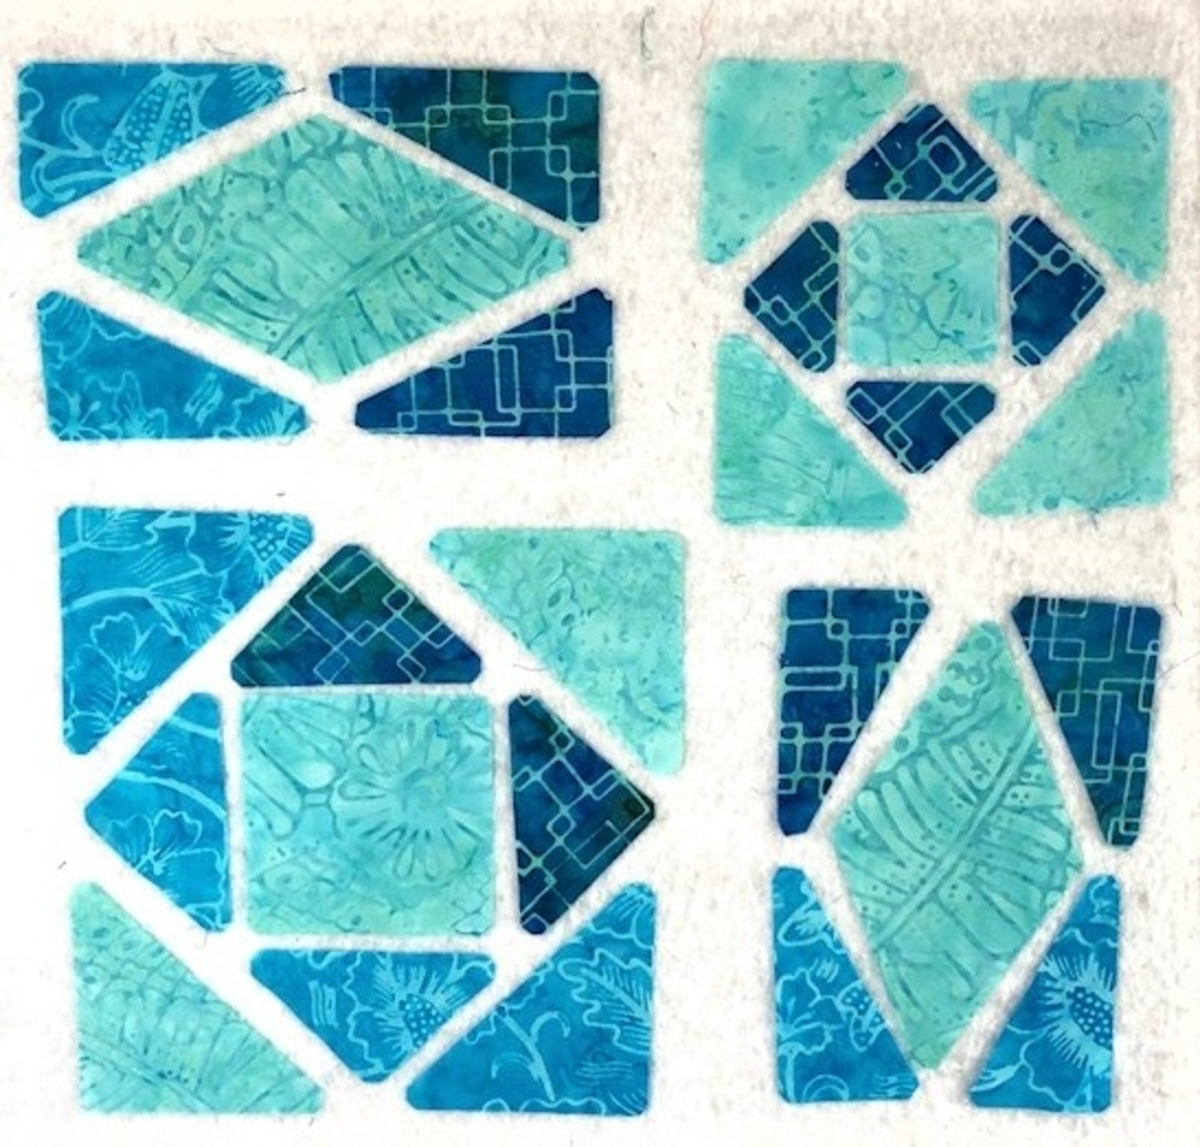
Place up to six layers of fabric on your die. For this pattern and color placement, I found it beneficial to place fabrics on every other shape to avoid cutting through too many layers. For example, if you are cutting six layers of light blue on shape E and six layers of medium blue on shape F, you risk the two stacks overlapping.
After cutting, organize the patches to match the block layout in Diagram 1. See the perfectly cut patches?
Piecing
- Begin by joining G patches to opposite sides of F.
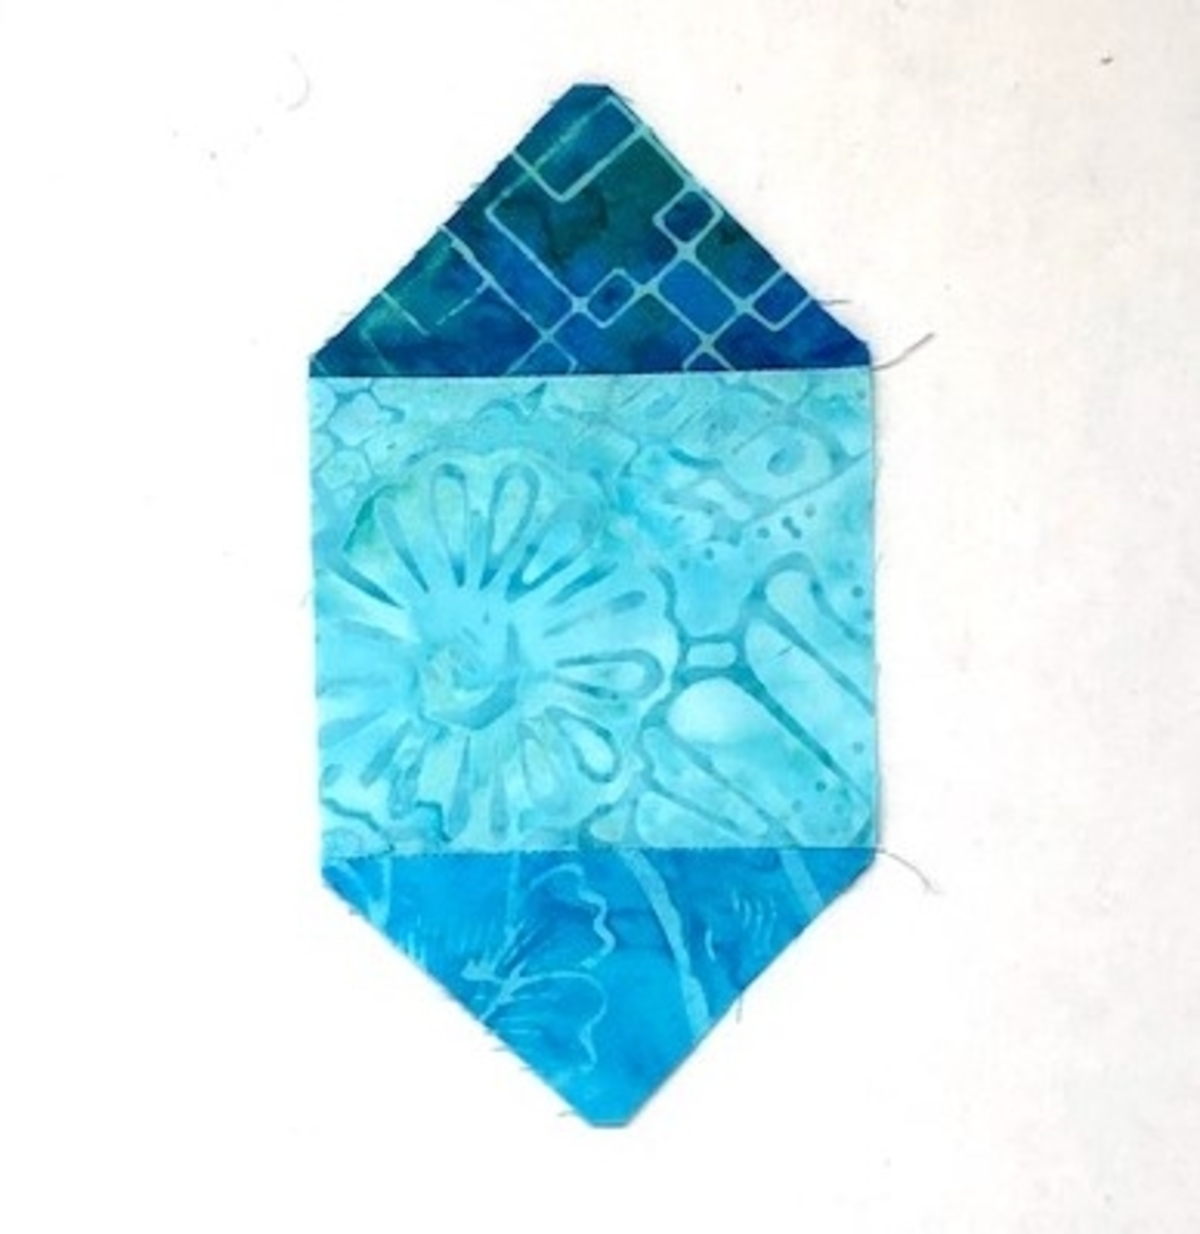
- Press seams open. Join the two remaining G patches to F. Press seams open.
- Join H patches to G/F. Stitch your medium fabric to opposite sides. Press seams open.
- Now join the two light H patches to opposite sides. Press seams open.
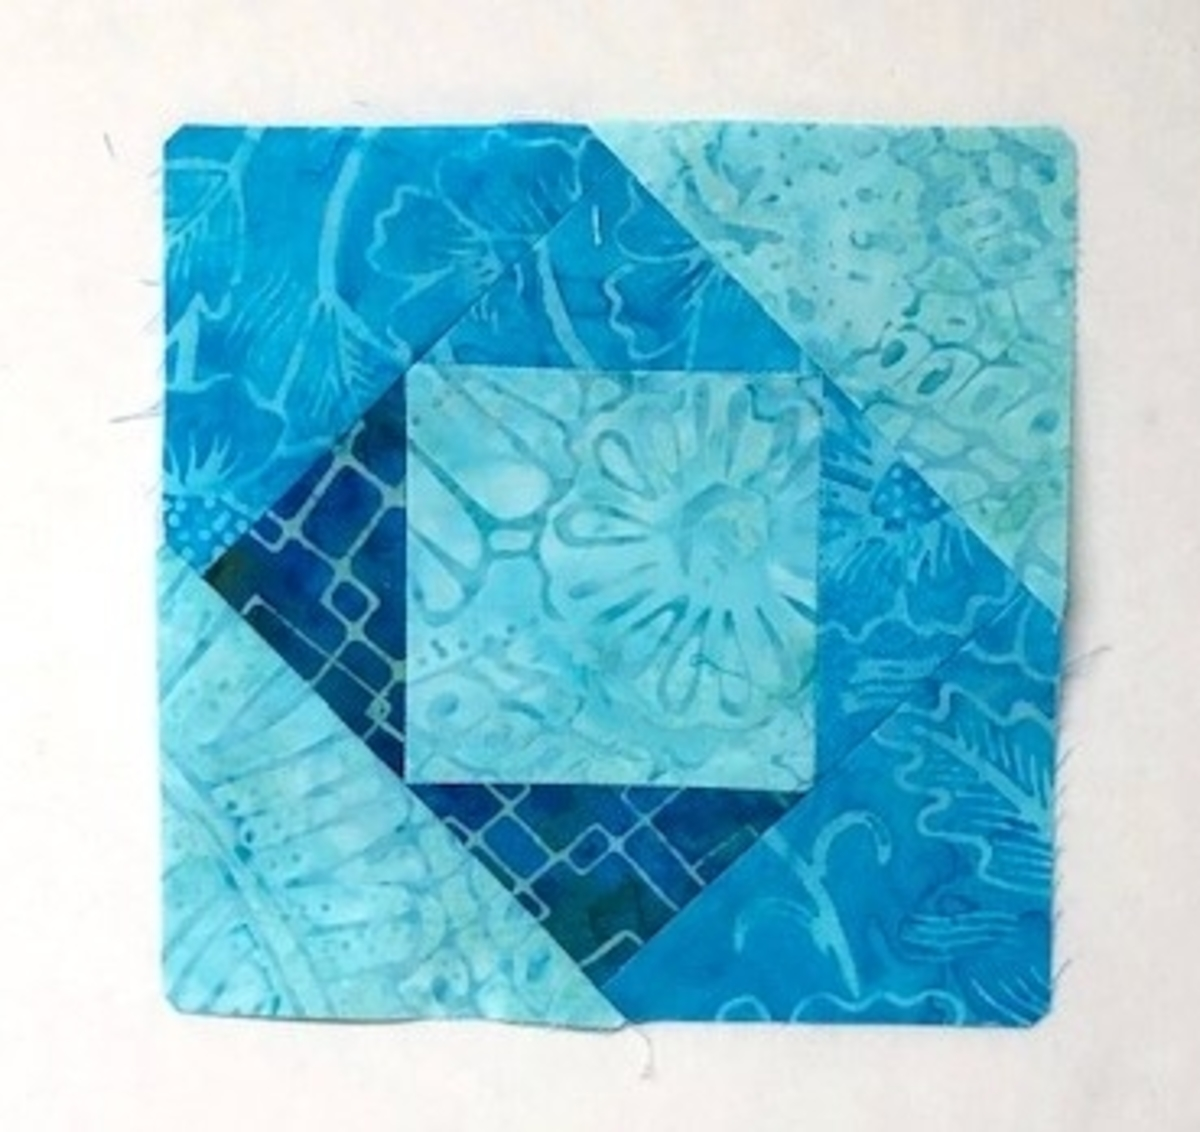
- Continue piecing the A/B (diamonds) units and C/D/E (economy block) unit's following the steps above. Joining the patches on opposite sides of the center patch. Refer to Diagram 1 for color placement. Press seams open.
- Join all four sections to form the Storm At Sea blocks, referring to Diagram 1.
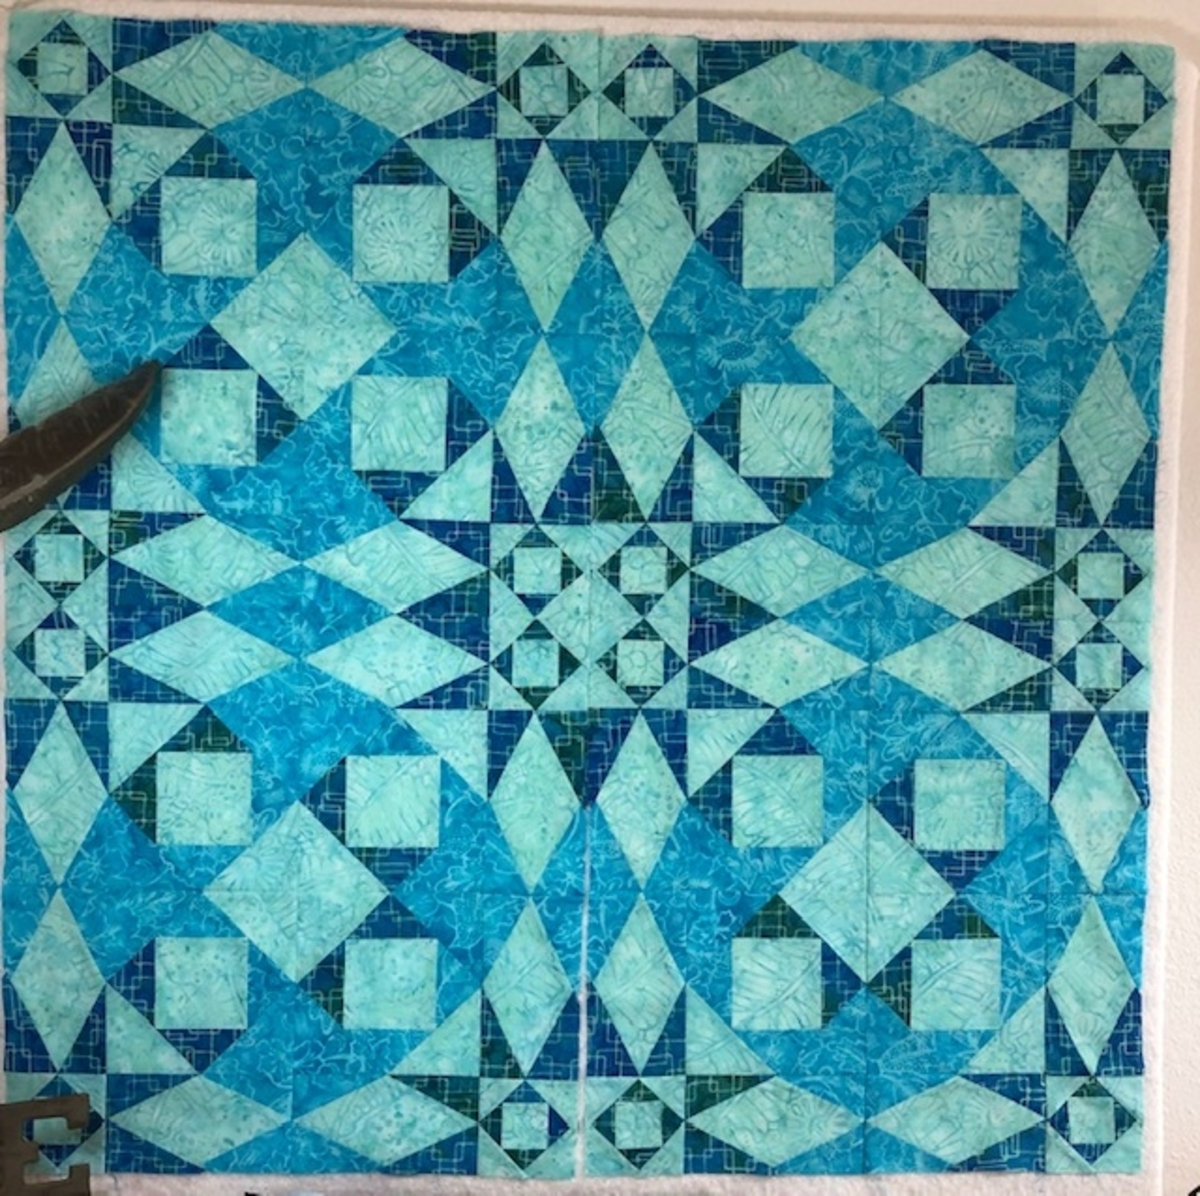
- Next, join blocks in the direction as shown below. Do this four times.

.png)
The center quilt layout will look like the below photo prior to joining the four blocks.
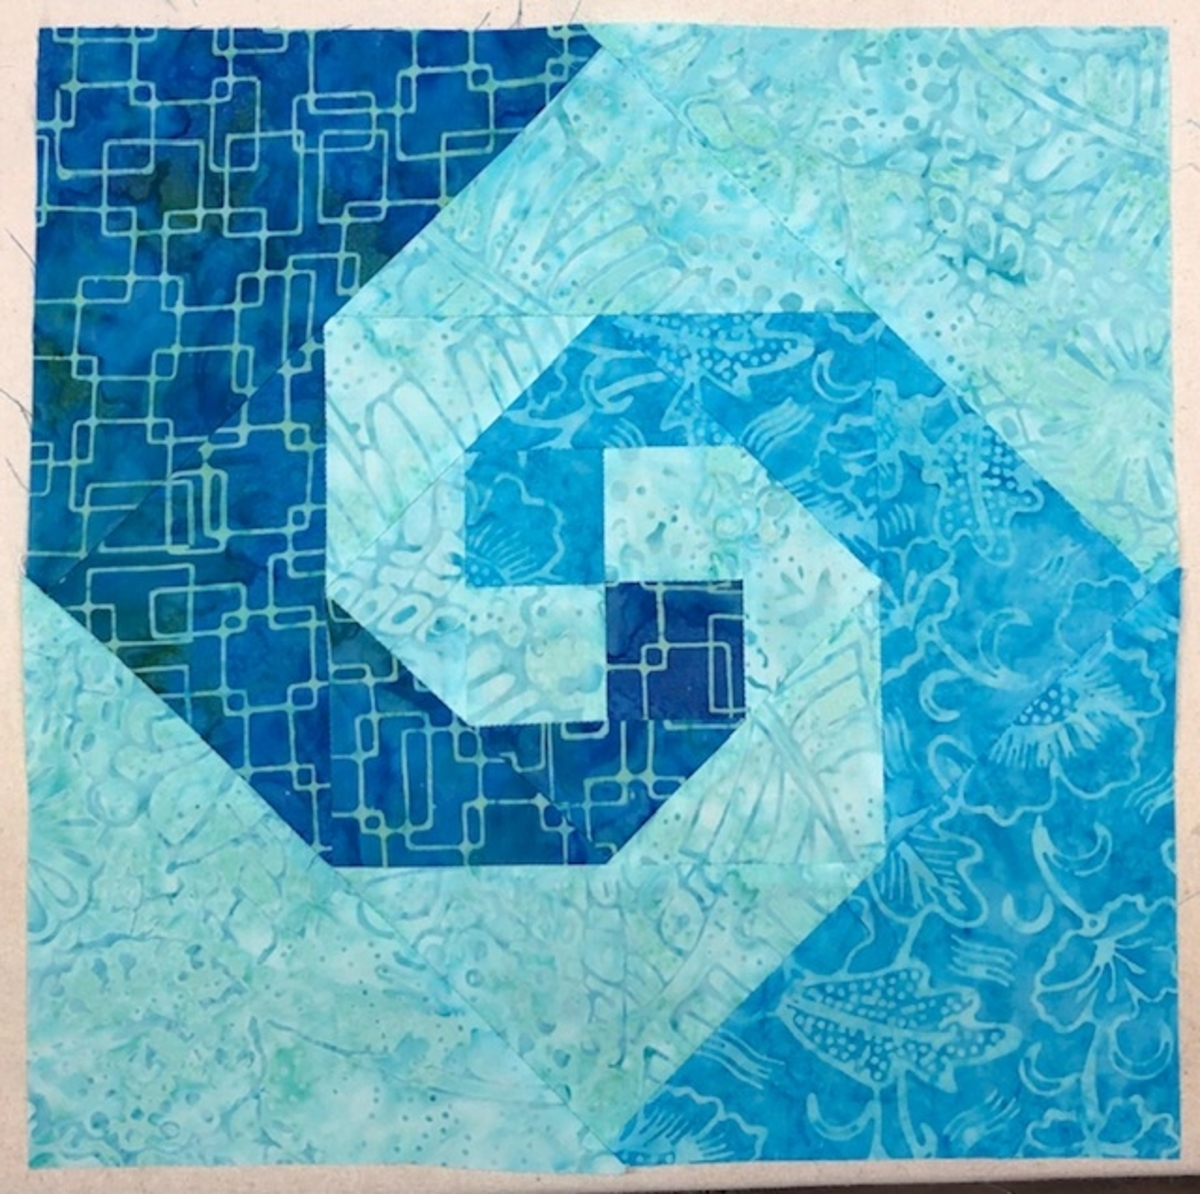
Snails Trail
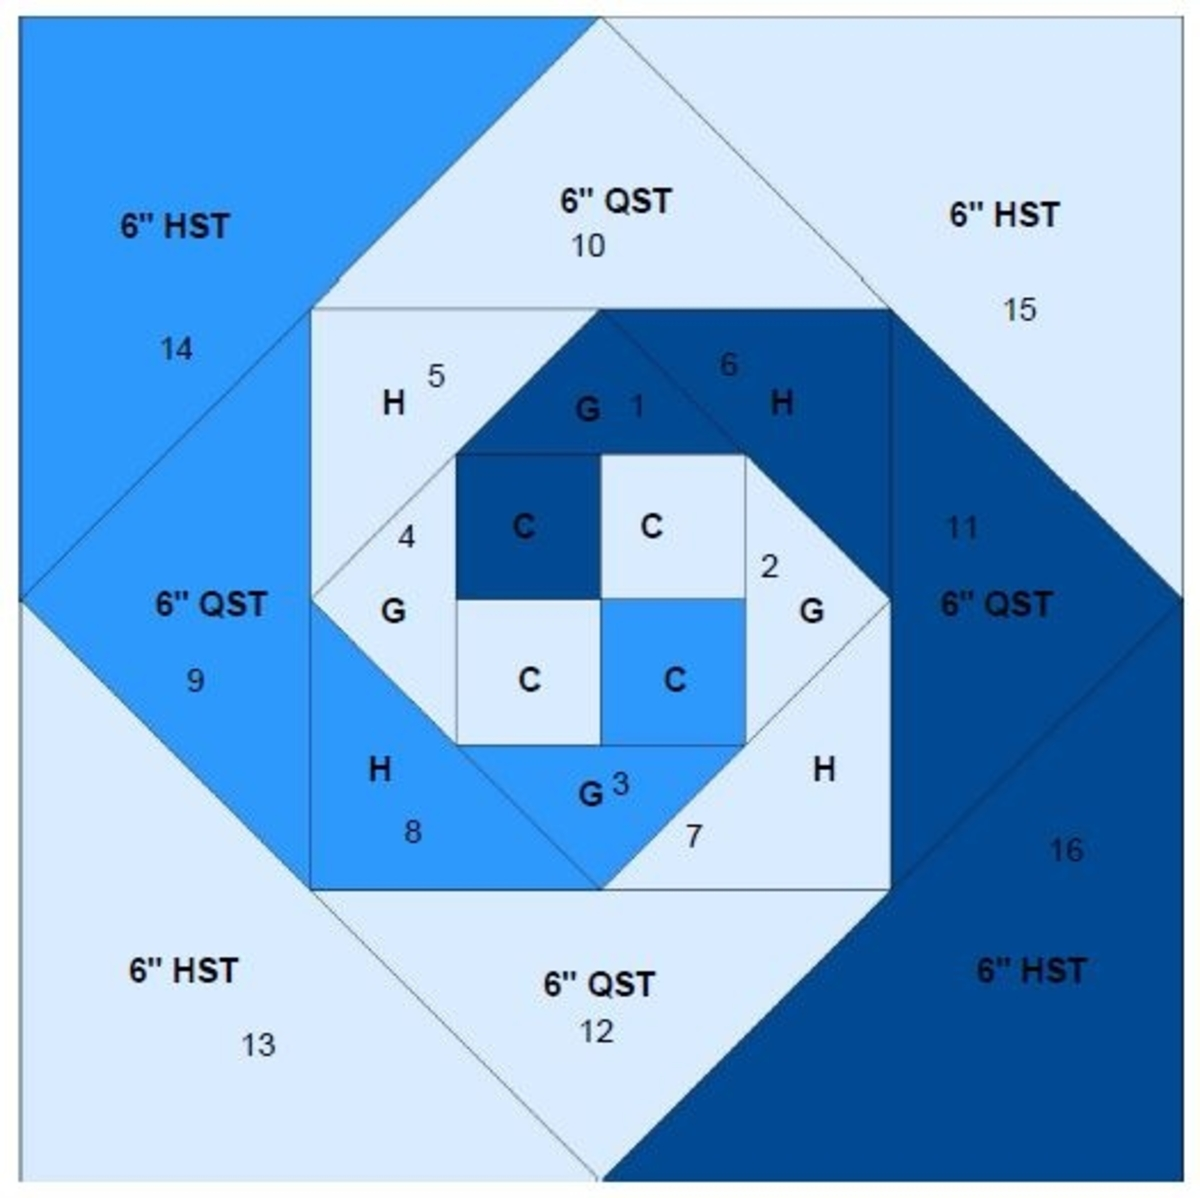
Diagram 2
Snails Trail 16 blocks
For each block, cut from your GO! Storm at Sea die (55221):
C- cut 2 light, 1 medium and 1 dark
G- cut 2 light, 1 medium and 1 dark
H- cut 2 light, 1 medium and 1 dark
For each block, cut from your GO! Qube Mix & Match 12" Block:
Shape 4, QST- cut 2 light, 1 medium and 1 dark
Shape 3, HST- cut 2 light, 1 medium and 1 dark
For the Snail's Trail blocks, we are only using patches C, G and H on the GO! Storm At Sea die. The two outside rounds will use theGO! Qube Mix & Match 12" Block's shape 4, the GO! Quarter Square Triangle-6” Finished Square, and shape 3 GO! Half Square Triangle-6” Finished Square. All seams are pressed open.
- Following color placement in Diagram 2, stitch the 4-patch center. Press seams open. Please note Diagram 2 is marked 1-16. This was my piecing order.
- Following color placement on Diagram 2, begin by joining the darkest blue G patch (marked as 1) to the top of the four patch C unit.
- Next attach the lightest blue G patch marked with a 2 to the right. Continue all the way around the unit until you finish with patch 16.
Finishing Up
- Decide what direction you would like the Snails Trail blocks to flow.
- Join three Snails Trail blocks for each side.
- Join five blocks each for the top and bottom.
- Join the side strips to the Storm At Sea unit.
- Join top and bottom.
Layout diagram for sample quilt
.png)
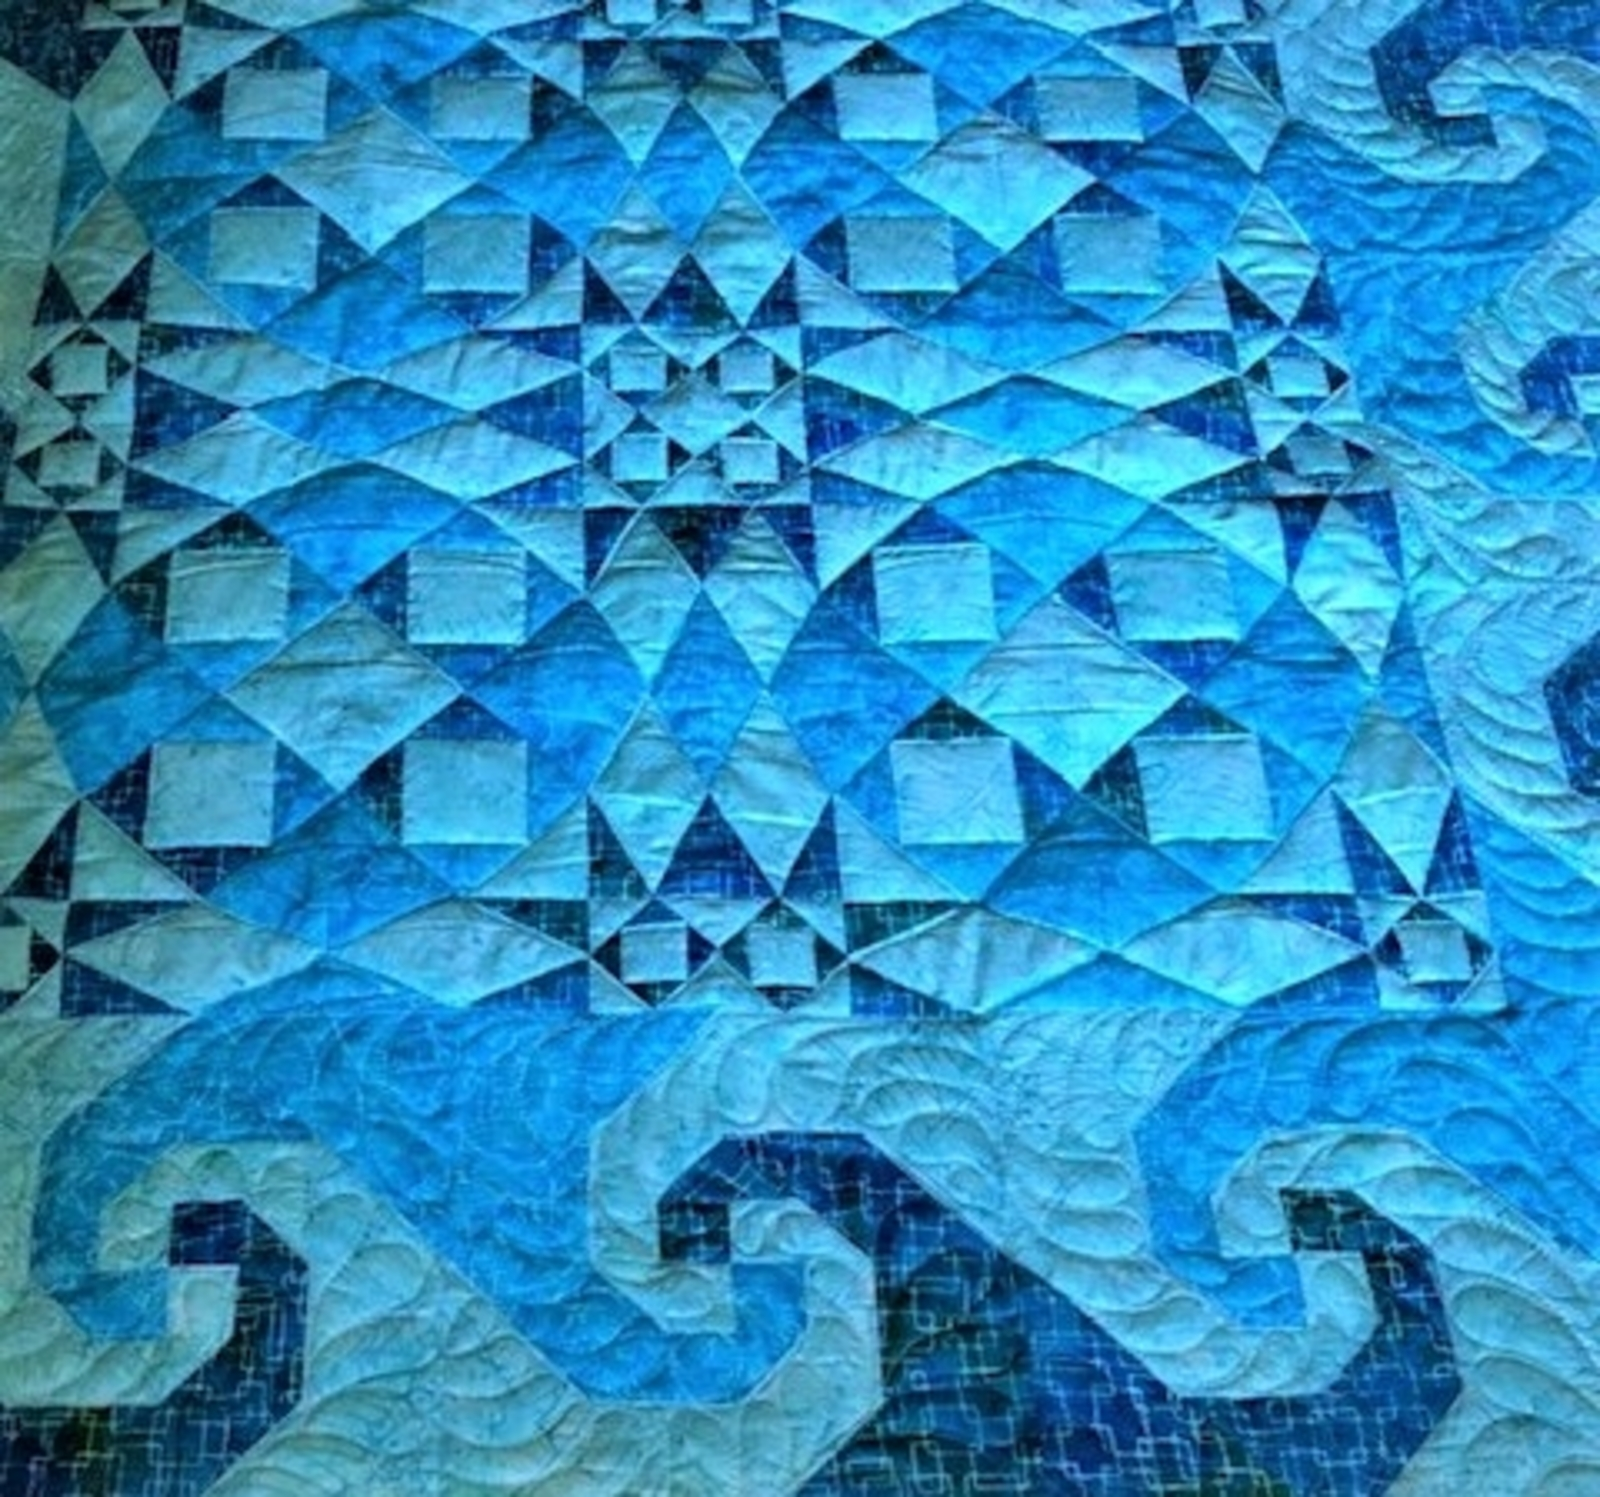
Quilting
Quilt as desired. For my quilt I decided feathers in the Snail's Trail blocks would add movement - and they did. I also chose to stitch in the ditch around the Storm At Sea.
My Thoughts
The GO! Storm At Sea die exceeded my expectations. My finished quilt was square and I had no fullness when I quilted it. I loved the die so much that I could not quit bragging on it. In fact, one of my sister's dug into her stash and stopped by to cut her own quilt. I will be quilting it for her, so be sure to check back at my blog where I'll show the finished results!
If you follow this tutorial and make your own Tidal Wave Storm at Sea be sure to tag and follow @AccuQuilt on Instagram, Facebook and Twitter and me on Instagram (@fortheloveofgeese) or Twitter (@4theloveofgeese) so we can see yours, too!
{{cta('825231cb-8cde-4c9a-a670-40325ea75a2c')}}


