


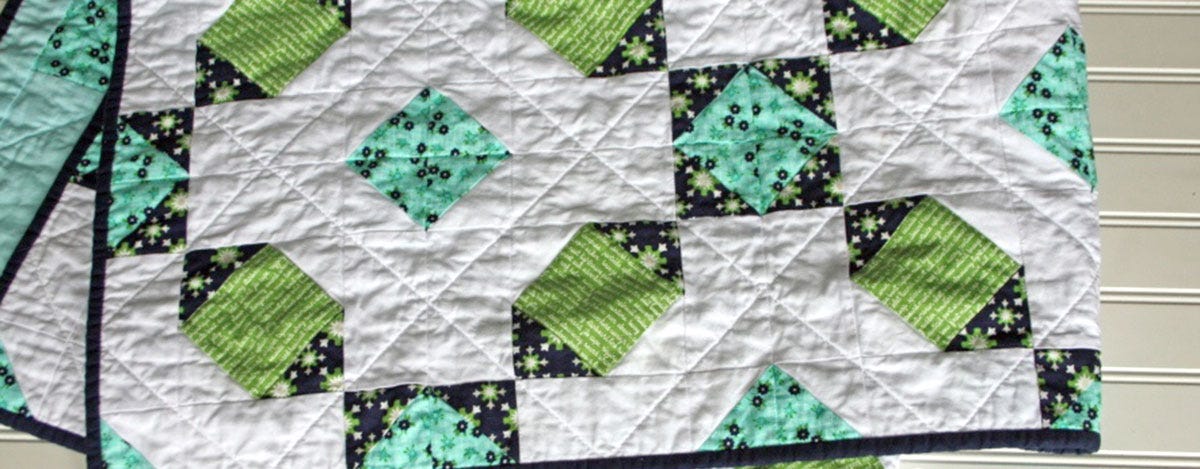
Hello, I'm Erin from AveryLaneSewing.com and I'm excited to share this free quilt pattern with you. I love how this quilt turned out! It's very fresh and bright, and I really like the lattice look that the blocks create. I used 3 dies from my GO! Qube Mix & Match 8" Block set: #5, 6, & 8, to create this modern lattice quilted throw.
The great thing about the GO! Qube sets is that you don't have to have the 8" block set to make this quilt. This free quilt block pattern can be made using any Qube set that you own. You just use the same number dies from the size Qube block set that you have. Your finished blocks (and finished quilt) will be a different size than mine, but the design will be the same.
If you have the GO! Qube Mix & Match 12" Block set, then you will have a twin size quilt when you're finished (72" x 96"). Wouldn't this be a great quilt to make as a "going to college" quilt? I'm always on the look-out for quilt pattern ideas to make for my boys-- quilts for when they move out. I'm embarrassed to admit they still use the quilts they've had since they were 5 and 8 years old (hint: that was a very long time ago!).
Let's sew!
Modern Lattice Quilt Tutorial
Finished Size: 48" wide x 64" long
Supplies Needed
GO! Cutter
GO! Qube Mix & Match 8" Block set (Dies #5, 6, & 8)
2.25 yards white quilting cotton
3/4 yard navy print
1/2 yard green print
3/4 yard aqua print
Batting: 49" x 65"
Backing: 50" x 66"
Binding: 245"
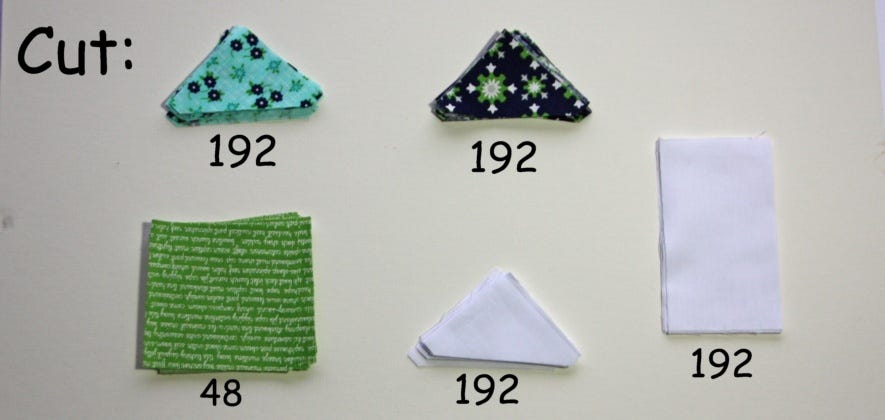
Cutting Instructions
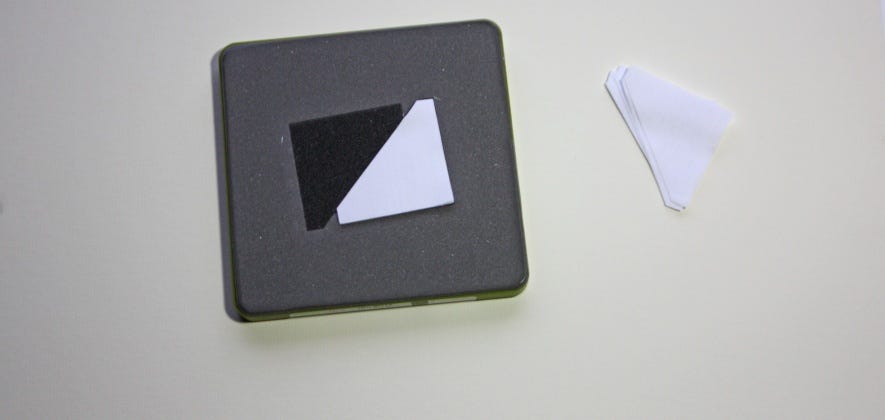
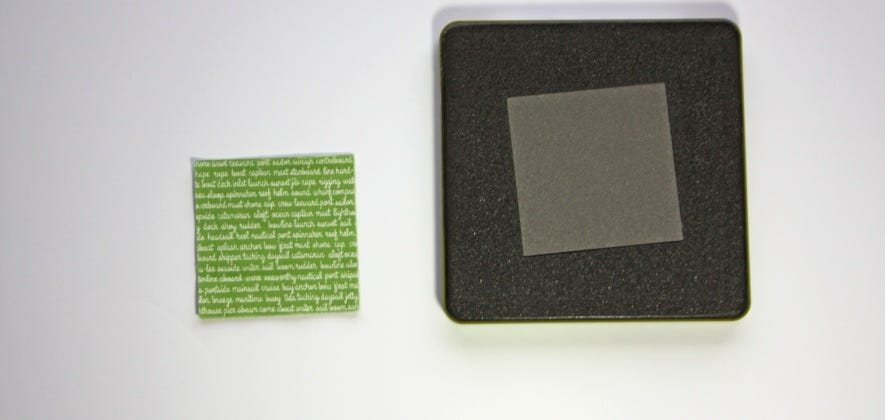
Tip: You can cut up to 6 layers of fabric at a time. I like to use the tip that came with my cutting system and place a plain white piece of paper on top of the fabric and under the cutting mat. This helps to ensure accurately cut pieces.
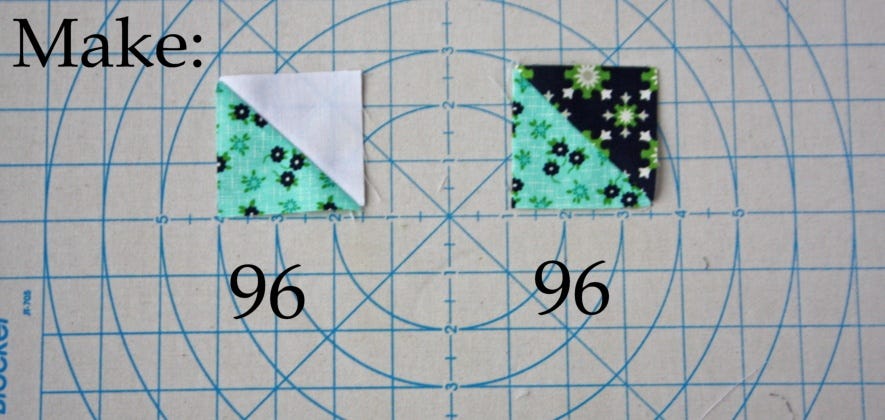
Use Die #5 (Half Square Triangle 2" finished) to cut:
192 from the aqua fabric
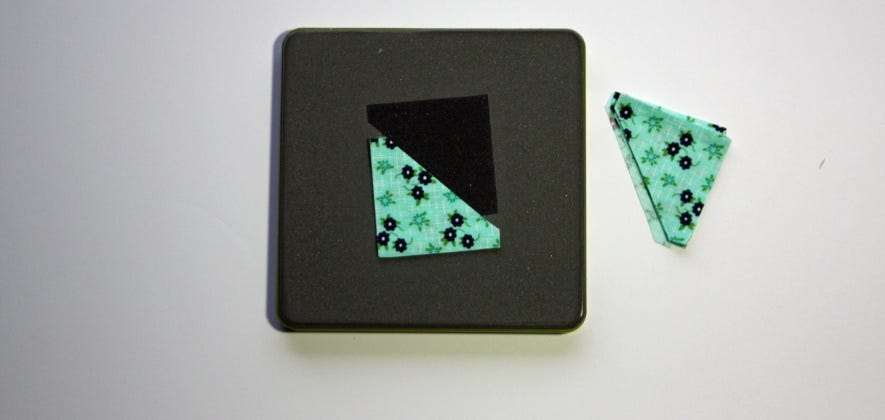
192 from the navy fabric

192 from the white fabric
Use Die #6 (Square on Point - 2 3/4" finished) to cut:
48 from the green fabric
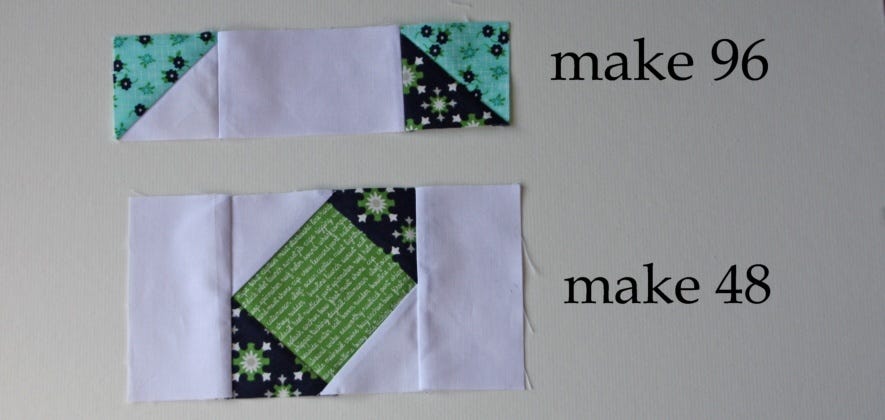
Use Die #8 (Rectangle - 2"x4" finished) to cut:
192 from the white fabric
These are all the pieces that you'll need for the quilt top:
Layout for the Blocks

Layout for the Quilt (6 blocks are in each row and there are 8 rows, for a total of 48 blocks)

Sewing Instructions
Sew all seams with a scant 1/4" and fabrics right sides together. Chain stitching makes this quilt go together even quicker. Pressing the seams open will help your blocks stay nice and flat, but press your seam allowances in your preferred direction. Just be sure to press and not iron (too much back and forth ironing may distort and curve your seams).
HST = Half Square Triangle(s)
Make the Parts for the Blocks
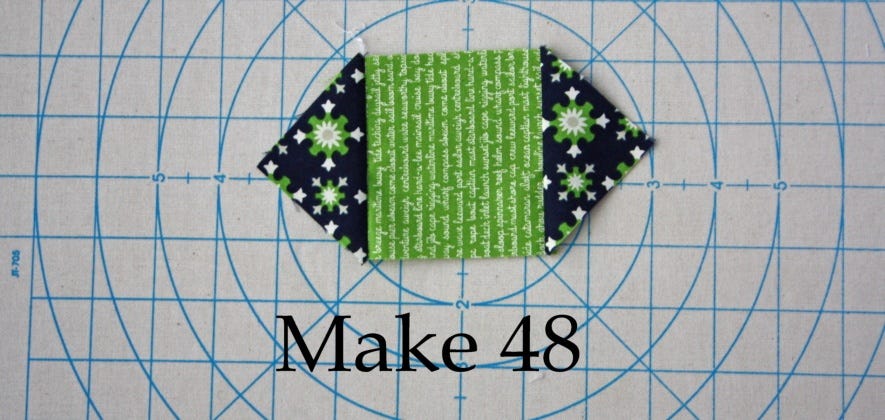
Step 1
Sew two of the navy HST to opposite sides of each of the green squares. Press the seam allowances.
Make 48.
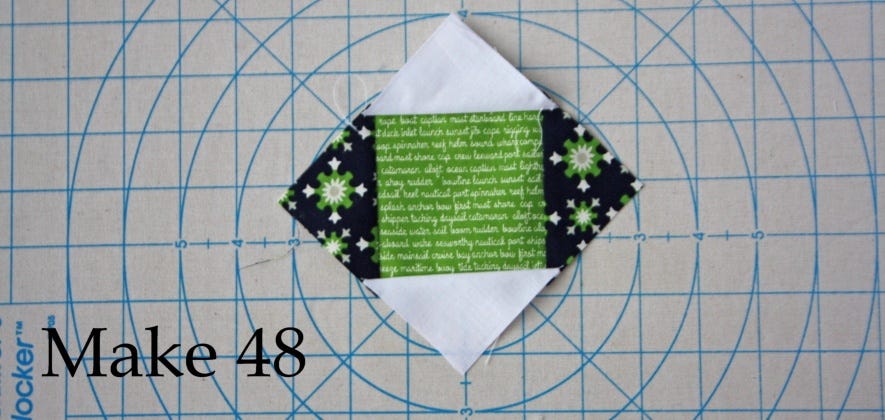
Step 2
Sew two white HST to the remaining opposite sides of each of the green squares. Press the seam allowances.
Make 48.
Step 3
Sew a white HST to an aqua HST and press.
Make 96.
Step 4
Sew a navy HST to an aqua HST and press.
Make 96.
Assemble the Blocks
Step 1
Sew the top and bottom rows of the block, by sewing one of each type of HST units to opposite sides of a white rectangle--Make sure to place the white and navy sides adjacent to the white rectangle as shown. Press the seam allowances.
Make 96.
Step 2
Sew the middle row of the block by sewing two white rectangles onto opposite sides of the square on point/HST unit. Press the seam allowances.
Make 48.
Step 3
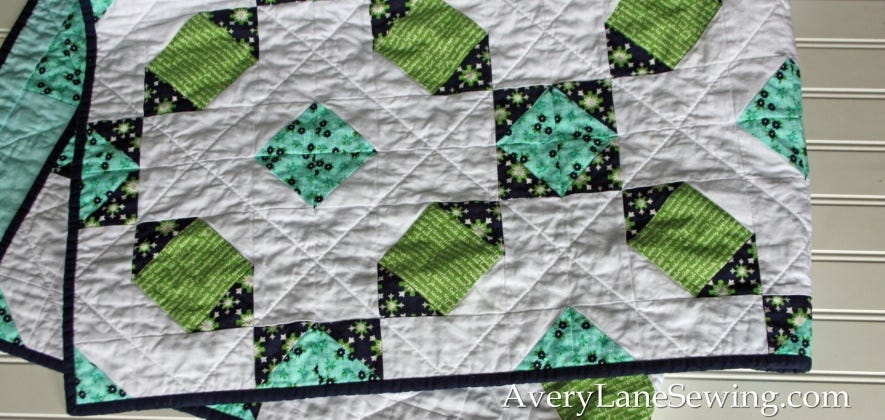
Sew the three rows together and press. Make sure that the navy and white HST units are matched up as shown.
Make 48 blocks.

Assemble the Quilt Top
To create the lattice design, simply rotate every other block in each row (90̊).
In rows 1, 3, 5, and 7: rotate the 2nd, 4th, and 6th blocks.
In rows 2, 4, 6, and 8: rotate the 1st, 3rd, and 5th blocks.
Step 1
Once your layout is correct and complete, sew the blocks together to make 8 rows. Press the seam allowances.
Step 2
Sew all the rows together and press to complete the quilt top.
Finishing
Layer and baste together the backing fabric, batting, and quilt top. Quilt and bind the quilt as desired.
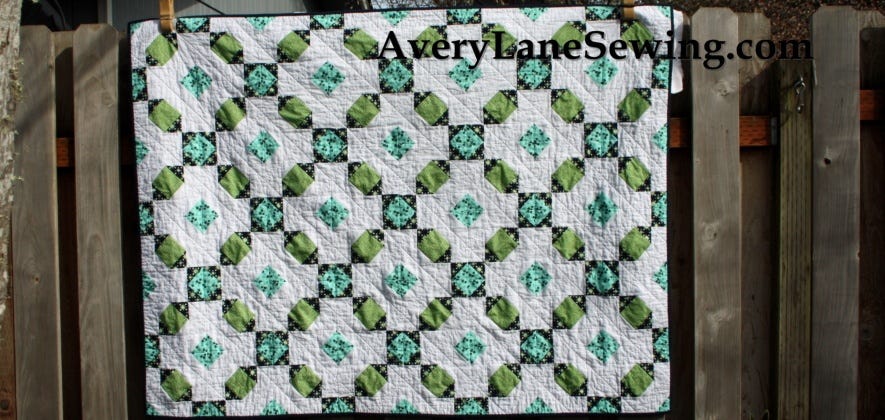
Step back and admire your beautiful creation!
I think it would make a great baby size quilt to give as a baby shower gift as well! Just make fewer blocks and in no time you will have a modern baby quilt for a friend :) This color scheme is great for a gender neutral or boy quilt. I think a pink and grey quilt would look adorable for a little girl.


