Hi, it's me Bea, from beaquilter again. Are you staying cool in this hot summer? I'm in NC and in July and August the heat is brutal! The kids don't even want to go in the pool. And I want to stay inside and sew/quilt.
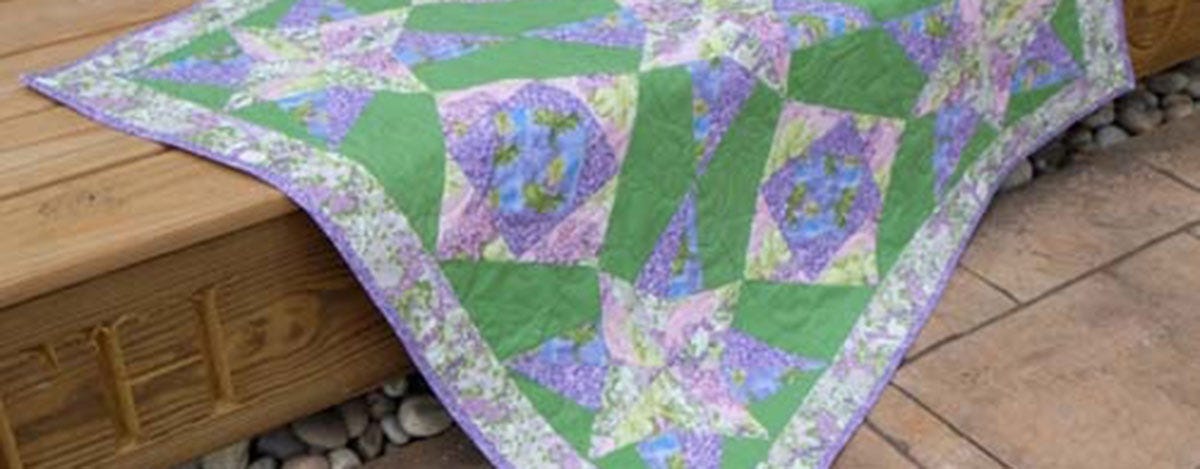
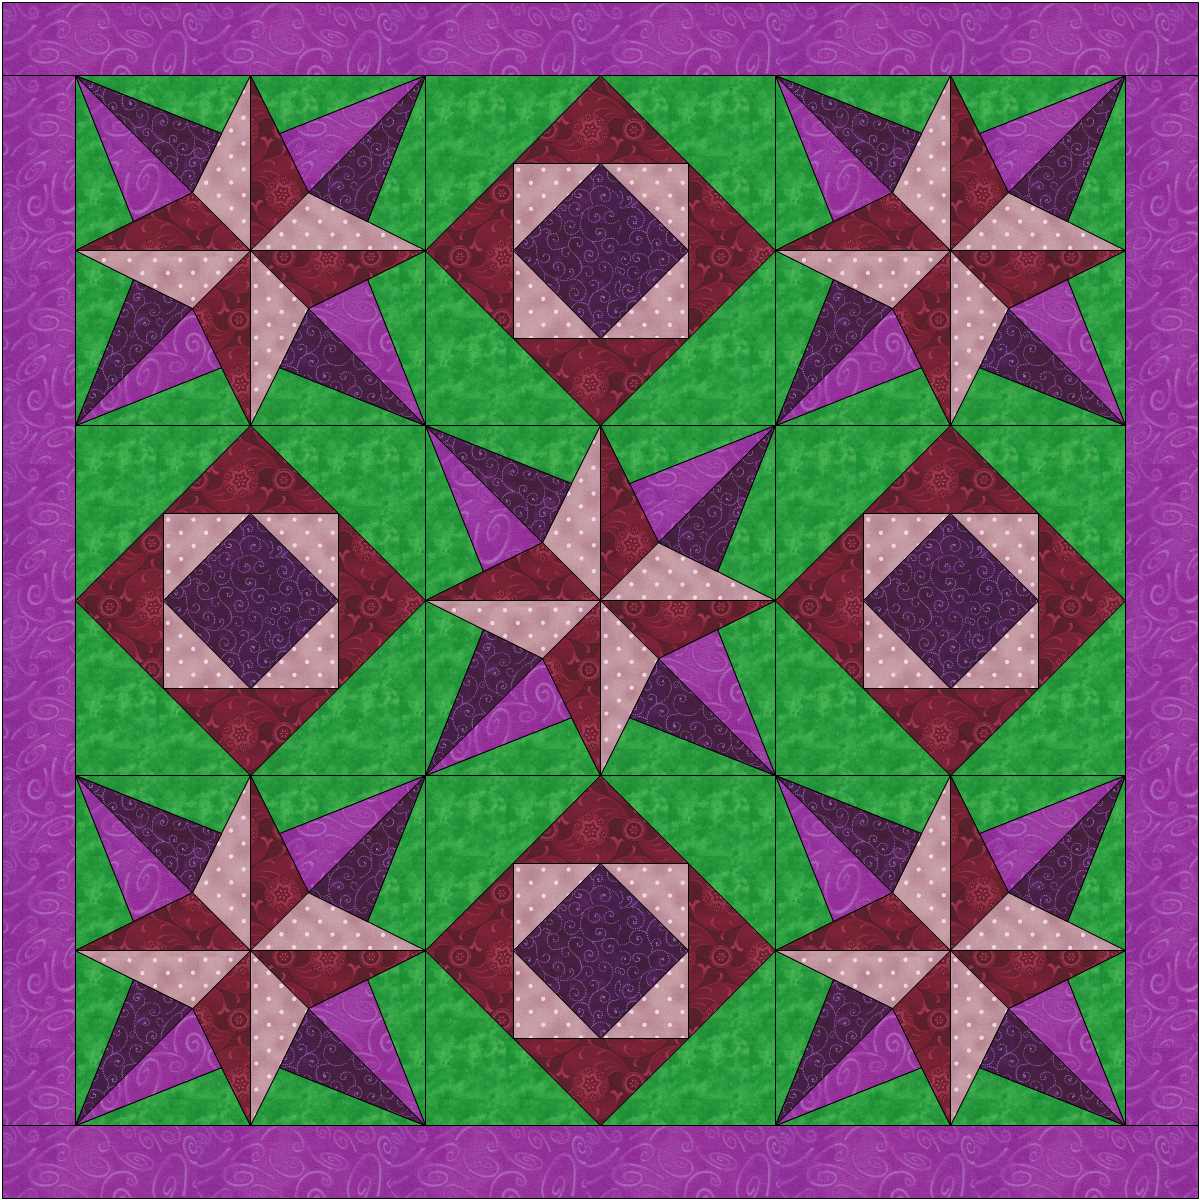
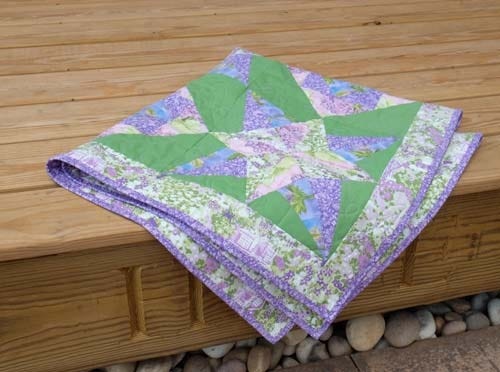
Here's a quilt I made recently:
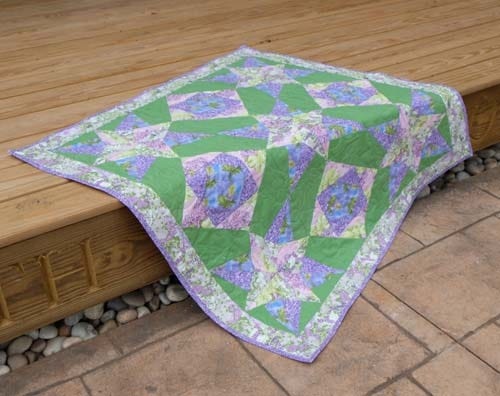
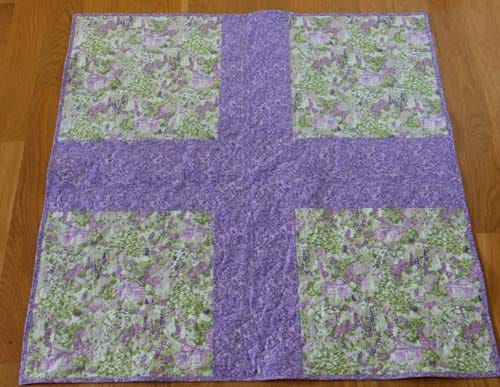
(It's so hot the quilt melted trying to get up onto our deck)
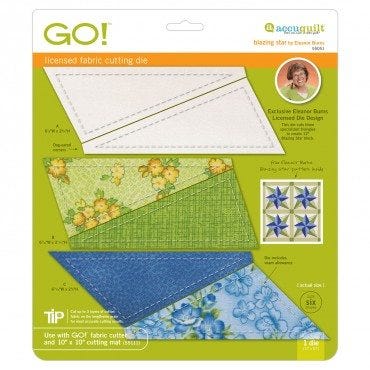
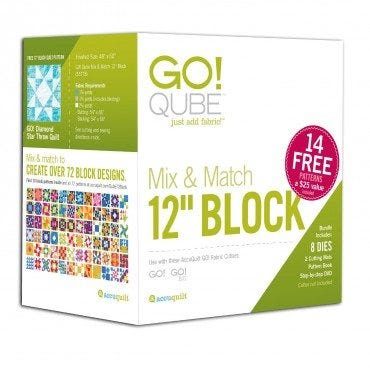
It's made using the Blazing star die.
and the 12" QUBE set.
At first I sketched out my idea in EQ7...
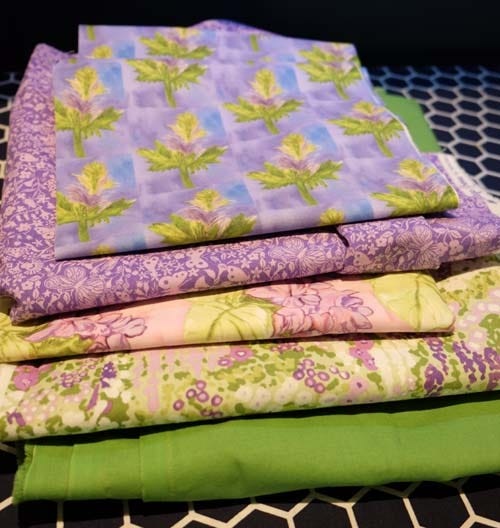
and I picked out my fabrics and according to EQ, I needed 1yd or less of each of the 5 fabrics. Here's what I chose:
4 purple prints (2 sort of dark purples and 2 lighter purples more on the pinkish side)
and one solid green.
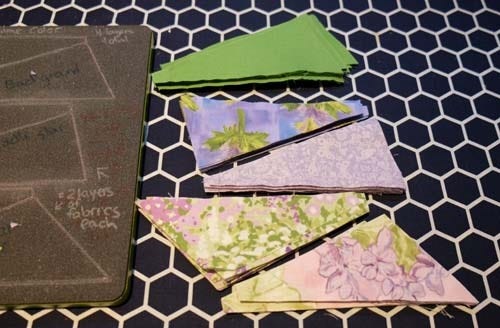
Next, I prepped the fabrics for the Blazing star die. The background A needed (20) 4" x 9" rectangles,
the Middle Star B needed (10) 4" x 8" rectangles of EACH of the dark purples,
and the first star-center star needed (10) 4" x 10 1/2" rectangles of EACH of the pink/purples.
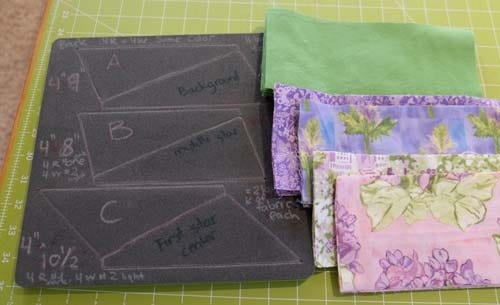
Then I cut them all out, but with the purple and pinks, ONE set of each has to be cut in reverse, that's VERY important!
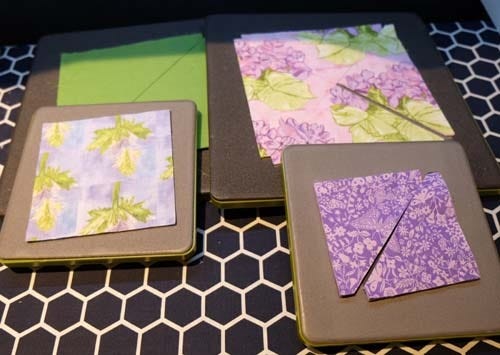
For the 12" QUBE blocks (gentleman's fancy), I sort of cut out the fabrics depending on if they were directional fabrics or not. So you may shuffle the fabrics how you want them to but keep the background fabric in the same spot.
I cut out (16) large triangles of shape #3 in the background fabric (from 7 1/2" squares or WOF strips).
Then (16) QSTs from shape #4 (7 3/4" squares or strips) in a pink floral.
After that, (16) small HSTs from shape #5 (4 3/4" strips) in a purple floral.
Lastly, I cut (4) on point squares from shape #6 ( 5 1/4" squares or strip) in another purple that was directional.
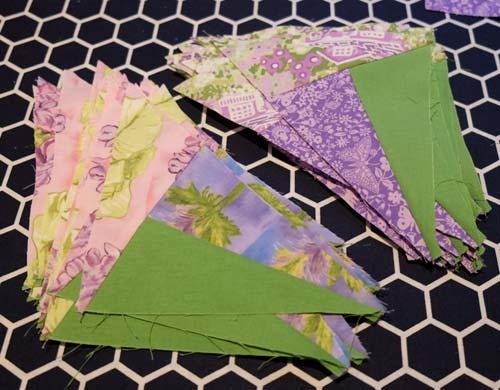
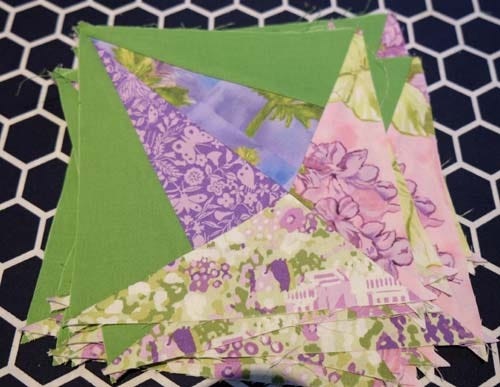
As always, I sew as much as I can in one sitting before getting up to iron. Here I sewed A and B blazing star wedges together with half being in reverse.
Look at the insert for the die or AccuQuilt's YouTube video (https://www.youtube.com/watch?v=ZhfMMXaBQb0) about this die if you're confused. It's not hard, but you may just have to lay out the pieces first and figure out which pieces go where. Really, there's only one way to sew them together or the sides won't fit together.
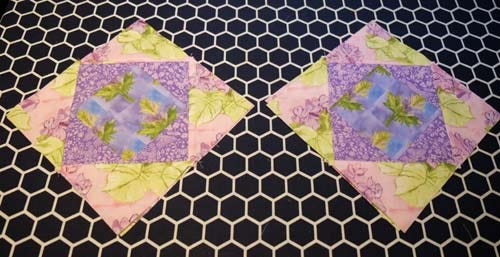
I also started the gentleman's fancy block by sewing a small triangle to the side of the on point square.
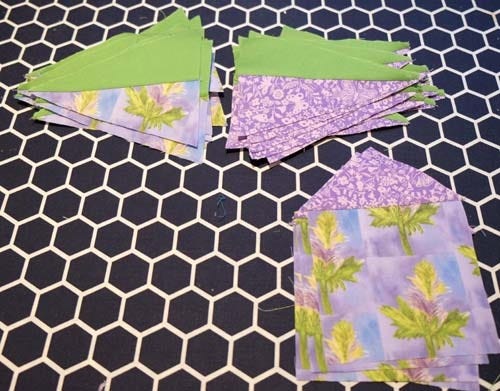
The blazing star wedges now get the center star wedges attached and now it's like large HSTs!
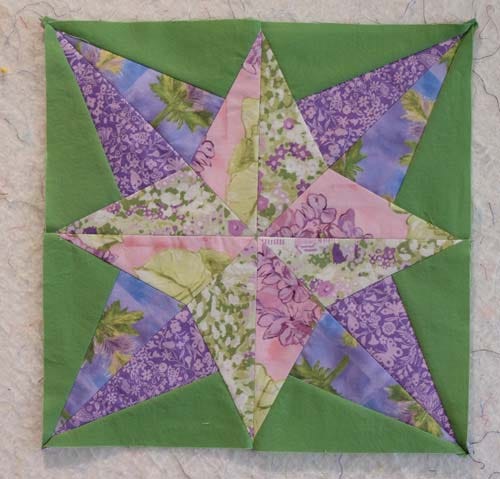
See! what a fun block to make!
Here's the finished block (make 5):
And the gentleman's fancy blocks are
coming along too.

After all the #5 triangles are sewed on, then add the #4 QSTs to the sides as well.
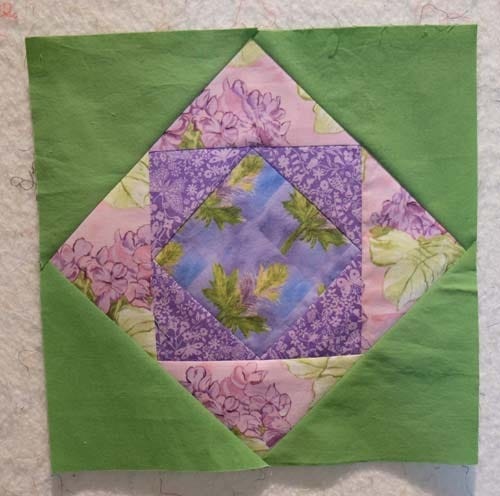
And finally the large #3 background triangles to complete the blocks (make 4).
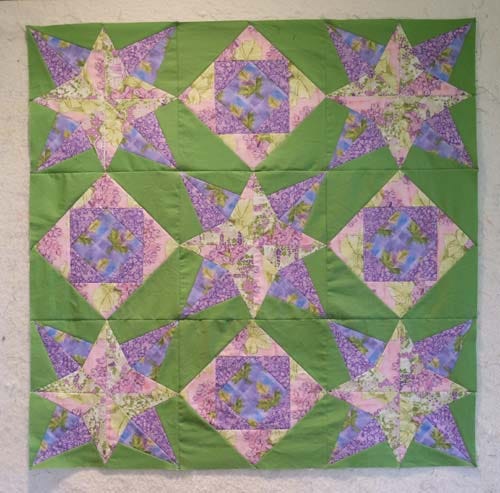
Then alternate the blocks and sew the top together.
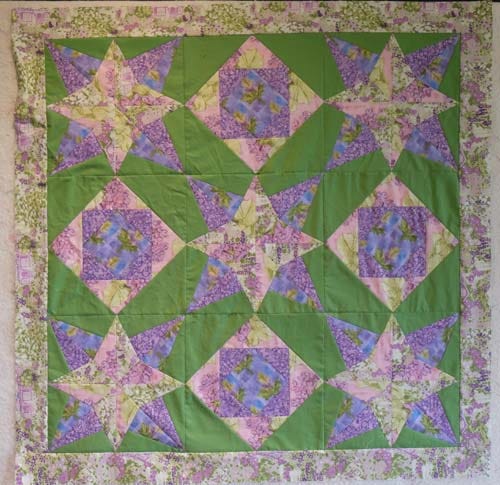
I also added a small border around (3 1/2") and kept it skinny so it would be close to a WOF. I didn't have to piece the border.
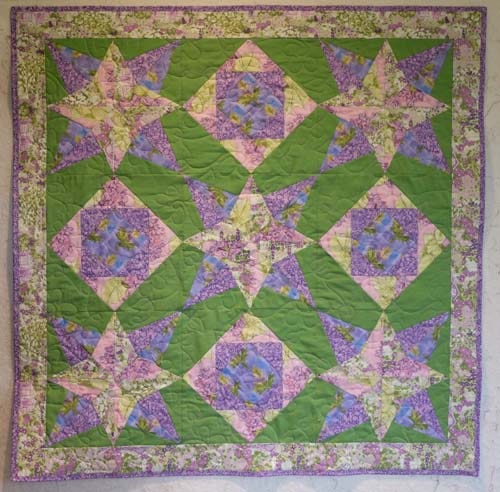
Then I quilted it and added binding.
I quilted a large loopy flower and leaves all over it.
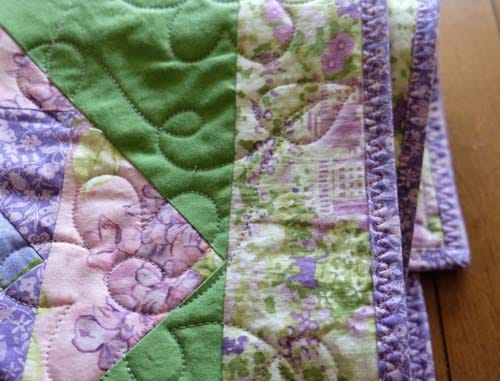
I've started sewing my binding down on the sewing machine more now instead of sewing it by hand to the back. This is a good time to play with all the fancy stitches that come with the sewing machine! This is not quite a zig zag but more of a tumbler looking stitch, I thought it was fun.
There's nothing wrong with scrappy backings!
A fun and quick quilt to make, I think I'll keep it in the pile of baby quilts to give away any time I know of a new baby girl coming.
Hope you'll try this quilt! It's fast, fun and looks like you spent SO long on it, but with the AccuQuilt dies, it goes together in a snap!
With kids and life and summer right now it probably took me 2 days from start to finish to complete this.
Have fun!