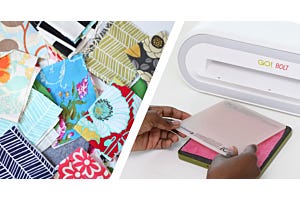
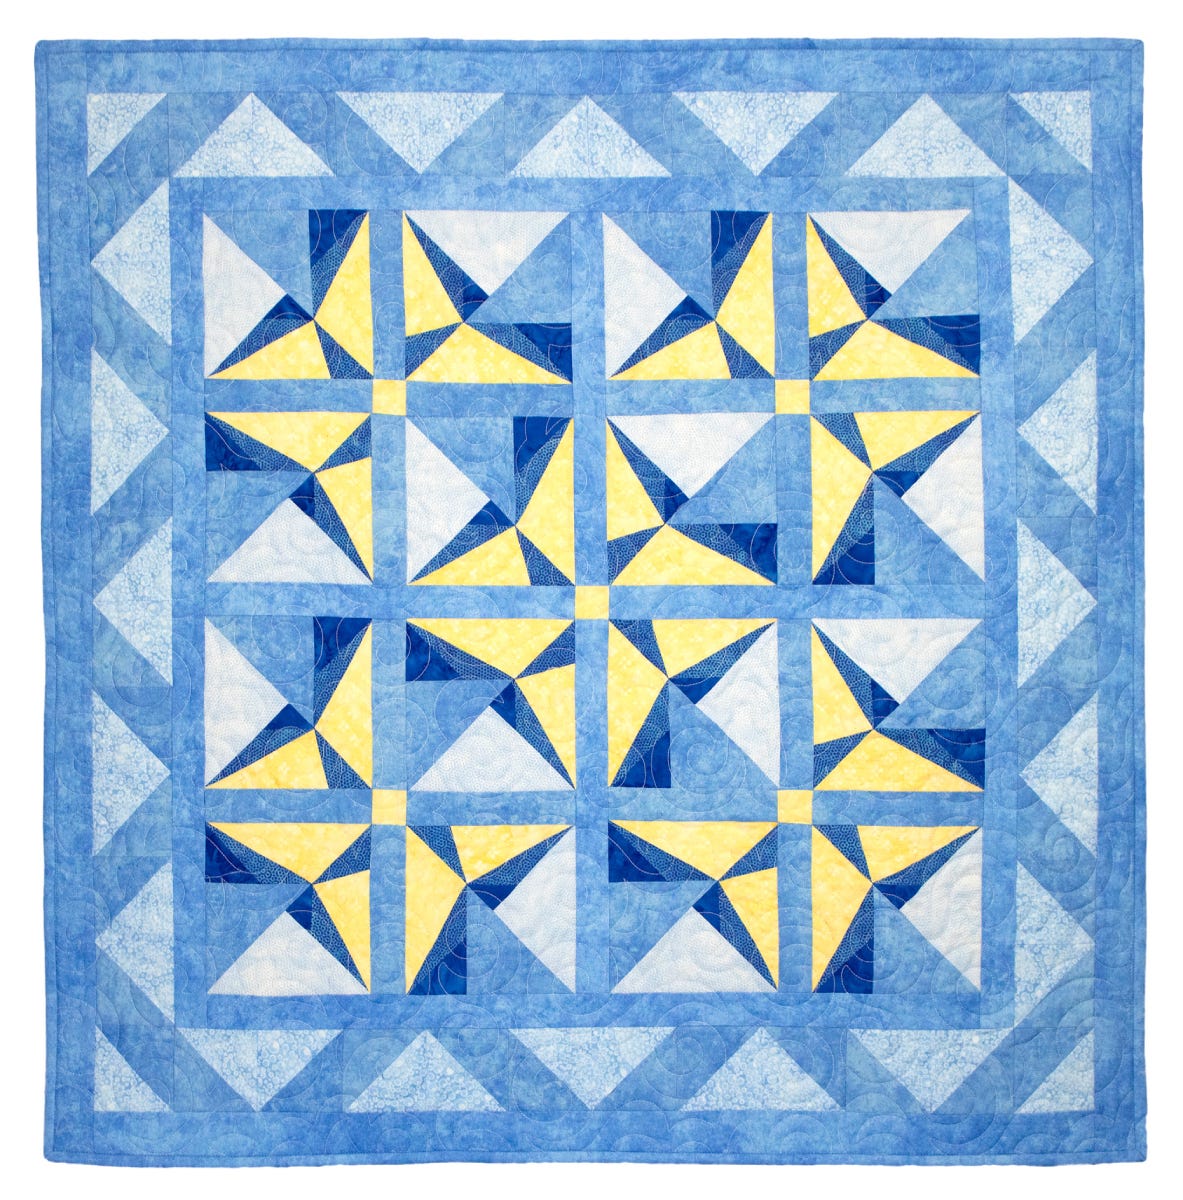
Hi, quilters! It's Marjorie Busby from Blue Feather Quilt Studio with a fun wall hanging or table topper using the new GO! Lucky Star-10" Finished Die.
Spinning the Lucky Star
When I make a project like this, it makes me love AccuQuilt even more. The GO! Block on Board Dies are wonderful because they are a one-step way to make a quilt block. It is so easy to simply precut the fabrics, place them on the die, cut the fabric with your GO! Fabric Cutter, and the blocks are ready to sew before you know it. Everything is at your fingertips.
What's even better is that AccuQuilt's Block on Board Dies are so versatile that I can make more quilt blocks than the block pictured on the packaging. With a little imagination, it is easy to design many more quilt blocks than the one in the picture. The block example on the packaging for the GO! Lucky Star-10" Finished Die is similar to this one:
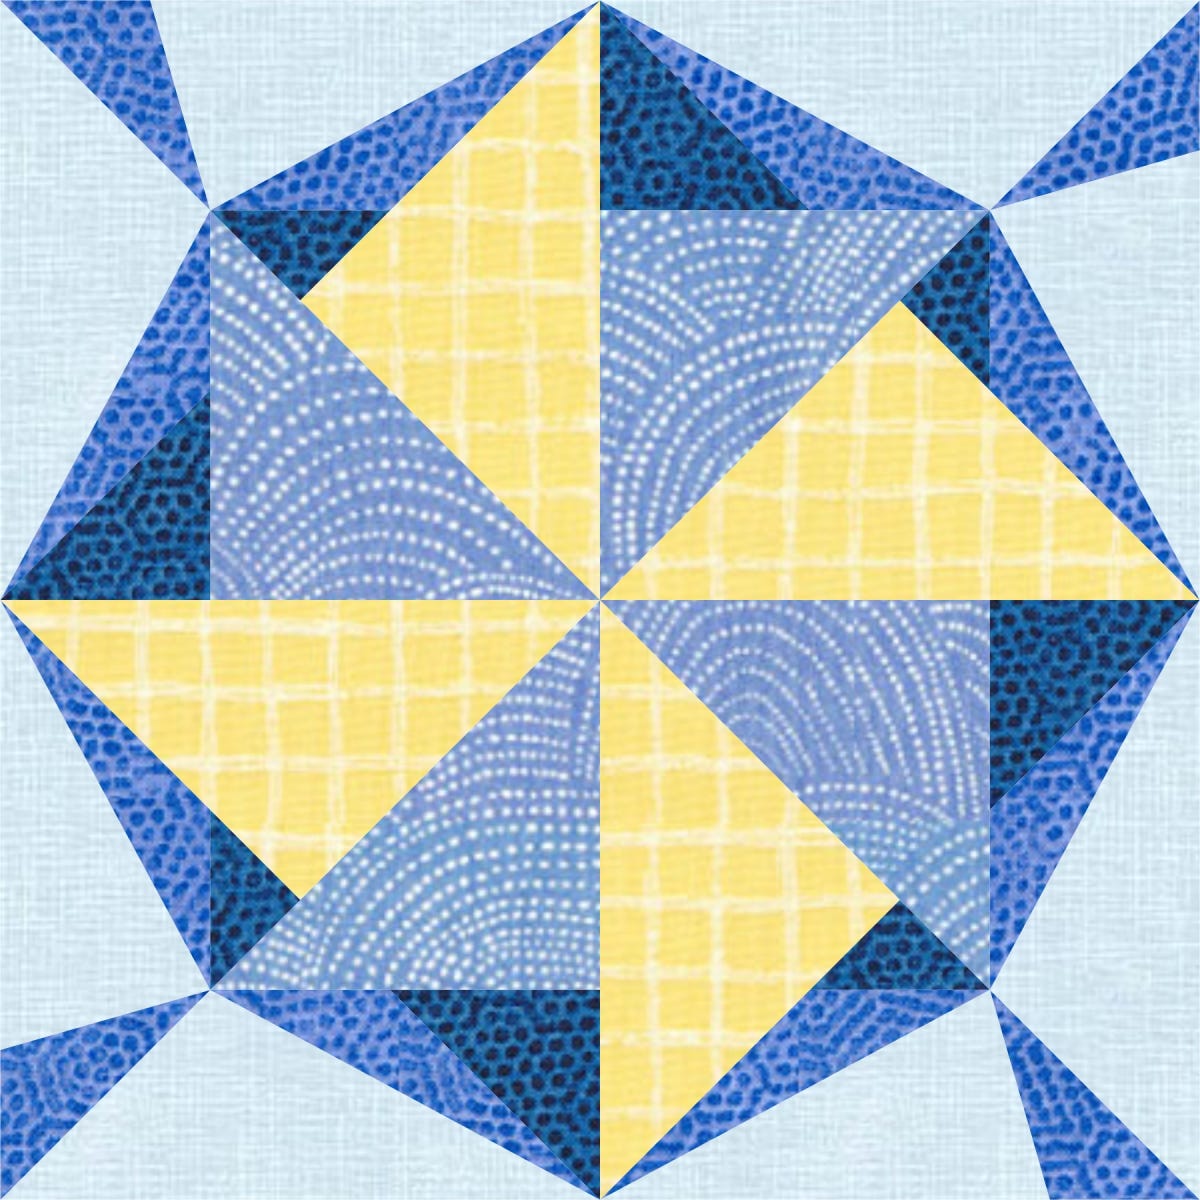
For this project, the quilt block was divided into quarters. These quarters were rotated around (like puzzle pieces) and the color placement was changed to make a new star from the original quilt block (pictured below).
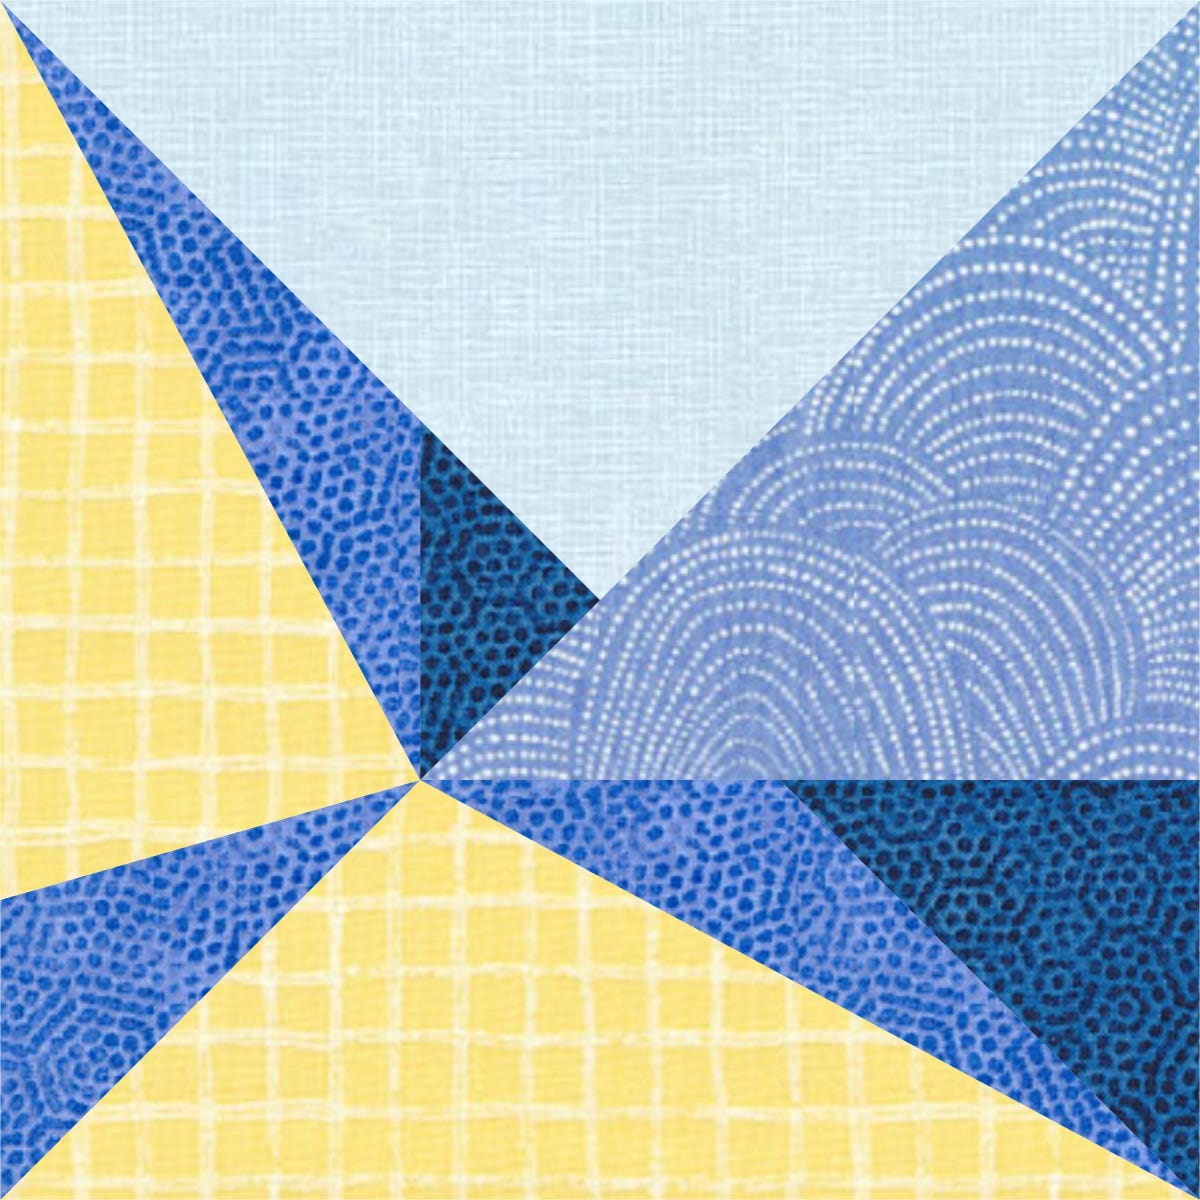


Not only can you divide this block into quarters, but you can divide it into eighths. Each quarter block is made up of two different half square triangles. Imagine a quilt border made with the quarter block or one or both of the half square triangles to replace an ordinary half square triangle block border.

Supplies Needed:
- GO! Lucky Star-10" Finished Die
- GO! Qube Mix & Match 10" Block
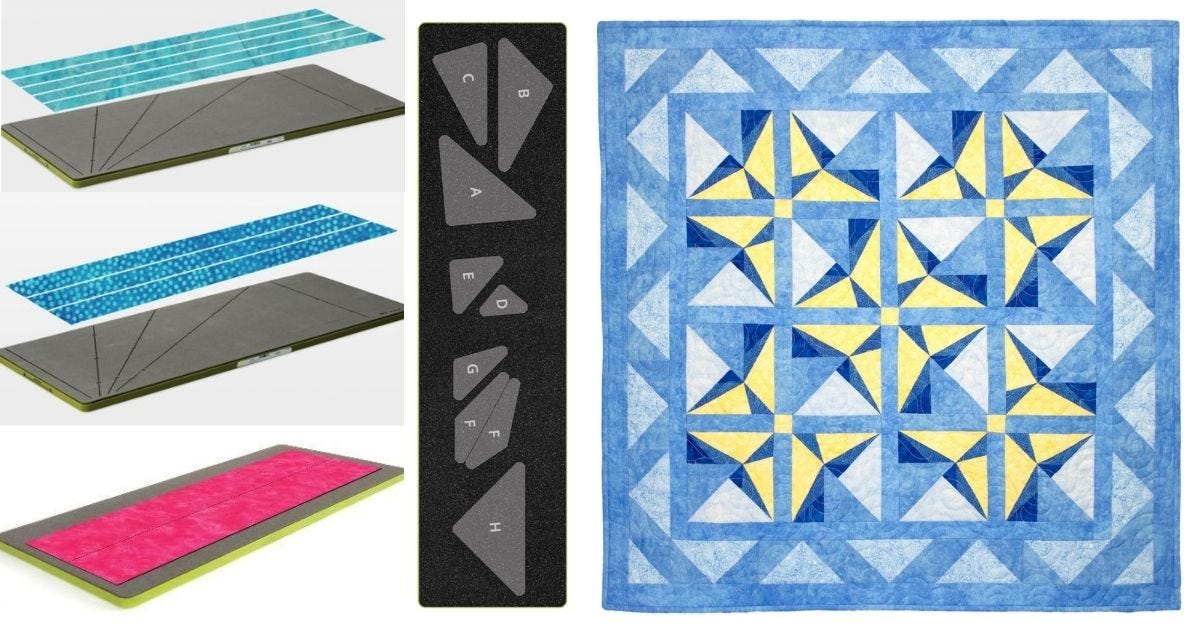
- GO! Strip Cutter-2 1/2" (2" Finished) 3 Strips Die
- GO! Strip Cutter-3 1/2" (3" Finished) 2 Strips with Angled Guidelines Die
- GO! Strip Cutter-1 1/2” (1" Finished) 5 Strips Die
- 3/4 yards of light blue fabric
- 1 1/2 yards of medium blue fabric
- 1/4 yard of dark blue contrast fabric
- 1/4 yard of dark blue fabric
- 3/4 yards of yellow fabric
- 40" x 40" of quilt batting
- 40” x 40” of quilt backing
Cutting Instructions
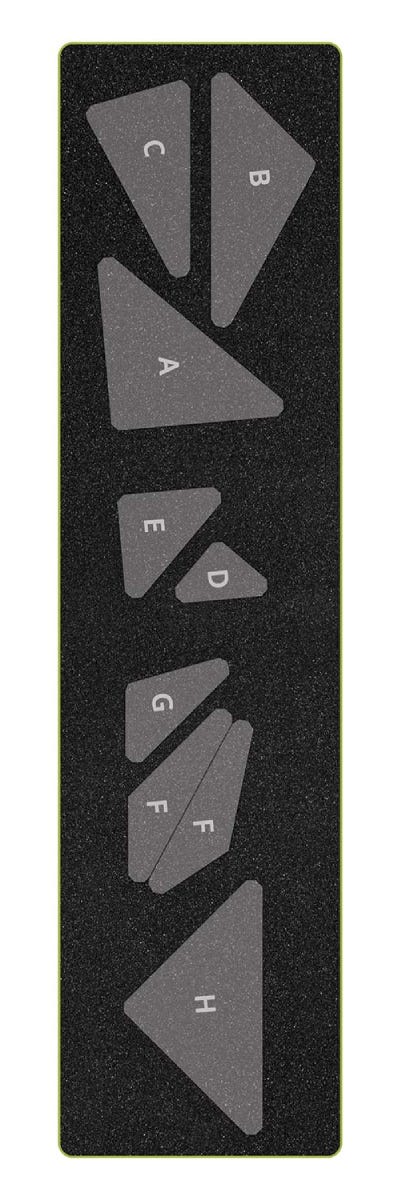
One of the nice things about the GO! Block on Board Dies is that each piece is labeled with a screenprinted letter on the die board. Not only are the shapes labeled, but there are instructions on the package for cutting. However, if you change the colors like I did (from the instructions or using GO! Quilt), it's easy to follow the guidelines in the instructions and substitute the colors you select.
1. Prepare and cut fabric for quilt blocks and sashing.
NOTE: For this quilt top (16 quarter blocks), 16 of each shape should be cut. Shape F is the exception because Shape F is used twice in the block (cut 32 pieces for Shape F).
PRO TIP: Shape F and Shape G are directional shapes, so they must be cut with the wrong side of the fabric facing the foam on the die board.
Quilt Blocks:
- For Shape A, cut four 4 1/2” x Width of Fabric (WOF) pieces using the medium blue fabric.
- With Shapes B and C, cut three 6” x WOF pieces using the yellow fabric.
- For Shapes D and E, cut two 3” x WOF pieces with the dark contrast blue fabric.
- With the directional Shapes G and FF, cut two 3 1/2” x WOF pieces using the dark blue fabric.
- For Shape H, cut two 6” x WOF pieces with the light blue fabric.
Sashing:
- Using the medium blue fabric, cut 16 1 1/2” x 5 1/2” pieces.
- Cut four 1 1/2” x 11 1/2” pieces of medium blue fabric.
- With the yellow fabric, cut five 1 1/2” x 1 1/2” pieces.
Inner Border:
- Using the medium blue fabric and the GO! Strip Cutter-1 1/2" (1" Finished) 5 Strips Die, cut:
- Two 1 1/2” x 25 1/2” strips
- Two 1 1/2” x 23 1/2” strips
-5-Strips-Die---web.jpg)
Middle Border:
- Cut two 3 1/2” x WOF pieces with the medium blue fabric and the GO! Strip Cutter-3 1/2" (3" Finished) 2 Strips with Angled Guidelines Die.
- Cut two 3 1/2” x WOF with the light blue fabric and the GO! Strip Cutter-3 1/2" (3" Finished) 2 Strips with Angled Guidelines Die.
- Using the medium blue fabric and Shape 5 from the GO! Qube Mix & Match 10" Block, cut 44 half square triangles.
- With Shape 5 from the GO! Qube Mix & Match 10" Block and the light blue fabric, cut 44 half square triangles.
-2-Strips-with-Angled-Guidelines-Die---board.jpg)

Outer Border:
- Using the medium blue fabric and the GO! Strip Cutter-1 1/2" (1" Finished) 5 Strips Die, cut:
- Two 1 1/2” x 32 1/2” strips
- Two 1 1/2” x 30 1/2” strips
Binding:
- Cut four 2 1/2” x WOF strips with the GO! Strip Cutter-2 1/2" (2" Finished) 3 Strips Die.
-3-Strips-Die.jpg)
Assembly Instructions
1. Sew the quilt blocks together. Instructions for sewing quilt blocks together are found on the die packaging or on the AccuQuilt website. I followed the instructions exactly and these blocks went together perfectly.
PRO TIP: It is helpful to arrange the blocks as they will be sewn. You can see from the images below how the block will look by placing the pieces together on the design board before you begin sewing. As each section is stitched together, the shapes are placed back on the design board until the block is complete.


2. The quilt top is assembled in sections with sashing between the blocks and then sashing between the sections. Arrange the quilt blocks and sashing as shown below and sew them together. Make four sections like this:

3. Arrange the four sections with the longer sashing strips as shown below.
4. Sew the sashing and sections together. This completes the inner section of the quilt top.

5. To make and add the inner border, use the strips from the cutting instructions and sew them to the quilt top. Sew the vertical strips to the sides first and then sew the longer horizontal strips to the top of the quilt.

6. The middle border is made up entirely of half square triangles. The border is constructed as shown below. Make the half square triangles, arrange them, and then sew them together to make the vertical and horizontal borders.

7. To make and add the outer border, use the strips from the cutting instructions and sew them to the quilt top. Sew the vertical strips to the sides first and then sew the longer horizontal strips to the top of the quilt.

8. Quilt, bind, and enjoy your 31" x 31" finished wall hanging or table topper!
GO! Give It A Twirl
As you can see, the GO! Lucky Star-10" Finished Die offers a different - yet still eye-catching - design when you change up the block placement and colorway. What creative ideas do you have with the Lucky Star block? Use the hashtag #AccuQuiltBuilt and don't forget to tag @mgbusb and @AccuQuilt on social media so that we can see your luminous creation!