
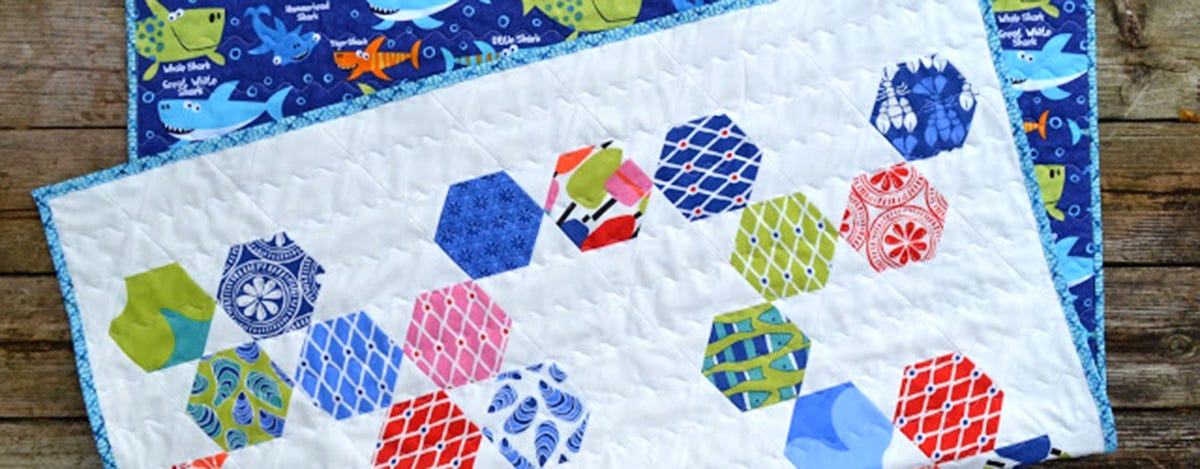
Hello everyone! This is Lorna of Sew Fresh Quilts. I’m here today to share with you my AccuQuilt guest blog post featuring my "Beach House" baby quilt. This fun project utilizes the GO! Hexagon 1", 1.5" and 2.5" and the GO! Equilateral Triangles 1", 1.5" and 2.5" dies.
I have made an equilateral triangle quilt before. Many times actually. And I have made a hexagon quilt once before. This was such a fun and easy baby quilt to pass the day away on. Playing in my sewing space!

For the hexagons, I found this cute charm pack of "Beach House" by Kate Nelligan for Moda. I have had it since the spring. And now that summer's over, I figured it could help revive thoughts of those days spent down at the beach.
You'll find that this GO! Hexagon die is the perfect size for using your charm squares. Or using up some of your small scraps!

This "Beach House" baby quilt finished at approximately 36.5" x 41.5".
Hope you like it as much as I do!

To make your own GO! Triangle-Hexagon baby quilt, follow the directions below......
GO! DIES USED:
FABRIC REQUIREMENTS:
- 42 @ 5" Charm Squares
- 2.75 yards of Background Fabric
- 0.25 yards of Binding Fabric
- 1.50 yards of Backing Fabric
- Batting to cover 42" x 45"
CUTTING DIRECTIONS:
Cut 42 – 5" Hexagons
From your background fabric:
Cut 57 – 5" Hexagons
Cut 186 – 2.5" Equilateral Triangles
From your binding fabric:
Cut 4 – 2.5" strips across the WOF

SEWING DIRECTIONS:

2. Sew two triangles to the opposing sides of the remaining 45 background hexagons.

3. Cut 5 of the 45 background hexagons in half.

4. Sew two triangles to the opposing sides of the 42 charm square hexagons.

5. Arrange your hexagons into rows, as shown in the picture below. The odd rows will begin and end with a one triangle hexagon, as shown in grey. The even rows will begin and end with a half hexagon, as shown in light blue.
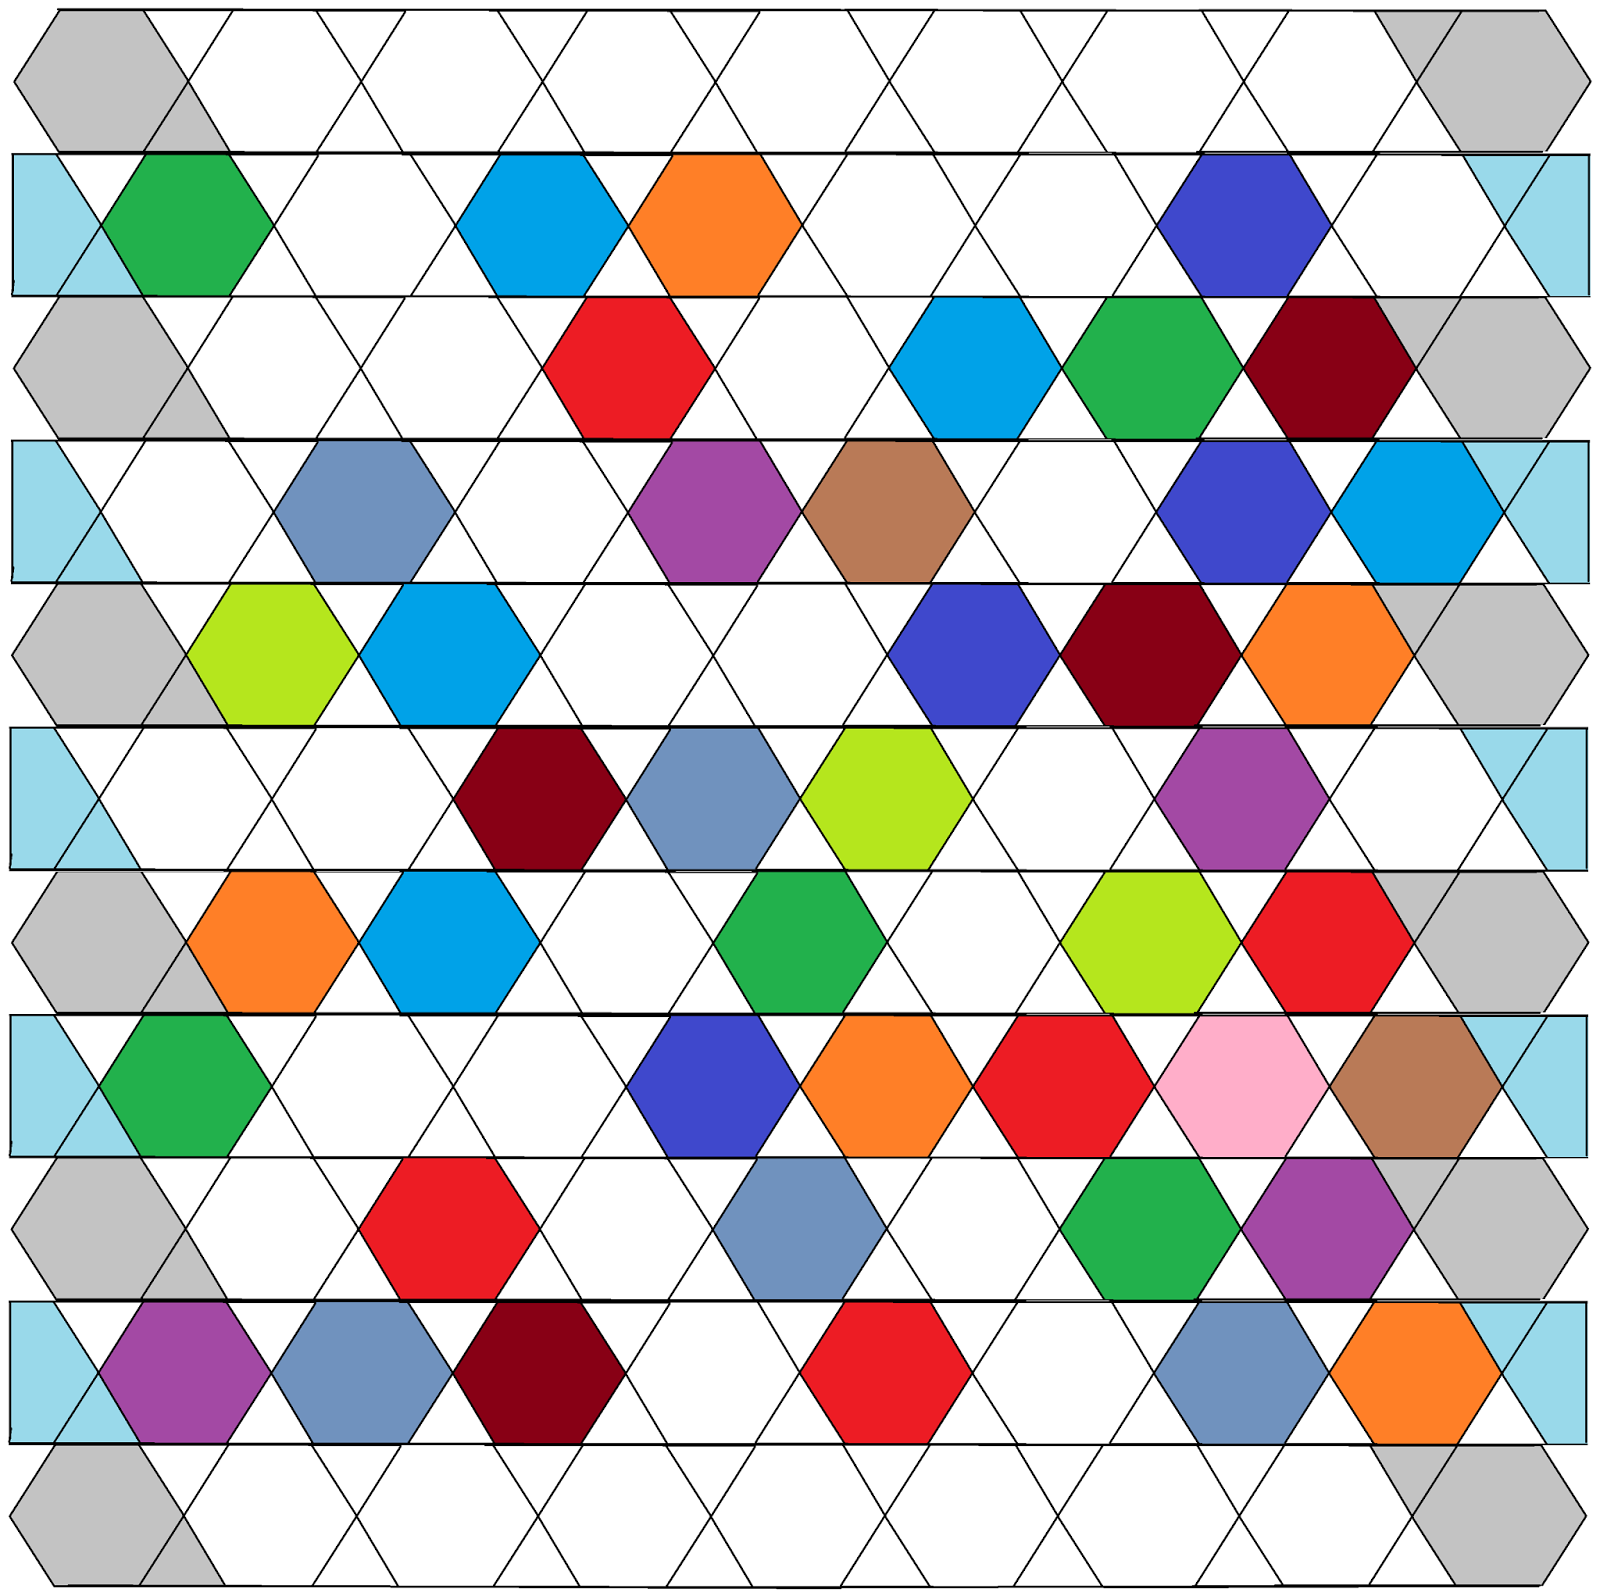
6. Pin and sew diagonal seams together matching points to complete the rows. Odd rows as shown first and even rows as shown second.

7. Pin and sew rows together matching seams. Press seams open.
QUILTING AND FINISHING:
1. Layer batting between quilt top and backing fabric, with right sides facing out.
2. Pin or baste layers together.
3. Quilt as desired. I used my walking foot and quilted using the serpentine stitch along the seam lines and in the center of each row, from edge to edge.
4. Trim sides of quilt square.
5. Prepare your binding, using the 4 WOF 2.5" wide strips. Bind your completed quilt.

Keep On Quilting On!


This guest post was written by Lorna McMahon, modern quilter, pattern designer and the author of the Sew Fresh Quilts blog. Lorna's use of eye-catching colour and minimalist design has taken modern quilting in an entirely new direction, as traditional piecing methods are used to create a menagerie of animals and entirely new blocks. A few of her signature items are her “Elephant Parade” and “Dog Gone Cute” quilt patterns, which are offered as free quilt alongs. On her website you can learn from her creative processes as she shares her love of quilting, tips and clever tutorials.
Connect with me in the following ways!


