
Hello, GO! Getters! It's Gina from Gem Hill Quilts. Are you ready to head down to the beach or lounge about poolside? I have a great project just for you! I'm going to show you how to make personalized beach towels!
Transform a regular store-bought beach towel into a Personalized Multi-Pocket Beauty of a Beach Towel! Hook the large pocket over the back of a lounger and place your personal items in the smaller pockets. And the best part is having your name on all your personalized beach towels!

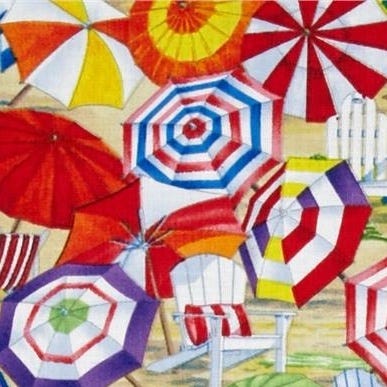
I was lucky to find this beachy large-print fabric with umbrellas and chairs to go with my striped beach towel.
A coordinating background tonal is needed for the small pockets section and another fabric, which won't be seen, is needed for the back of the small pockets. Scraps or fat eighths of six other fabrics are also needed to complete the project.
The beach towel used here measures about 30" x 60". I used dies from the GO! Qube Mix and Match 9" Block. To cut the letters, I used the #55092 GO! Carefree Alphabet Set (2-Die Set). This Alphabet die set produces letters that are 3" tall.
Cutting Directions

Cutting Notes
*If you use a larger beach towel, you can simply widen the Side Strips to accommodate the wider beach towel.
**When cutting these letters, note that the die shapes are reversed. So, place the Fusible-Backed Yellow Fabric right side down on the die.


***The large-scale print I used was directional and fussy-cut accordingly.
Pinwheel Blocks
Layout 4 Orange and 4 Background Shape 5 triangles to form a Pinwheel Block.

Sew one Orange and one Background Shape 5 triangle together to make a unit that measures 2 3/4" square. Make 4 of these.


Then, sew the 4 square units together to make a Pinwheel Block that measures 5" square.

Repeat to make one each of a Green, Aqua, Red and Blue Pinwheel Block.

Square In A Square
Layout one Aqua, one Orange and two Background Shape 5 triangles around one Large Print Shape 6 Square-On-Point.

Center and sew each of the Background Shape 5 triangles along opposite edges of the Large Print Shape 6 Square-On-Point.

Repeat for the Aqua and Orange Shape 5 triangles for the remaining sides to complete a Square in a Square Block that measures 5" square.


Make a second Square in a Square block with one Orange, one Green and two Background Shape 5 triangles around another Large Print Shape 6 Square-On-Point.


Layout and Letters
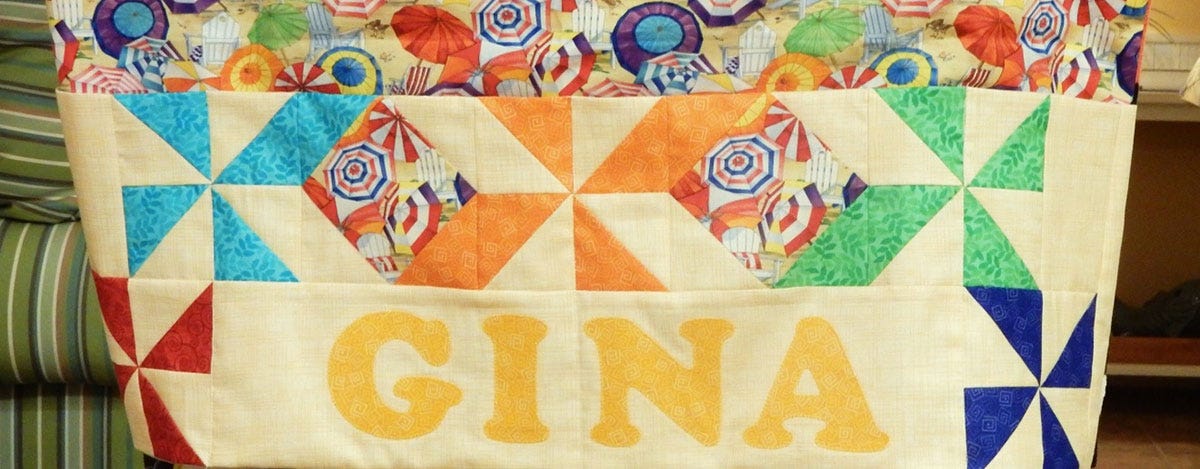
To create the pieced Pocket section, layout all the Blocks, the two Background Shape 8 rectangles, the Applique Background and the two Side Strips.
At this point, I assessed where to stitch down the middle to create multiple pockets. So, when placing the letters on the Applique Background, I made sure that none of them would fall on the stitch lines. As it turns out, all I had to do was avoid the center of the Applique Background.

After fusing the letters in place, I machine appliqued them down with a small zigzag stitch.

Assembly
Replace the Applique section in the pieced Pocket section. Sew units in each row together. Then, sew rows together. Finally, sew the Side Strips onto the opposite sides.

Now, layout the front and back pieces, the pocket backing and the pieced section as shown. With pieces that are directional - such as the pieced section - make sure that it is oriented correctly. Do NOT mix up the front and back pieces - they are sized just a little differently. Sew pieces together into one rectangular piece.

Fold in half. It should fold on the seam connecting the pieced section to the pocket backing. Pin the pieced section/pocket backing flat. The seams at the bottom of the front and back pieces are offset about an inch and will not match.


Stitch in the ditch across the bottom seam of the pieced section. Note that this stitching will show on the pocket backing only.


Fold the pieced section up from this stitching to place over the Front Piece.

Baste the side edges together. Then, pin and stitch the pieced section to create multiple small pockets.

Place the top of the beach towel, right side down, over the small pockets, matching raw edges with the sides and top of the beach towel. Pin and sew along the sides and the top. Be sure to to backstitch when you start and stop.


You may choose to finish the raw edges with a zigzag stitch or if you have a serger, serge it.
Turn the pocket inside out and find the nearest lounger!

Here is how the beach towel looks on the lounger - from the front side, it's just another beach towel!

From the back, this beach towel is one of a kind!
Options
If your name is long and does not fit on the Applique Background, you can remove the red and blue pinwheels and simply expand the Applique Background
When you are storing the personalized beach towels, you can fold up the towel portion and insert it into the large pocket section.
You can sew a strap to the side strips to make it easy to carry around.
You can also insert a pillow in the large pocket and lay out the towel on grass or sand for a quick snooze!
The personalized beach towels are quick fun gifts for a loved one or yourself. So, go ahead, get ready to sew pockets on those personalized beach towels!!!
Come and visit my site to see some of my other projects including several made with the GO! Fabric Cutter.


