


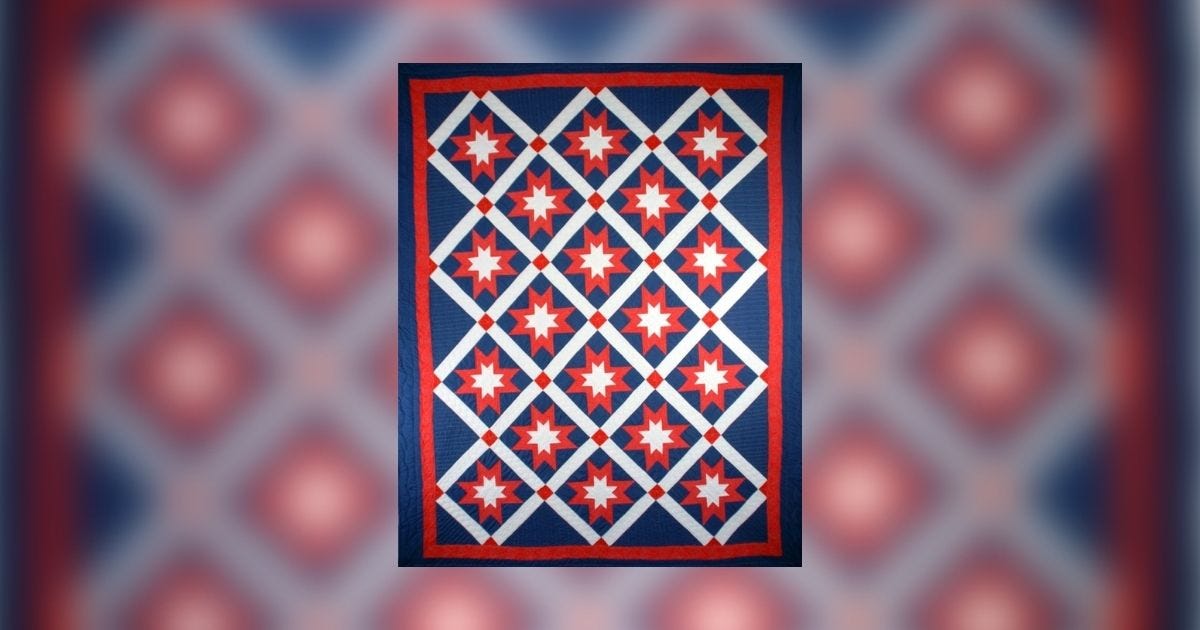
Hello AccuQuilters! It's Lori from Lori Miller Designs, and I'm back to share something that's near and dear to my heart. It's a Quilt of Valor made with the new GO! Rising Star 10” Die (55541). This versatile star block finishes at 10'' and is the perfect foundation for this beautiful quilt.
It's a Block on Board (BOB) where all of the pieces to cut are on one die board. I also used the GO! Setting Triangles – 10” Finished Die (55553) since the blocks are set on point.

I'm a member of the Stitching Sisters Quilt of Valor (QOV) group in Clawson, Michigan. We make patriotic quilts for service members who have been touched by war. It is so rewarding to honor these service members with a tangible thank you for their service.

I love to design my quilts using Electric Quilt Software. So, I drew the rising star quilt block and used it to design this quilt.
If you like designing your own quilts with your fabrics and colors, you might want to check out my EQ8 Block Library files for AccuQuilt. They are available for most BOB blocks and many of the Qubes.
GO! Rising Star Quilt of Valor Directions
Finished Size: 64” X 80”
Dies Used
- GO! Rising Star 10” Die (55541)
- GO Strip Cutter – 2 1/2” (2” Finished) 3 strips die (55017)
- GO! Setting Triangles – 10” Finished Die (55553)
Fabrics Needed
- Red– 3 yds
- Navy – 4 1/4 yds
- White – 2 yds
- Binding 5/8 yd
- Backing 5 yd
- Batting 72” x 88”

Cutting Instructions
From Red Fabric
- Cut three strips 8½” x width of fabric (WOF)
- Subcut 9 – 2½” strips for the border
- Use two strips of the strips above to subcut 31 - 2½” squares using 2½” strip cutter
- Cut 13 strips 3½” x WOF
- Subcut 144 – Rising Star Shape C
- Cut five strips 3½” x WOF
- Subcut 72 – Rising Star Shape D
- Cut 5 strips 2¼” x WOF
- Subcut 72 – Rising Star Shape F
From White Fabric
- Cut four strips 8½ " x WOF
- Subcut 48 - 2½” X 10 ½” sashing pieces
- Cut two strips 3½” x WOF
- Subcut 18 – Rising Star Shape A
- Cut nine strips 2¼” x WOF
- Subcut 144 – Rising Star Shape E
From Navy Fabric
- Cut three strips 15 3/8” x WOF
- Subcut 10 – Side Setting Triangles 10”
- Cut one strip 8¼” x WOF
- Subcut 4 – Corner Setting Triangles 10”
- Cut seven strips 6" x WOF
- Subcut 72 – Rising Star Shape B
- Cut seven strips 4½” x WOF for border
- Cut seven strips 3½ " x WOF
- Subcut 72 – Rising Star Shape A
Binding Fabric
- Cut three strips 8½” x WOF
- Subcut 8 strips for binding

Sewing Instructions
- Use the GO! Rising Star – 10” Finished instructions to sew the 3-color block.
- I started by assembling the center of the star.

- The center makes a 5” block. These would be super cute all by themselves.

- Then I put together the rest of the blocks. You will need 18 Rising Star blocks total.

- I use my design wall to arrange the blocks with the corner and side setting triangles.

- Then I started sewing it together in rows with the sashing and cornerstones.

- Finally, I added the outer borders. This is a rendering from EQ8.

How to Finish the Quilt
- Make a quilt sandwich with the backing, batting, and pieced quilt top.
- Pin baste or use your favorite method.
- Quilt as desired. I tried a little bit of custom free motion quilting.
- Bind the quilt using the 2 1/2" strips to finish. I machine stitched the binding on.

Blocks on Point and Sashing Fun!
Setting the blocks on point with the sashing and cornerstones really makes a stunning presentation. Have you tried the GO! Rising Star Die? What other projects have you made?
I would love to see your version of this patriotic Rising Star Quilt of Valor. Please share and tag AccuQuilt and Lori Miller Designs on Facebook or @AccuQuilt and @lorimillerdesigns on Instagram.


