
Hi, quilters! It’s Bea from Beaquilter. Inspiration for new projects strikes me at any time, and this idea hit me when I took a trip to the mall! I’m totally NOT a mall person. Plus, the closest mall is an hour away from where I live, so we only go a few times a year - if that.
A Lovely Idea from the Mall
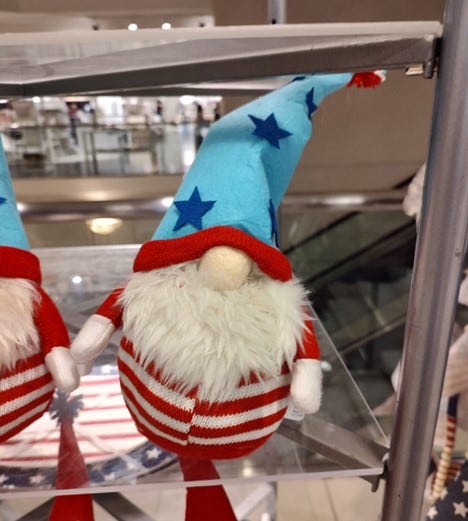
Gnomes are SO popular! When I went to the mall in the spring, I chuckled when I saw cute gnome dolls with Easter hats on. On our recent mall trip, I saw darling patriotic gnome dolls!
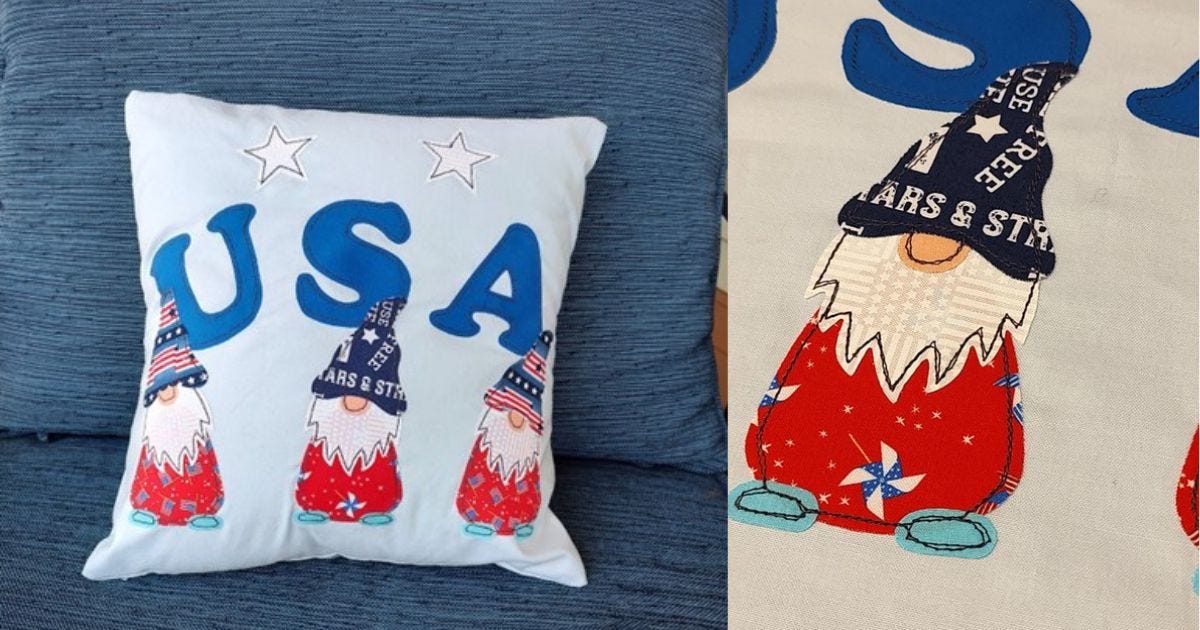
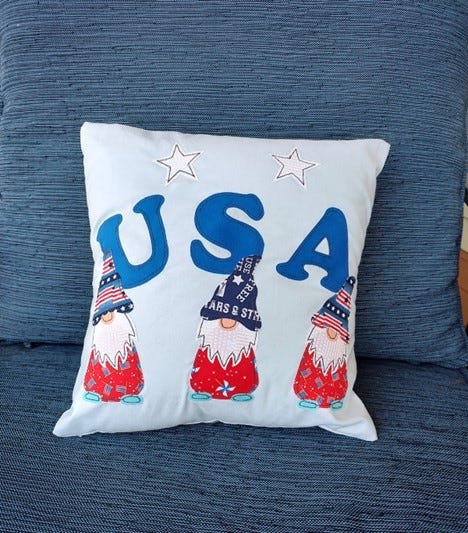
Once I saw these, I knew that I had to make my own patriotic gnome project. My initial idea included a gnome shape next to "USA" on a mug rug, but I wasn’t sure how big the finished cut shapes would be. While creating this project, I discovered that a mug rug wouldn't work out, but a pillowcase did!
Creating Patriotic Gnomes For Your Home
Materials Needed:
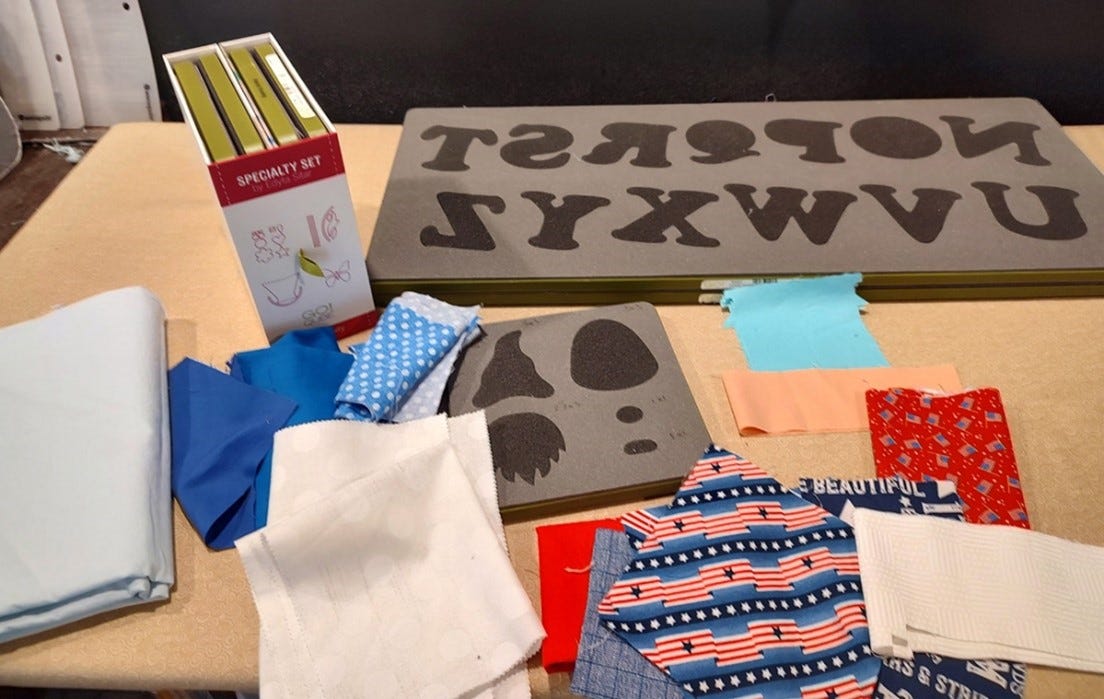
- GO! Gnome Die
- GO! Carefree Alphabet Uppercase Set (2-Die Set)
- Only the second die ("N" to "Z") is needed
- GO! Qube Specialty Set - Serendipity by Edyta Sitar
- For the star shape in the GO! Flower Shapes by Edyta Sitar Die
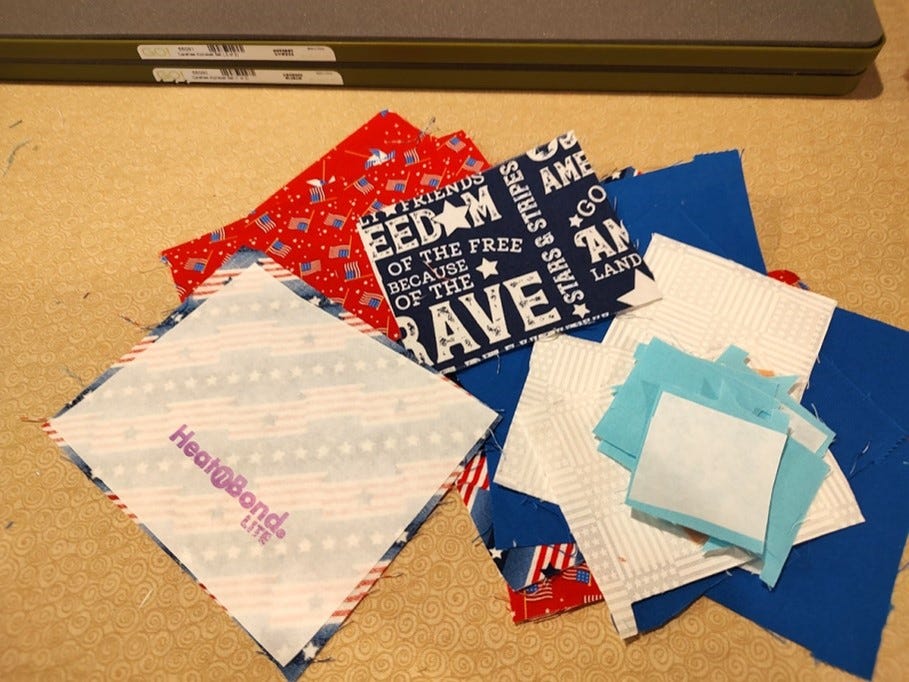
- HeatnBond Lite Iron-On Adhesive
- Light blue scrap fabric
- Blue scrap fabric
- White scrap fabric
- Red scrap fabric
- Scrap fabric for the gnomes' nose shapes
- I used a beige color
- 5/8 yard of light blue fabric
Shape Instructions
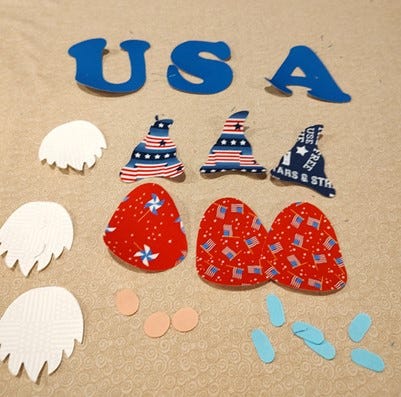
1. Attach HeatnBond Lite Iron-On Adhesive to the back of each piece of scrap fabric.
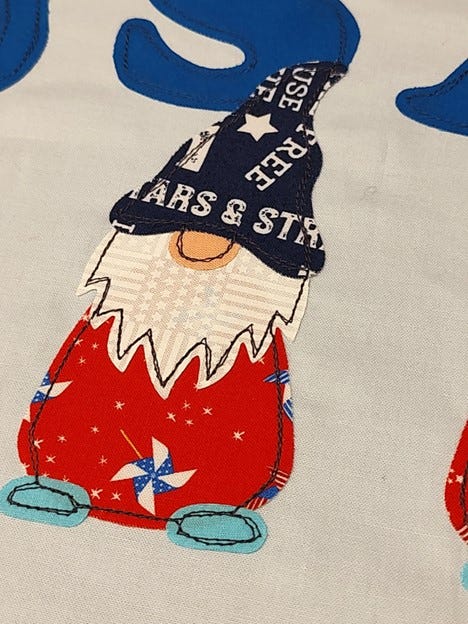
2. Cut out three full gnomes using all the shapes on the GO! Gnome Die.
3. Cut out the letters "U," "S," and "A" with the second die ("N" to "Z") in the GO! Carefree Alphabet Uppercase Set (2-Die Set) with the right side DOWN.
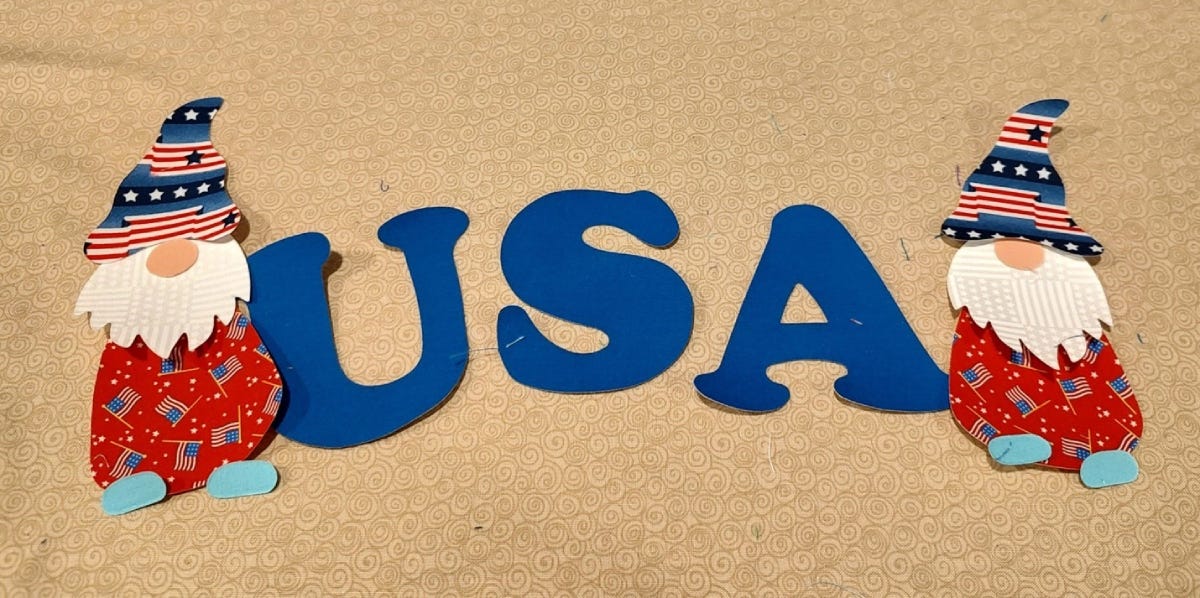
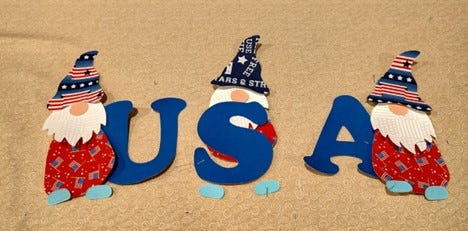
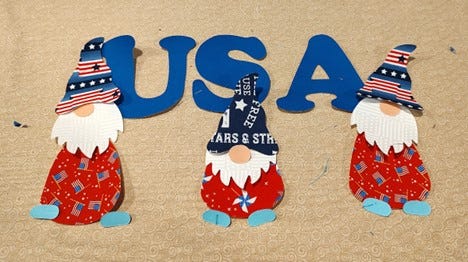
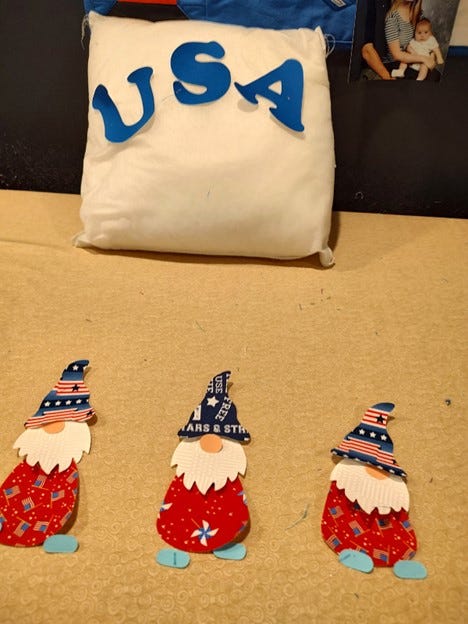
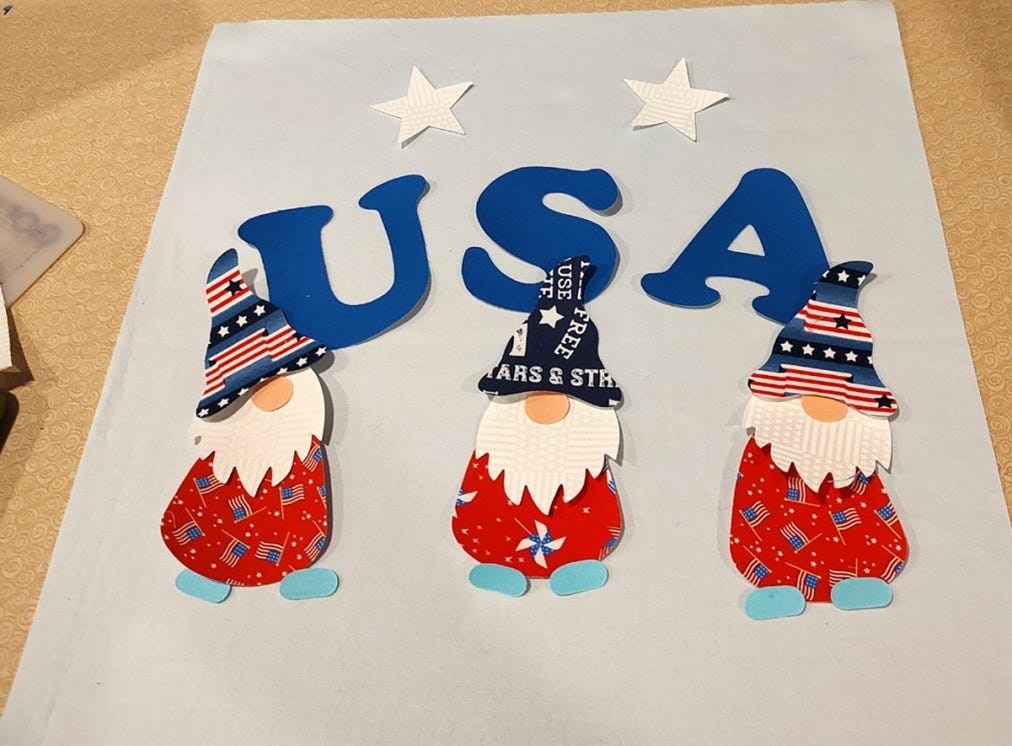
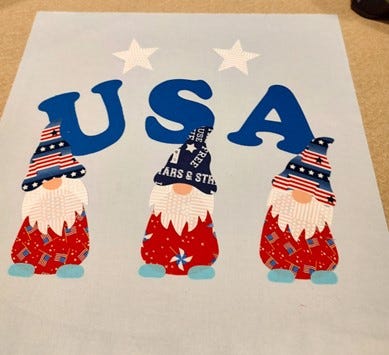
4. Once you have all of the shapes cut, play around with the layout. I tried three different placements (pictured below) before settling on the last one.
NOTE: This is where I realized that all the cut shapes where I wanted them laid out was 12” wide, which would create a huge mug rug or maybe a small table topper. Instead, I found a 13” pillow shape in my sewing space to use! Since I was now making a pillowcase, I wanted to fill out the empty space above where I was going to place the gnome and letter shapes.
5. Using another piece of scrap fabric (with HeatnBond Lite Iron-On Adhesive applied first!), cut out two white stars from the GO! Flower Shapes by Edyta Sitar Die in the GO! Qube Specialty Set - Serendipity by Edyta Sitar.
Piecing Instructions
1. Place your desired shape layout on the piece of light blue fabric. I tweaked my original layout so that the "USA" curves.
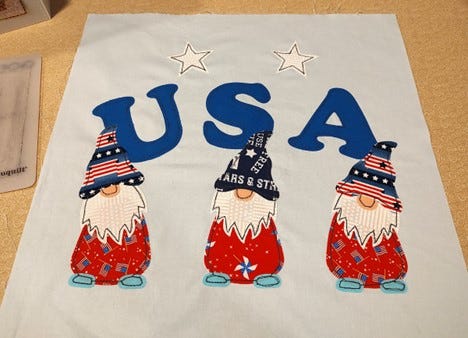
2. Remove the paper backs from each shape and iron them all down.
3. Quilt or hand sew each shape onto the square of light blue fabric.
PRO TIP: I decided to do a simple applique method to attach the shapes. I used a dark gray-ish blue thread and stitched down a double line around all the edges. This method let me have fun to “think” ahead to try not to have too many breaks in the thread and ONLY go around twice. It’s better if the lines look a little sloppy, like a sketched line!
Pillowcase Instructions
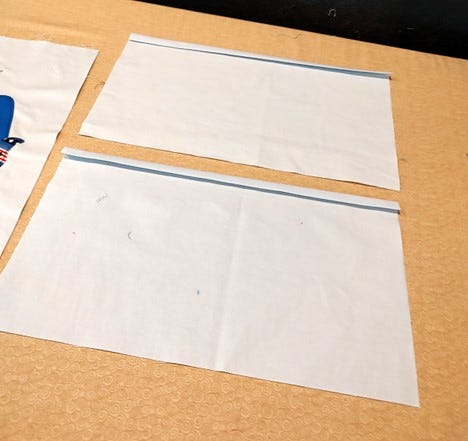
1. For the pillow case, cut the remaining light blue fabric into two 13 1/2” x 8 1/2” pieces.
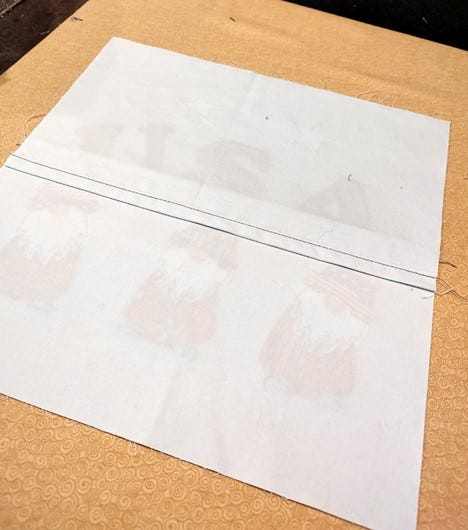
2. Press down on the top edge of each pillowcase piece twice before stitching each edge down.
3. Lay one pillowcase piece right side down on the bottom of the appliqued fabric square and the other pillowcase piece on top, with the stitched edges overlapping in the middle.
4. Stitch around the perimeter of the entire thing. I used a zig zag stitching (pictured below).
5. Trim the corners and turn the pillowcase right side out.

6. Stuff the pillow back inside around the pillowcase.
What Precious Patriotic Gnome Project Will You Make?
I think this pillowcase turned out to be absolutely adorable! Even though I decided to go from a mug rug to a pillowcase, it would be fun to create a small table topper using all of these shapes or a mug rug with one (or two) gnomes and the GO! Carefree Alphabet Lowercase Set (2-Die Set) Die. Whatever patriotic gnome project you create, use the hashtag #AccuQuiltBuilt and don't forget to tag @bealeequilter and @AccuQuilt on social media so that we can see your charming creation!


