
Hello, again! It’s Bea from Beaquilter. Today, I’m here to show you how to make a quilt from a quilt book (or magazine) into an AccuQuilt-friendly quilt!
Planning My Own Version
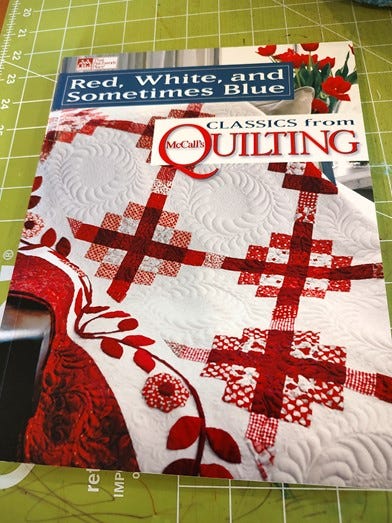
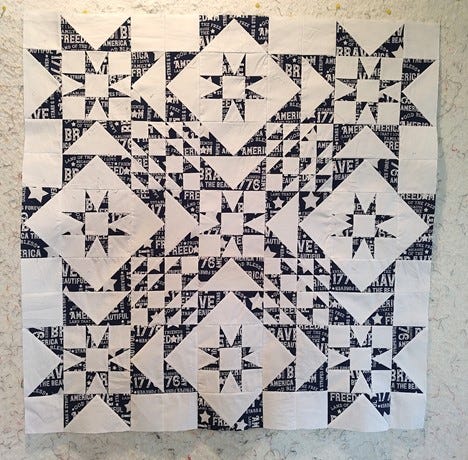
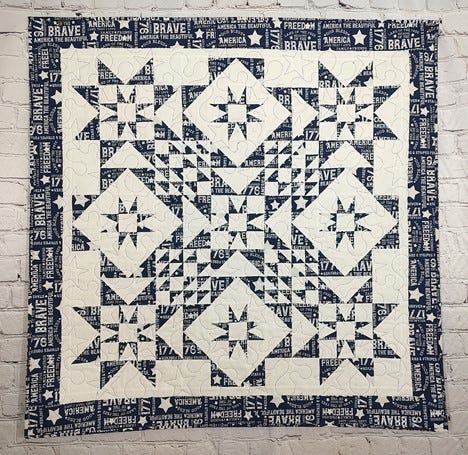
In this sample, I used the book Red, White, and Sometimes Blue: Classics from McCall’s Quilting. The pattern I picked is called Blue Moon, which is available as a free download!
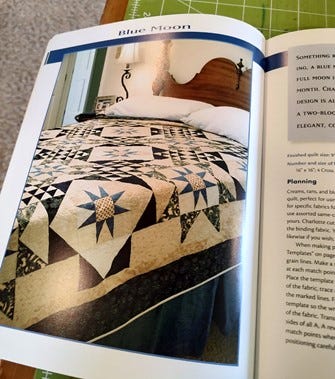
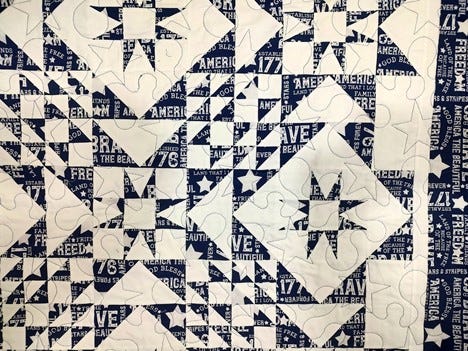
I copied this pattern into EQ8, but I chose to use solid white and a blue print, not scrappy like pattern's directions instruct you to use.
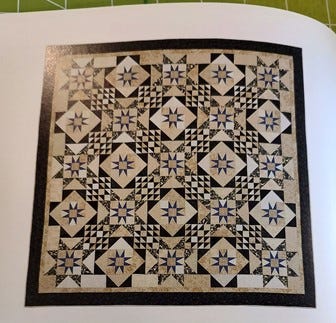
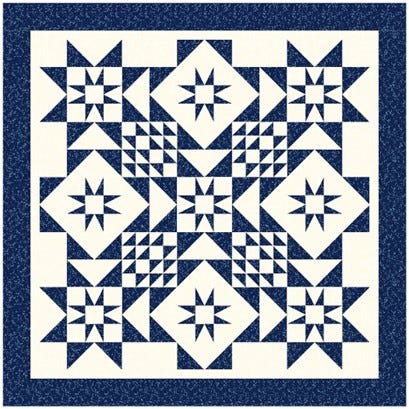
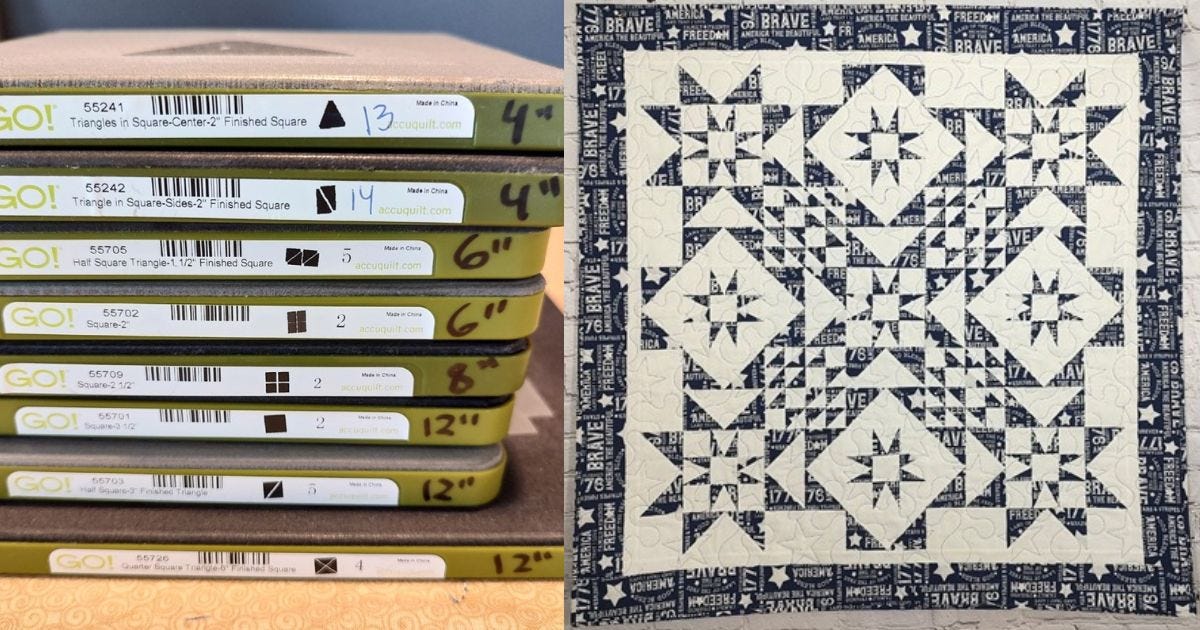
The blocks in the book finish at 16”, but I wanted something smaller. I studied these blocks and started thinking about how I could use my GO! Qube Mix & Match Blocks to create this quilt.
This pattern consists of nine large star blocks with another block inside them. Since a GO! Qube is based off of a 4 x 4 grid, the inside small star is half the block size in a 3 x 3 grid. Plus, the 1/4 block is also split in half in the one corner (and on other blocks). I figured out that the larger block size should be 12”, the middle part is 6”, the small star tips finish at 2", the large star would be 3" finished, and the small corner triangles would be 1 1/2" finished. Therefore, I can combine the GO! Qube 4" Companion Set-Angles with the GO! Qube Mix & Match 6", 8", and 12" Blocks to make my own version of the Blue Moon quilt!

How To Create Bea's Blue Moon Quilt Variation
The finished quilt size is 44" x 44" with 1” and 3” finished borders.
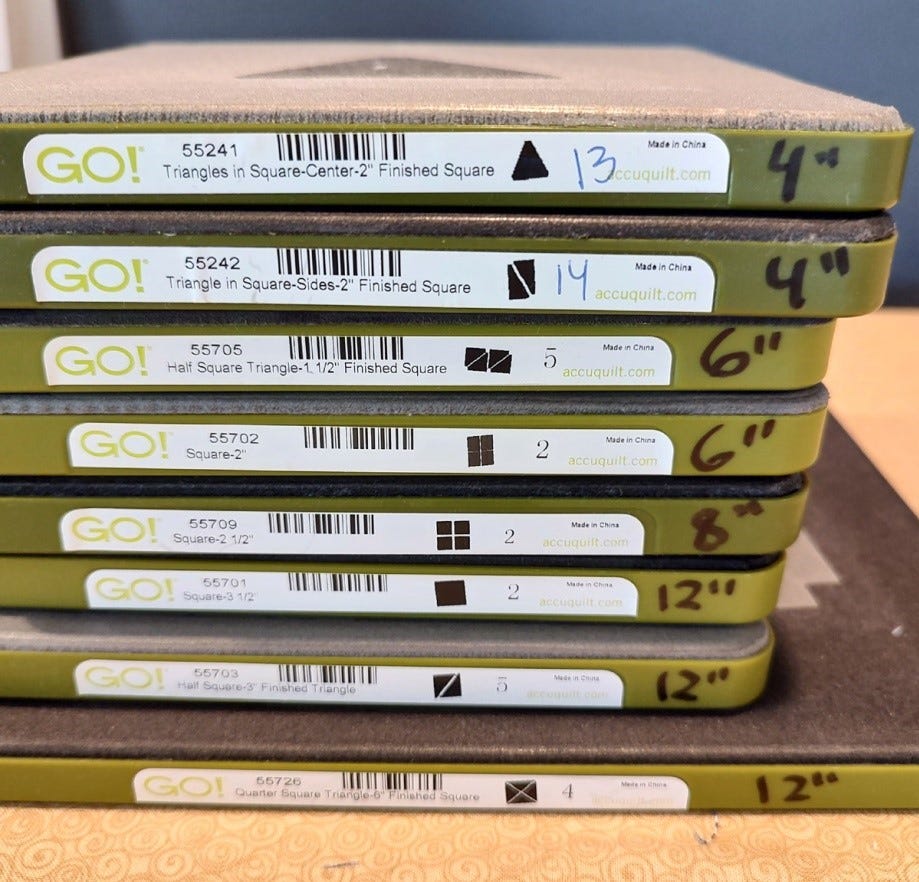
GO! Dies Needed
- GO! Qube 4" Companion Set-Angles
- GO! Qube Mix & Match 6" Block
- GO! Qube Mix & Match 8" Block
- Shape 2
- You can also use Shape 1 from the GO! Qube Mix & Match 4" Block
- Shape 2
- GO! Qube Mix & Match 12" Block
- GO! Strip Cutter-1 1/2" (1" Finished) 5 Strips Die
- GO! Strip Cutter-3 1/2" (3" Finished) 2 Strips with Angled Guidelines Die
Fabric Needed
- 1 1/2 yards of white fabric
- 1 1/4 yards of blue fabric
Cutting Instructions
PRO TIP: I always start with cutting the large die shapes FIRST to reduce waste.
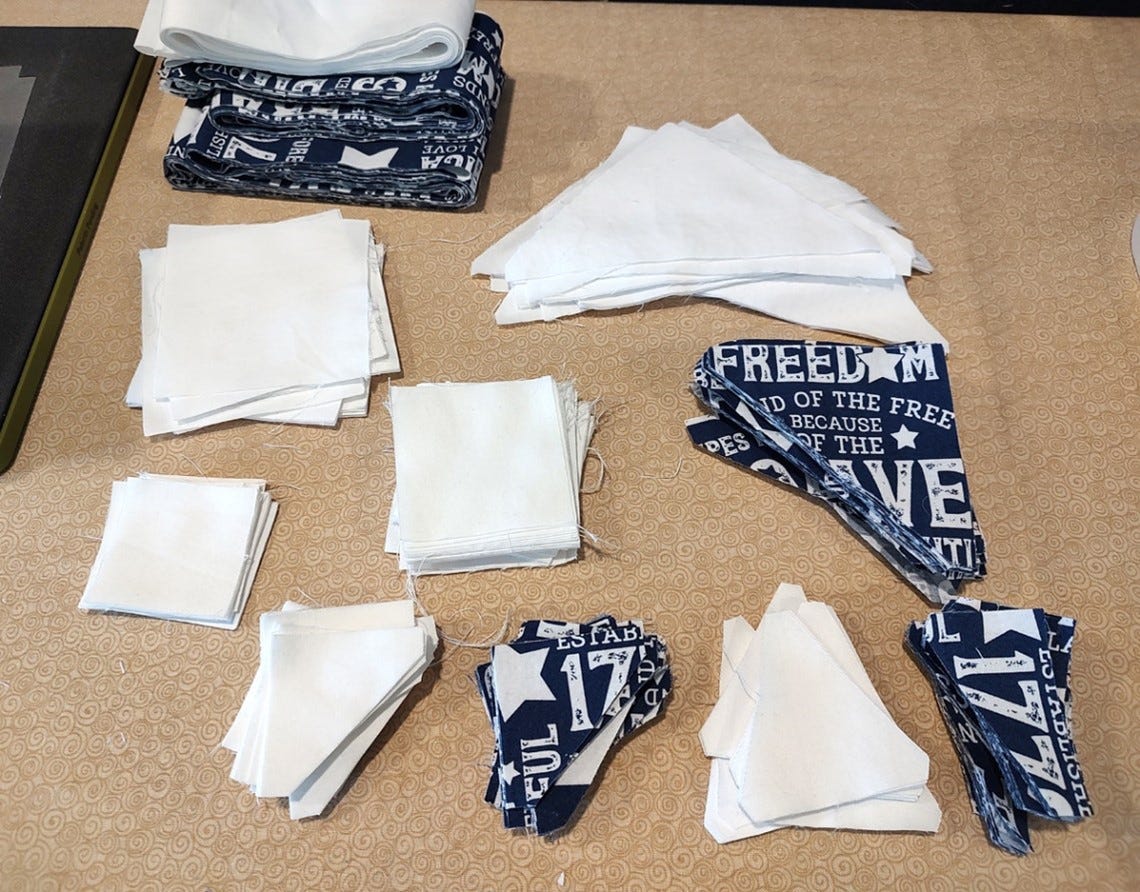
Using the white fabric, cut:
- Two 7 3/4" Width of Fabric (WOF) strips to subcut into 36 pieces from Shape 4 in the GO! Qube Mix & Match 12" Block
- Two 4" WOF strips to subcut into 20 pieces from Shape 2 in the GO! Qube Mix & Match 12" Block
- Two 5 1/2" WOF strips to subcut into 45 pieces from Shape 2 in the GO! Qube Mix & Match 8" Block
- Two 3" WOF strips to subcut into 36 pieces from Shape 13 in the GO! Qube 4" Companion Set-Angles
- One 5 1/4" WOF strip to subcut into 48 pieces from Shape 5 in the GO! Qube Mix & Match 6" Block
- One 4 1/2" WOF strip to subcut into 16 pieces from Shape 2 in the GO! Qube Mix & Match 6" Block
- Four 1 1/2" WOF strips with the GO! Strip Cutter-1 1/2" (1" Finished) 5 Strips Die
With the blue fabric, cut:
- Four 4 3/4" WOF strips to subcut into 72 pieces from Shape 5 in the GO! Qube Mix & Match 12" Block
- Three 3 1/4 WOF strips to subcut into 72 pieces from Shape 14 in the GO! Qube 4" Companion Set-Angles
- One 5 1/4" WOF strip to subcut into 48 pieces from Shape 5 in the GO! Qube Mix & Match 6" Block
- Five 3 1/3" WOF strips using the GO! Strip Cutter-3 1/2" (3" Finished) 2 Strips with Angled Guidelines Die
NOTE: I also cut five 2 1/2" strips for binding.
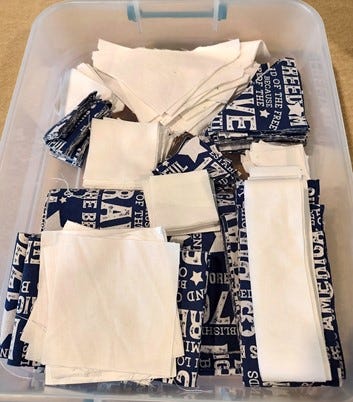
PRO TIP: I store my cut pieces in these plastic bins I have because I usually work on more than one project at a time, so I like to keep the pieces together and then just grab step #1 and sew that with my other projects.
Assembly Instructions
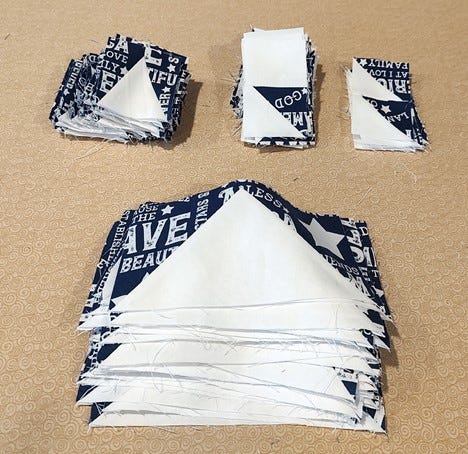
1. Sew all 36 of the small triangle in a square shapes together.
2. Sew all of the half square triangles together.
3. Sew the small white square pieces to the half square triangles.
4. Create 36 large flying geese blocks and sew them together.
5. Sew together the triangle in a square blocks with a small white square to make the small star pieces.
6. Create the corner half square triangle pieces (there’s 8 blocks in each of the block sections).
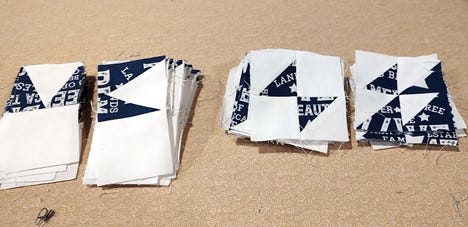
7. Sew all of the corner half square triangle pieces together to make the center of the quilt.
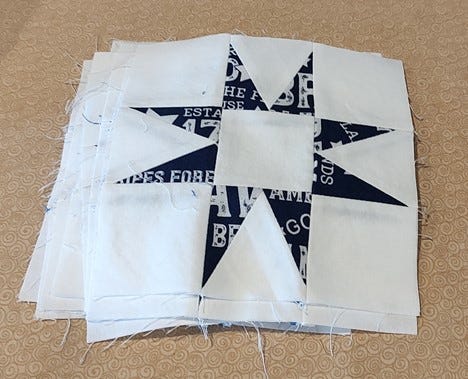
8. Sew all of the blocks together according to the pattern instructions.
9. To make the inner borders, you need:
- Two 1 1/2" x 36 1/2" strips
- Two 1 1/2" x 38 1/2" strips
10. For the outer borders, you need:
- Two 3 1/2" x 38 1/2" strips
- Two 3 1/2" x 44 1/2 strips
11. Create a fifth outer border strip, cut it in half, and add it to the two other strips so that they fit.
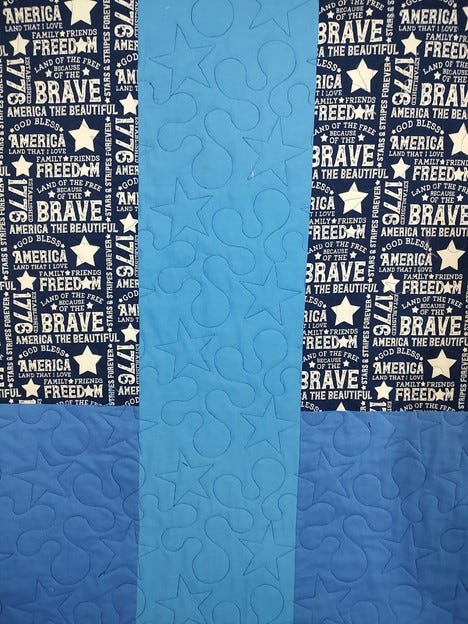
12. Quilt as desired. I quilted a star loopy design in a blue variegated thread.
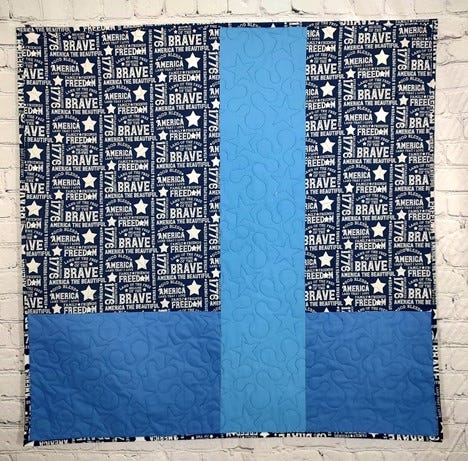
I always like to use up as much of the fabrics from the top as possible for the backing. Here, I had some of the blue print leftover and I added another solid blue chunk at the bottom, cut down the middle (not exactly centered works totally fine), and added another blue chunk in the middle.
Endless Project Possibilities with AccuQuilt
I love looking at quilts in books and magazines or at shows! They offer me the opportunity to try a new project with more of my beloved GO! Dies. If I can figure out how to use square and triangle dies in these other quilts, there’s always a possibility to create it the AccuQuilt way!
If you make your own version of this tutorial, use the hashtag #AccuQuiltBuilt and don't forget to tag @bealeequilter and @AccuQuilt on social media so that we can see your personalized creation!


