
Do you have a collection of fabric scraps and strips that you would hate to see go to waste? Check out this scrappy appliqué technique that helps use up your stash while bringing fun whimsy to your sewing projects.
Hi! I'm Nancy McNally of NancyMcNallyQuilts.com. A few of months ago, I became an AccuQuilt GoGetter. I thought it might be a good idea to introduce myself. Quilter for over 25 years, author, designer, online teacher, national instructor and I'm a longarm quilter. Basically, I pretty much do it all. I love everything quilt related.
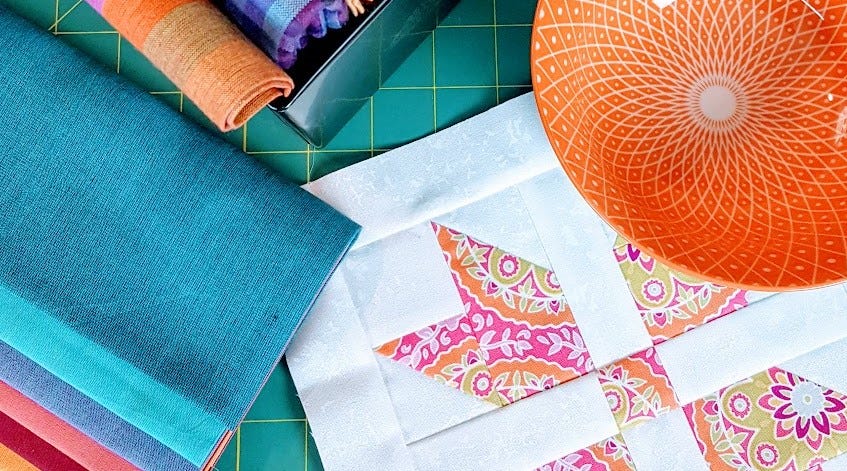
I was introduced to AccuQuilt about 6 years ago, and let’s just say I have a lot of dies! Actually, I have over 100 dies! I love how accurately my fabric pieces are cut, how easy it is to grab, cut and make a block. Just the other day I decided I wanted to start a scrappy simple project of the 6” Churn Dash block. Simple, right? I had my pieces cut within seconds! I grabbed a group of fat quarters, the GO! Half Square Triangle-2" Finished Square (#55063), the GO! Strip Cutter 1½" (1" Finished) (55024) and GO! Strip Cutter 2½" (2" Finished) (55017) and I was sewing in no time!
FREE downloadable embroidery files available for all GO! appliqué and select Studio dies!
I am one of those crafty quilters that thinks “outside the box” when it comes to using AccuQuilt dies. Let me explain. Shortly after I began collecting dies, I thought of a technique, whimsical appliqué, that would be fun and whimsical, hence the name. I have taught this technique at quilt guilds, conferences. It is so freeing.
Sew, what is my technique? First, let me preface the appliqué method is raw edge machine appliqué and I stress to please use your pretty variegated threads and don’t overthink!
My Technique
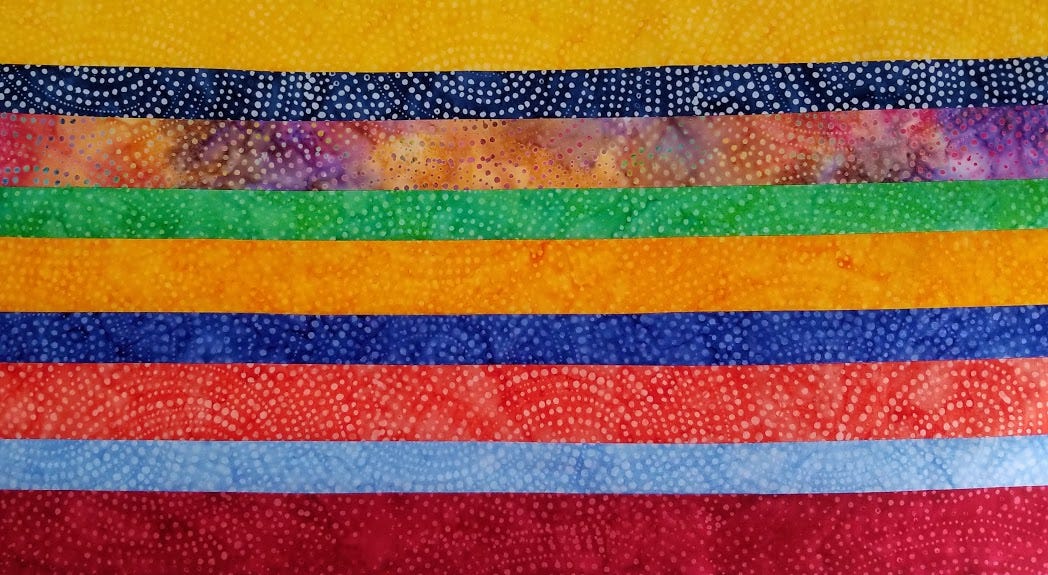
We begin by making strip sets. When making the strip sets, you want to use a variety of strip sizes, but none that are larger than two inch or smaller than one inch. I have strip dies from 1½" and up and am using the...
- GO! Strip Cutter 1½" (1" Finished) (55024)
- GO! Strip Cutter 2½" (2" Finished) (55017)
TIP: to keep your strip set from warping during construction, cut your strips in half along the length (20” long).
Depending on which appliqué shape you need, will depend on the size (width) you will need to construct. See, it is very freeing. All I do, is sew a few strips together, press seams open as you go. After a few are together, I take the strip set and compare it to the shape on the die I need. If It is not large enough, just add another strip or two.
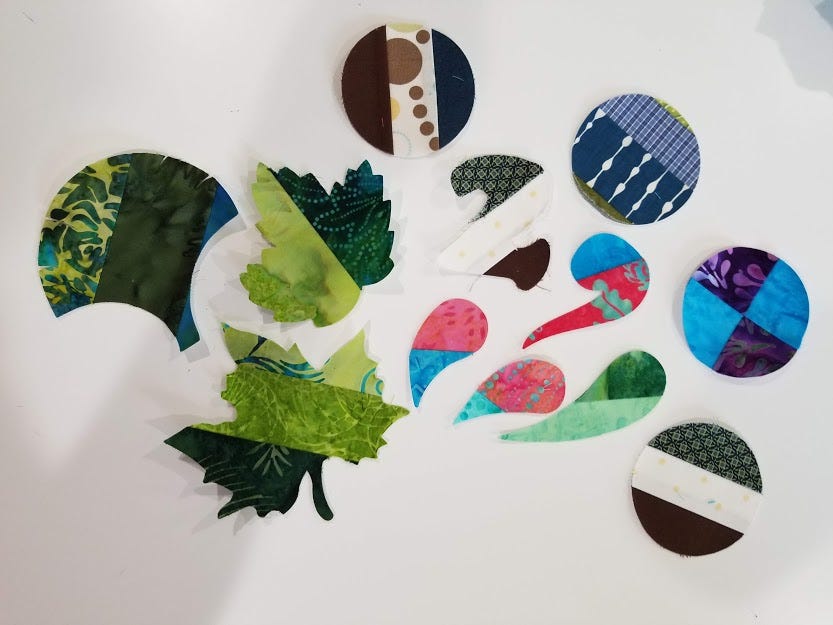
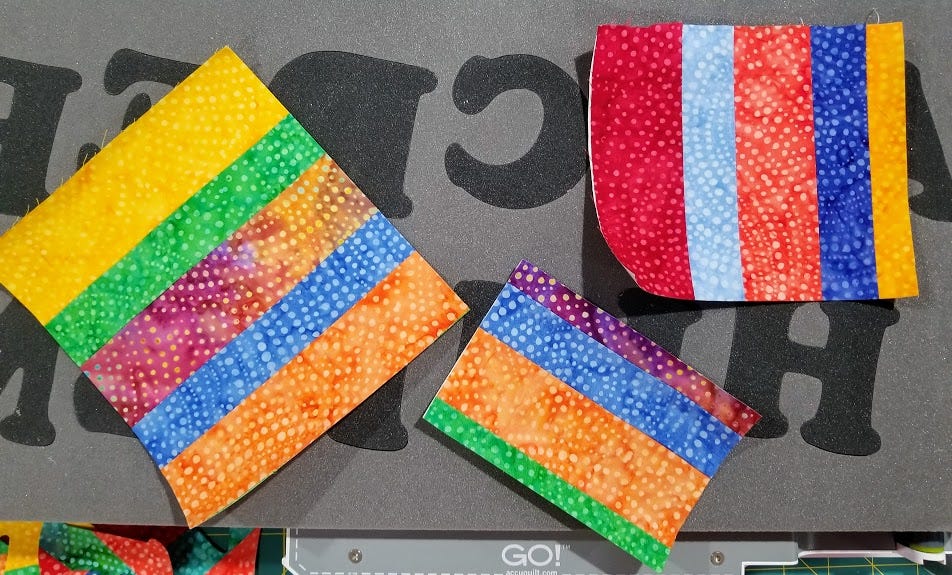
Remember: Place the strip set on the die at an angle. This gives your appliqué shape visual interest!
You can also use one of your rulers to measure, place your ruler at an angle to make sure the strip set is large enough. Once your strip set is large enough, you will need to apply paper-backed fusible web. Use a light weight fusible web so your shapes are soft.
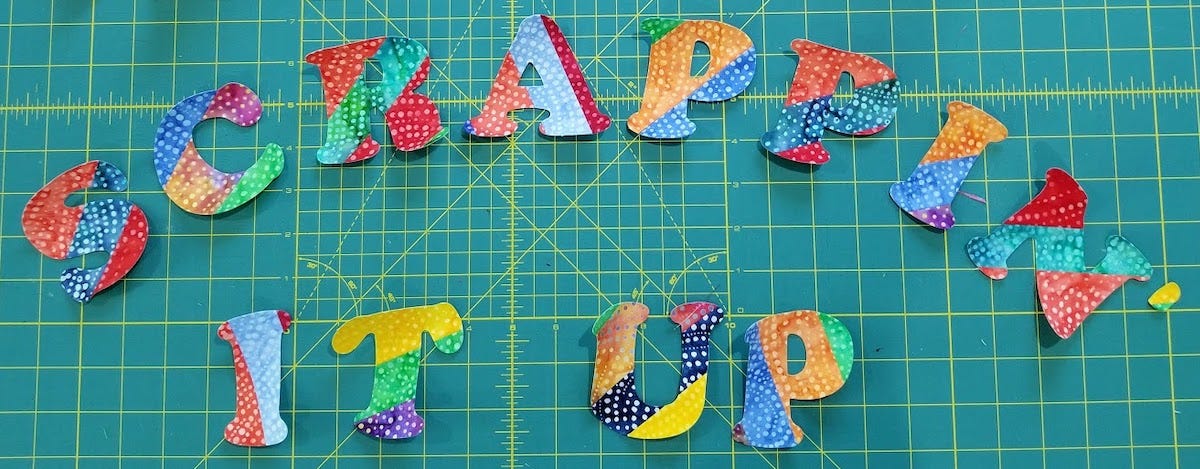
Next, place your strip set pieces on the die, mat on top and cut. If you are using the alphabet or numbers dies, place your strips right side down, fusible side up. Pull paper off the shape after you decide placement and are ready to press in place.

Checking out all my alphabet letters. See how by placing your strip set pieces at different angles on top of the shape gives visual interest? Isn't this great!?

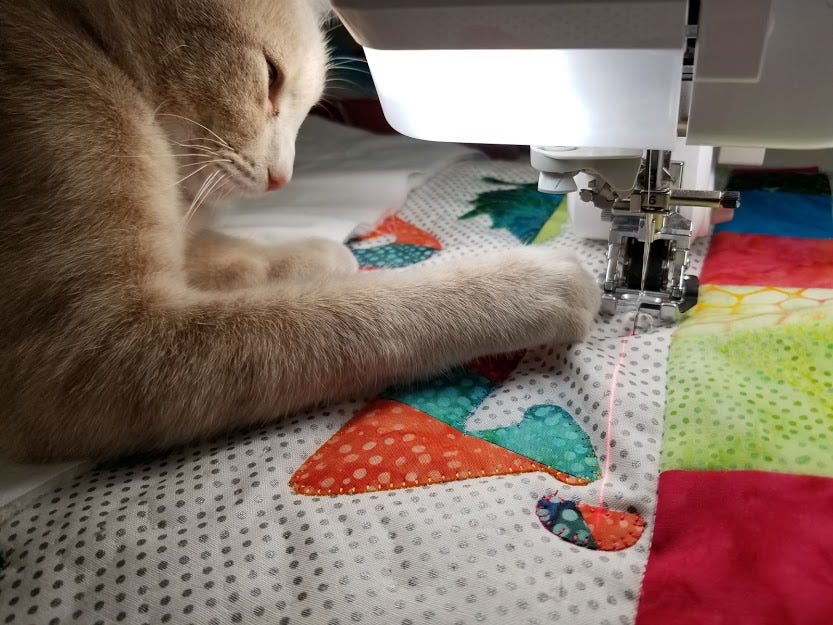
Next, let's fuse it down to our background fabric and press. Don't forget to remove the paper backing from the fusible. While I was blanket stitching, Mr. Kitty decided it was time for him to investigate. Does this ever happen to you cat owners?
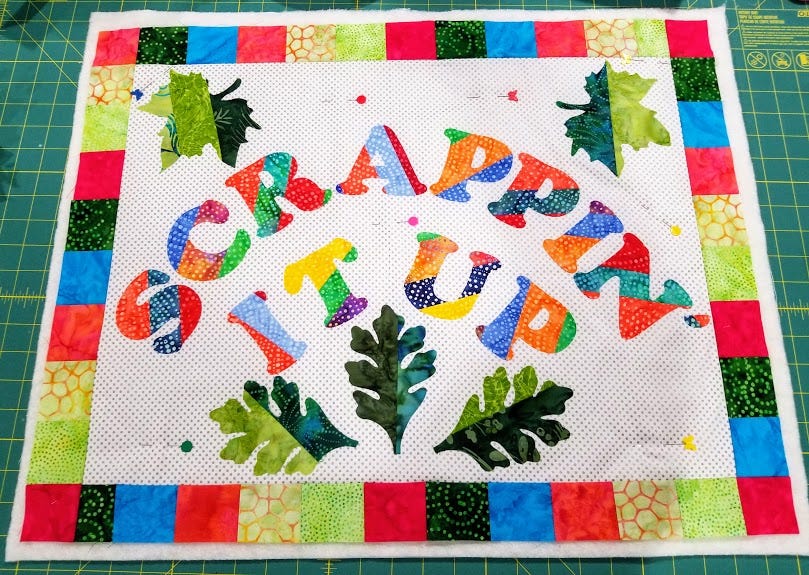
Finished Project


Happy Quilting! It's time to think outside the box, have fun and enjoy!
Be creative,
Nancy McNally


