

It’s time! The first 2024 AQS & AccuQuilt Along is right around the corner, and it’s time to reveal our project to you – the GO! Grapefruit Slice Throw Quilt. This bright and sunny project will finish to 42½” x 42½” and is made using the GO! Tangled Star-10" Finished Block on Board (BOB) die, or traditional cutting directions provided by our partners at AQS.

How We Chose the Project
AccuQuilt Cutting Expert Pam Heller and I put a lot of thought into what project we should kick off with. We poured over all our patterns and dies, and polled quilters on our live shows and at in-person events hosted by some of our wonderful retailer’s. One die just kept coming up over and over – the GO! Tangled Star-10” Finished die. We both love this die and the stunning block that it creates, so who are we to go against popular opinion?
-
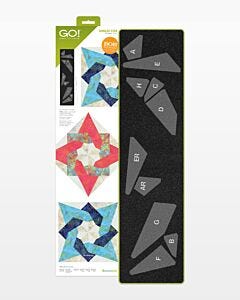 GO! Tangled Star-10" Finished DieSpecial Price $89.99 Regular Price
$104.99You Save $15.00
How the Quilt-Along Works
First, you’ll want to go to our website and download the free pattern. Whether you are planning to die cut or use the rotary cutting instructions, you will want to have the assembly directions handy.
While you’re on the website, be sure to enter your email on our Events page. We will be working on the project live each Wednesday from February 14 through March 6 at Noon CT. Entering your email enters you for a chance to win weekly door prizes, plus you’ll receive an email reminder before each show.
Don’t worry if you can’t watch the show live, it will be recorded and available for you to watch anytime on our website, Facebook page and YouTube channel.

We're Sewing and Sharing!
Be sure to join the AQS Quilting Project Parade Facebook group for sharing pictures of your project all along the way using #AQSews. It’s been amazing to be a part of this supportive and creative community.
Next Up - Fabric
I don’t know if selecting fabric is my favorite part of each project, but it’s right up there! The pattern uses 4 different fabrics, in bright sunny tones, but that’s just a suggestion! I suggest using GO! Quilt, a free design tool on our website to try all different fabric and color combinations before you head to the fabric store. You also may want to “shop your stash” and see what you have already that would be just perfect. Here’s what we came up with.


If picking fabric isn’t part of the process that you love, here are some suggestions to help you:
- Do you know where the finished quilt will live? Does it match the décor of the space or the recipient’s favorite colors?
- What’s lurking in your stash?
- Try different colors of fabric in GO! Quilt.
- Do you want this for a particular holiday or season?

Then, unless you pulled all your fabric from your carefully curated collection of fabric, head off to your local quilt shop. Oh – and don’t forget to take your pattern with you including the picture of the quilt. Now, wander around the shop and consider your options! Yes, to me this is the best part, but it can be overwhelming to many quilters, especially when you are just getting started, so here are a few tips.
Above all, ask for help! This is why you go to a quilt shop, they know fabric and quilts and they love helping you find just the right combination! Don’t worry if you don’t like their suggestions, it won’t hurt their feelings at all, but they know their inventory and may think of something you don’t even remember seeing!
- Find one fabric that you love, and build off of that. For me, I started with the dark navy background.
- Look for a variety of tones – dark, medium and light.
- Look for other fabrics from the same collection as your favorite, that way you know they were meant to “go together”.
- Check the selvedge edge of your base fabric for the registration marks. These will show all the colors that are used in that fabric, and you can match to them.
- Keep in mind the size of the prints and the size the pieces will be in the quilt. If you choose a large print for the small pieces in the center of the star, you really won’t see the fabric design at all.
Traditional Cutting Instructions
AQS and AccuQuilt want everyone to be able to join in the fun with our quilt-alongs, so they have provided traditional cutting instructions and you can download the templates for the Tangled Star blocks here.
From the Candy Green (background):
- 2 squares 15½" x 15½"; cut each square diagonally twice to make 8 triangles (Large setting triangles)
- 4 squares 10½" x 10½" (setting squares)
- 2 squares 8" x 8", cut each square diagonally once to make 4 triangles (Small setting triangles)
- 36 E
- 36 ER
- 36A
From the Camellia:
- 5 strips 2½" x WOF (binding)
- 36 F
- 36 G
- 36 B
From the Peony:
- 36 D
- 36 H
- 36 C
From the Aloha:
- 36 AR
Schedule
We will be kicking off the fun on Valentine’s Day with a live show on cutting and organizing your pieces. All the shows will be available to watch live at Noon CT on Facebook, YouTube and AccuQuilt.com. You can also watch the replay on these platforms if you can’t join us live. Here is the full schedule:
- Wed. Feb. 14: Cutting and Organizing
- Wed. Feb. 21: Sewing Tangled Star Blocks
- Wed. Feb. 28: Quilt Assembly including Setting Triangles
- Wed. March 5: Show & Tell
That’s it, your full “homework” assignment to be ready to start this project. Don’t forget to join the AQS Quilting Project Parade Facebook page and start posting pictures of your fabric choices – or options – using #AQSews in the descriptions.
See you on Valentine’s Day!


