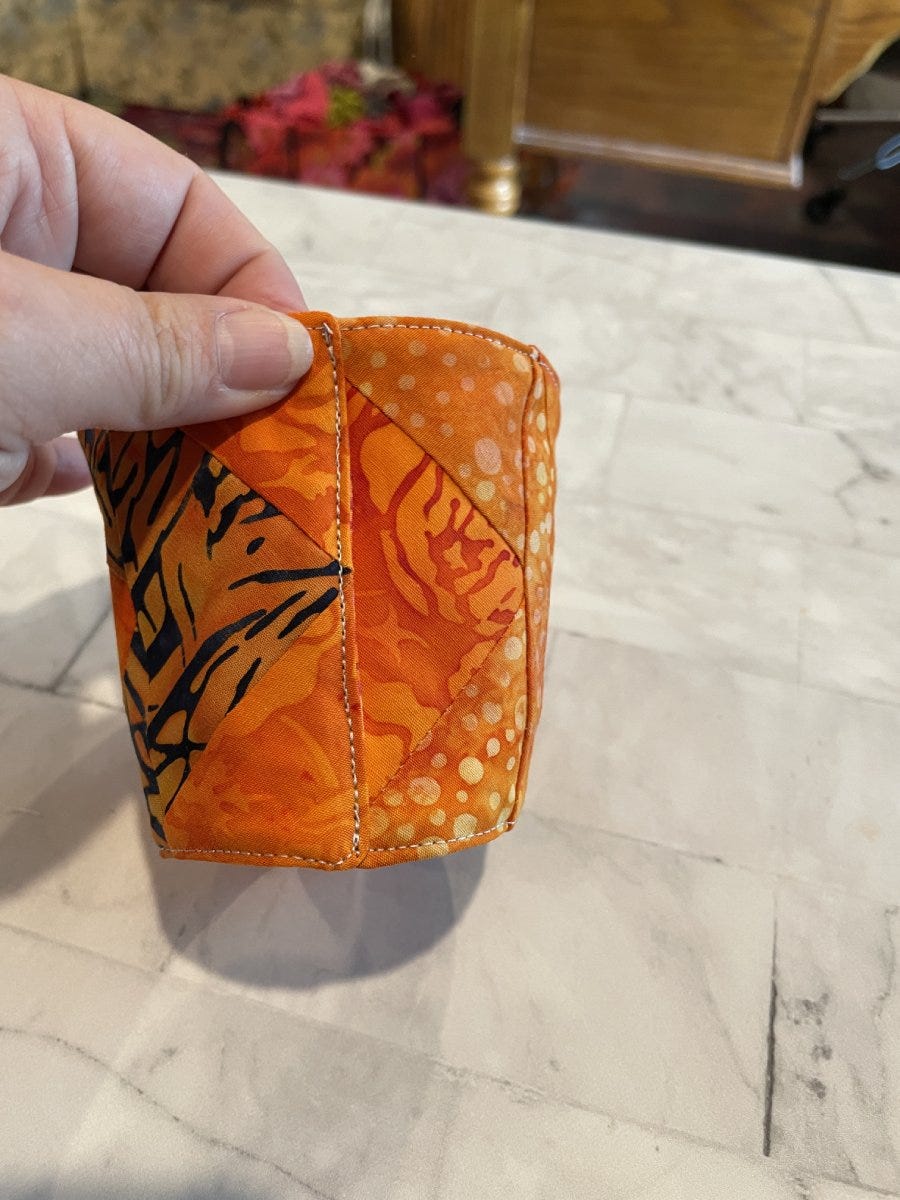
This project is very small and fast. I drafted my pattern using a piece of paper and a pint of Ben and Jerry’s ice cream. Then, I looked at my GO! Qube dies to find a unit that would fit nicely. The winner was Flying Geese from the GO! Qube Mix & Match 5" Block. It fits perfectly!
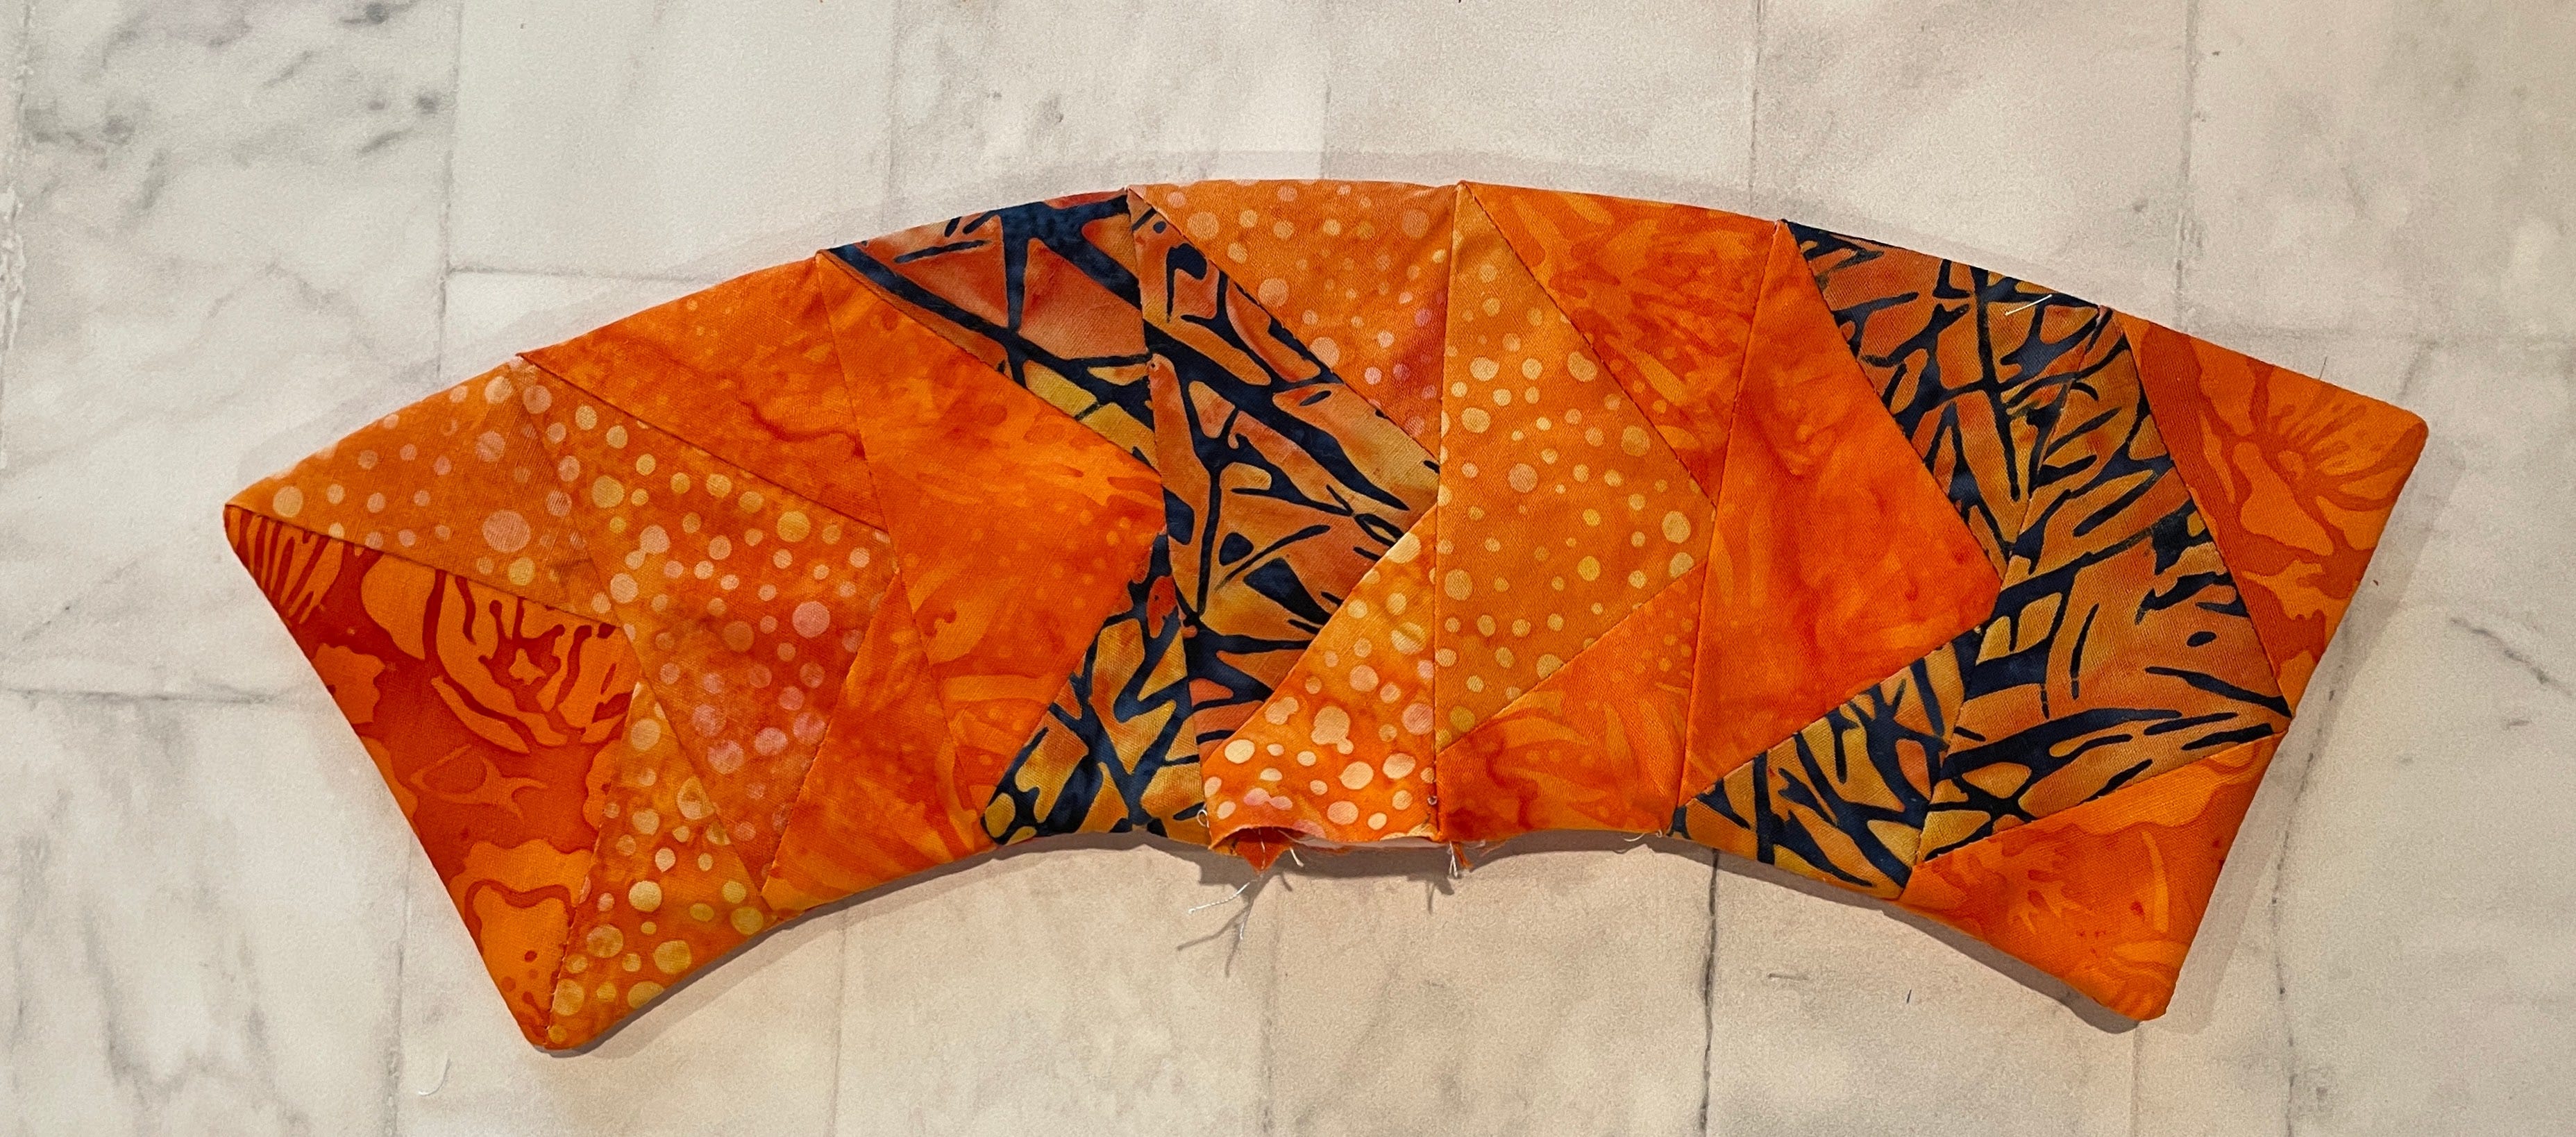
The cozy is a bit of a weird shape. Since ice cream pint containers are tapered, it is an arc. Rather than try to piece it all together, I decided to piece a row of regular Flying Geese and then re-stitch the seams at an angle to taper one side. It’s so easy this way!
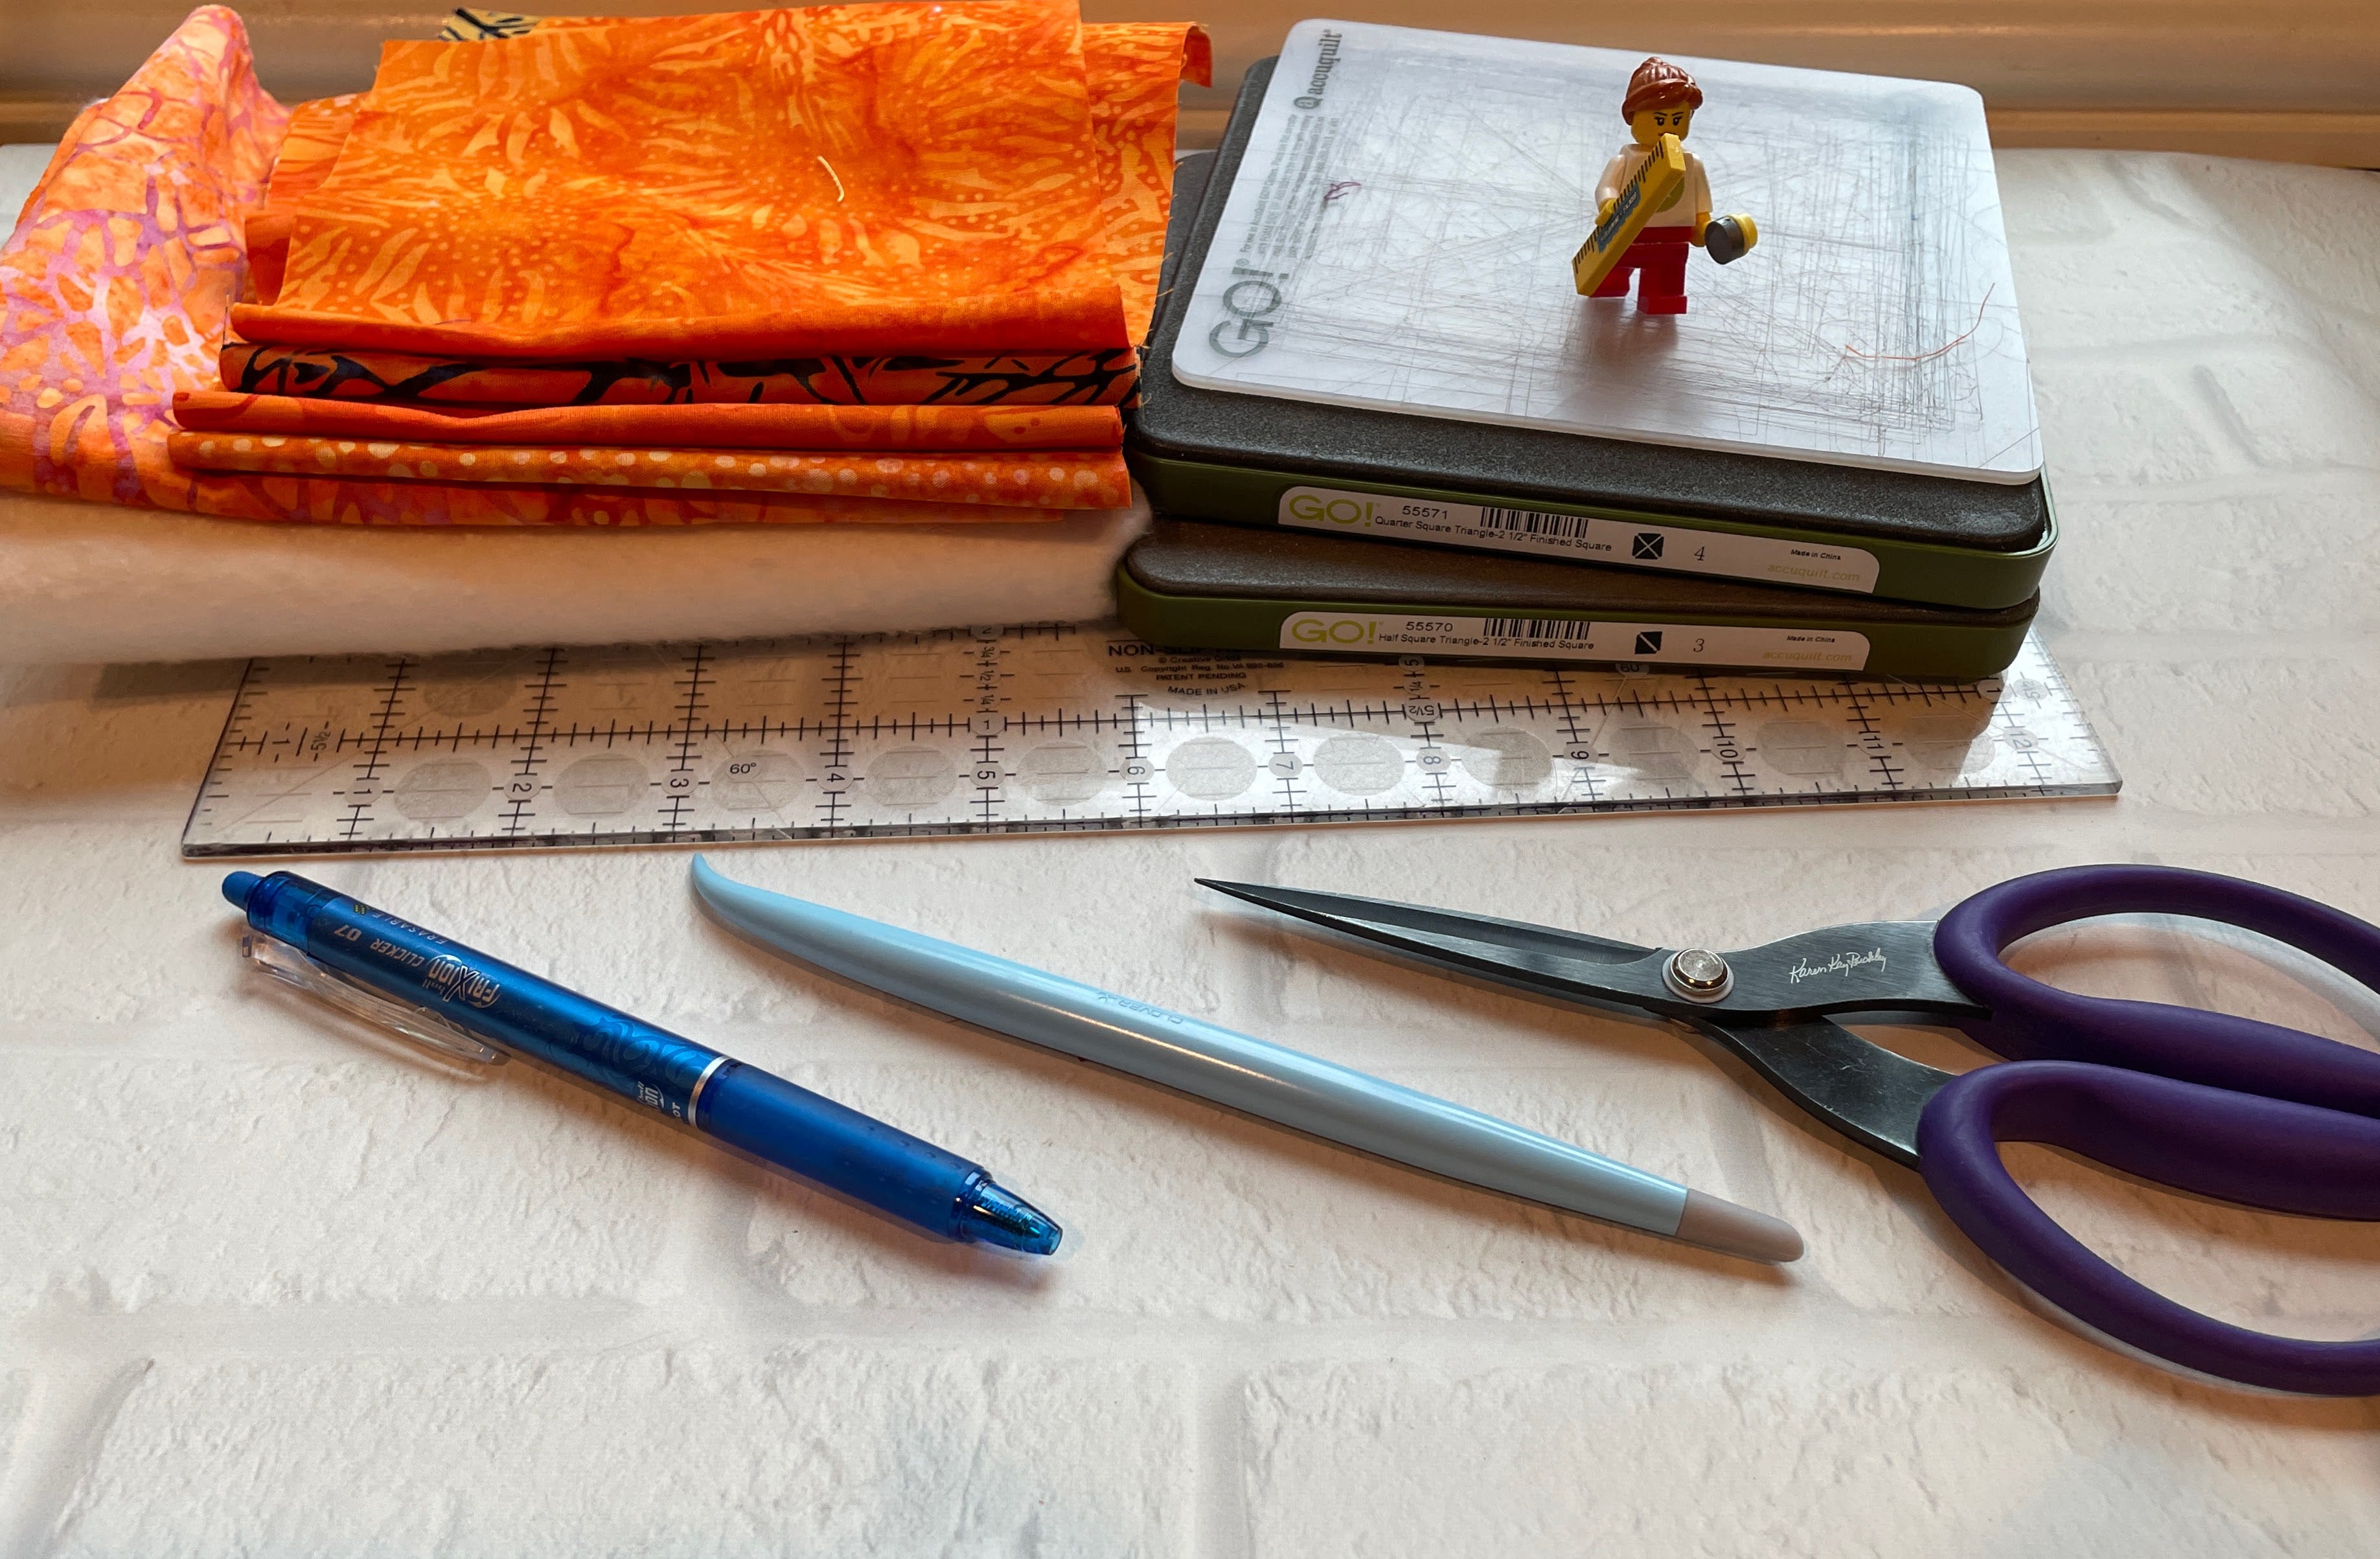
Supplies Needed:
- GO! Qube Mix & Match 5" Block
- Shapes 3 and 4
- Four 4" squares of fabric
- Four 4 1/4" squares of fabric
- 6 1/2" x 12 1/2" rectangle of fabric for the interior*
- 6 1/2" x 12 1/2" rectangle of batting*
*I just chose something from the scrap pile that was larger than the pieced unit.
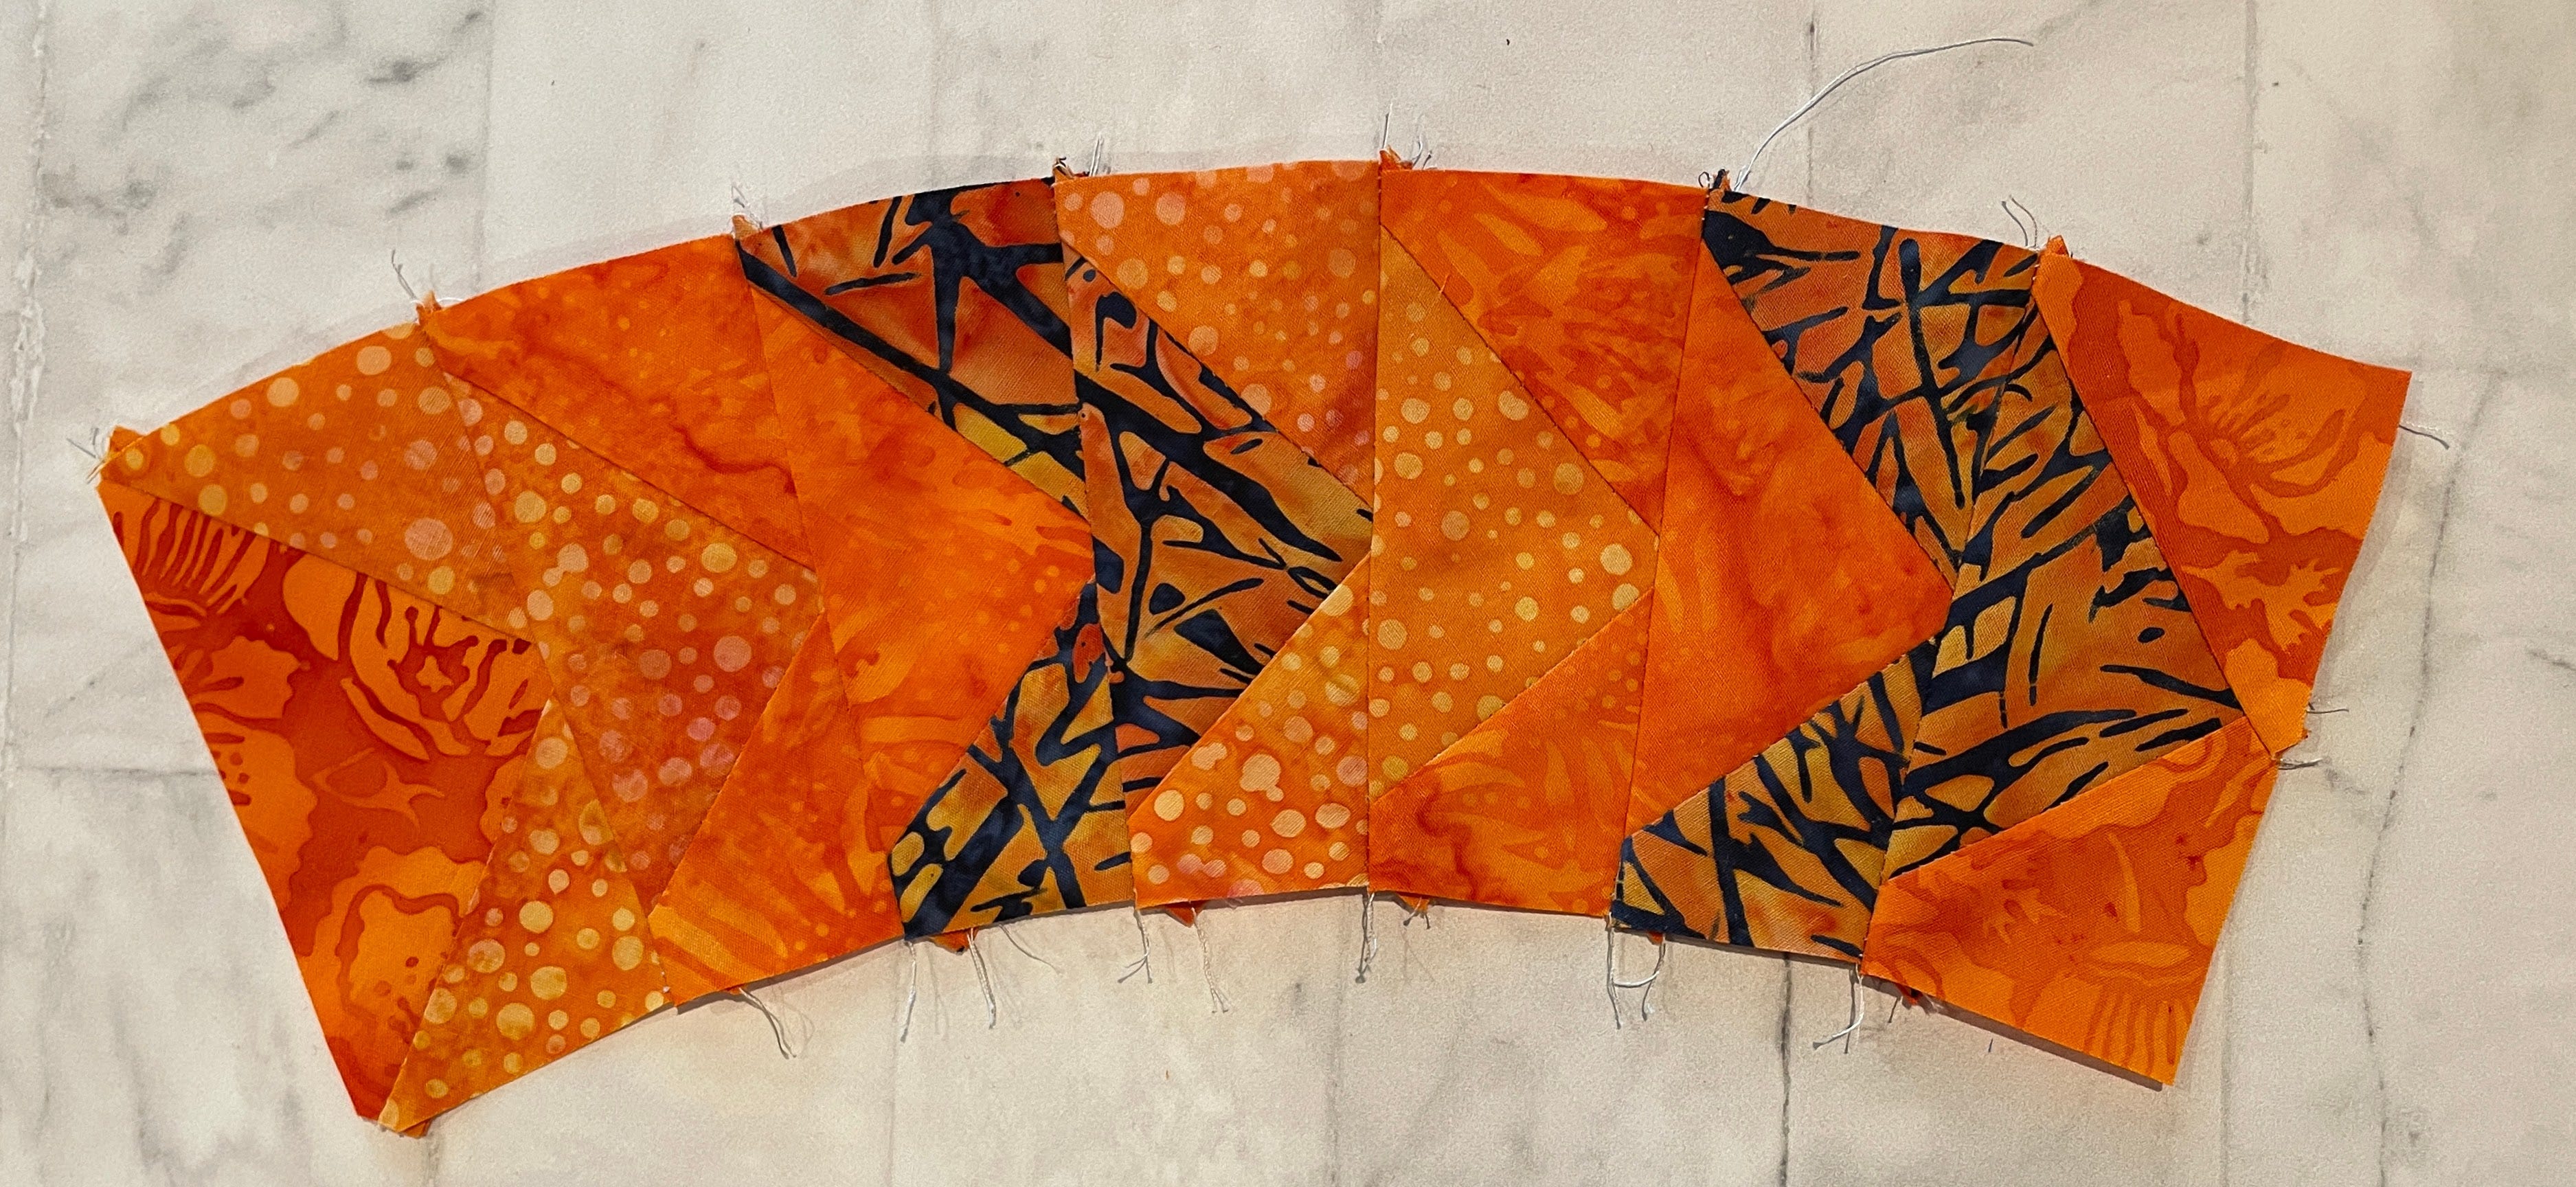
For colors, my two samples were made using four different colors each. That allowed me to make the V shapes of the Flying Geese extend across units. This meant that I needed one 4” square and one 4 1/4” square of each color.
Cutting & Assembly Instructions
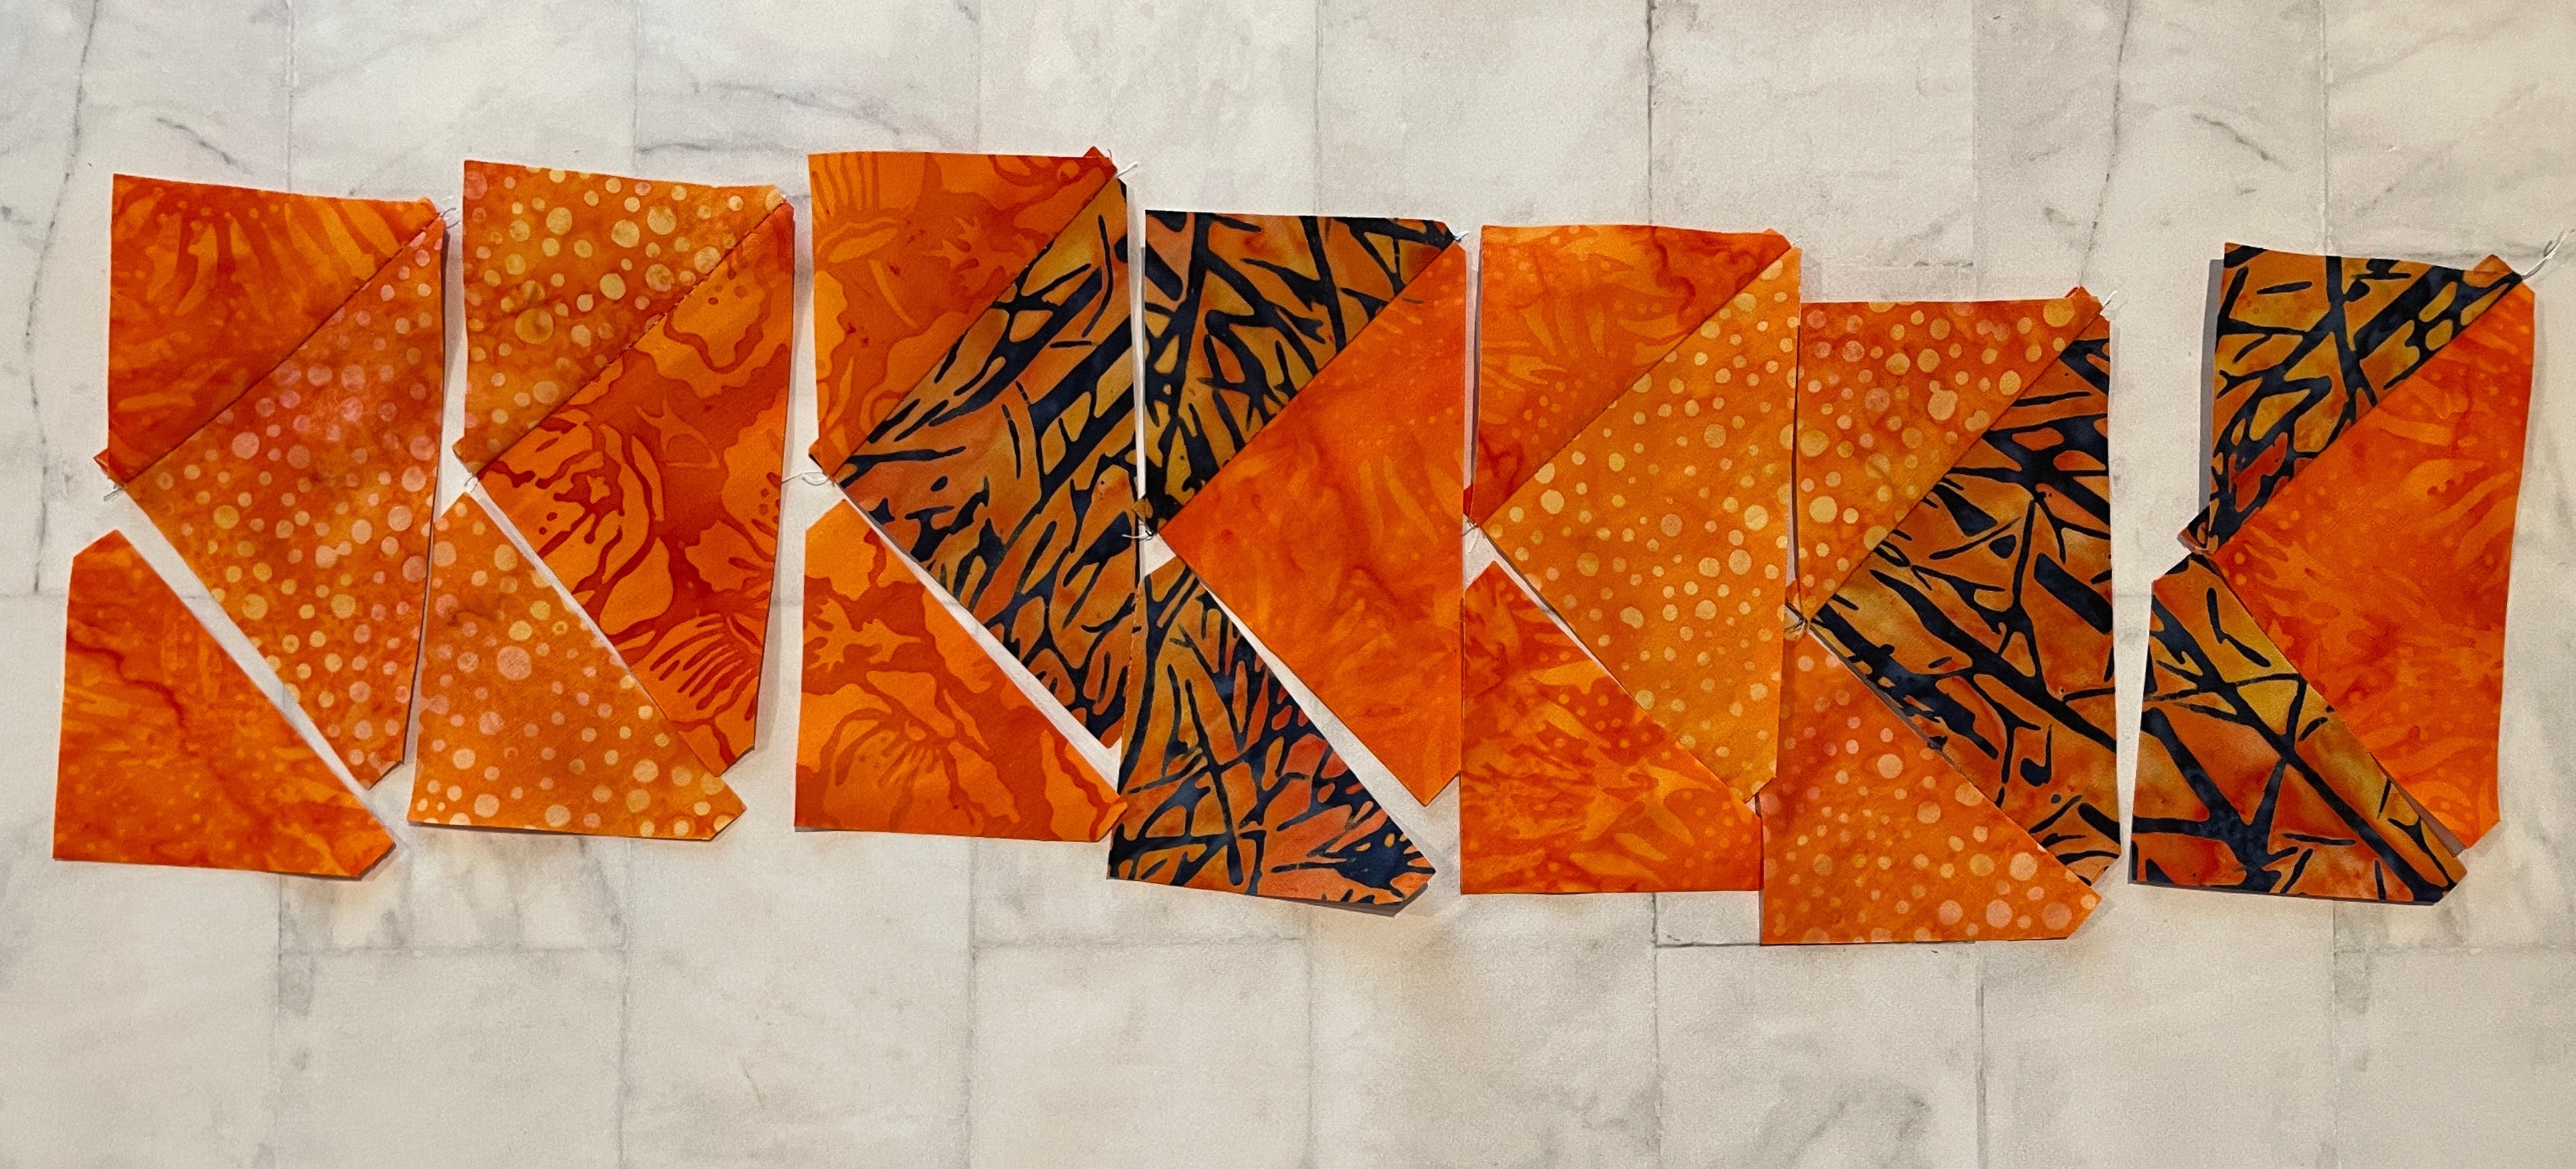
1. Lay the 4” squares over the blades on Shape 3. Cut eight large triangles. Set one aside for another project.
2. Lay the 4 1/4” squares over the blades on Shape 4. Cut 16 small triangles. Set two aside for another project.
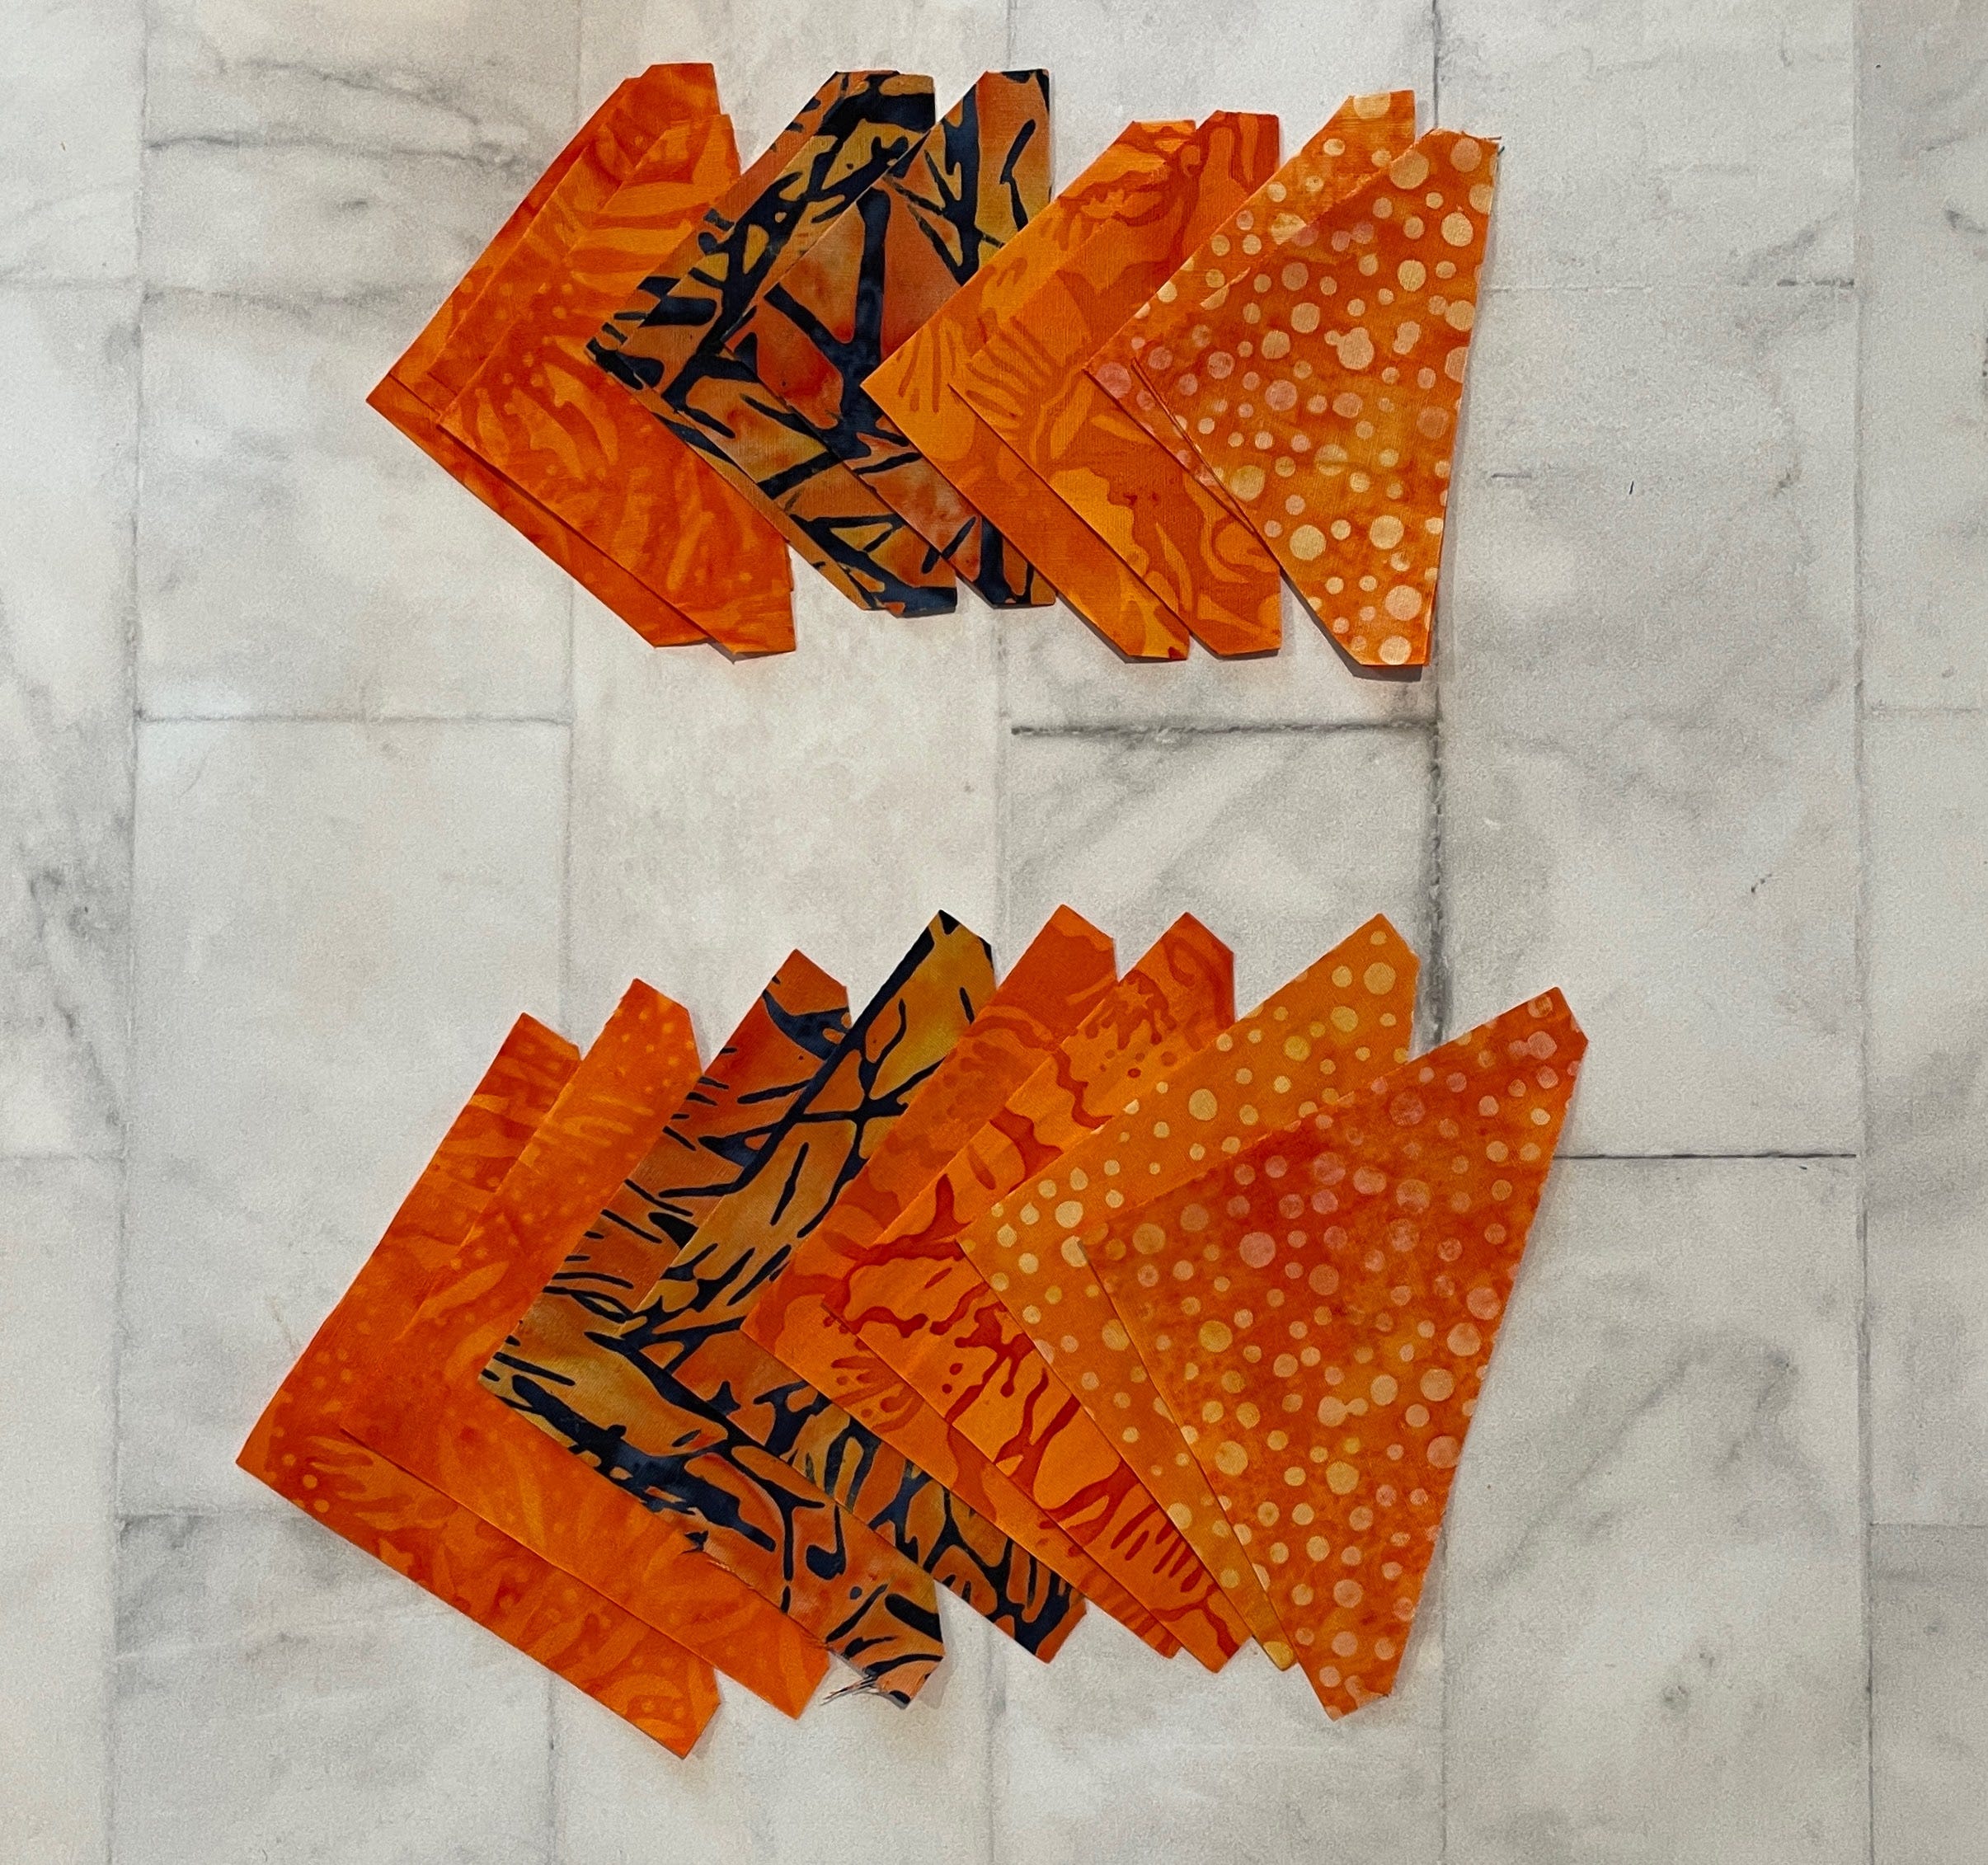
3. Lay the Flying Geese units out, matching the color of the larger triangles to the smaller triangles on the next unit.
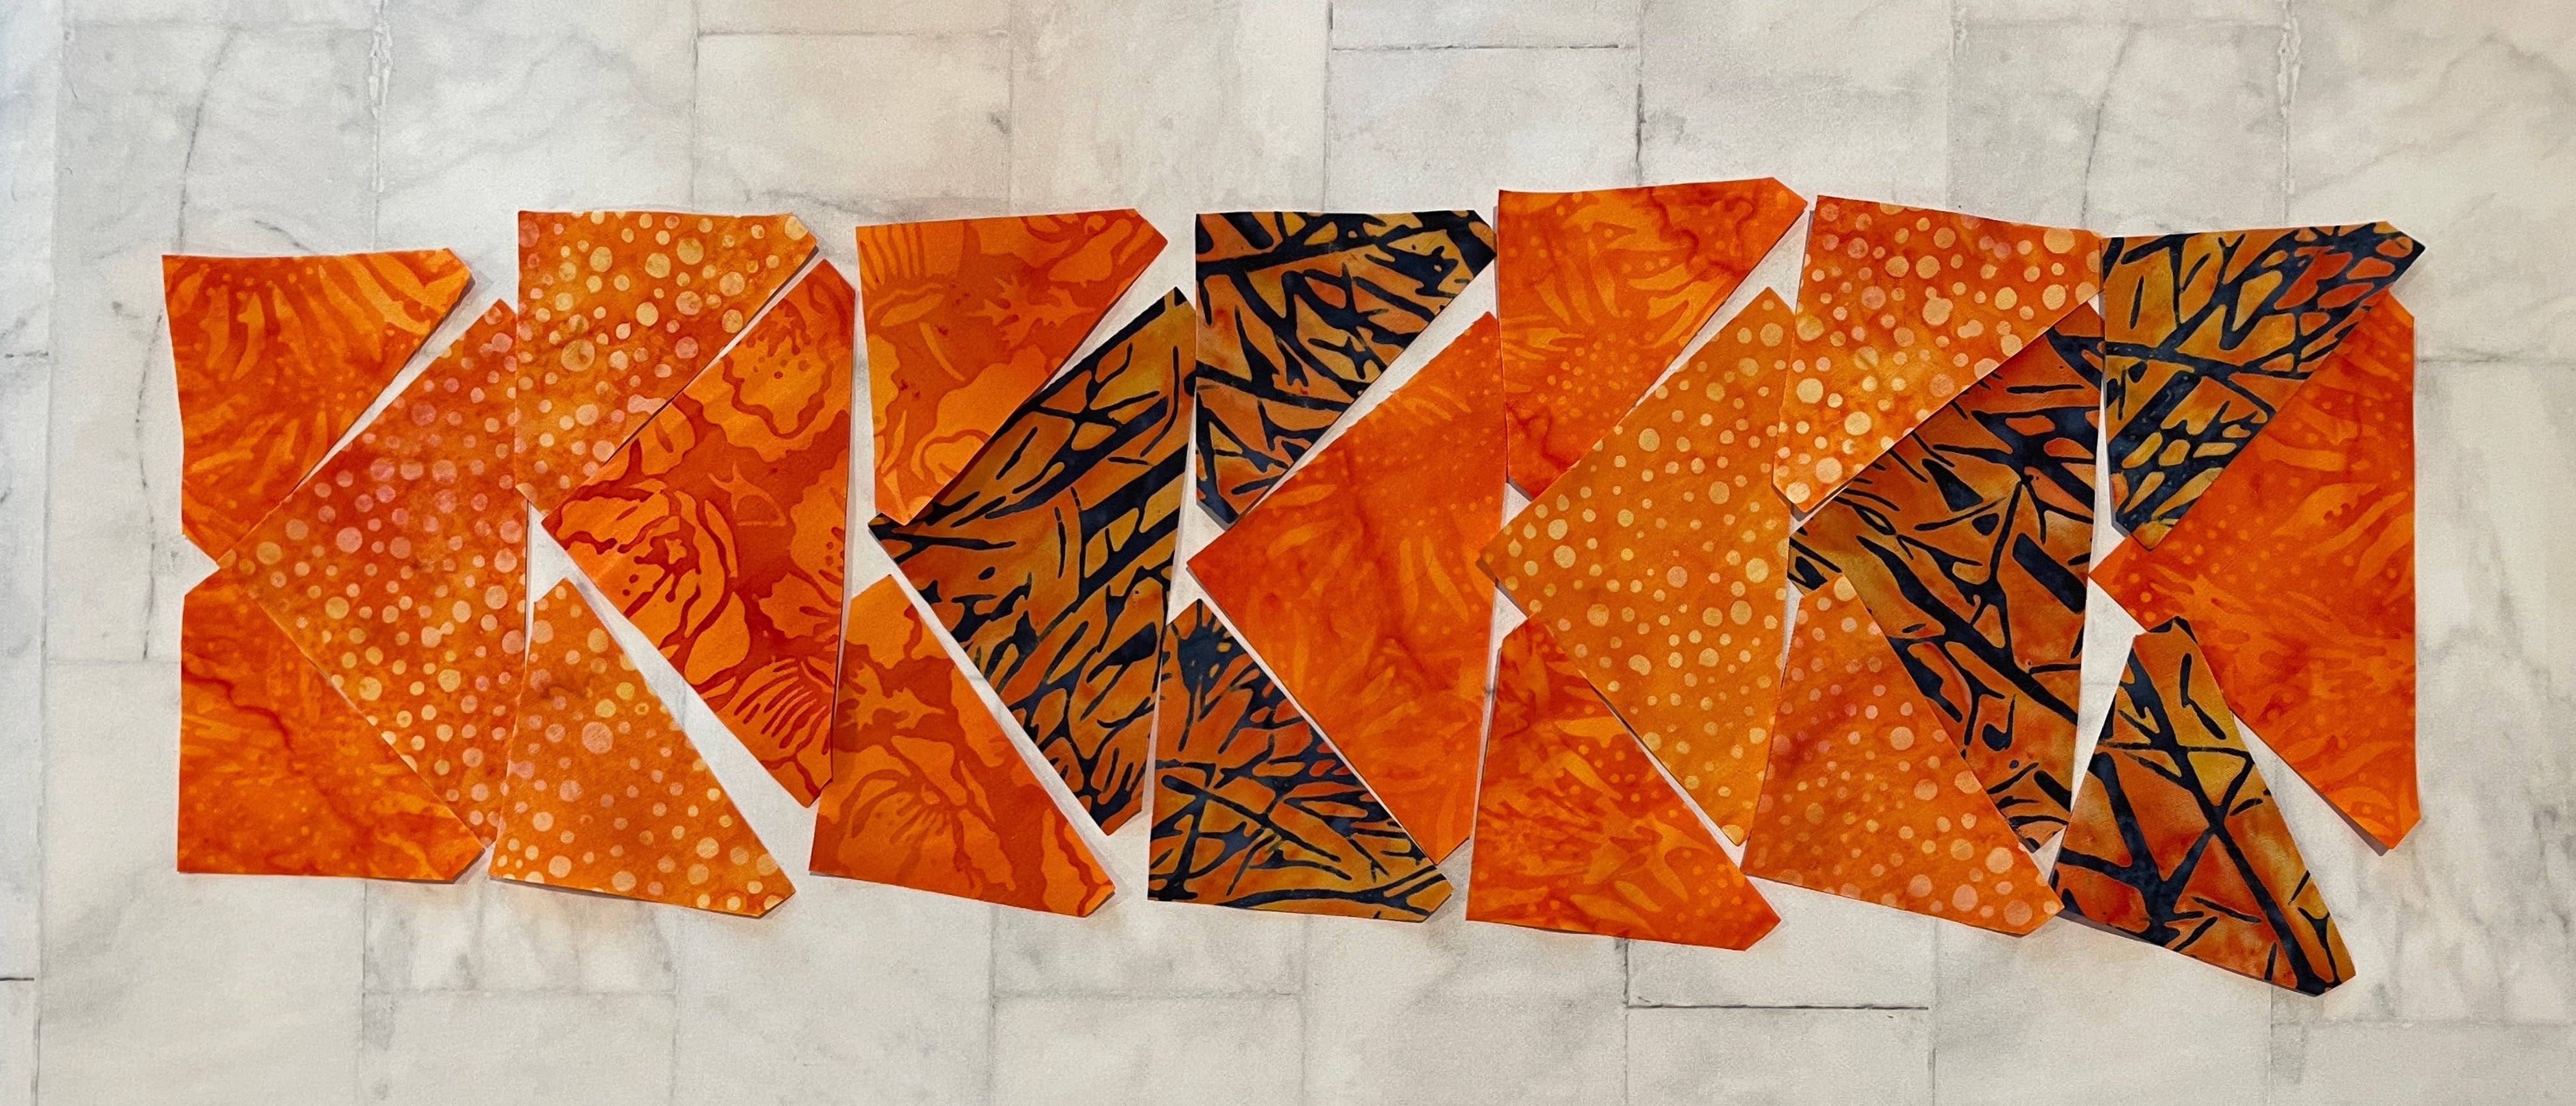
4. Sew the units together using a 1/4” seam allowance. Attach all of the small triangles to one side. Press away from the large triangle.
5. Add the second set of triangles to the other side of each unit. Press away from the large triangle.
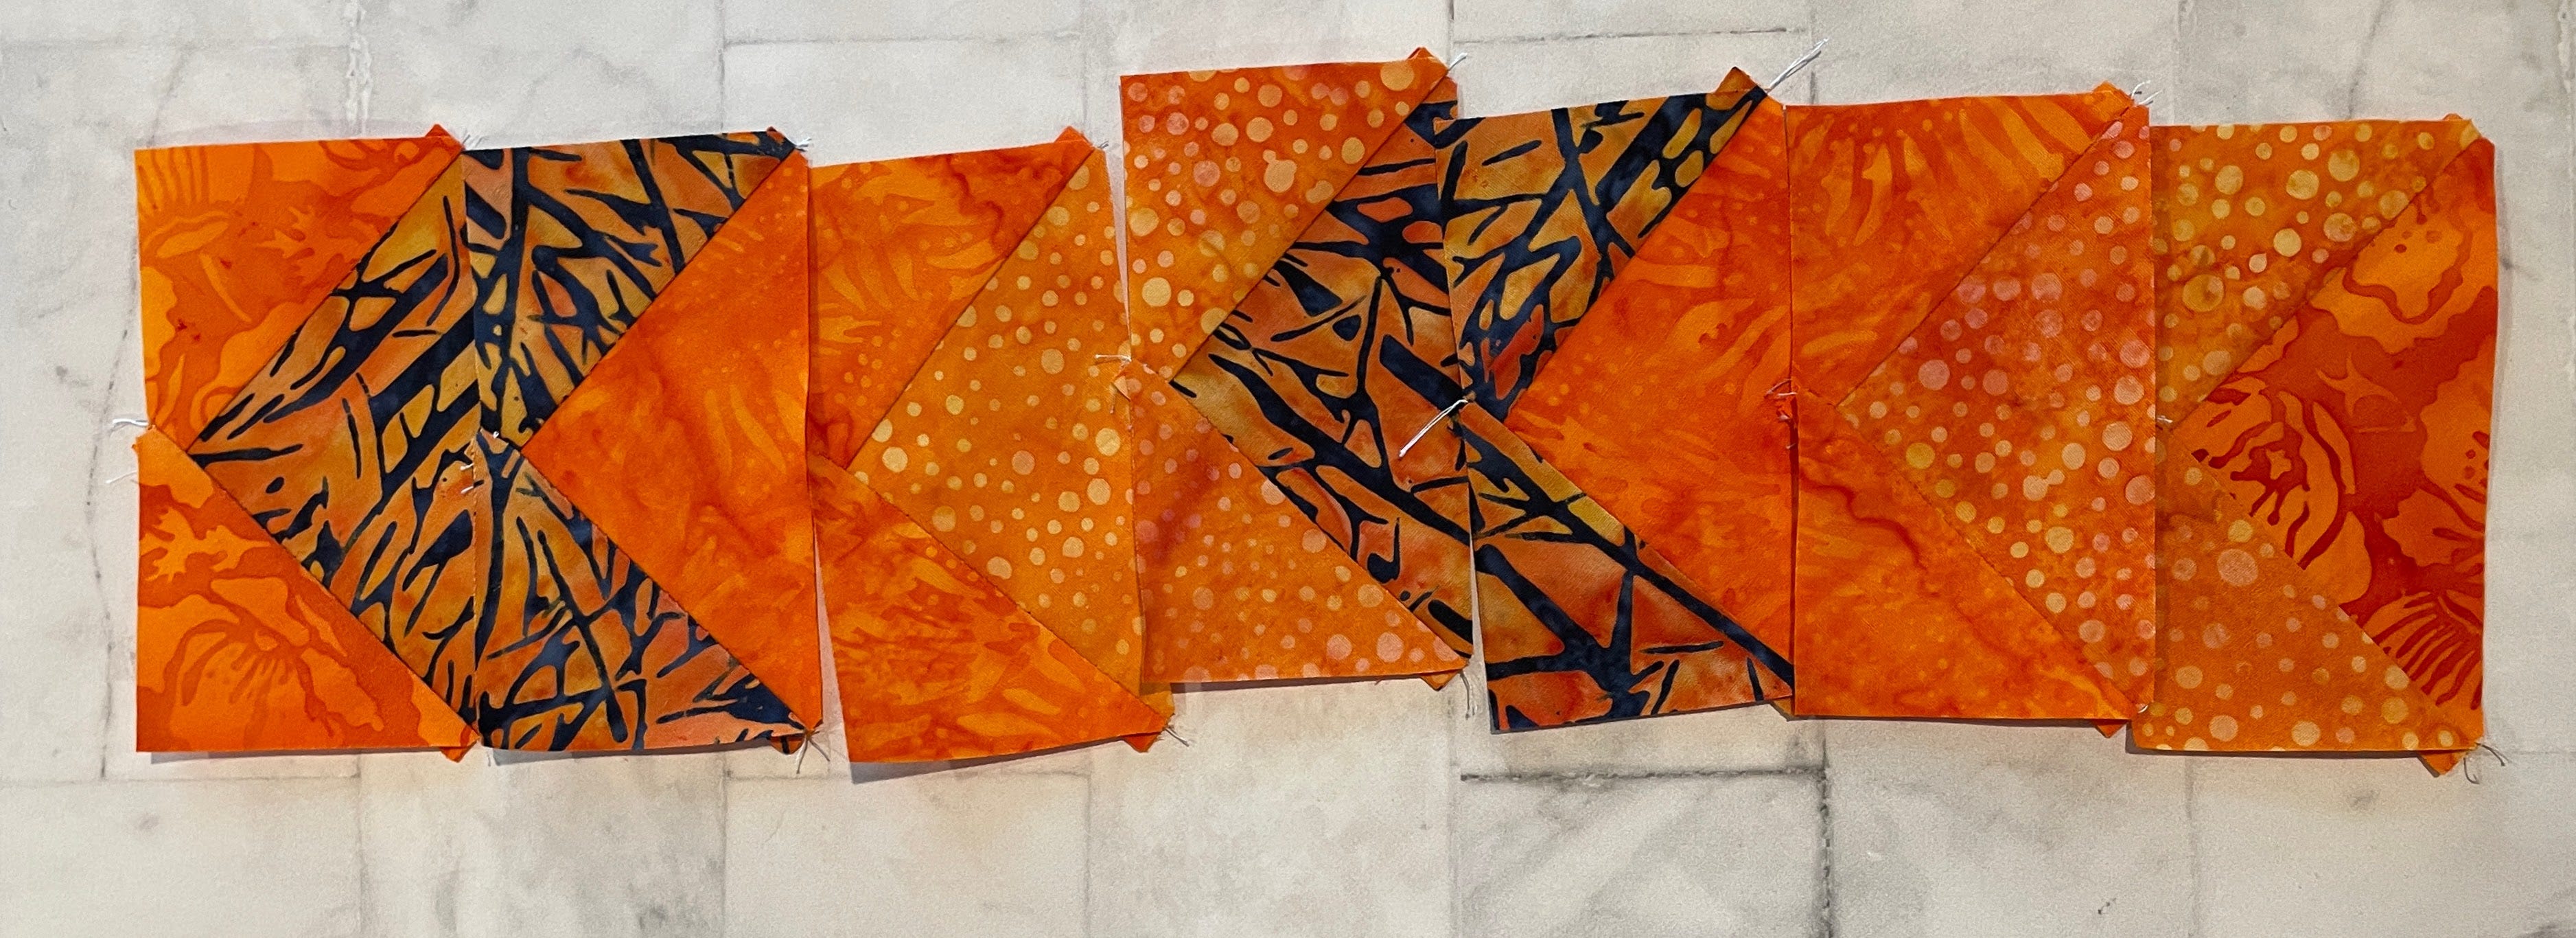
6. Sew the units together. Don’t press yet.
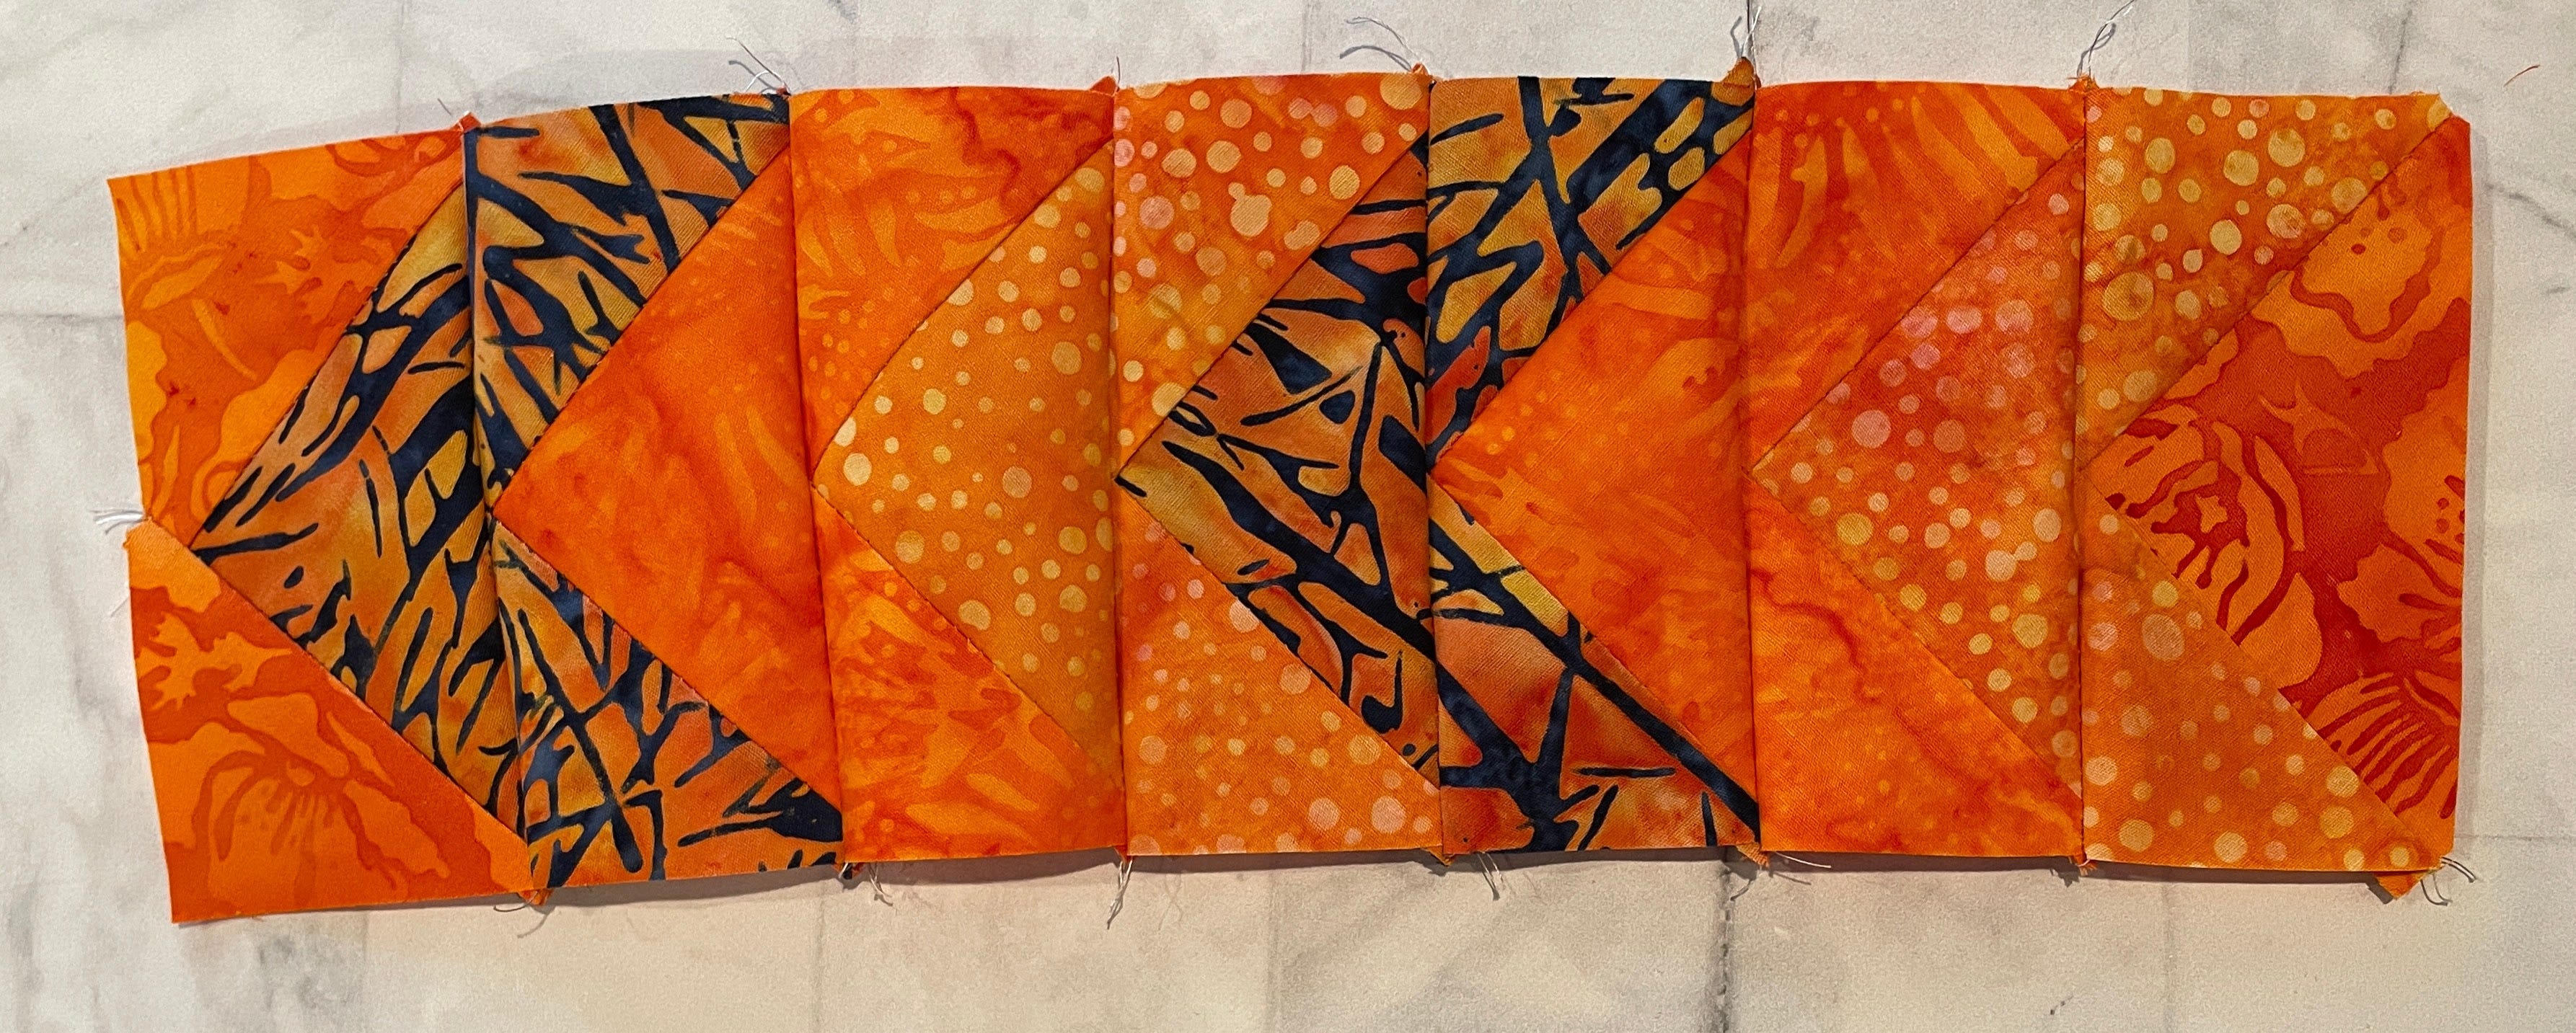
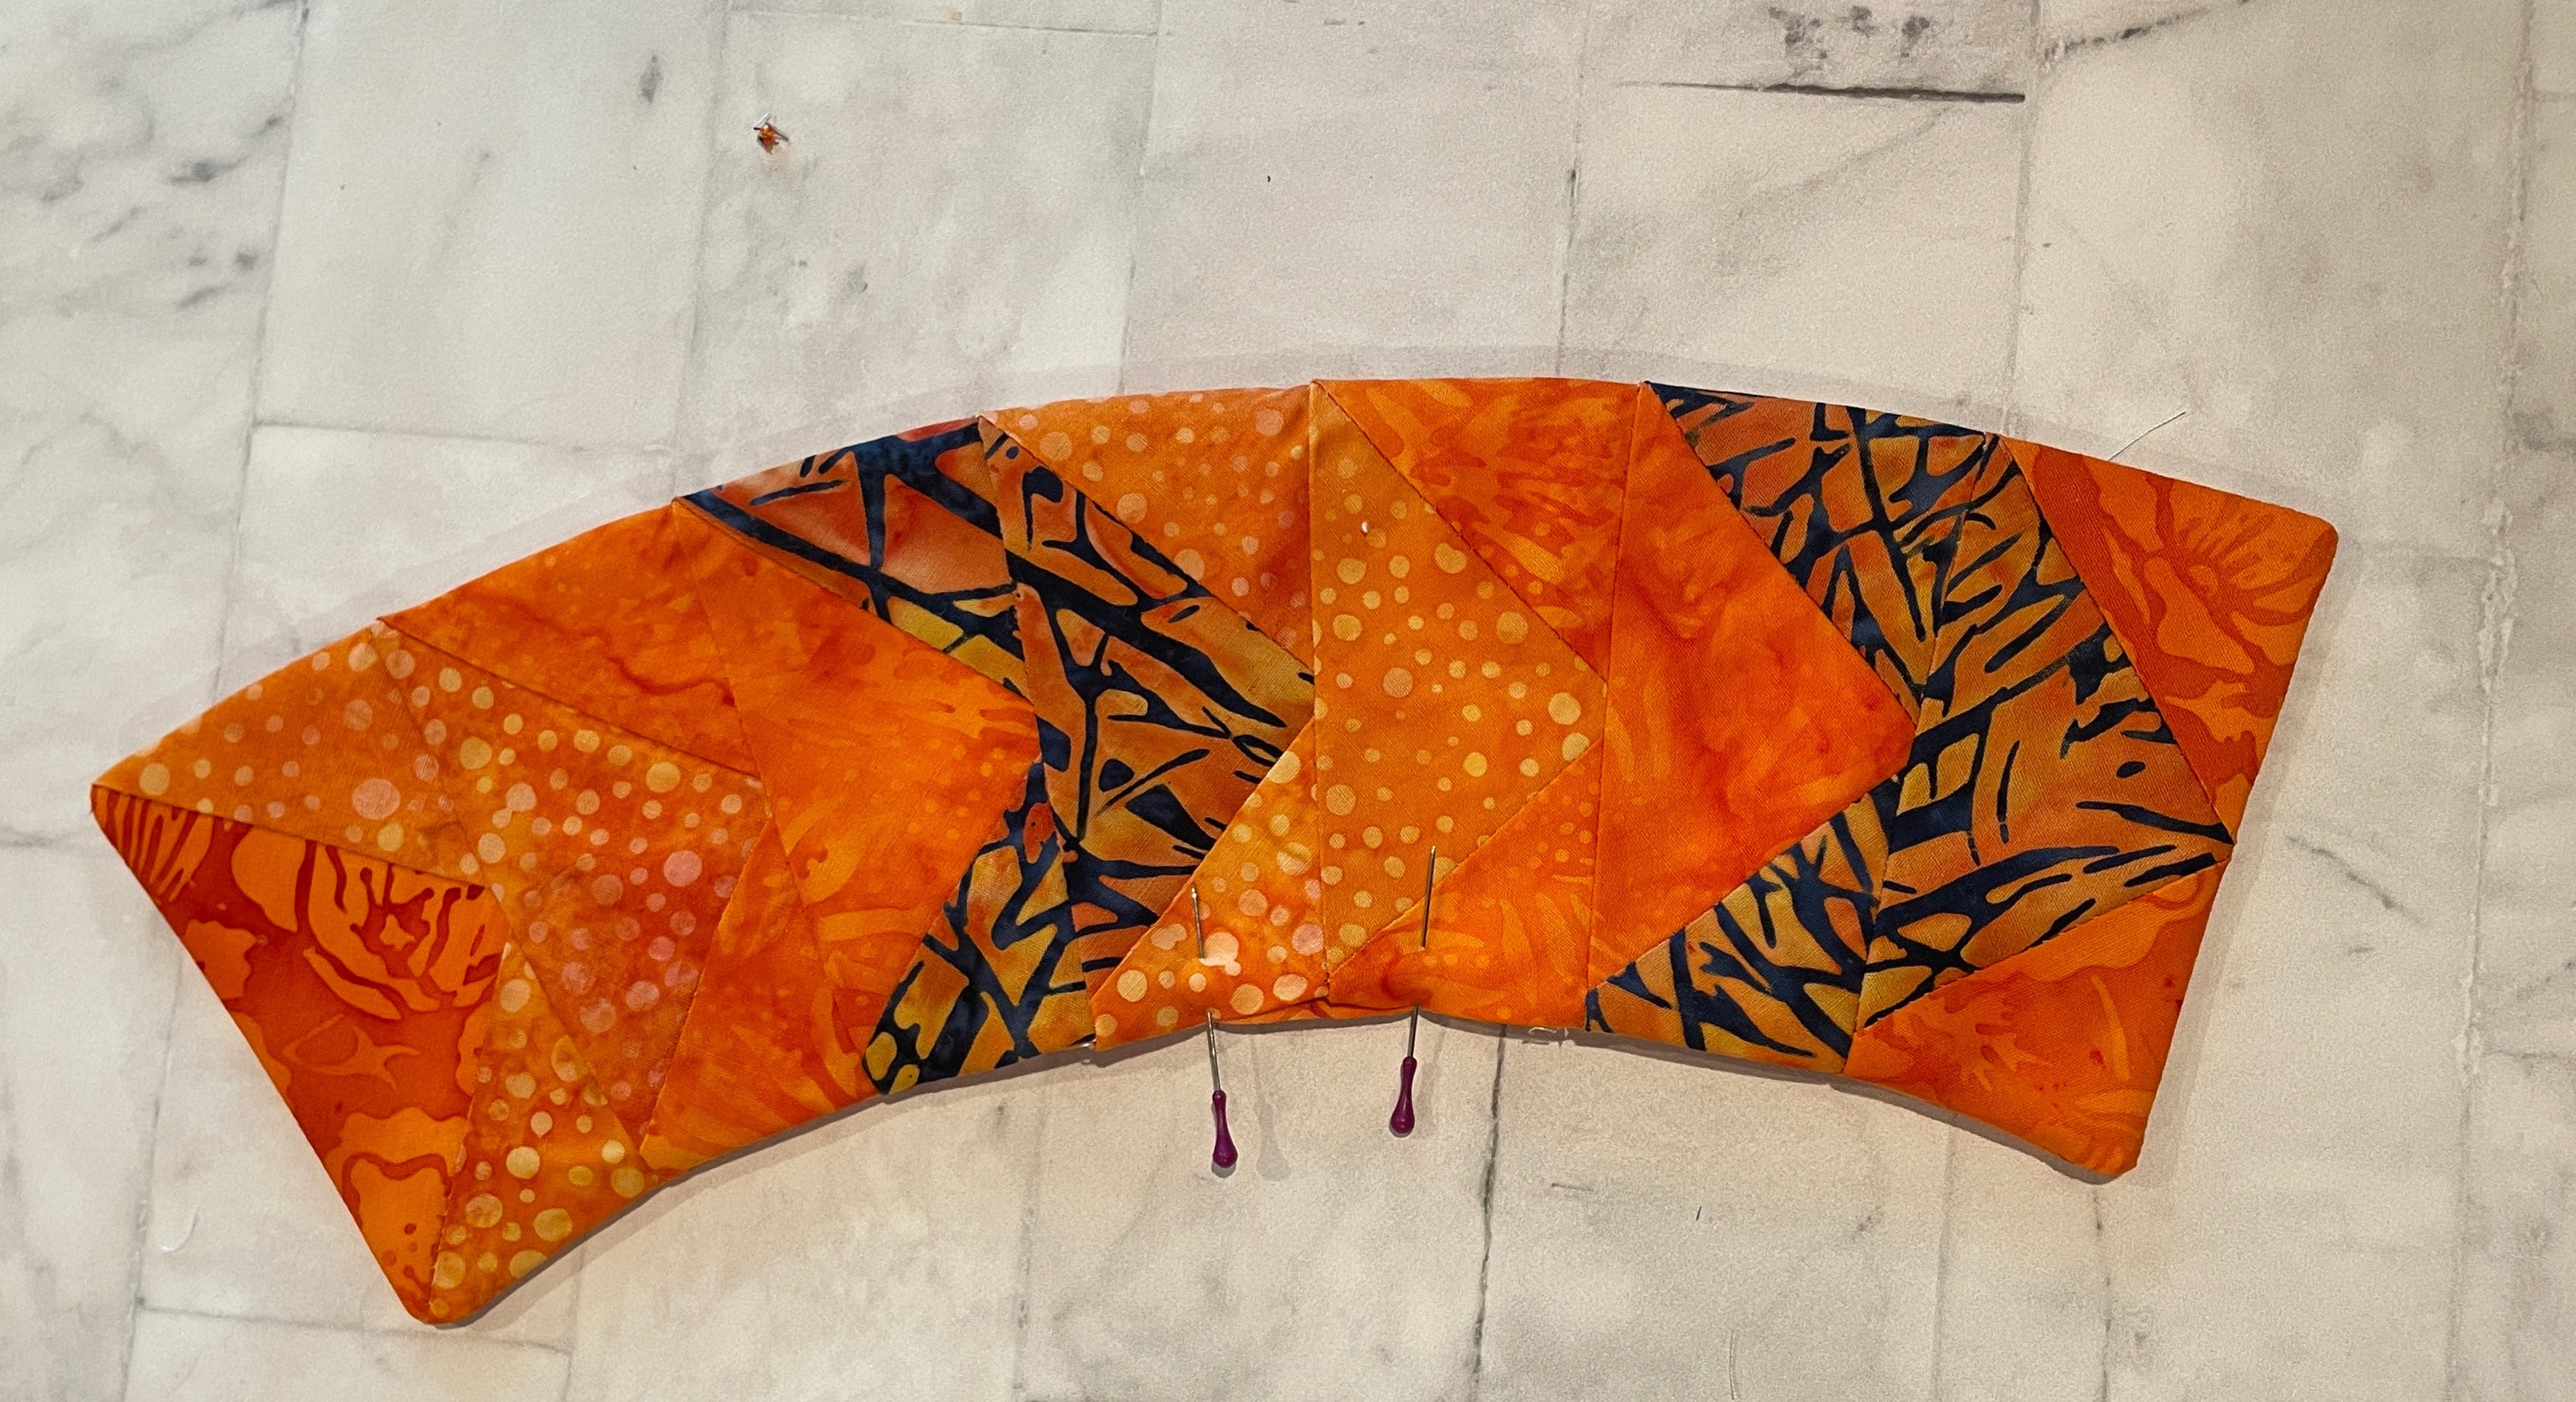
7. Lay the pieced unit on your table with one unit folded under. Using a ruler, mark a line that crosses the intersection of the pieces and extends 1/4” beyond the stitched line at the other end.
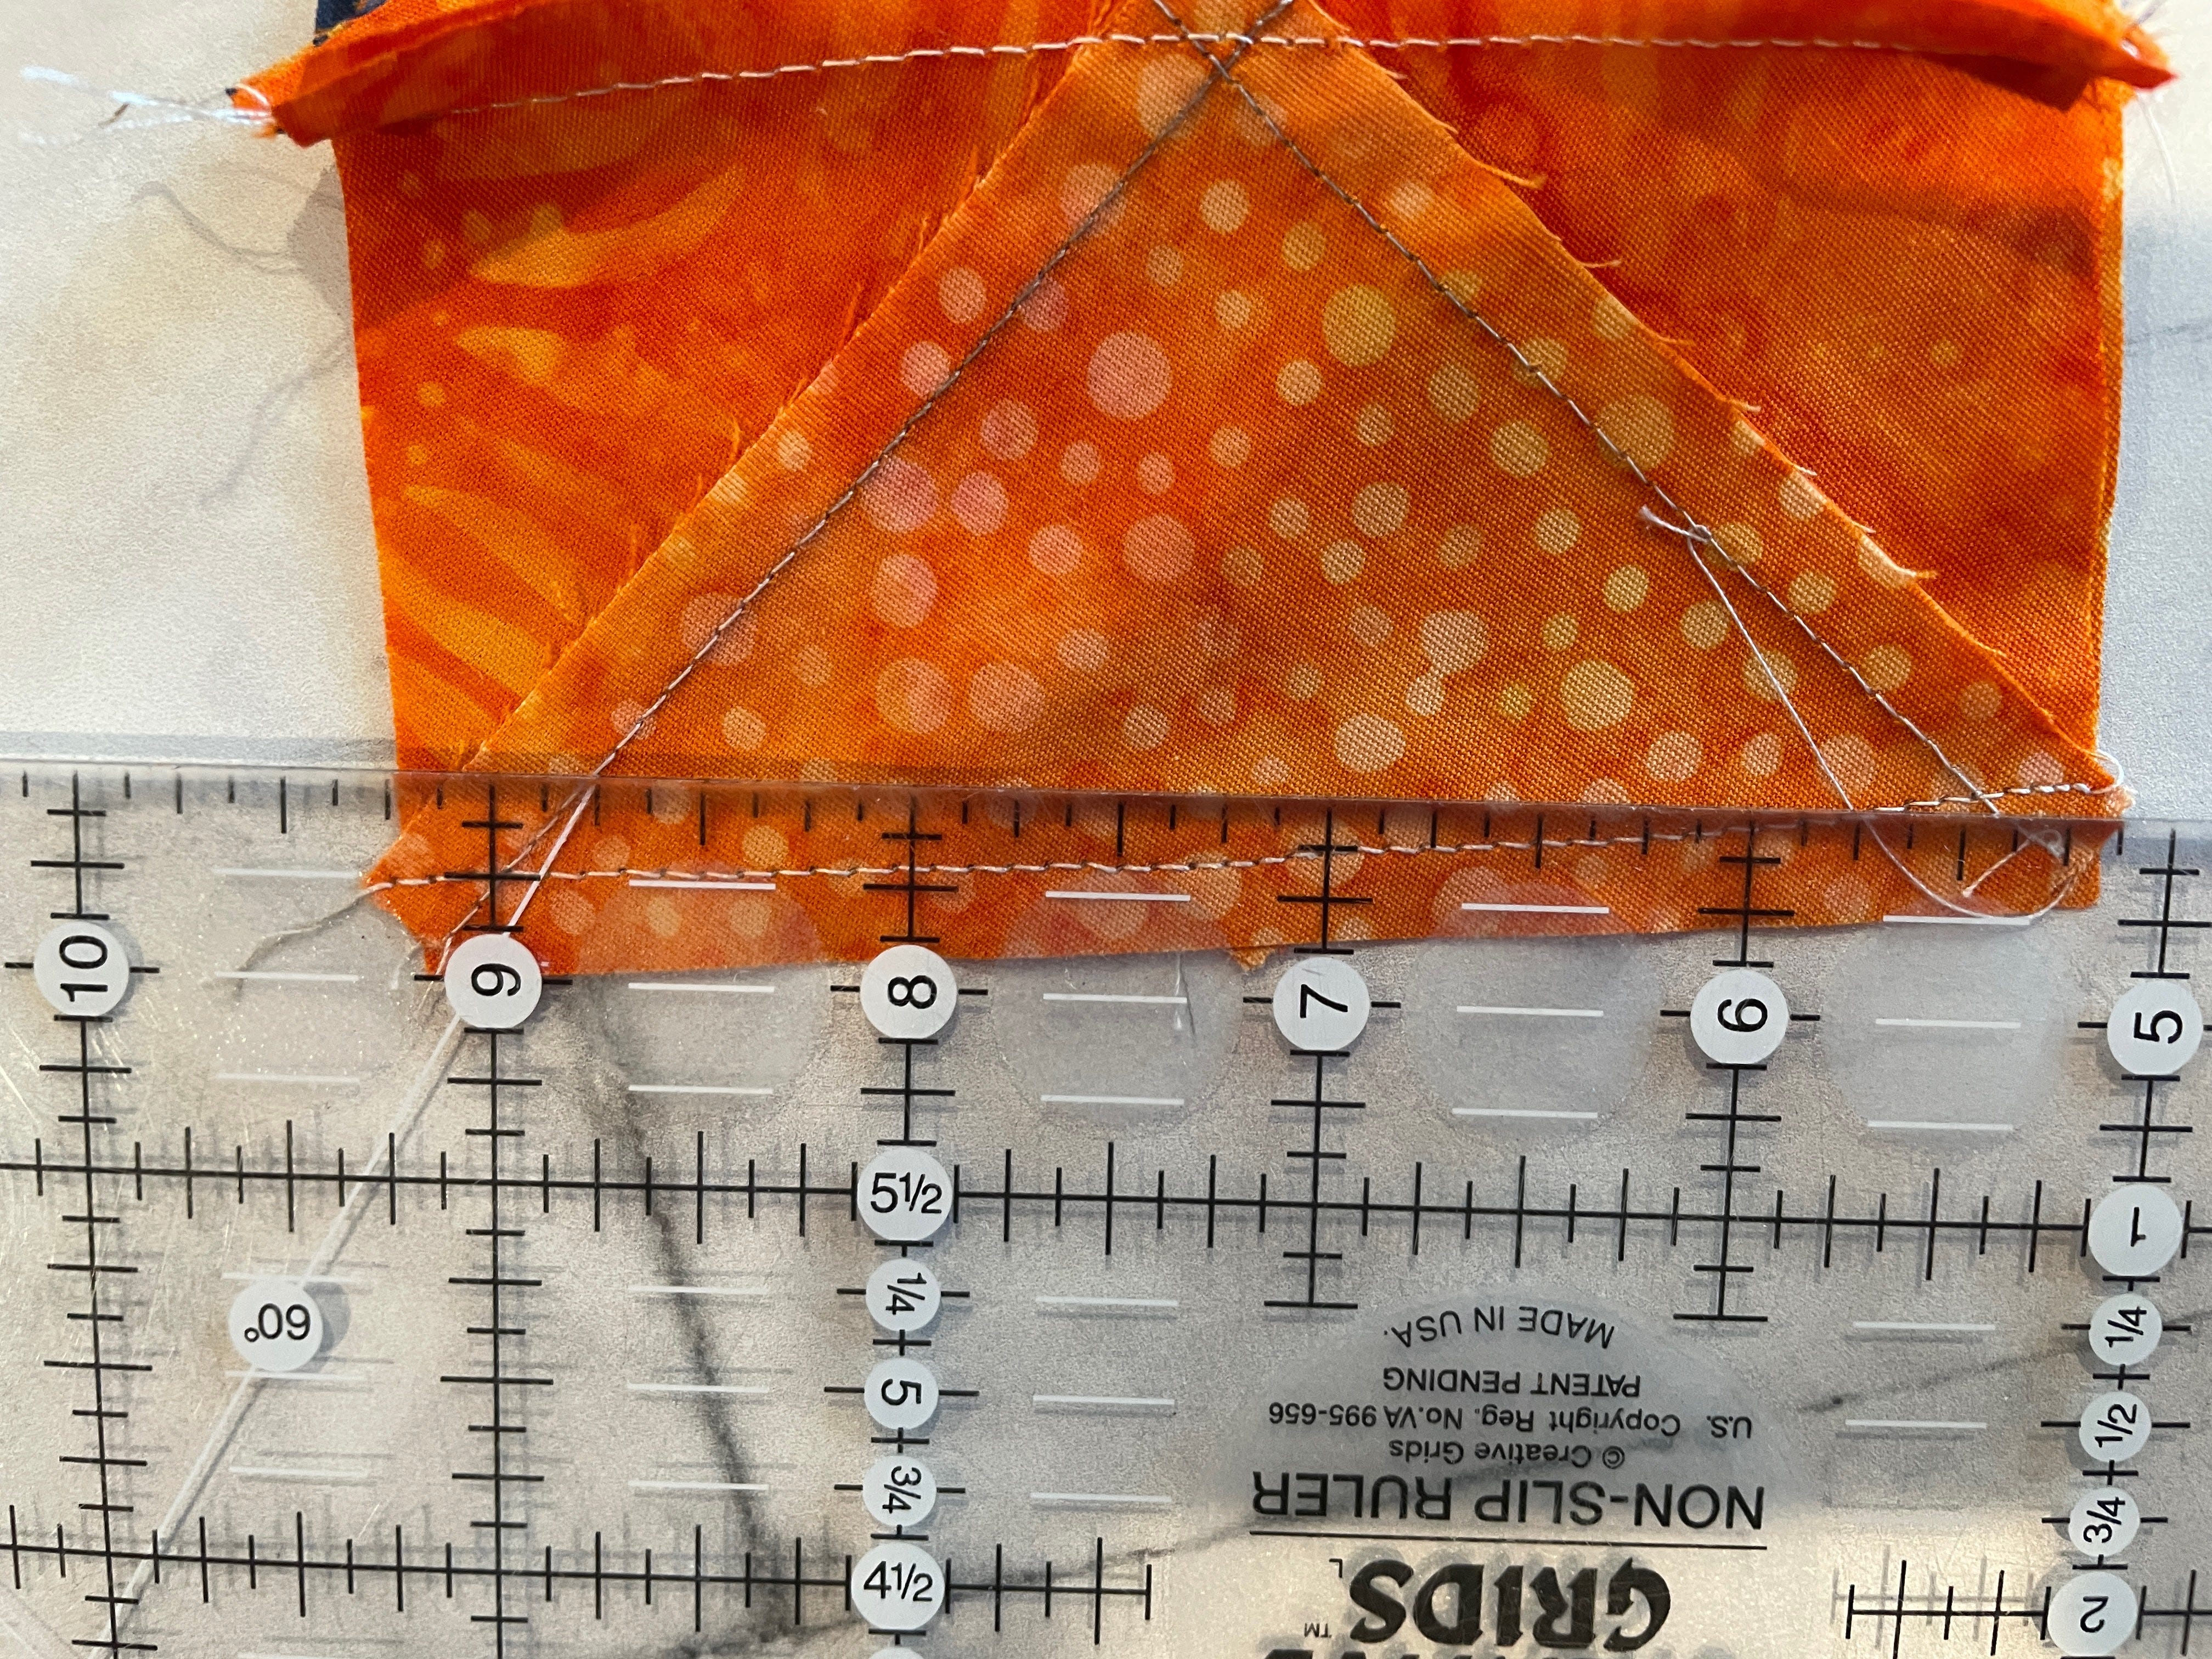
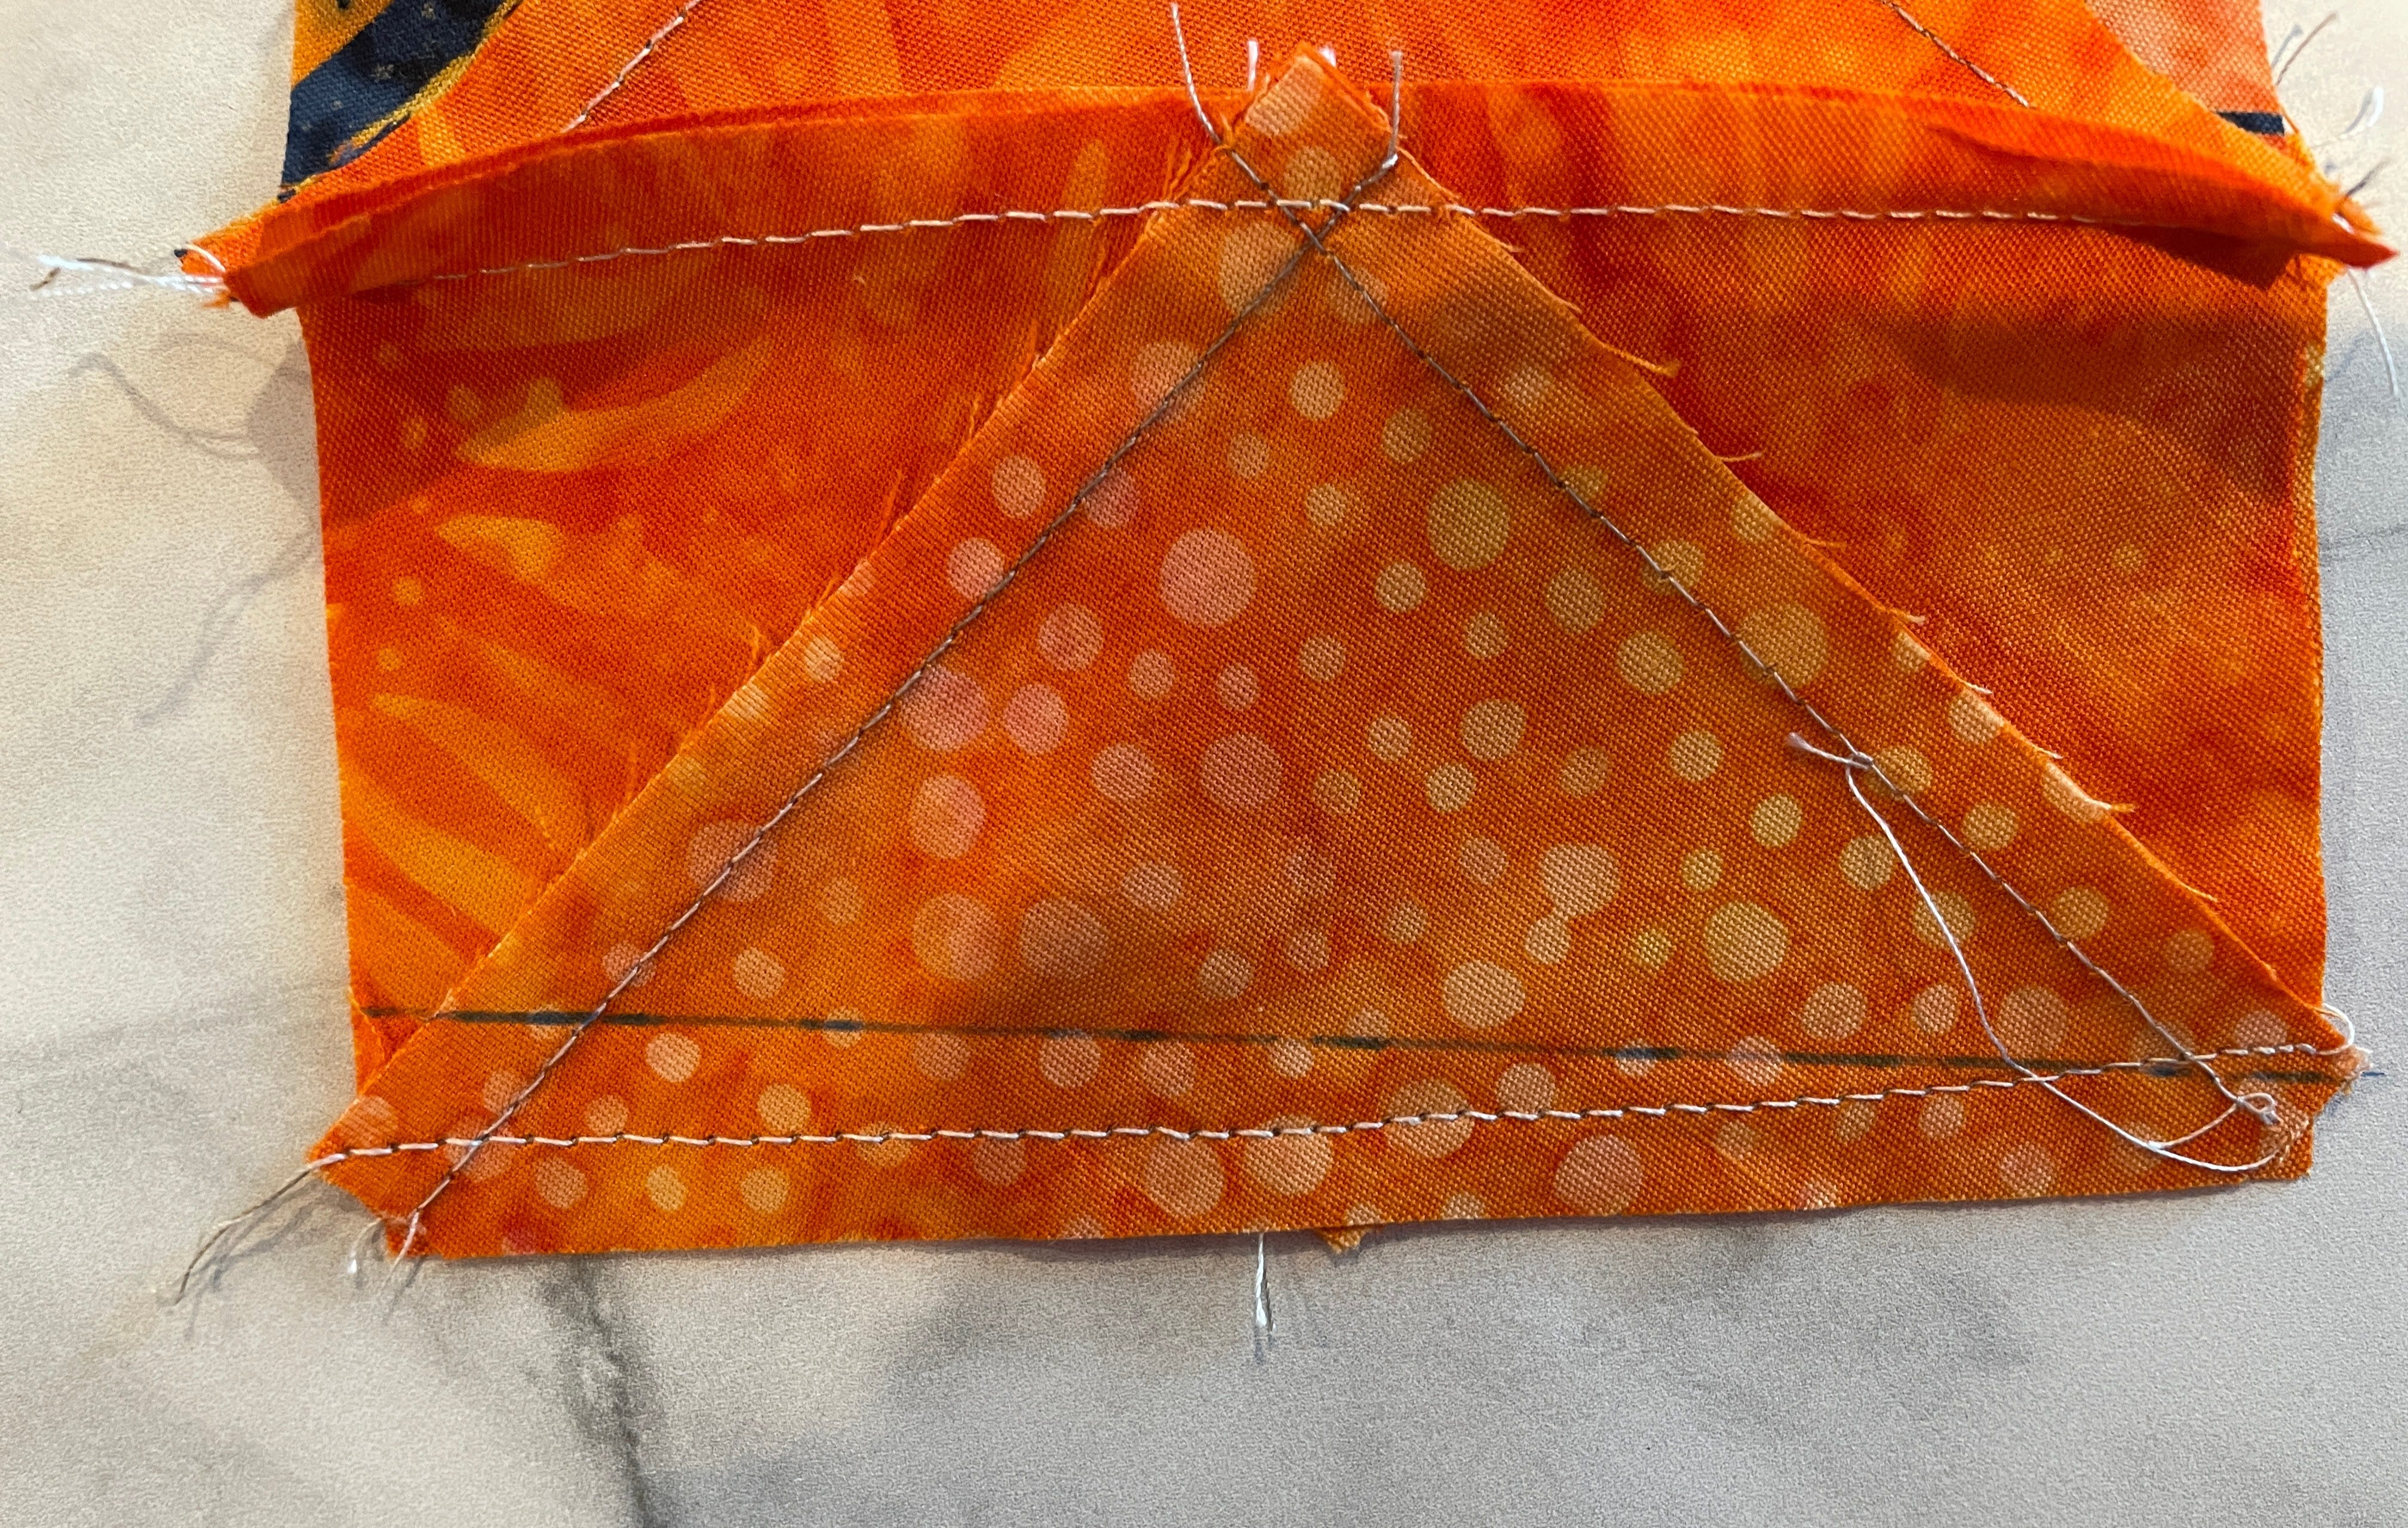
8. Stitch along the line you marked. Press the seams towards the large triangle.
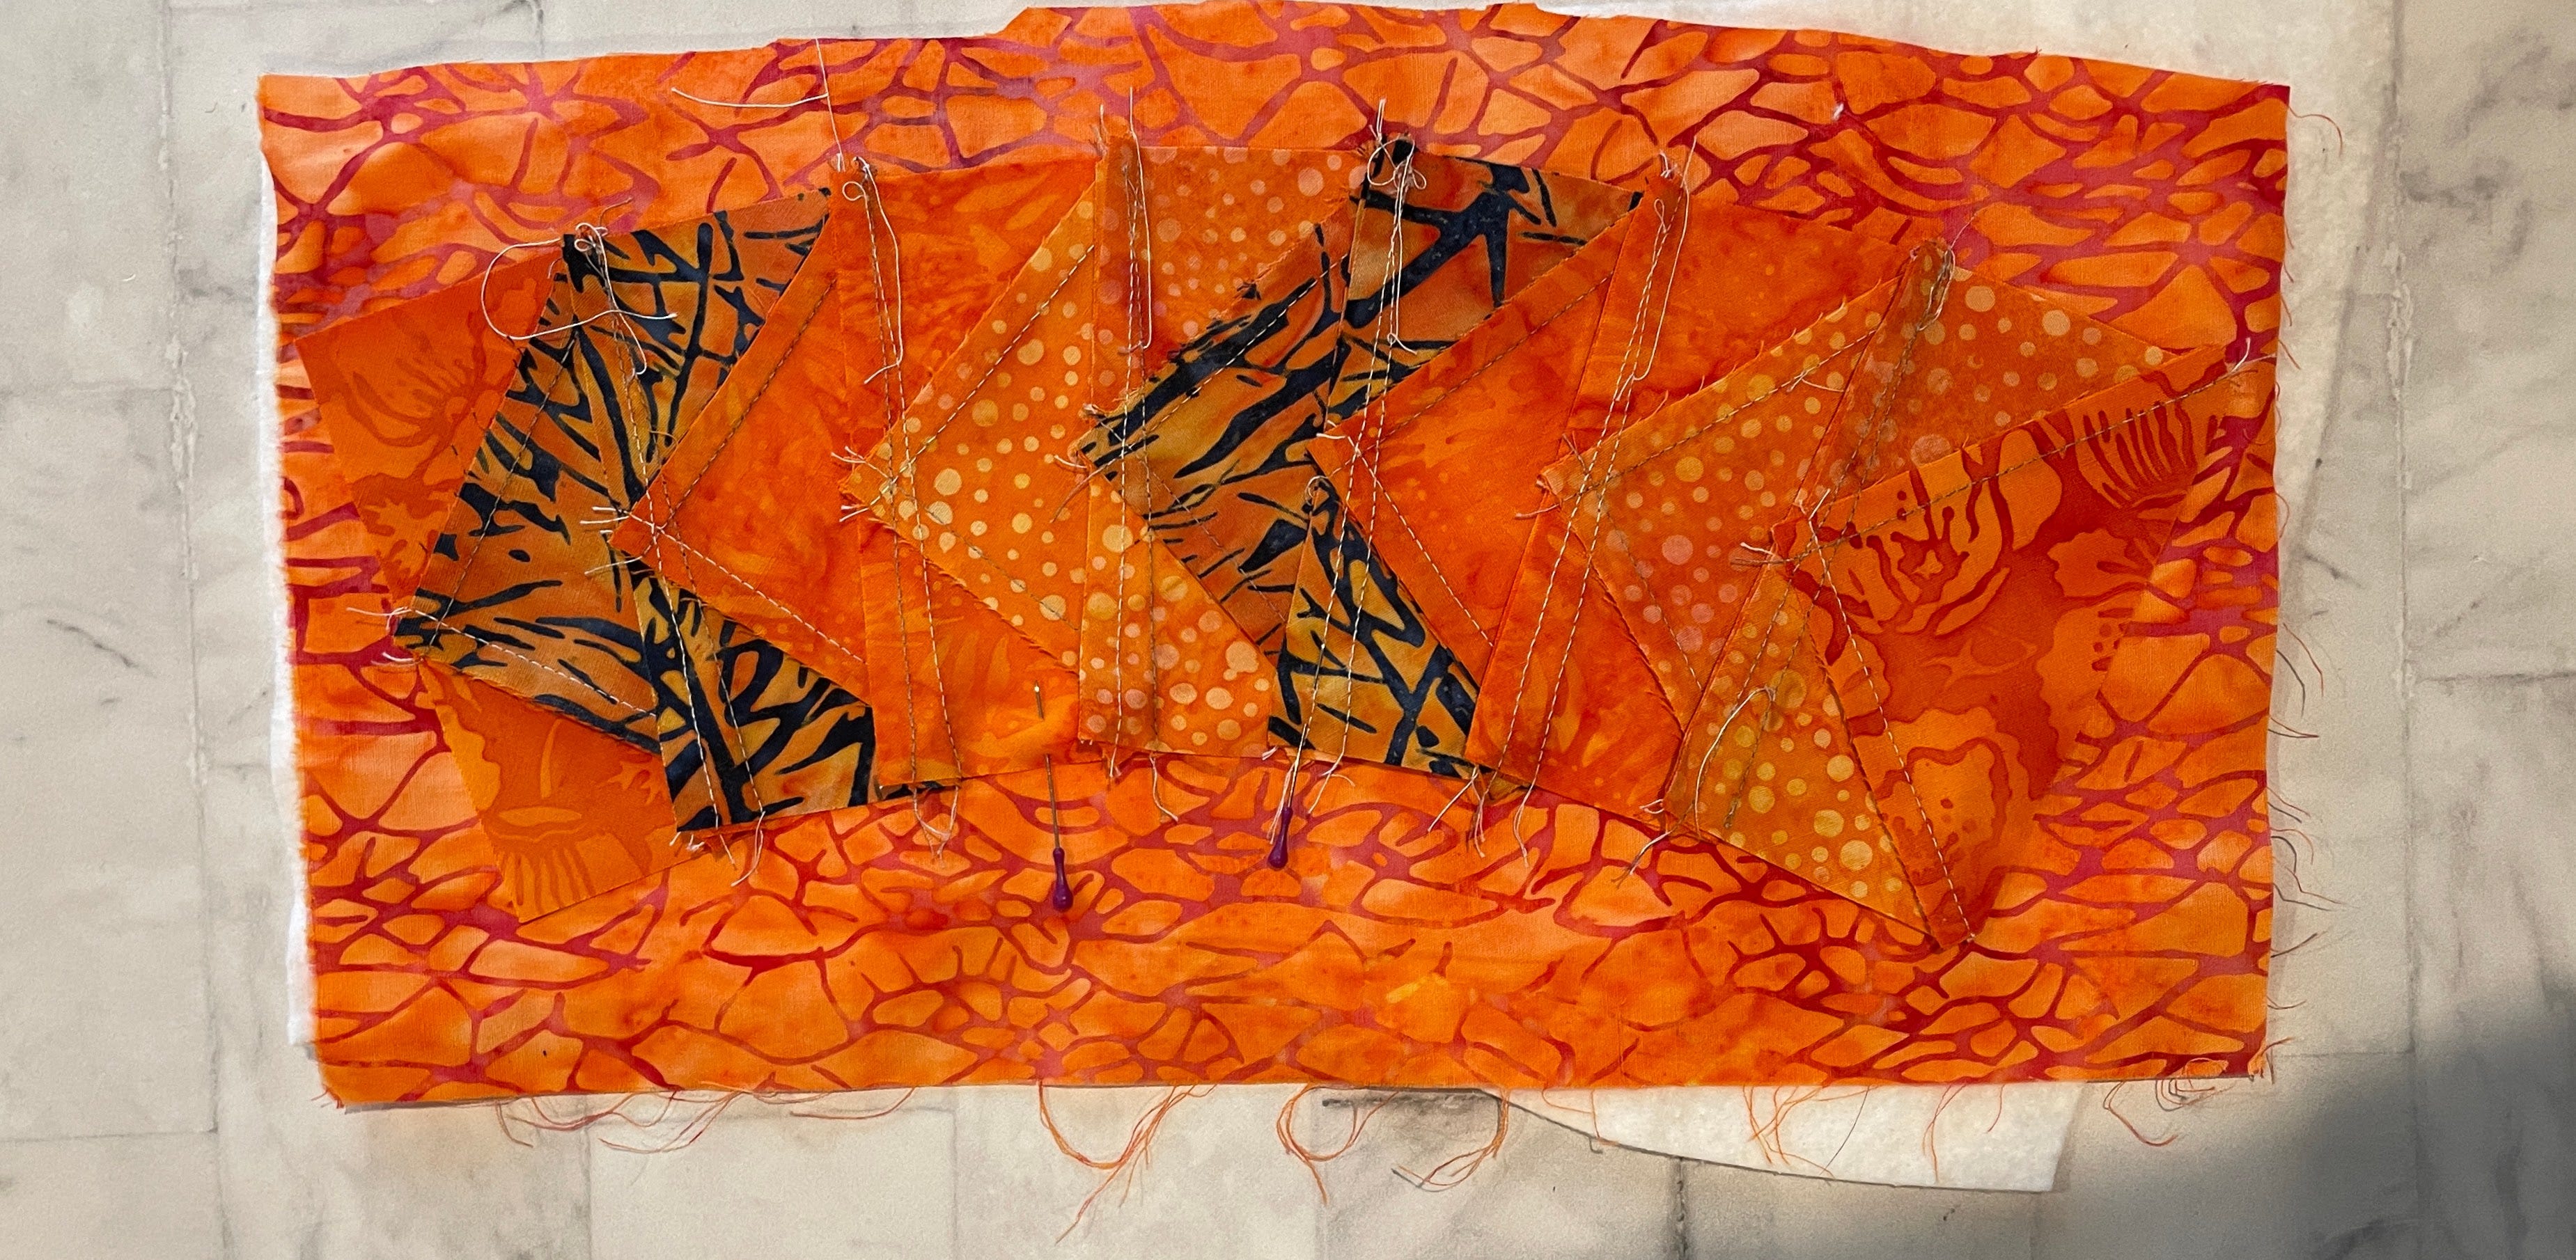
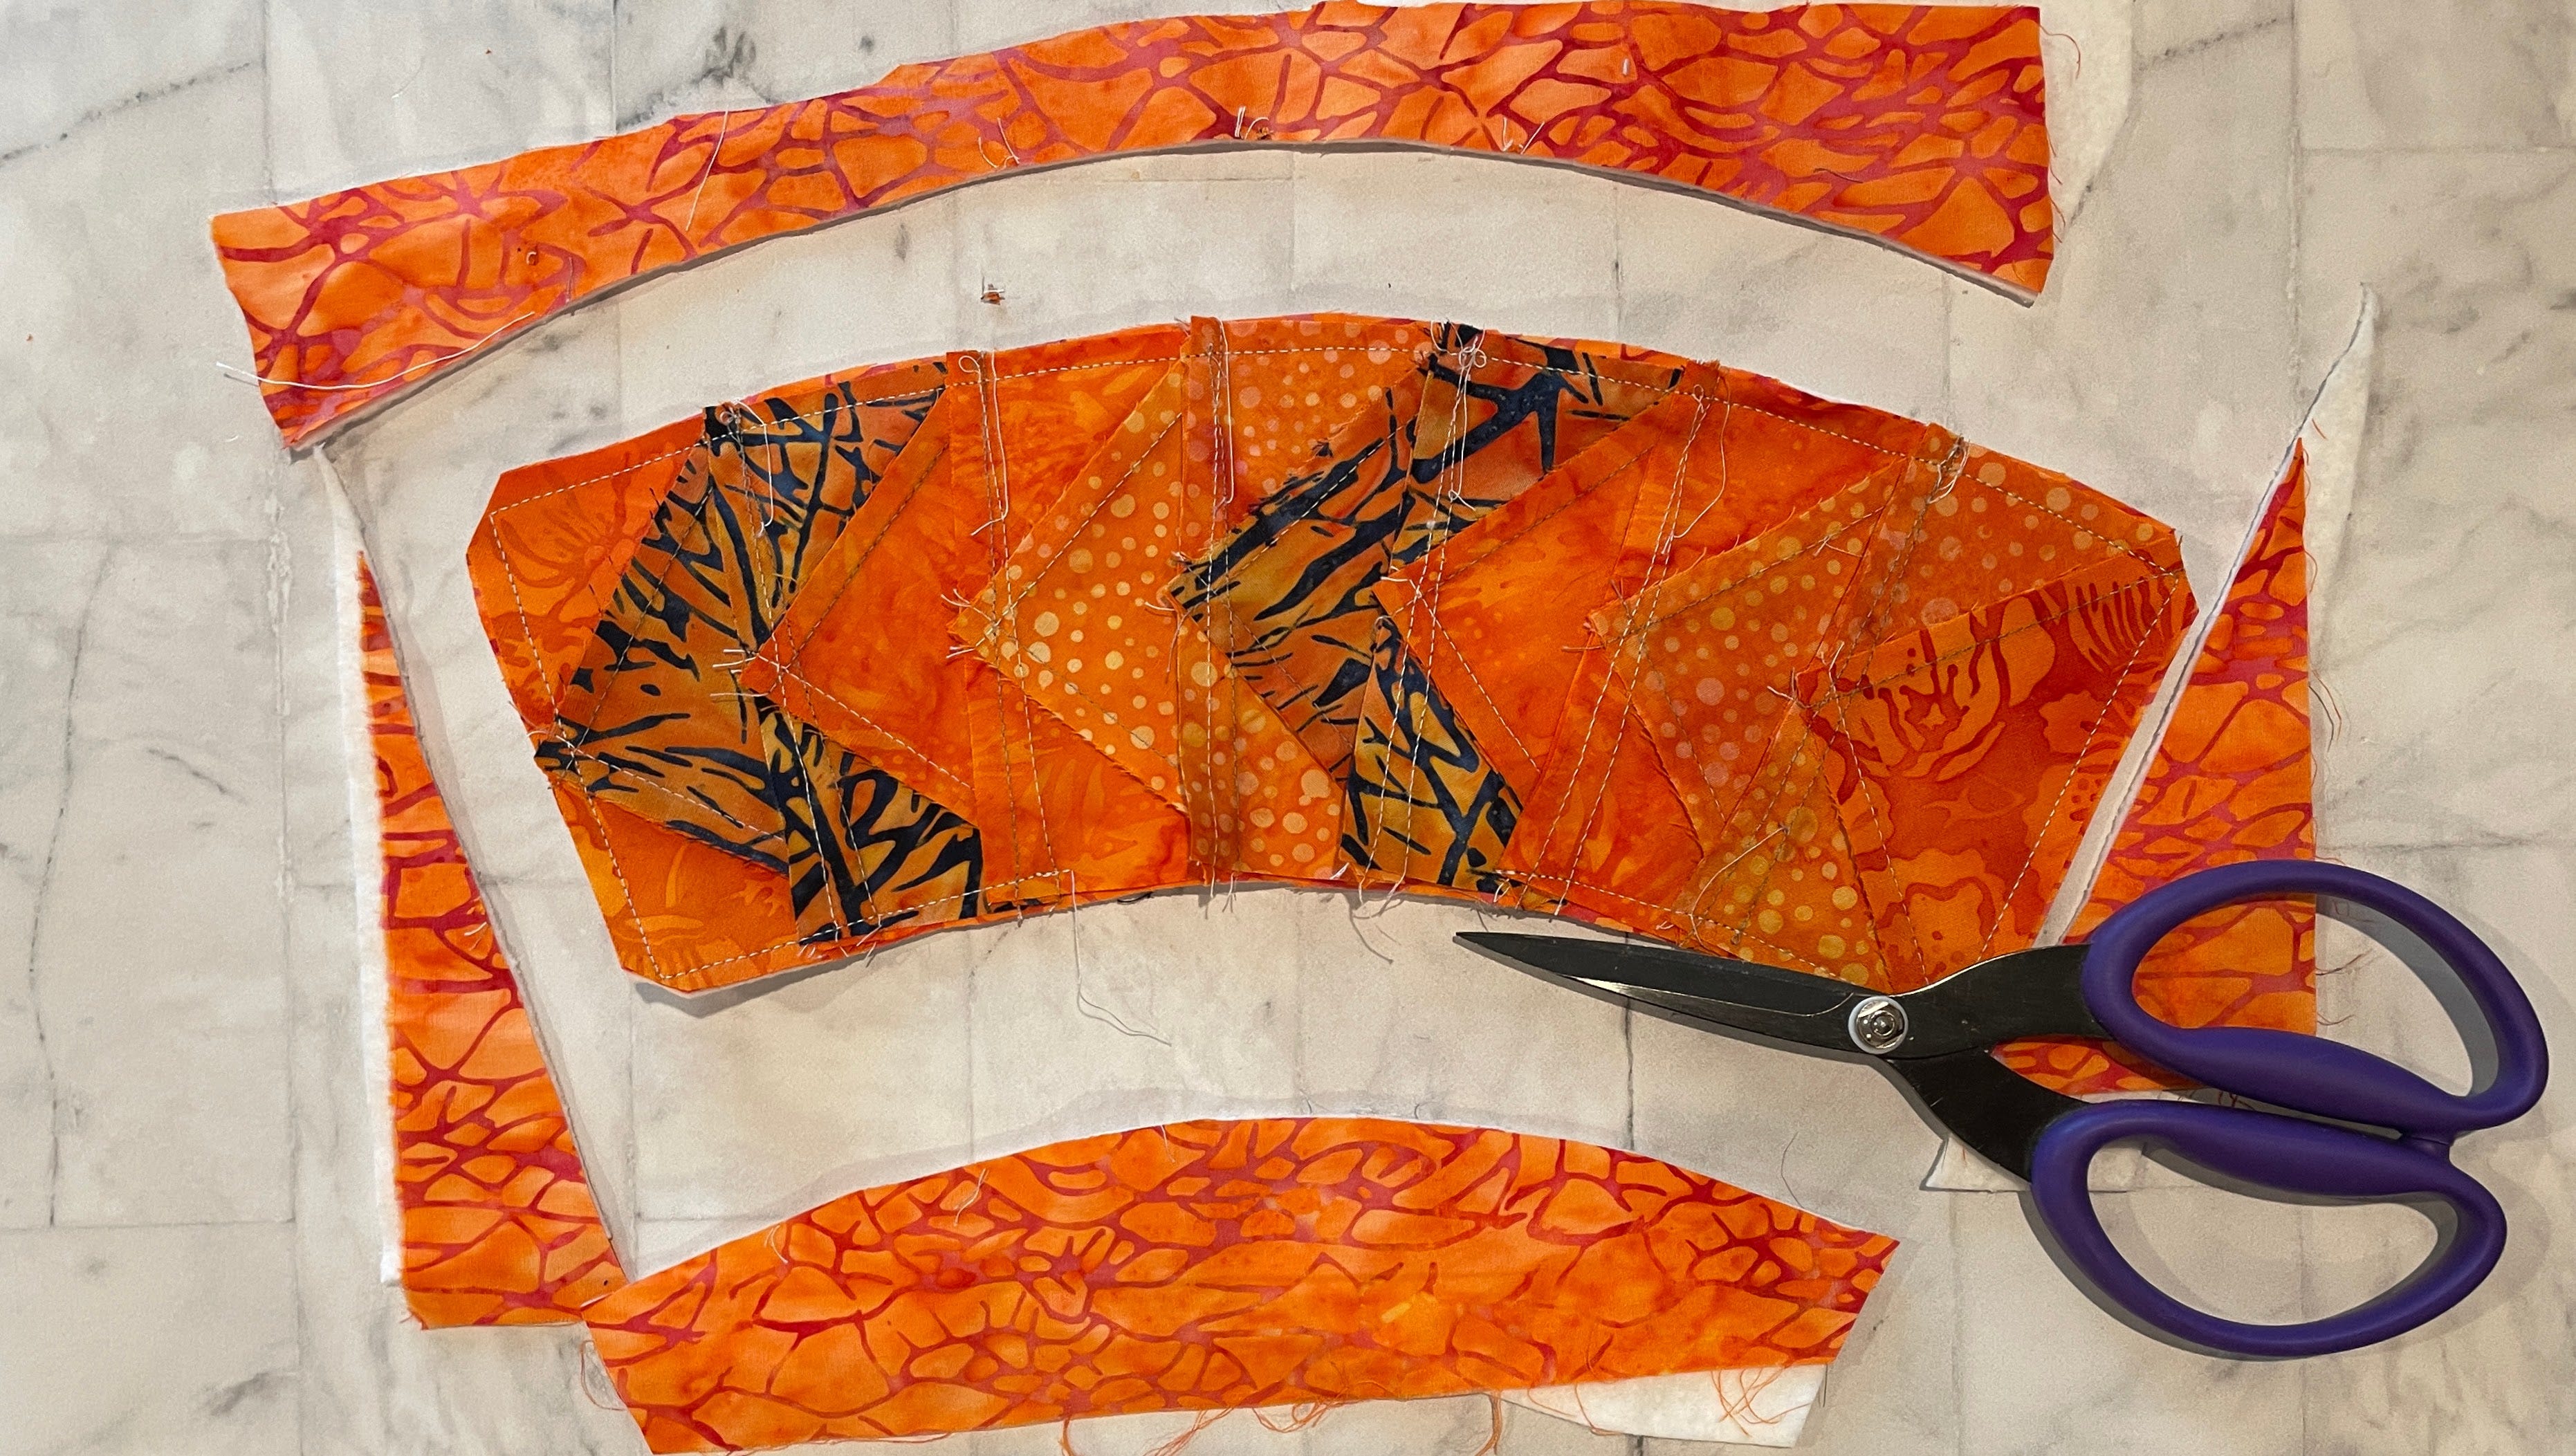
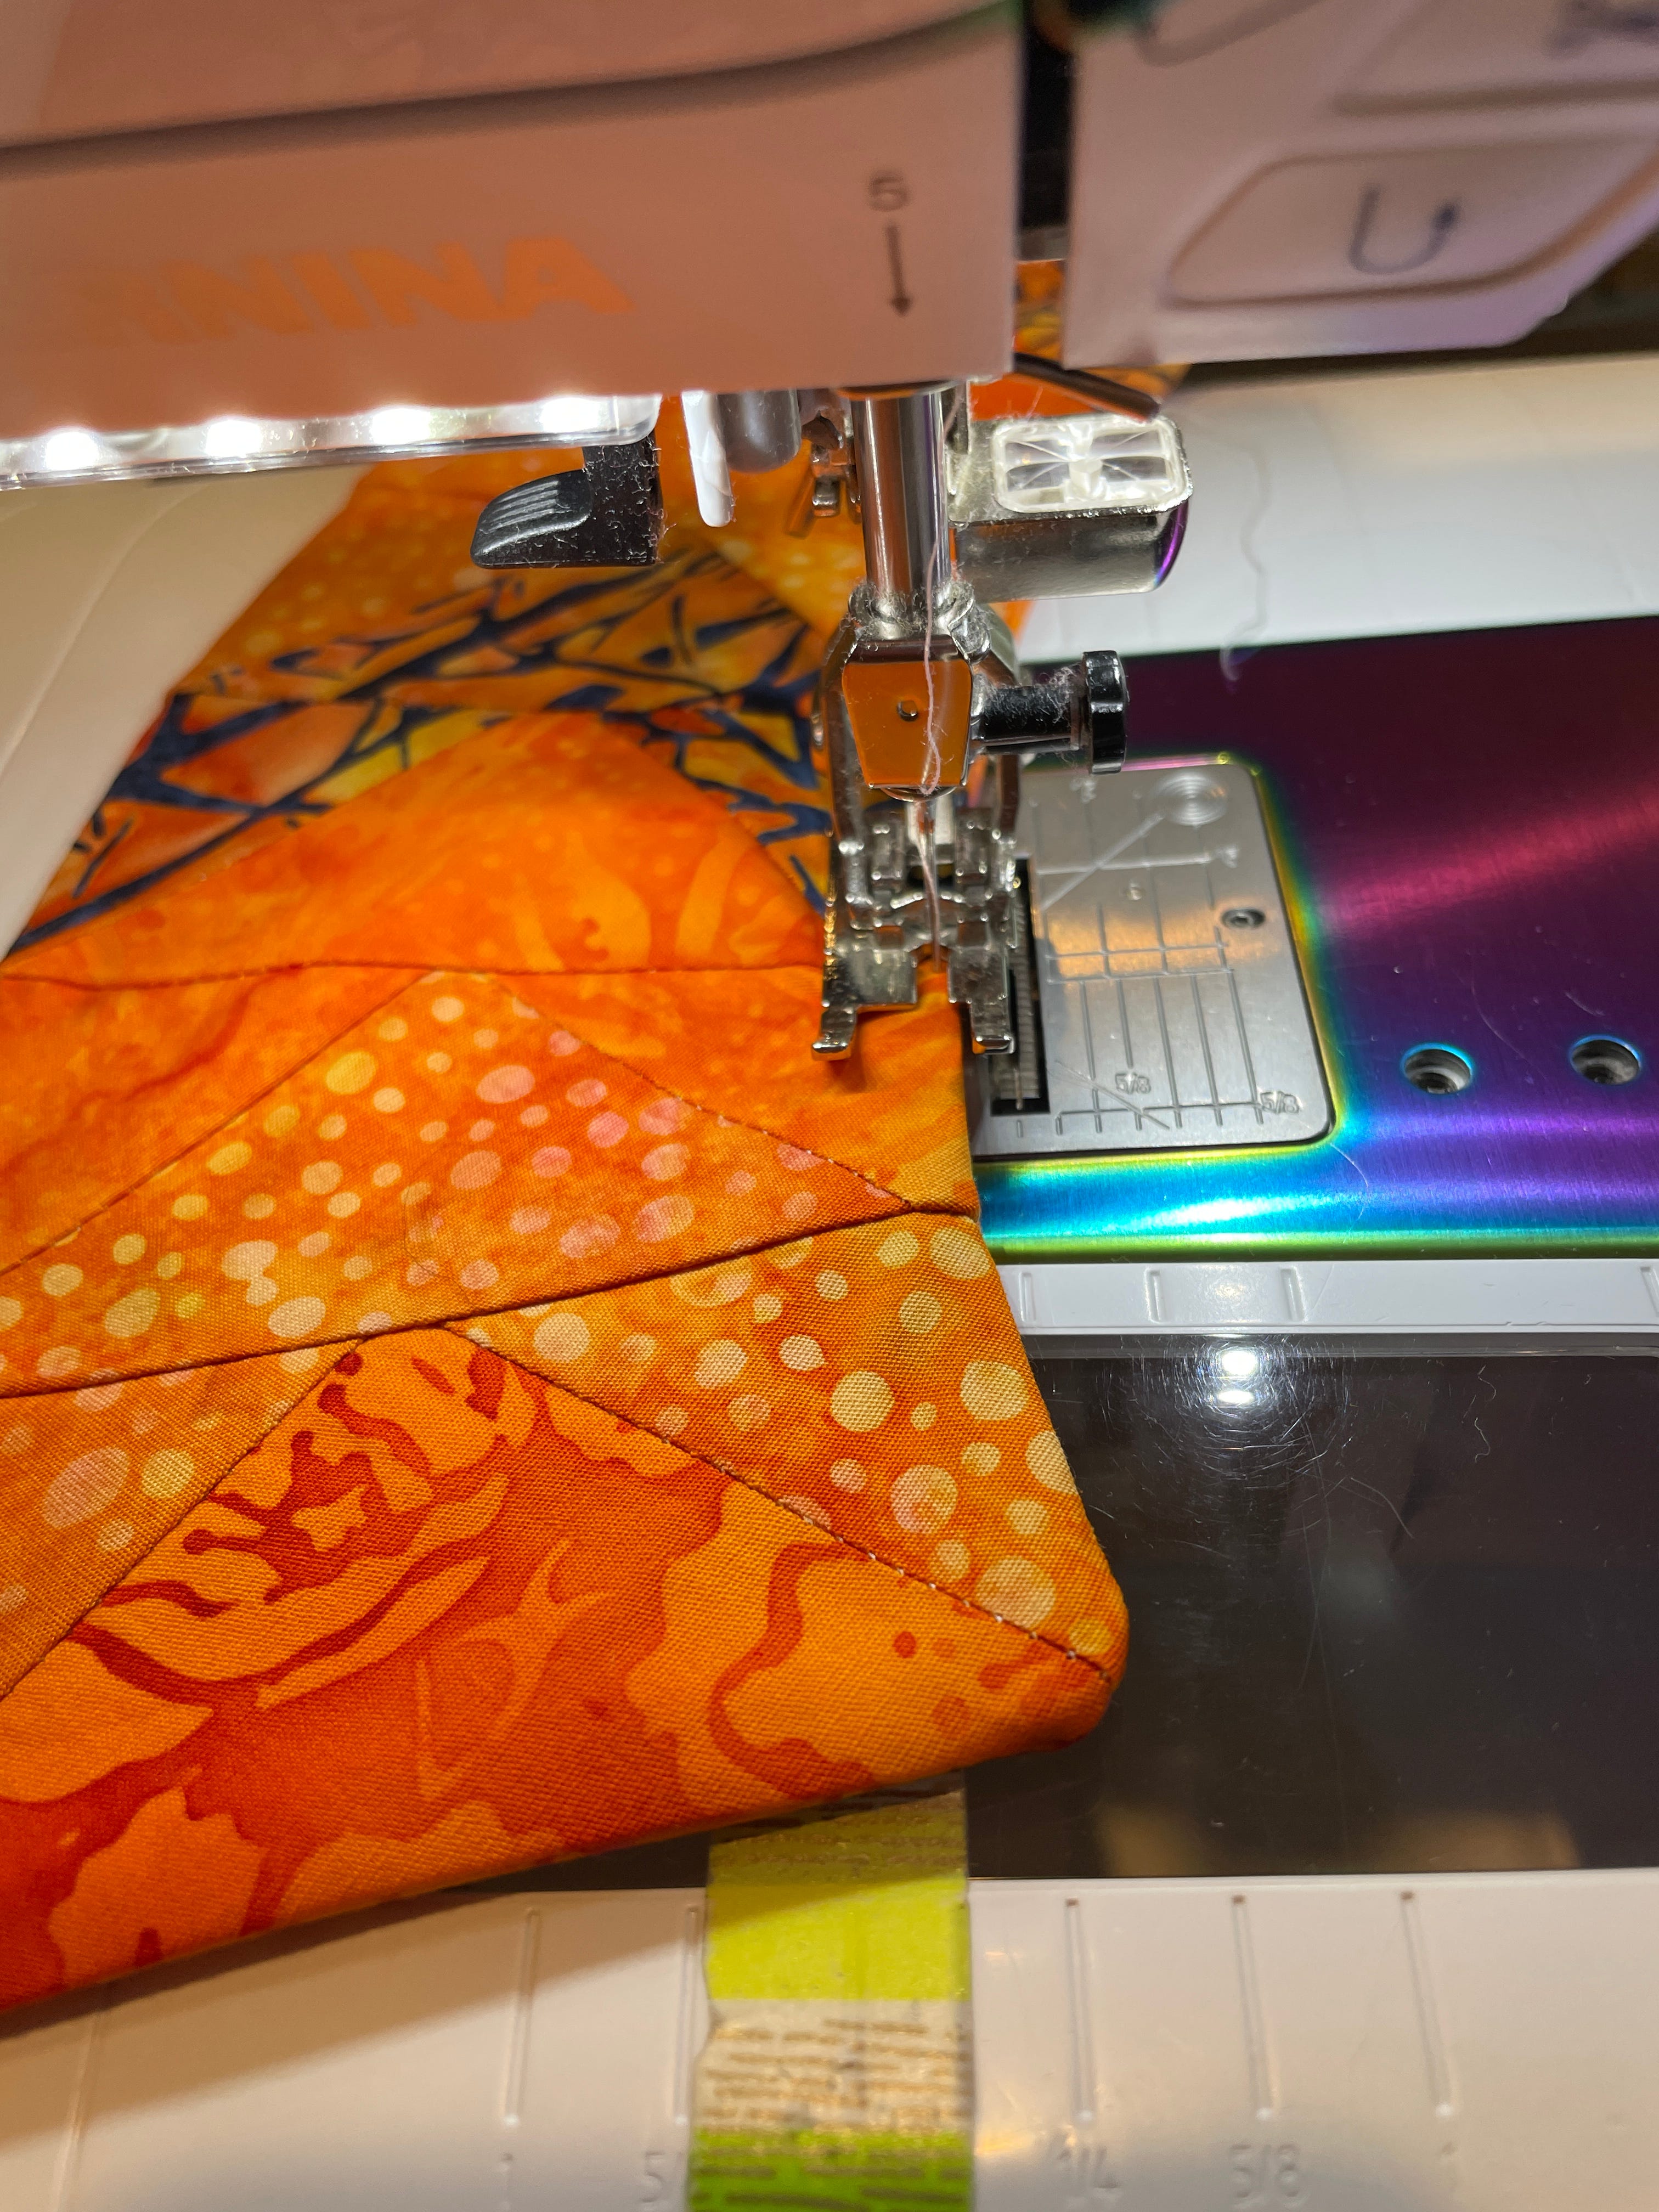
9. Layer the batting, backing (right side up) and pieced unit (right side down). Stitch around the outer edge, 1/4” from the edge of the pieced unit. Mark a space on the lower curved edge about 2” wide. Leave that portion un-stitched for turning.
10. Trim the piece close to the edge of the pieced unit. Clip the corners to reduce bulk in the turned piece.
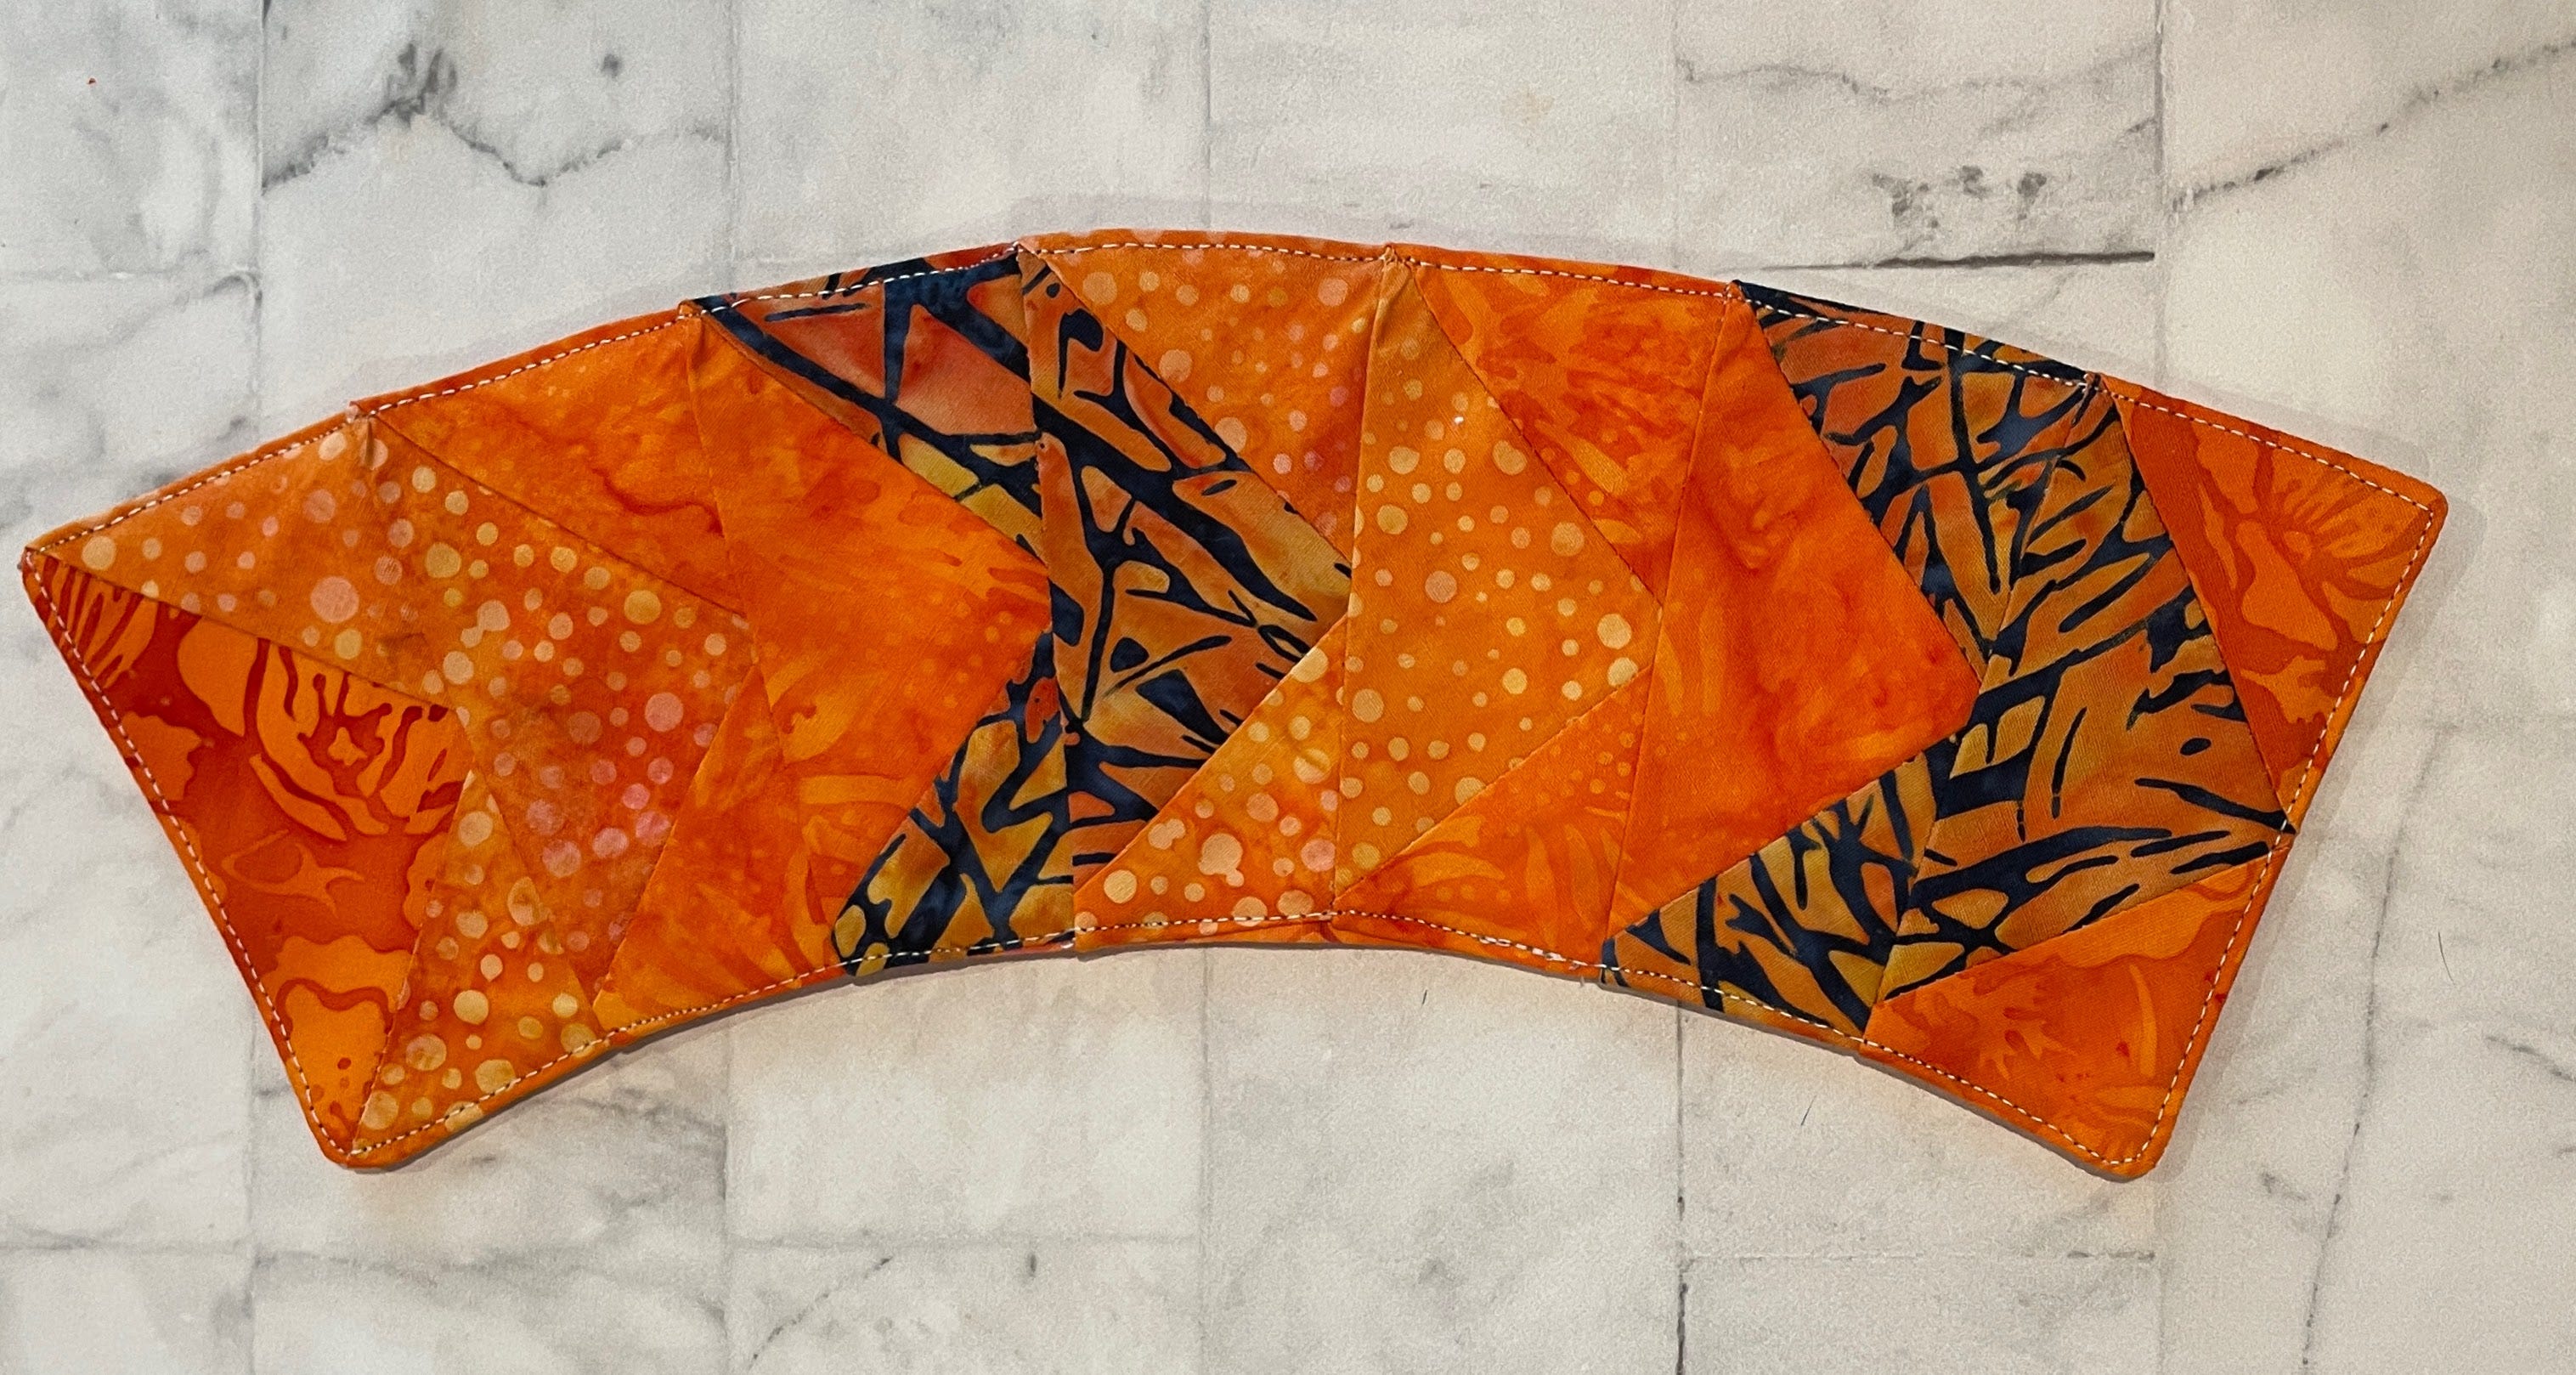
11. Turn the pieced unit right side out using a chopstick or other blunt tool to push out the corners. Press.
12. Carefully turn in the opening and pin shut.
13. Top stitch around the piece close to the edge.
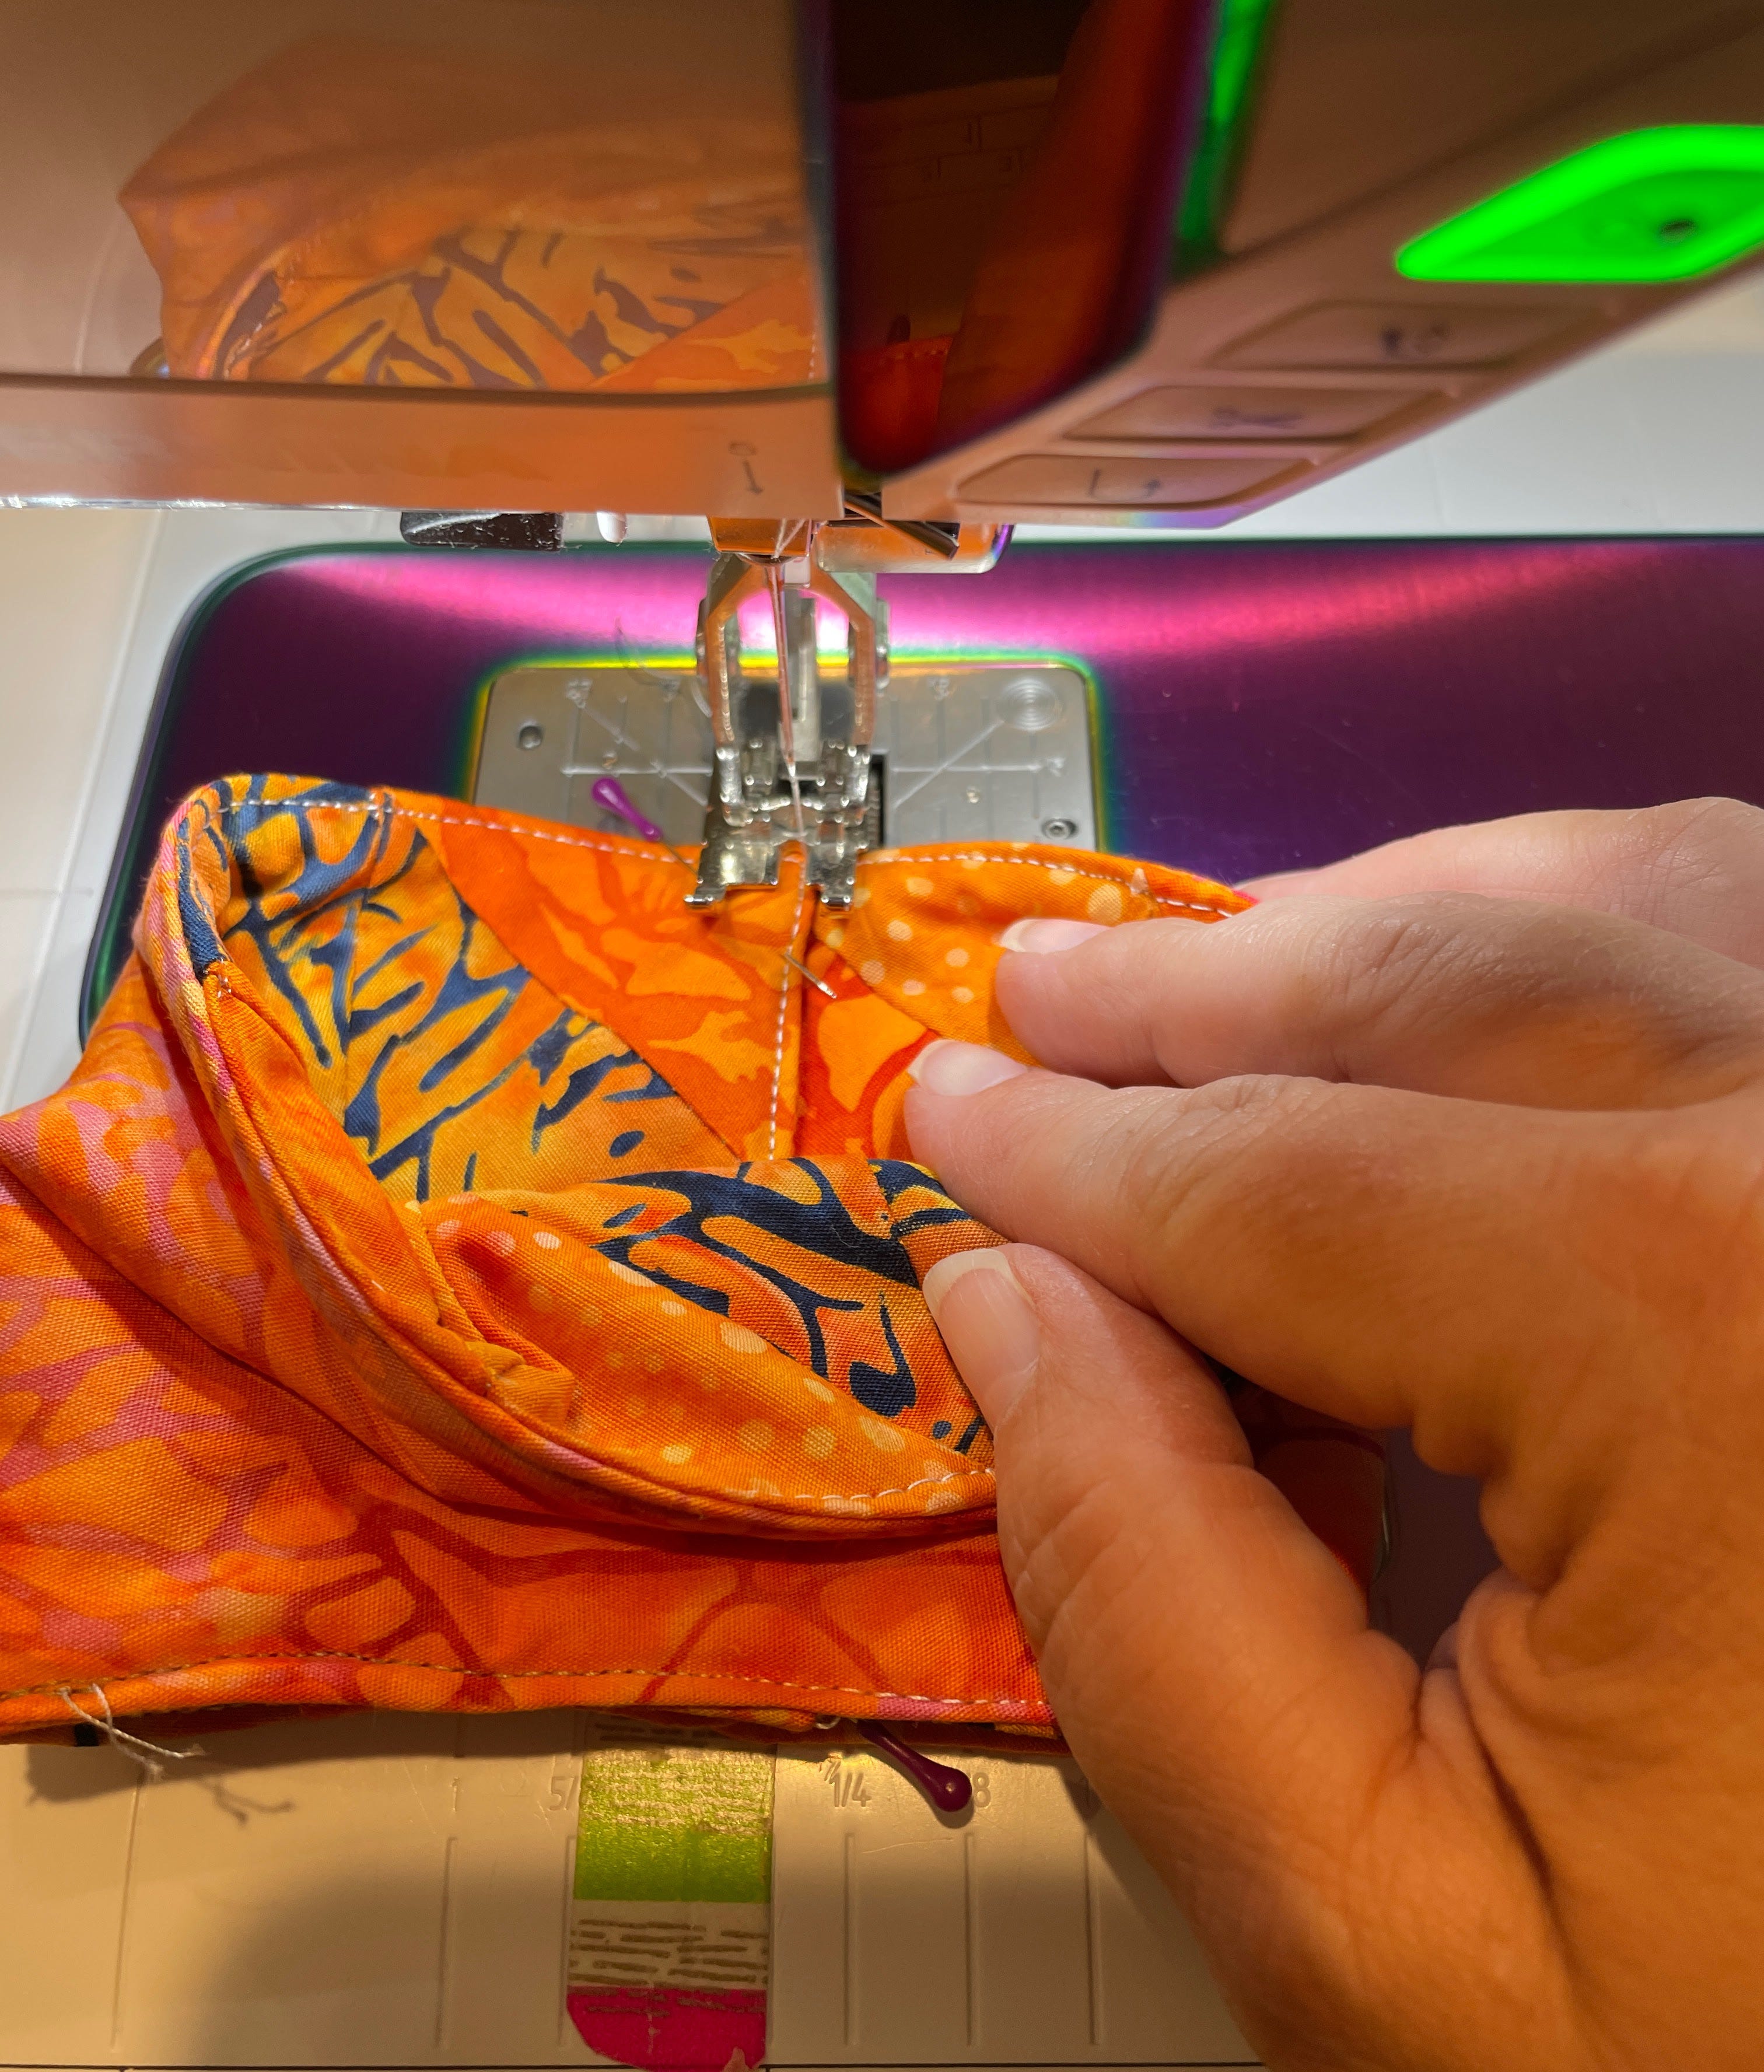
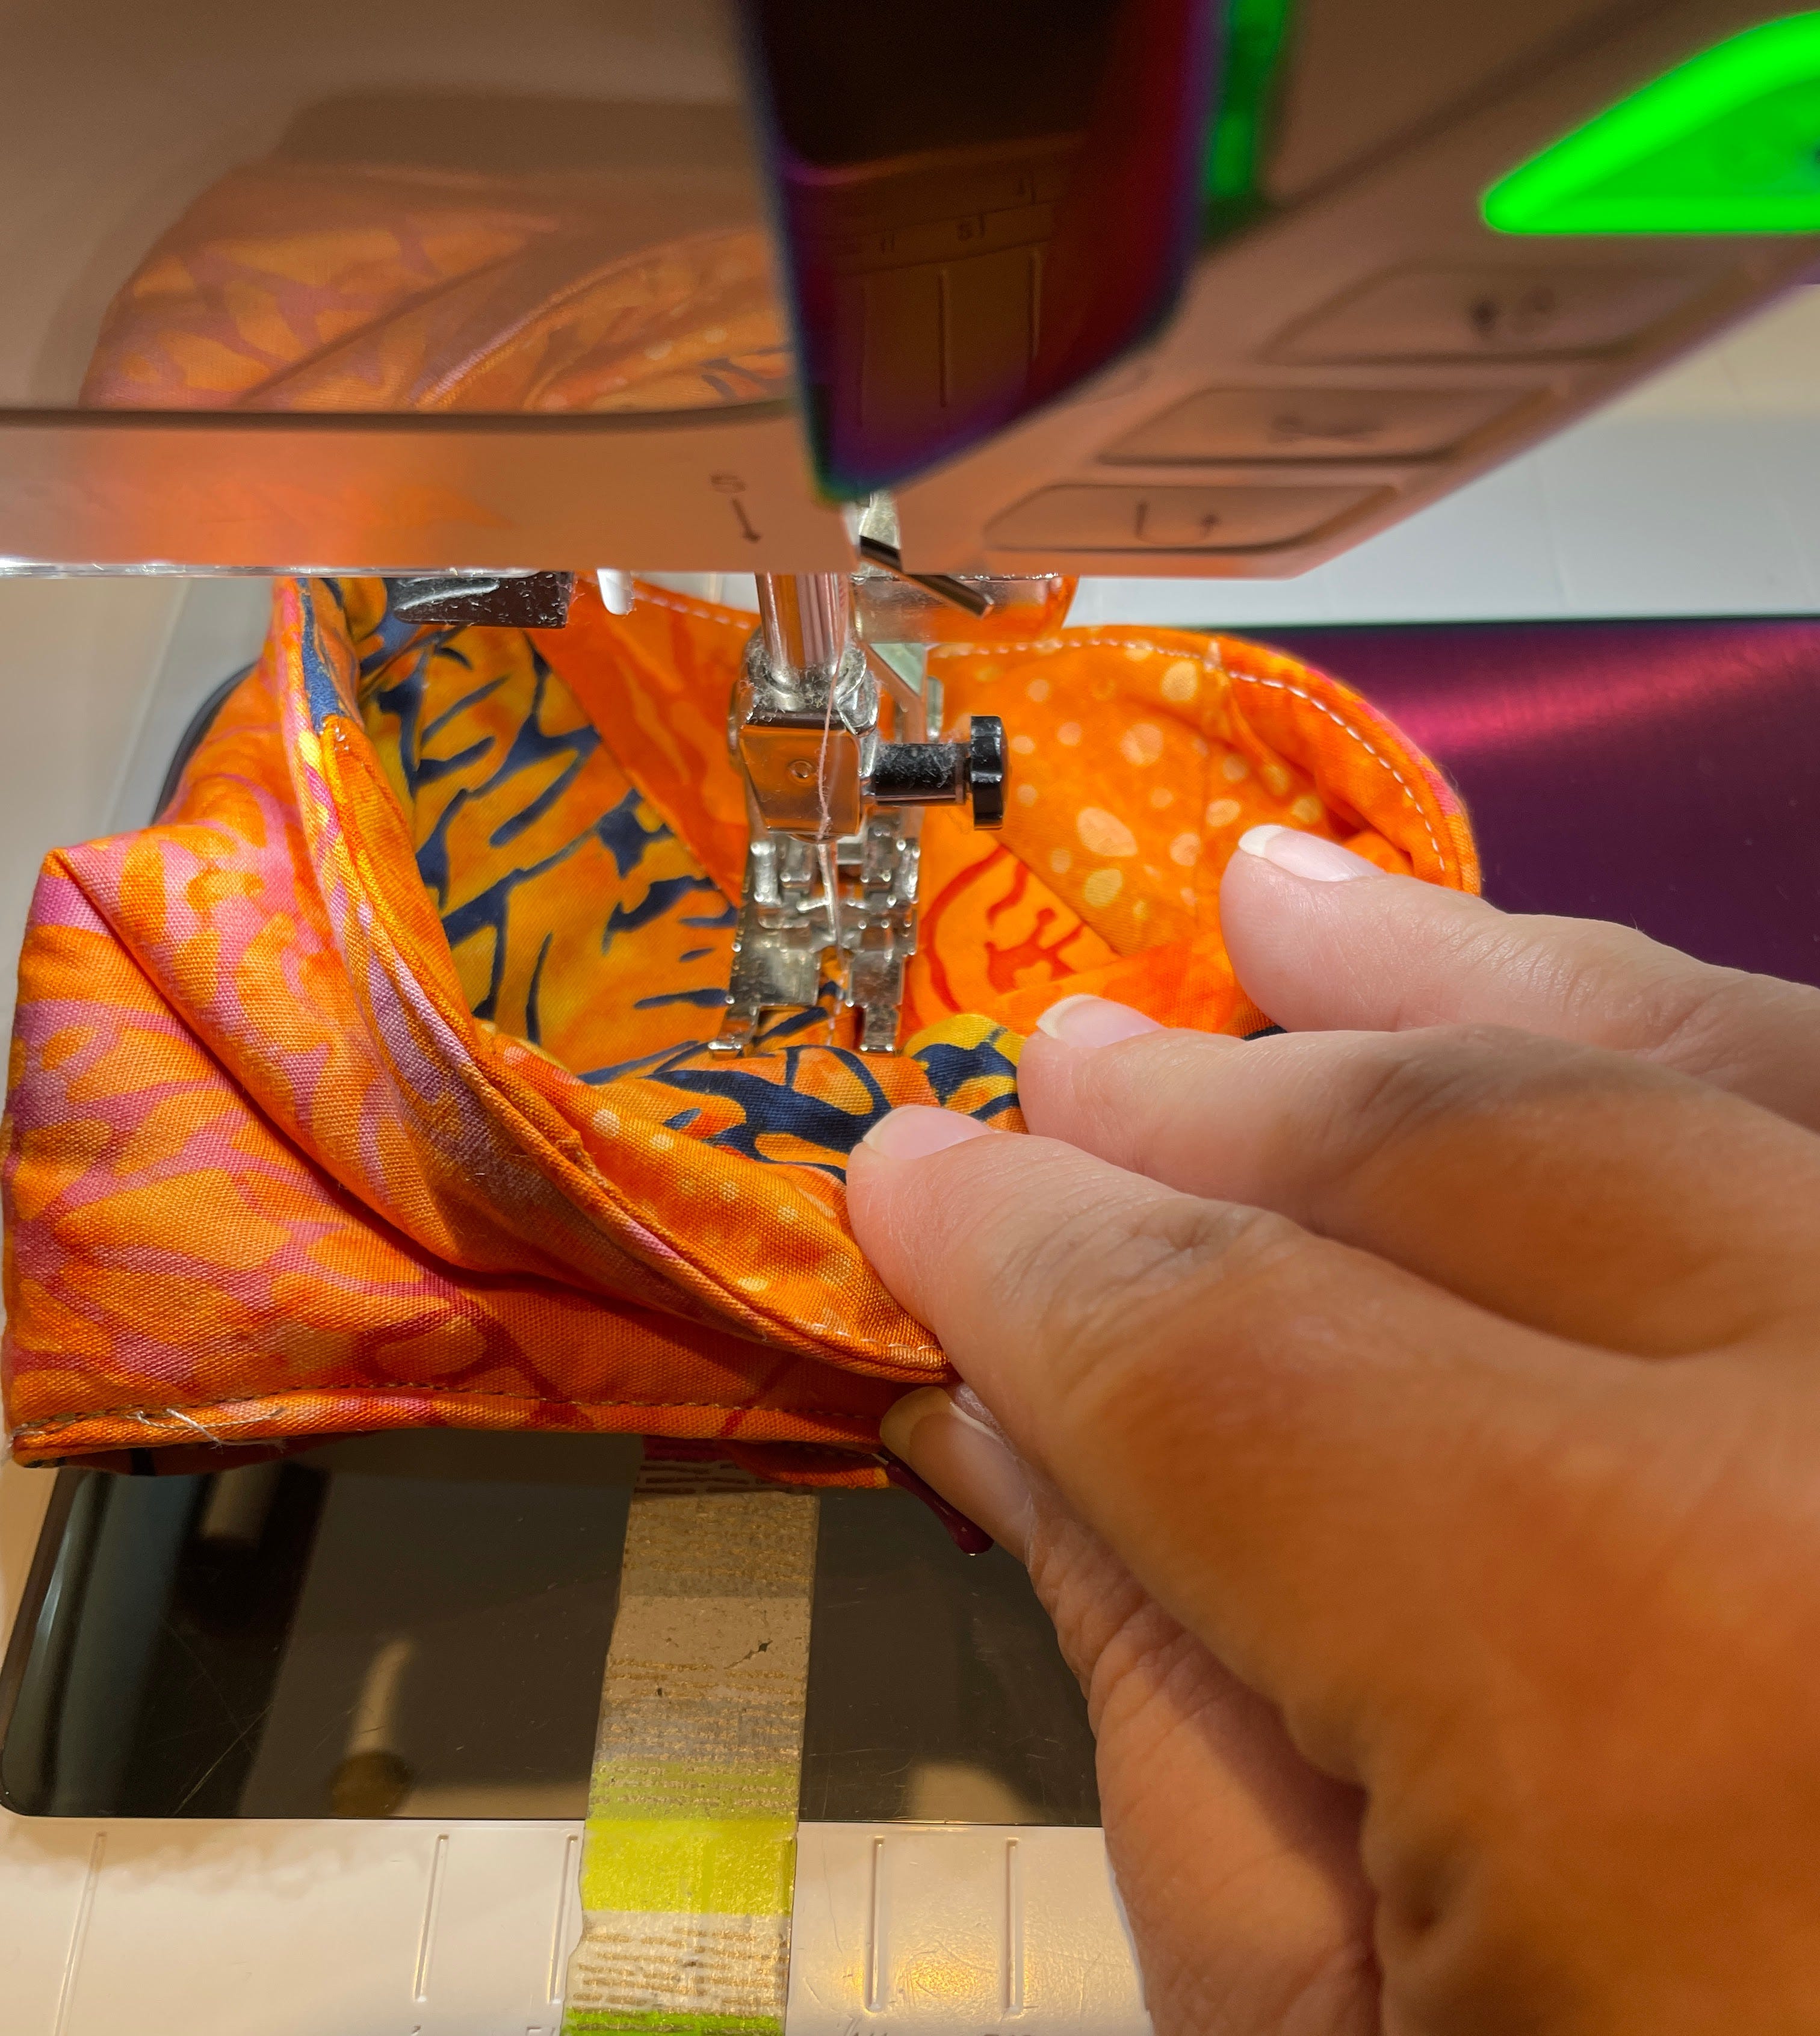
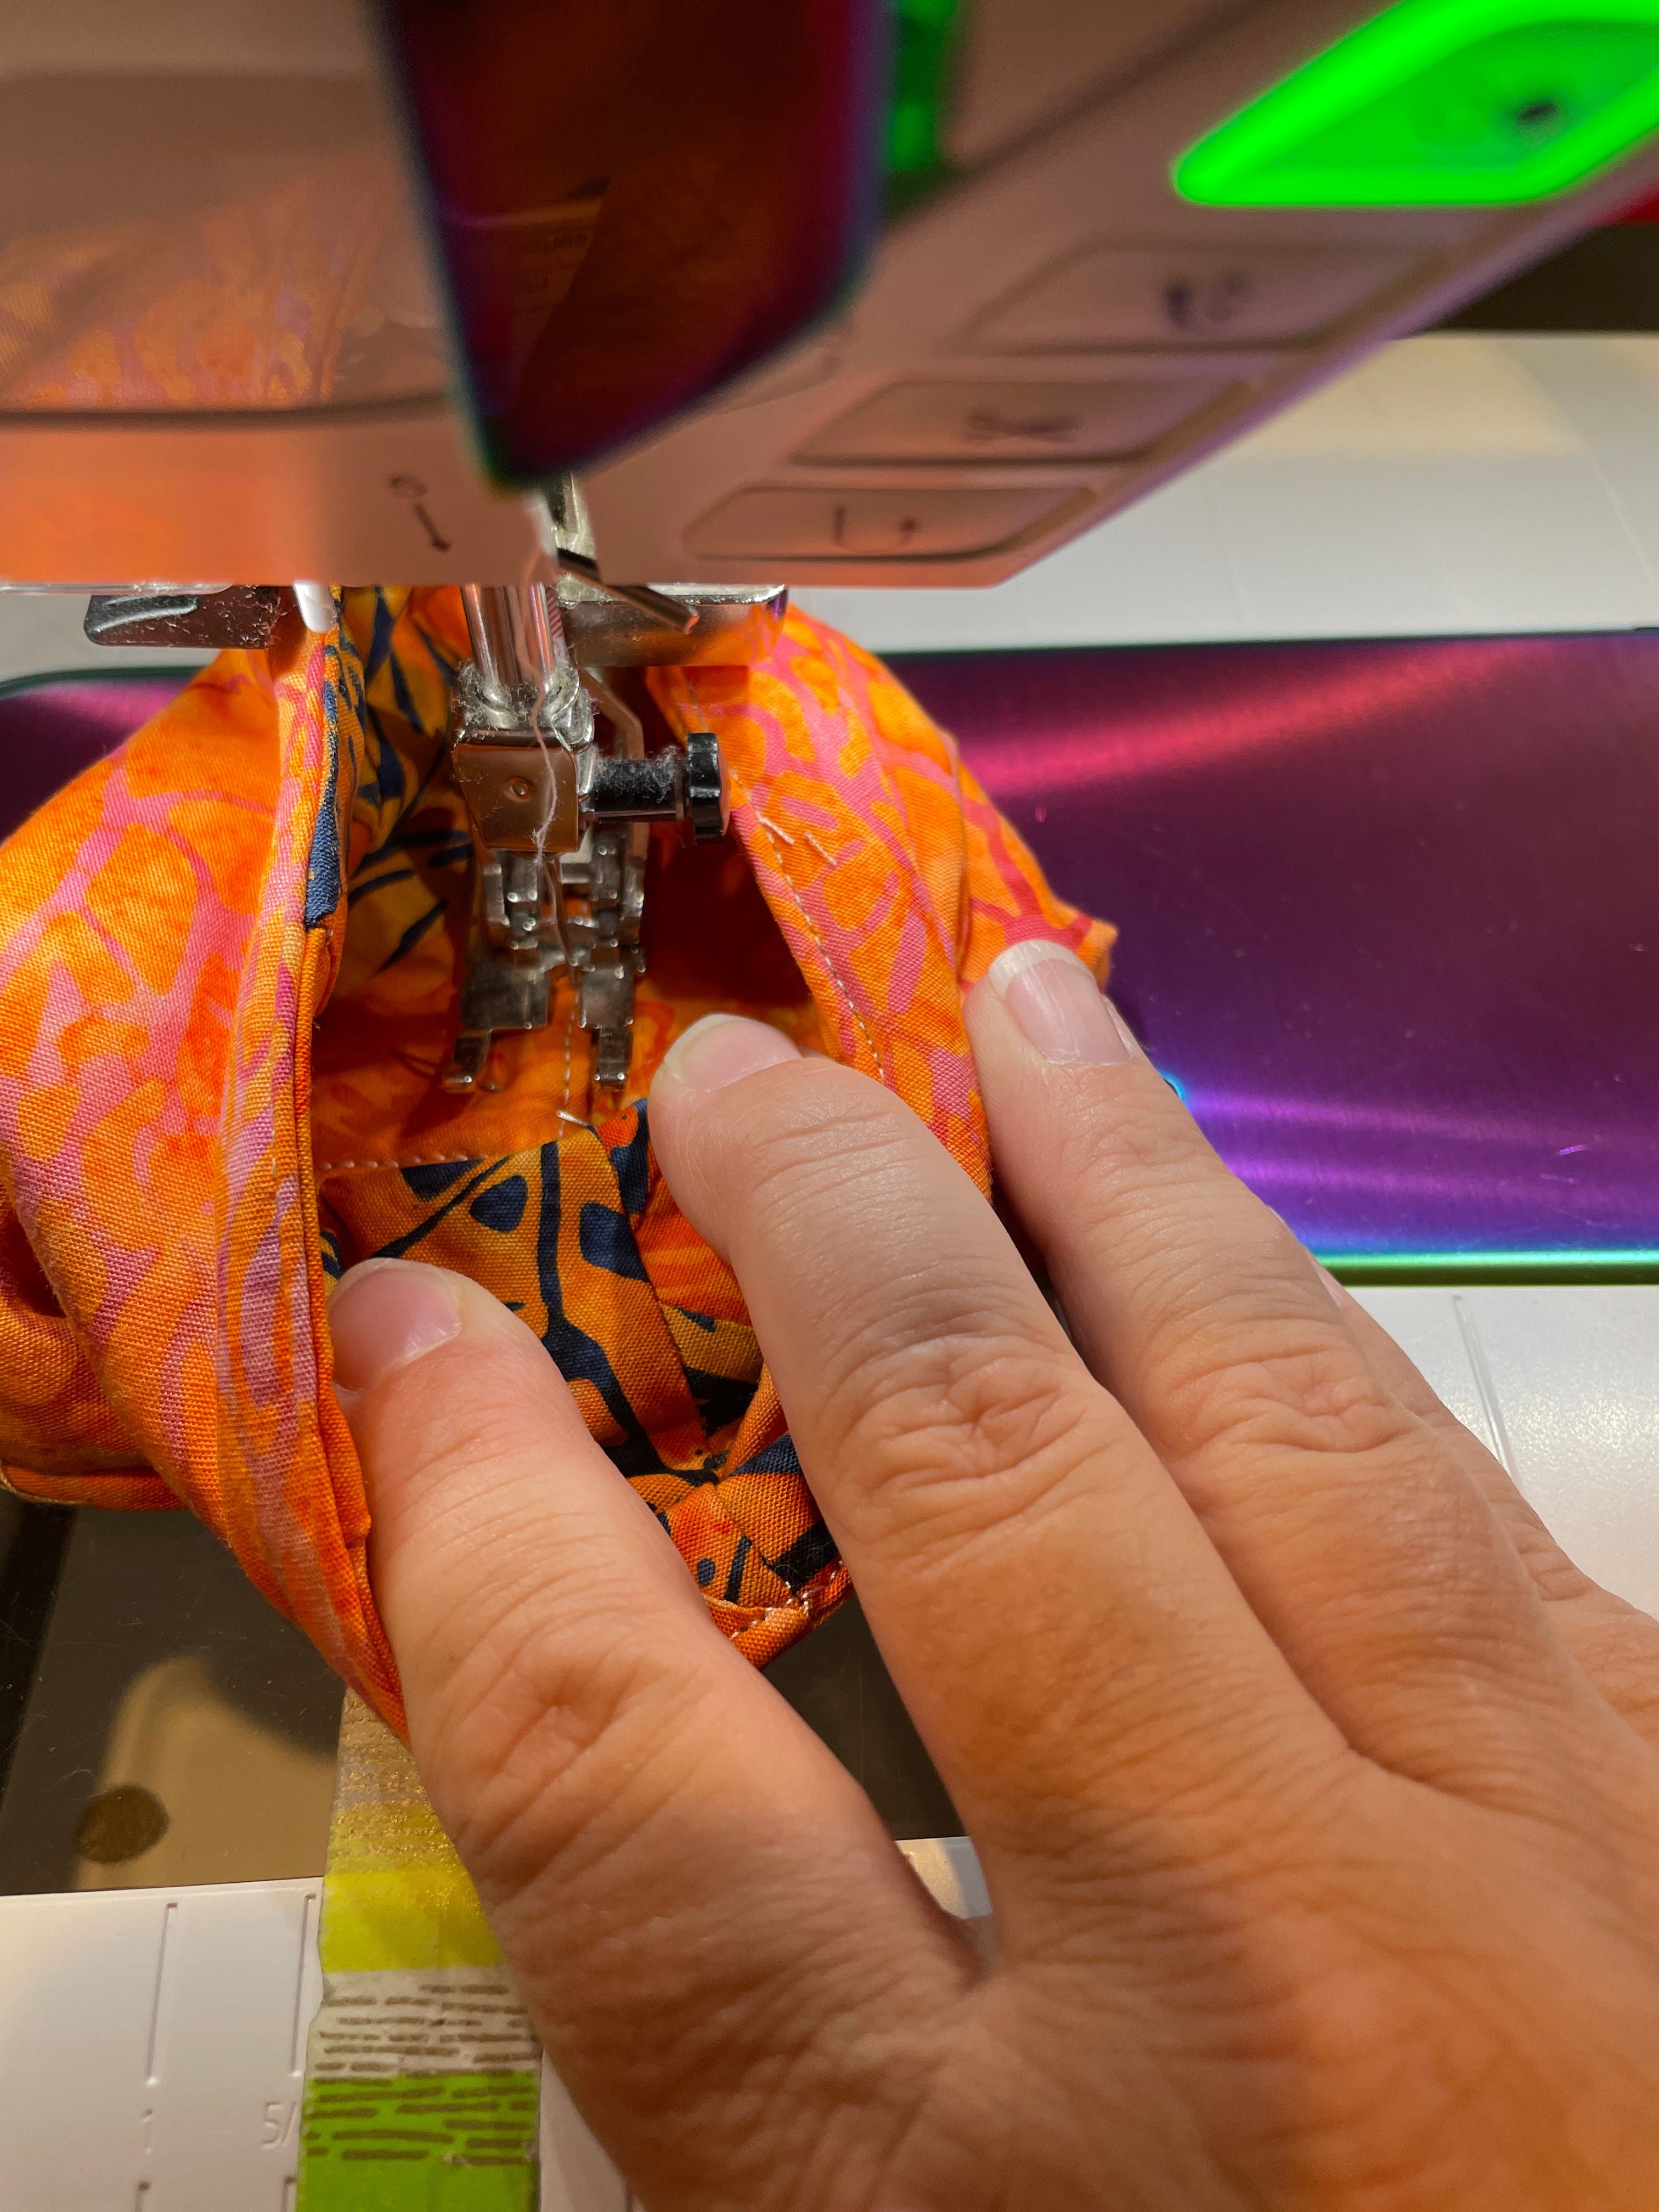
14. Roll the piece into a tube, inside out, slightly overlapping the ends. Pin together.
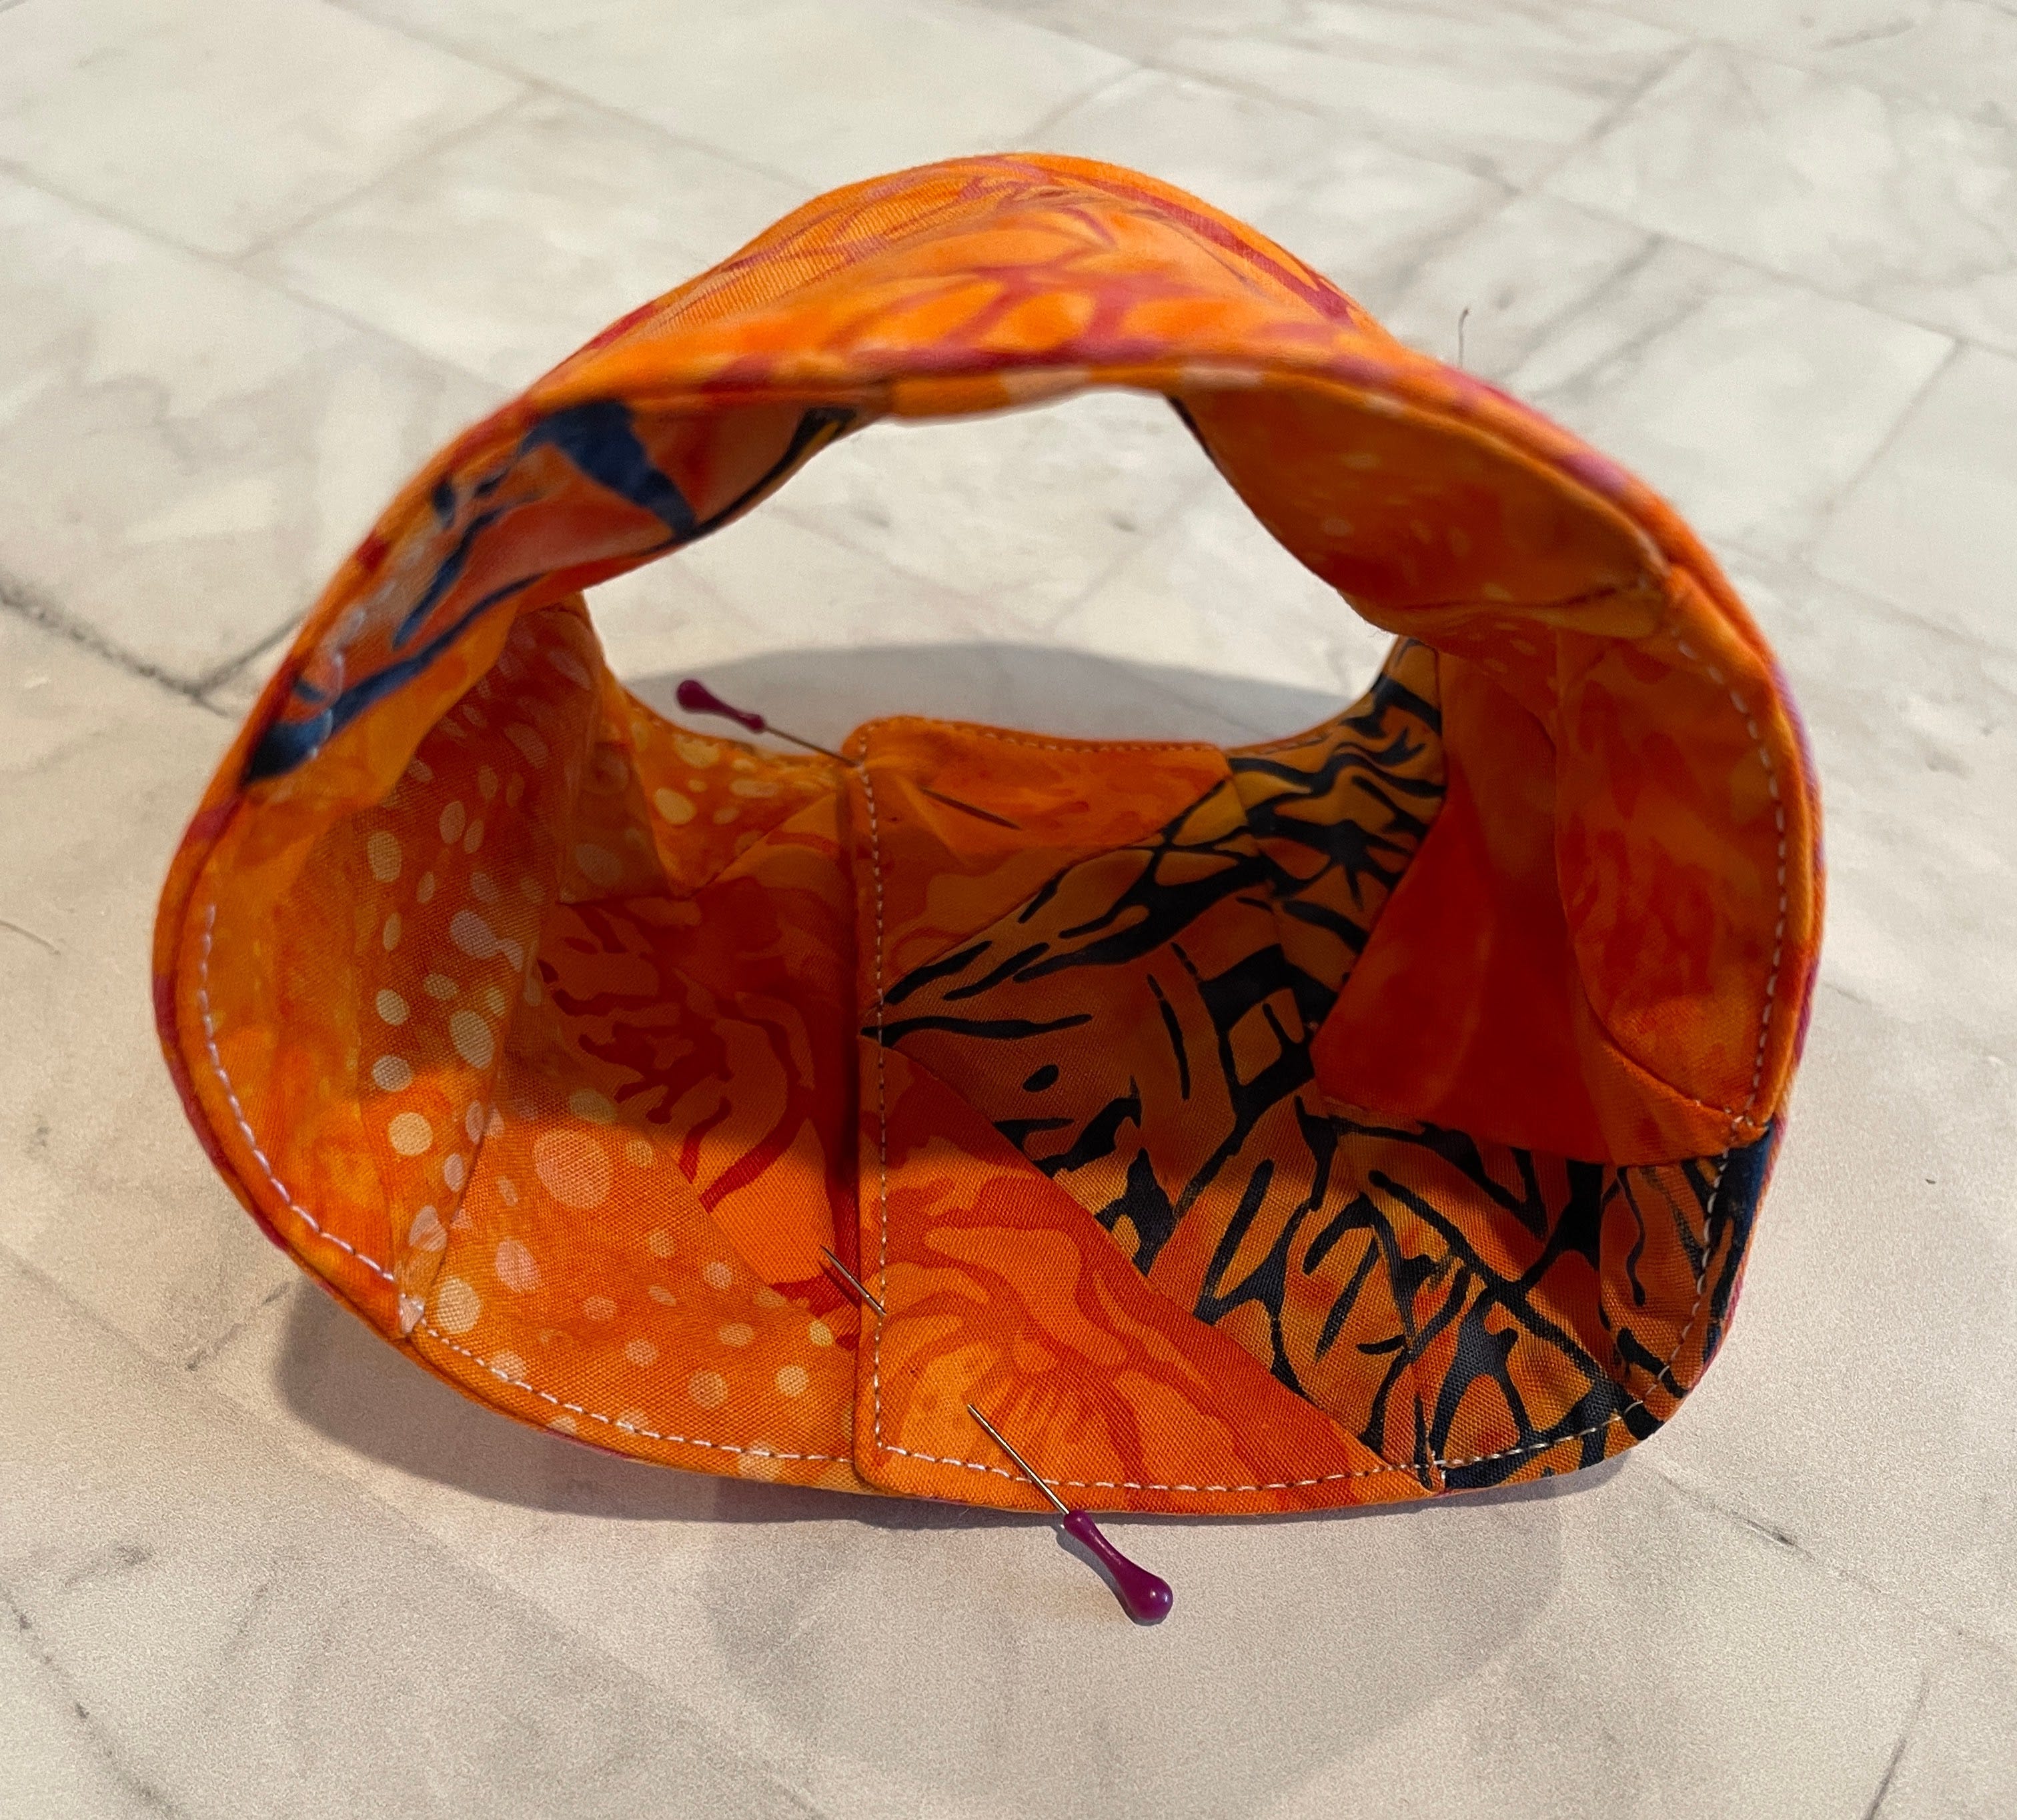
15. Carefully stitch along the edge to connect the two ends, back stitching to make a strong seam. This is fiddly. Take a few stitches and then re-adjust your piece under the needle. Keep going all along the seam and backstitch at the end.
16. Clip the threads, turn the cozy right side out and pat yourself on the back.
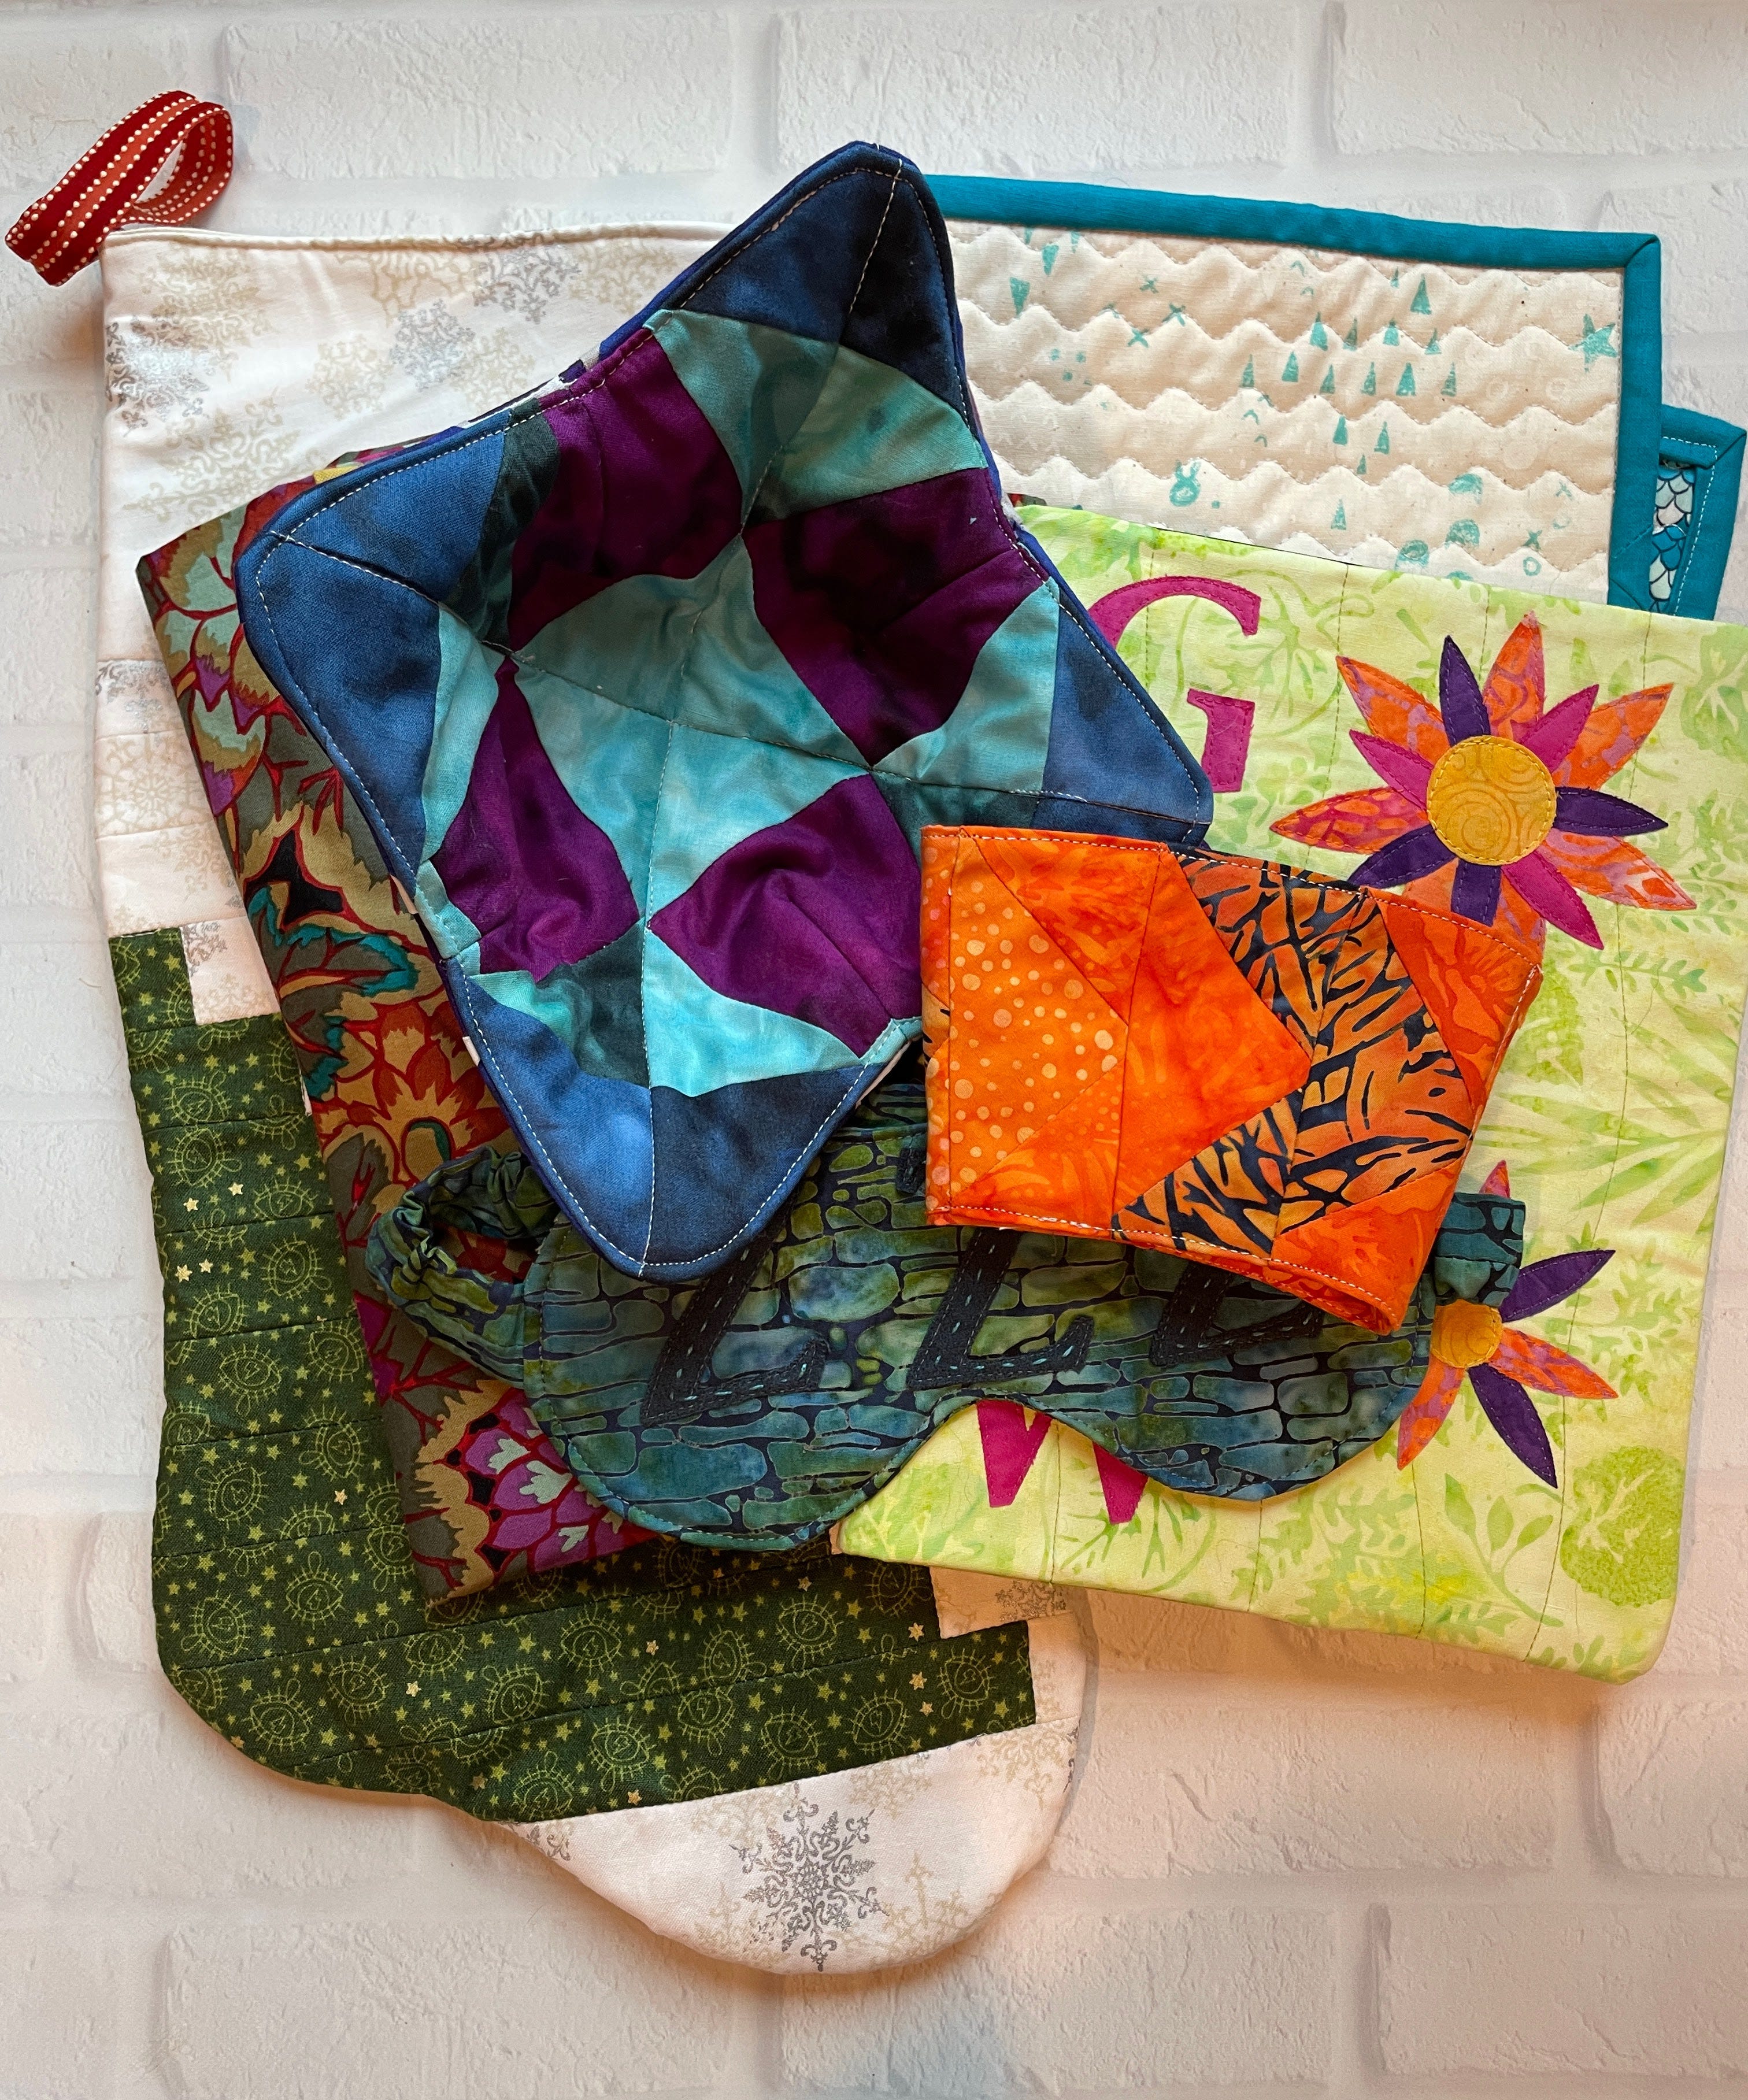
Gather up all of your gifts and admire the great stash!
If you make your own version of this tutorial, please tag @jenstrauser and @AccuQuilt on social media. Don't forget to use the hashtag #AccuQuiltBuilt so that we can see how your ice cream pint cozy turned out!