
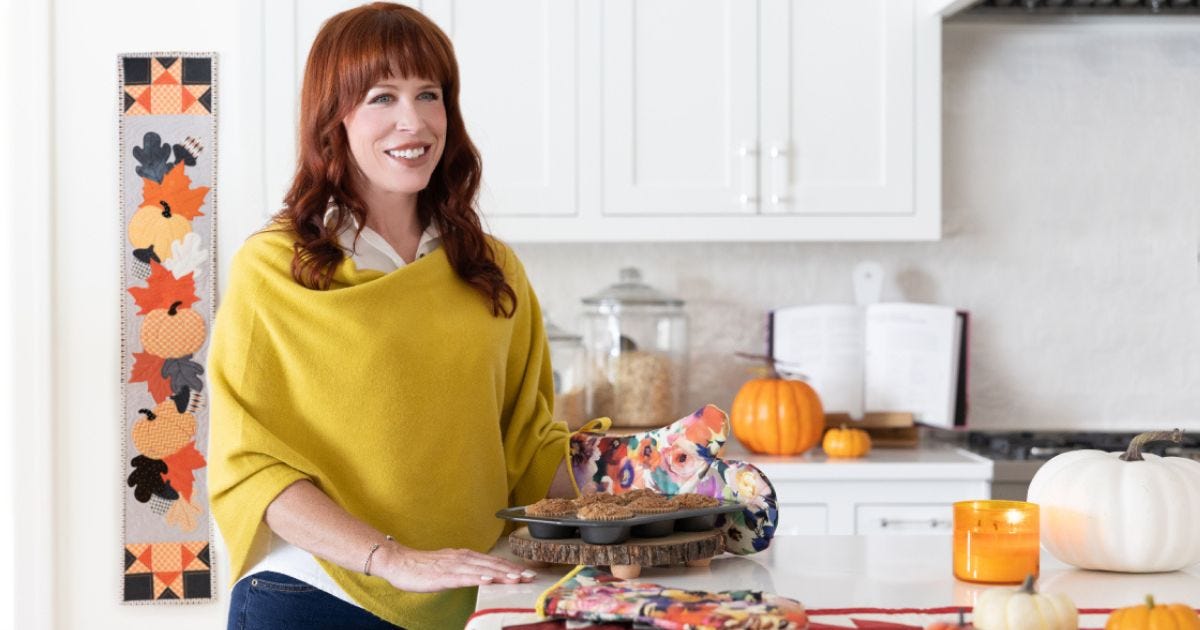
Hi, quilters! Laura here from Orange Blossom Quilt Design Studio, LLC with a refreshed version of the GO! Fall Frolic Skinny Pattern!
As the long warm days of summer begin to pass and become replaced with crisp cool mornings, I'm always excited to adorn my house with autumn's bounty. We live in a log cabin, so the rustic nature of our home blends seamlessly with autumn decor. Over the past few years, we have updated our home to incorporate the modern farmhouse aesthetic that has become so popular with the timeless rustic beauty of a log home. We've added white and grays to our color palette to balance the dark rich wood tones. We've also added touches of oiled bronze and black accents for a grounded yet cozy and minimal environment.
So, I knew I wanted to turn the GO! Fall Frolic Skinny Pattern into something that was timeless and chic as well as subtle and elegant. These elements drove my color and fabric choices. I created two versions of the classic favorite.
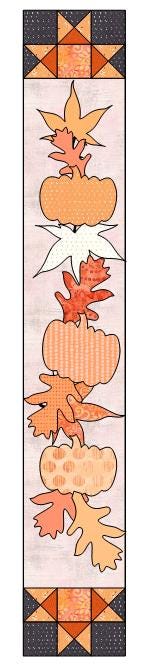

The first version combines subtle orange hues with blacks, creams, and warm grays to create a vintage palette that celebrates the season's color in a minimalist fashion. This is the Vintage All Hallows Eve version.

The second version uses all neutrals: grays, creams, white, blacks, and taupes. These colors, or lack thereof, create a modern farmhouse wall hanging that feels at home in a cozy midwestern farmhouse or a reclaimed urban loft space with minimalist decorating.

I did include a couple of fun techniques in this project. The first technique I used in the center pumpkin on the Modern Farmhouse version (pictured above). I wanted to reference the black and white buffalo check that is currently having a moment in decorating and fashion. It feels both rustic in style, yet crisp and clean in its color scheme.
Since I was unable to find a buffalo check in the scale I needed, I created the buffalo check by piecing white and two shades of gray. The technique I used for this pieced buffalo check is called "micro piecing." Trying to sew individual tiny squares together is tedious and usually yields a sloppy result, so I created my plaid by making strip sets.
How to Create Laura's Refreshed Version of the Fall Frolic Skinny Pattern
Supplies Needed
- GO! Fall Medley Die
- GO! Strip Cutter-2" (1 1/2" Finished) Die
- GO! Fabric Cutter
- White fabric scraps
- Light gray fabric scraps
- Dark gray fabric scraps
- Scraps in various muted colors for some of the applique shapes
- 1/4 yard of a light colored background fabric
- Fusible fleece batting
- Backing
- Thread
- Pins
- Iron
- Embroidery machine
Micro Piecing Instructions
1. Cut 2" strips using your GO! Fabric Cutter and the GO! Strip Cutter-2" (1 1/2" Finished) Die. You will need:
- Four light gray strips
- Four white strips
- Two dark gray strips

2. Sew two of the light gray strips with two of the dark gray strips, alternating the colors. Press the seams.
3. Sew the two remaining light gray strips to the two white strips, alternating the colors. Press the seams.
4. Now, cut down the center of each strip. The inner strips measure 1 1/2", so cut with 3/4" on either side of the seam. The two outer strips are 1/4" wider since they still have a seam allowance. On the outer strips, cut 3/4" away from the seam and 1" away from the unsewn side (see diagram below).

5. Re-sew the strip set, alternating the fabrics. Now the fabric strips will measure 1/2" in width.
NOTE: Keep the white and light gray pieces together and the dark gray/light gray pieces together. Do not mix the strips.
6. From these strip sets, sub-cut 1" units across the fabric. You will need to cut at least eight 1" strips of each colorway.
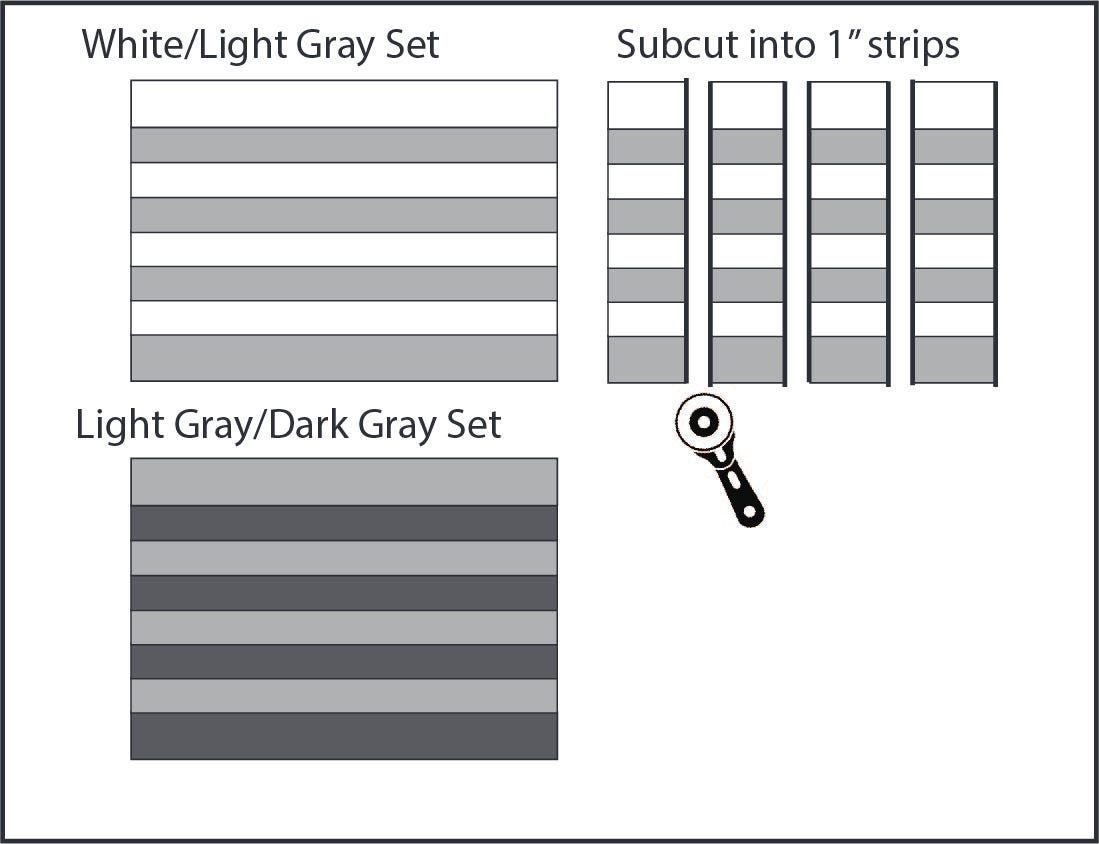
7. Sew the 1" cross cut strips together, alternating the colorway. The white in the lighter strip set should be sewn to the light gray in the darker strip set. Once sewn, press the seams.

8. Now, you have 1/2" buffalo check made with micro piecing. From this point, treat it as a single piece of fabric. Using this, cut the pumpkin shape using the GO! Fall Medley Die.
9. With an open-toe presser foot and a variegated thread, sew 1/4" from each seam in both directions using a bean or triple stitch. Also, use a satin stitch around the outer edge of the pumpkin. AccuQuilt has free downloadable embroidery files available that will make quick work of this step.
AccuQuilt Trapunto
In addition to the micro piecing I created on the Modern Farmhouse version, I created a new technique that I am so over the moon about: "AccuQuilt Trapunto." Trapunto is a traditional quilting technique where you overstuff a portion of the patchwork during the quilting process. Traditionally, this is accomplished by cutting a small hole in the backing of the quilted area and adding stuffing or small pieces of batting until the area within the quilt stitching looks dimensional. Once the area is stuffed, the hole is sewn shut.

I use this technique to give my AccuQuilt applique shapes some added dimension. You can achieve this dynamic technique easily and flawlessly by using your GO! Fabric Cutter and some fusible fleece batting.
1. Using the GO! Fall Medley Die, place one layer of fusible fleece on top of each shape. Then, add the cutting mat and cut the shapes.
PRO TIP: When cutting fusible fleece layers, think about what would stand more forward in the composition. For instance, the caps of the acorns have three layers of fusible fleece behind them while the main part of the acorns only have one. The pumpkins each have two.

2. Use a lightbox to see where the applique motif is located on the front of the quilt top. Press the fusible fleece to the wrong side of the quilt top. Line up the fleece with its applique shape on the quilt top. Press multiple layers for the acorn caps (three) and pumpkins (two).
PRO TIP: Trace around the images you pressed any fusible fleece die-cuts to the back of. This will give the fusible fleece added stability. It will also give the motif a raised appearance.
3. Once the fusible fleece has been secured to the reverse side of the quilt top using your iron, layer the quilt top, batting, and backing.
4. Quilt as desired.
5. Stitch the details in the pumpkins, acorns, leaves, and acorn caps.

Adding Hanging Corner Squares
One last fun addition is the ability to hang your quilt without the hanger showing. Half-square corner pockets allow you to hang your quilted decoration without any visible sign of how it is hung.
1. Once you have completed your quilting and are ready to bind and hang your quilt, sew the binding around the perimeter of the wall hanging. My favorite way to hang wall hangings is with folded corners to support a dowel rod that is cut the the width of the wall hanging.
2. To make the folded corner hanging, first cut two 2 1/2" squares of the buffalo check fabric.
3. Press each square in half diagonally with the right side facing out.
4. Position one square in each of the upper corners with the diagonal folded edge facing the center and the two raw edges lined up with the side and top of the quilt back.
5. Sew the folded corner hanging pocket to the quilt as you machine sew your binding to the edge of the quilt.

6. Cut a piece of wooden dowel to the same width as your quilted wall hanging. Place this wooden dowel into the corner pockets and hang it up.
Share Your Fall Frolic Skinny Pattern With Us!
I hope you enjoy this update on a classic favorite and make a couple - one for your door or kitchen and a few more to share with your friends. This cute and classic wall hanging makes a wonderful hostess gift at any dinner party or gathering.
Don't forget to use the hashtag #AccuQuiltBuilt and tag us @orangeblossomquilt and @AccuQuilt on social media so that we can see your version of this fun pattern!


