
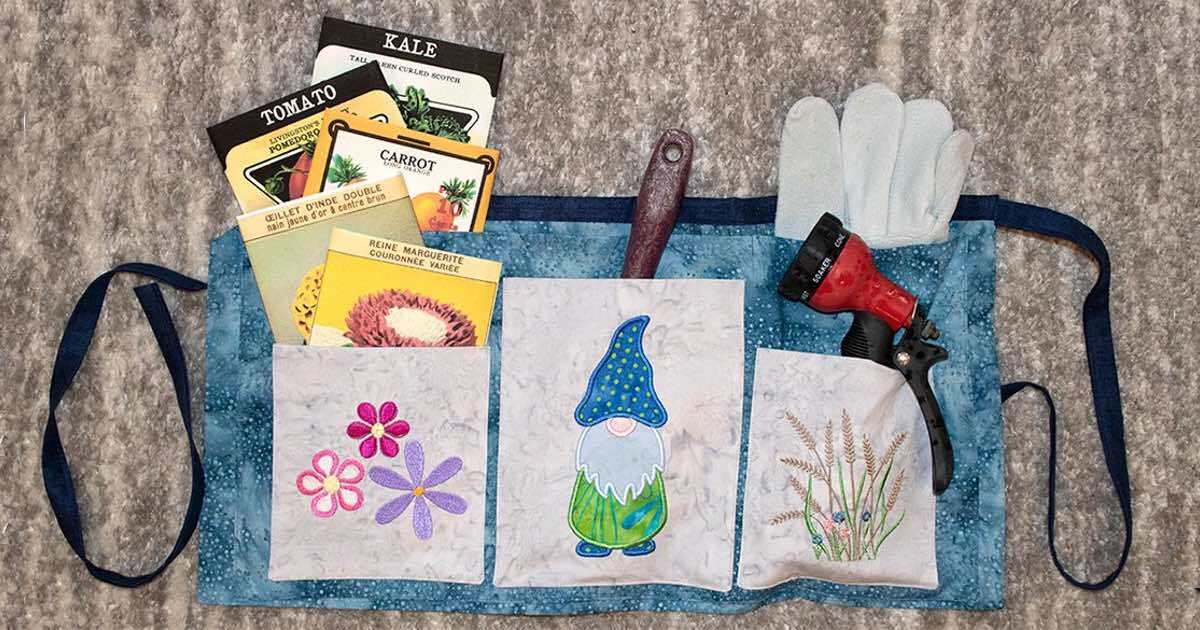
2021 promises new hope for health, happiness, and creativity. Spring is just around the corner and we are all looking forward to being outdoors and enjoying the sunshine. If you’re a gardener and a quilter who enjoys AccuQuilt applique, this project will make you happy. If you haven’t tried AccuQuilt applique, this project is just the right size to give it a spin. This garden apron has six pockets to hold tools and seed packets and any other supplies needed while you work. And it’s so easy to make with just three fat quarters of fabric and the gnome applique die.
Did you see the blog post about the gnome? There are so many ways to make gnomes, and this garden apron is the perfect time to make one. And when you have finished the garden apron, why not make one to wear when you’re quilting.
Supplies Needed:
- AccuQuilt GO! Gnome Die (55210)
- Accuquilt GO! 2-1/2” Strip Die (55017)
- AccuQuilt GO! Free Embroidery for the Gnome Die
- Optional Flower or other Embroidery for the smaller pockets.
- Fabric for apron - 3 Fat Quarters or 3/4 yards fabric and 6" x WOF fabric for apron band and ties. These may be the same color or in coordinating colors. A wider grosgrain ribbon may be used for ties if desired.
- Assortment of fabric scraps for applique that coordinate and contrast with background fabric
- Embroidery supplies: Embroidery machine and supplies including medium weight tearaway stabilizer, iron on fusible web, coordinating thread, bobbin thread, and either water soluble glue stick (Elmer’s purple glue stick or a fabric glue stick or pen) OR temporary spray adhesive for fabric (Sulky KK2000)
- Cut pockets to be embroidered.
With one fat quarter, cut into three strips approximately 6-1/2” x 18”. The embroidery will be completed and then the pockets will be cut to size for the apron.
- Stitch embroidery onto front pockets.
Embroidery will be stitched on the lower half of the pocket fabric. Complete embroidery as per instructions that come with the embroidery designs.

- Trim pockets to size, stitch, and press.
Determine the size you would like your pockets to be and cut, allowing for a ¼” seam allowance on three sides. The pocket will be folded over so that the back of the embroidery is enclosed and the inside of the pocket is smooth. Two layers of fabric also gives the pockets more body as the apron is made of quilting cotton fabric.
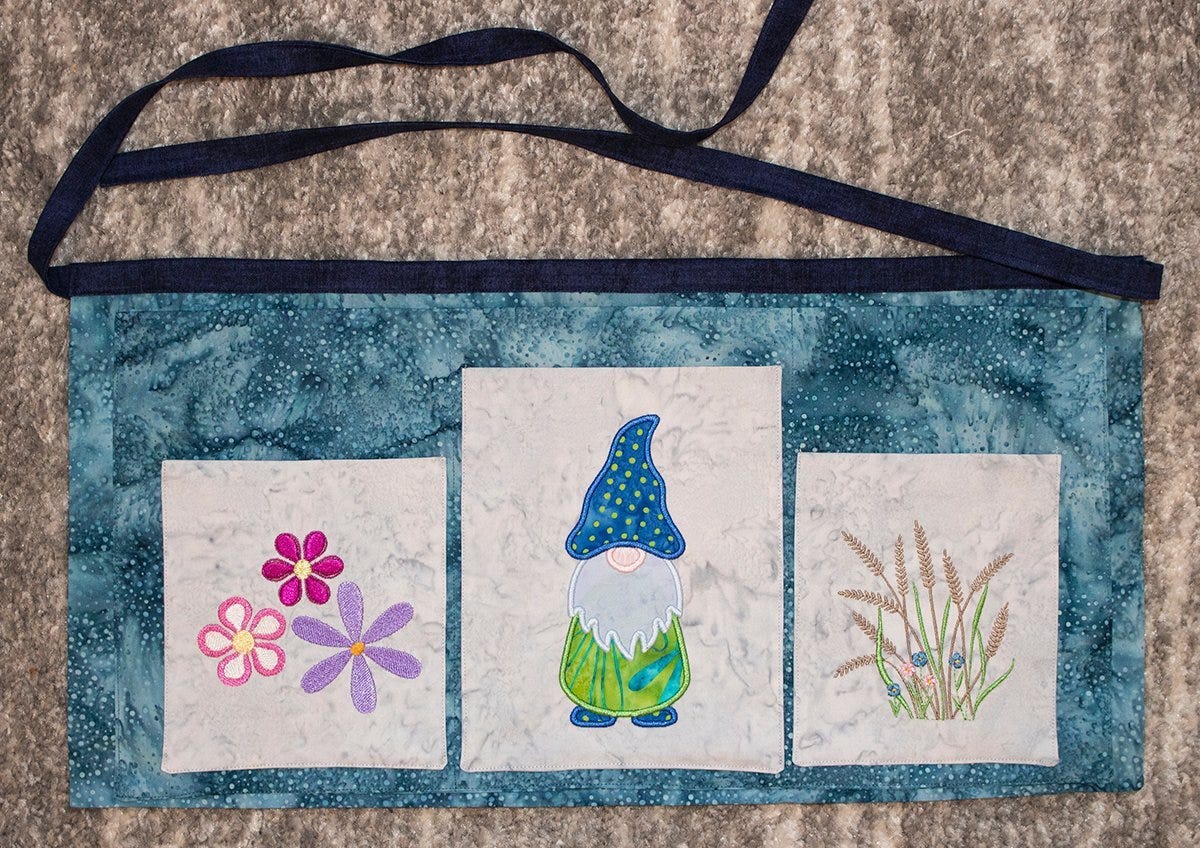
The apron I made has three front pockets and a larger pocket behind the front pockets. The three front pockets are made from one fat quarter. The back pocket is made from another fat quarter. The apron itself is made from a third fat quarter folded in half.
The center pocket is 6” x 7-1/2” finished. That pocket is cut 6-1/2” x 15-1/2”. When cutting, be sure to pay attention to gnome placement on the front of the pocket.
Two side pockets that are 5” x 6” finished. Those pockets are cut 5-1/2” x 12-1/2”.
The back pocket is 17” x 8” finished. That pocket is cut 17-1/2” x 16-1/2”.
When the pocket is cut, stitch as shown in the image below. Note that three sides are stitched and there is an opening to turn the pocket right side out. When the stitching is complete and the pocket has been turned, use an edge turner to sharpen the edges where it has been stitched and press carefully.
Make all the pockets in the same manner.


- Stitch the front pockets to the back pocket.
Arrange the pockets so that they fit onto the completed back pocket. Pin the pockets and stitch on three sides, backstitching at the start and the end.

- Make the apron.
Fold the third fat quarter in half and stitch on two sides. Turn right side out and press. This is the apron and the foundation for the pocket unit that was created.
Fold the 2-1/2” width of fabric strips in the center. Open the strips and fold the edges of the strip to the center and press again. This will be the top band of the apron and the ties for the apron.
Stitch the band onto the raw edges at the top of the apron. Insert the ties (option may be wide grosgrain ribbons instead of 2-1/2” fabric strips and top-stitch the band.


- Stitch the pocket unit to the apron.
When the pocket unit is stitched to the apron, a total of six pockets are created. Stitch three sides of the blue pocket to the blue apron. When three sides have been stitched, stitch between the front pockets from top to bottom to create three pockets between the blue pocket unit and the apron.


