

Hello Friends! It's Melissa Corry from Happy Quilting here and I am thrilled to be bringing you a new quilt tutorial today perfect for Back To School!!
School Spirit Quilt Project
What better way to show your School Spirit than with an All-Star Rally Quilt!!! It is easy to customize with your school colors using beautiful and bold solids and is sure to make you the crowd favorite at all the games!!!
So without further ado, here is my All-Star Rally Quilt!! The quilt blocks feature the Hunter Star BOB Die. You can also use the 2 1/2" Strip Die and 2 1/2" Squares Die for the sashing.

The quilt is made with 16 Hunter Star Blocks and then adds sashing to create an awesome secondary star design. Hence, it's all star!!!
The quilt finishes at 58" x 58". So, it is a great lap size quilt that will work perfectly to wrap up in on the bleachers when Fall and Spring sports get chilly.

So, let's get to making your own All-Star Rally Quilt!!!
Materials Needed:
To make your own All-Star Rally Quilt, grab your AccuQuilt GO! Cutter and...
- GO! Hunter Star - 6" Finished Die
- GO! Strip Cutter 2 1/2" - 2" finished - Die (Optional)
- GO! Square 2 1/2" - 2" finished - Die (Optional)
- 3 Yards Solid White Fabric
- 2 1/4 Yards Solid Red Fabric
- 1 1/2 Yards Solid Black Fabric
- 3 1/2 yards of print for backing the quilt

STEP 1 - CUTTING
For the blocks, cut the following strips from the yardage:
- From the Black Yardage cut (32) 2 1/2" x 21" strips (you can use the Strip Cutter 2 1/2" Die for this)
- From the White Yardage cut (16) 4" x 42" strips
- From the Red Yardage cut (16) 4" x 42" strips
Set remaining yardage aside for the moment.

- Fold a White 4" x 42" strip in half twice, so it is 4 layers thick. Place the folded strip over the Hunter Star BOB die - covering all 4 pieces.

- Cut the die in your AccuQuilt GO! Cutter. Repeat this process for all 16 White Strips.

- Fold a Red 4" x 42" strip the same way in 4 layers and cut the die in your AccuQuilt GO! Cutter. Repeat this process for all 16 Red Strips.

- Fold a Black 2 1/2" x 21" strip back and forth like a fan to make 5 layers. The fan will be about 5" long. Since we are using solids, the A and AR (A reversed) doesn't matter, so you can cut 2 Strips at the same time. Place the 2 folded strips over the Hunter Star BOB die A section and AR Section.

- Cut the die in your AccuQuilt GO! Cutter. Repeat this process for all 32 Black Strips.

And now all of the pieces for your Hunter Star Blocks are cut. You will have some extra pieces, but they will make cute little patchwork stars that you can applique on a separate project ;)
See below for the total number of pieces you will be using for this All-Star Rally Quilt.

And one last bit of cutting. We need to cut the Sashing for the Quilt and the Binding for the Quilt. From the remaining Solid Yardage cut the following:
- From the Black Yardage cut (25) 2 1/2" x 2 1/2" squares. (You can use the Square 2 1/2" Die)
- From the White Yardage cut (40) 2 1/2" x 12 1/2" rectangles. (You can use the Strip Cutter 2 1/2" Die)
- From the Red Yardage cut (7) 2 1/2" x WOF Strips for binding. (You can use the Strip Cutter 2 1/2" Die)

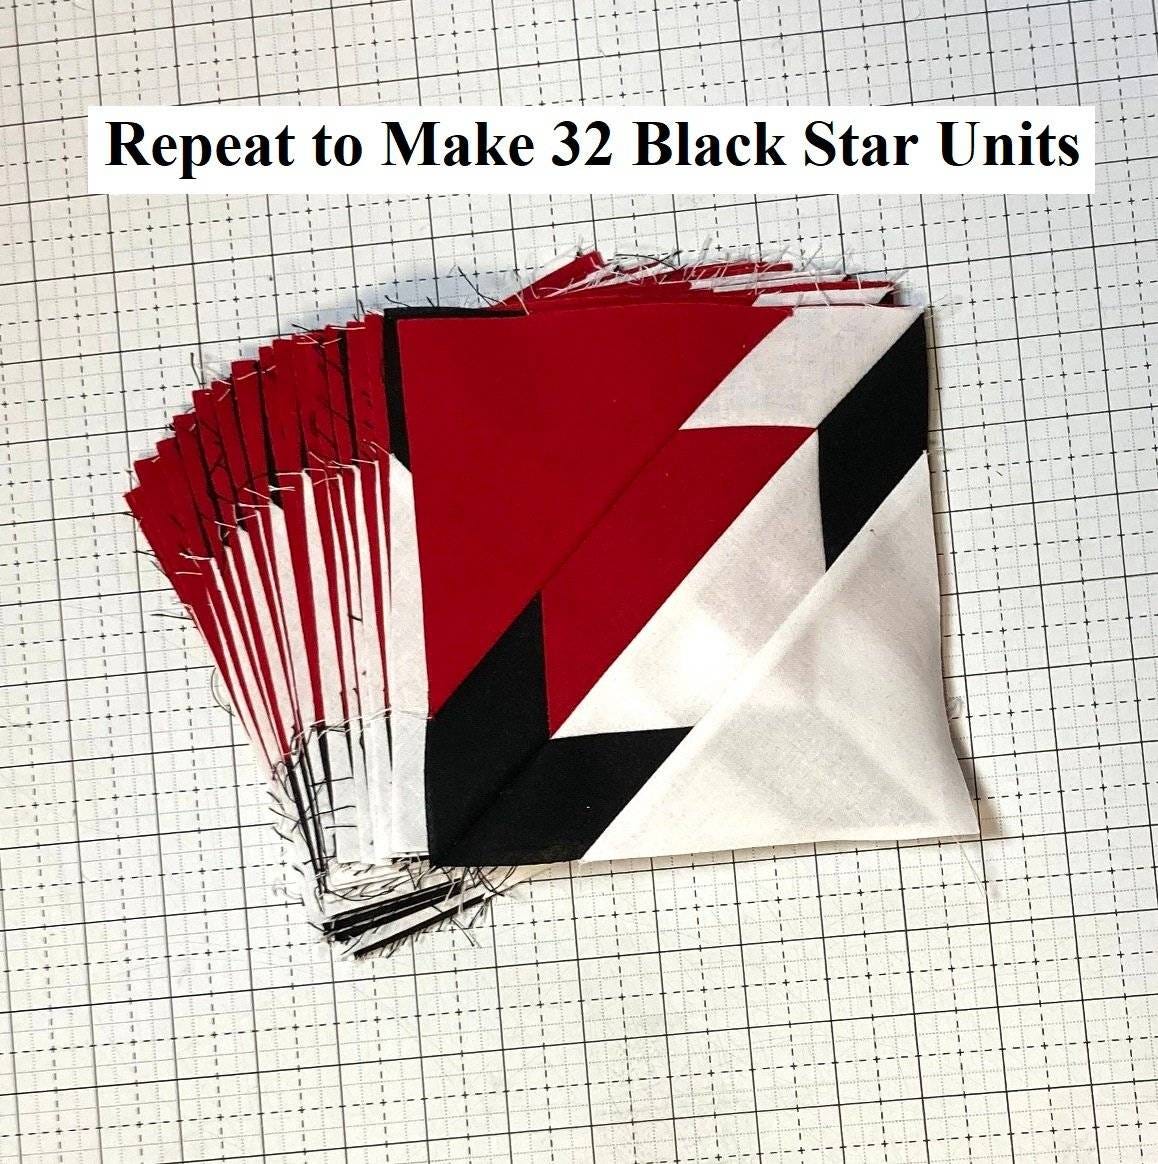
STEP 2 - SEWING THE BLACK STAR UNIT
We will start by making the Black Star Unit. We will be making 32 Black Star Units. The directions show one unit at a time, but you can always chain stitch each of the following steps 32 times to save time and thread :)
- Layout 3 Black A Units, 1 White A Unit, 1 Red B Unit, 1 White B Unit, 1 Red C unit, and 1 White C unit as shown below.
NOTE: It is super easy to get the A units flipped around, but don't worry, I will show you a double check in the next step to make sure they are aligned properly. ;)

- Place the A units onto the B units as shown below.
Pro Tip: To ensure the A unit is aligned properly, it should perfectly match the edges where the align arrows are pointing. If the notch is facing inwards, flip your A unit until it matches.
- Sew a 1/4" seam along the aligned A units.

- Follow the arrows below for pressing.
NOTE: Pressing here is very important! If you press the seams inward on your Red Unit and the seams outwards on the White Unit, it will allow you to nest the angled seams later, which makes them way easier to match up and sew.

- Place the C units onto the now stitched together AB Units. Once again, the edges will align perfectly thanks to the little notches in the cutting, I love that!!!
- Stitch a 1/4" seam along the edges. I didn't pin, but you can if you like the extra stability.

- Press the seams outwards towards the C units.

- Finally, place the two triangles with right sides together, nesting the angled seams. You can pin those seams if you like, or just keep them nested.
- Stitch a 1/4" seam along the pinned edge.

- Press the seam open to finish the Black Star Unit. It should measure appx. 6 1/2" x 6 1/2". I don't bother with squaring up, but you can if you like.

If you were chain stitching, you now have 32 Black Star Units. If you are making the Units one at a time, repeat the above steps until you have a total of 32 Black Star Units.
STEP 3 - SEWING THE RED STAR UNIT
We will now make the Red Star Units. Again, we will be making 32 Red Star Units so feel free to chain stitch and save time and thread. :)
The Red Star Unit is the exact same layout as the Black Star Unit except the bottom left A unit is Red instead of Black. Layout 2 Black A Units, 1 White A Unit, 1 Red A Unit, 1 Red B Unit, 1 White B Unit, 1 Red C unit, and 1 White C unit as shown below.

- Using the same steps as Step 2 Making the Black Star Units, sew together the Red Star Units.

- Again, if you were chain stitching, great. You now have 32 Red Star Units. If you are making the units one at a time, repeat to make a total of 32 Red Star Units.

STEP 4 - SEWING THE BLACK STAR BLOCK
We will now use the Black Star Units to make the Black Star Blocks. We will be making 8 Black Star Blocks.
- Chain stitch each of the following steps 8 times will save time and thread. :)
- Layout 4 Black Star Units as shown below.

- Place the right hand units onto the left hand units as shown below.
- Align and pin the seam.
Pro Tip: These seams are directly on top of one another, so pinning will help it from sliding.
- Sew a 1/4" seam along the pinned edges.

- Press the seams open.

- Now place the top row units onto the bottom row units - with right sides together.
Pro Tip: I like to use this little pin trick to align that center pinwheel where the 4 angled seams are coming together. Makes for a perfect point every time.
- Align and pin the star seams.
- Stitch a 1/4" seam along the edge, taking care to stitch right at the bottom of the fabric "V" in the center.

- Press the seam open.
- Your Black Star Block is now complete and should measure appx. 12 1/2" x 12 1/2" square. I don't bother to square up, but you are welcome to if you like.

And just like the units, if you were chain stitching, great! You now have 8 Black Star Blocks. If you are making the blocks one at a time, repeat the above steps until you have a total of 8 Black Star Blocks.

STEP 5 - SEWING THE RED STAR UNIT
We will now make the Red Star Blocks. Again, we will be making 8 Red Star Blocks so feel free to chain stitch and save time and thread. :)
The Red Star Block is the exact same layout as the Black Star Unit except Red A's in the middle instead of Black. Layout 4 Red Star Units as shown below.

- Using the same steps as Step 4 Making the Black Star Blocks, sew together the Red Star Units.

- If you were chain stitching, great! You now have 8 Red Star Blocks. If you are making the Blocks one at a time, repeat to make a total of 8 Red Star Blocks.

STEP 6 - SEWING THE QUILT TOP
And now, with all of your Hunter Star Blocks made, you are ready to sew the quilt top together!!
Arrange the blocks alternating the Black Star Blocks and Red Star Blocks as shown.
- Arrange the White 2 1/2" x 12 1/2" sashing rectangles and Black 2 1/2" x 2 1/2" cornerstone squares, as shown, around the blocks:
- Sew the sashing rectangles and cornerstone squares together into rows.
- Press the seams towards the sashing rectangles.
- Sew the blocks and sashing rectangles together into rows.
- Press the seams towards the sashing rectangles.
- Sew the rows together to complete the quilt top.
- Press the seams towards the sashing rows.

STEP 7 - FINISHING
All that is left is to turn that finished quilt top into a finished quilt.
Time to baste it, quilt it, and bind it - which is a whole lot in one little sentence.
If you are new to quilting, check out my video tutorial series on finishing your quilt. It will walk you through basting, quilting, and binding, step by step. :)

I quilted mine with an all-over echoed paisley design and then bound it with solid red strips.
This is such a fun quilt design to do, and I even have a free video tutorial on Free Motion Quilting this Echoed Paisley Design right over here.
Happy Quilting!!
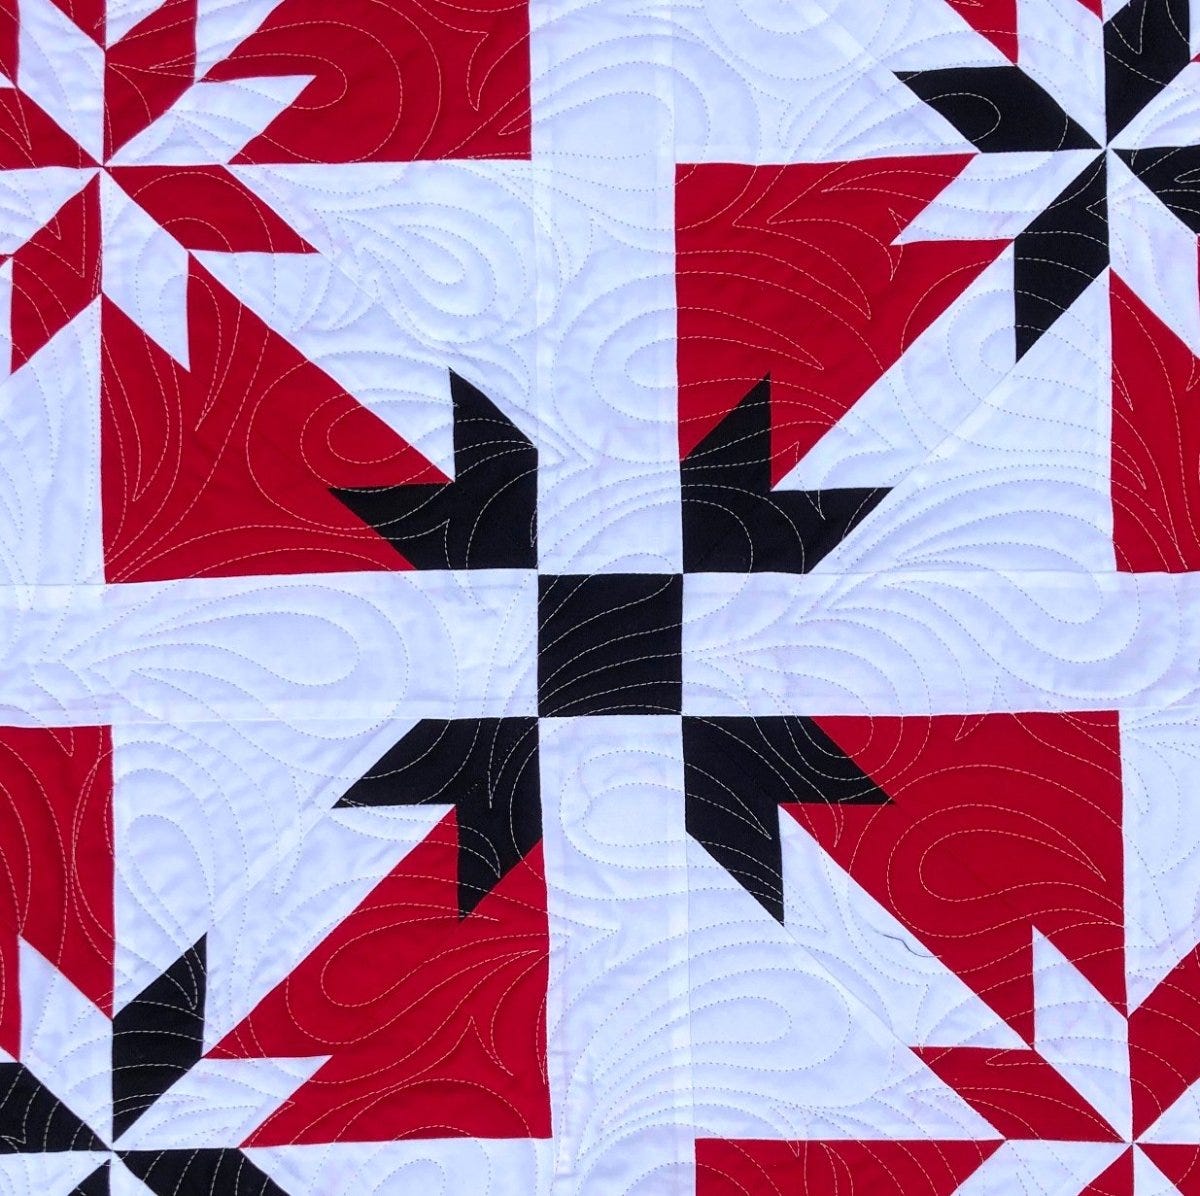
Now, you can sit back and enjoy your beautiful 58" x 58" All-Star Rally quilt!!! And that is today's project. :)
I hope you have enjoyed this tutorial and if you make your own All-Star Rally Quilt I would love to see it!
Share it with us on social media with the hashtags #happyquiltingwithmc and #AccuQuiltBuilt.
We can't wait to see your All-Star Rally Quilts in your favorite School Colors!!!

Thank you so much to AccuQuilt for having me here on their blog.
To see more of my Happy Quilting adventures, stop by Happy Quilting for a visit. I just love being able to share lots of quilting goodness on a daily basis.
I hope you all have a very Happy Quilting Day!!!


