
Trapunto is a traditional type of quilting. This technique adds extra dimension to appliquéd and quilted shapes and is most often used on whole cloth and appliqué quilts. I love the look of trapunto, especially with machine embroidery and will share with you a method I have developed for adding that extra dimension to machine embroidered blocks. The wonderful part of this is that the AccuQuilt GO! Cutter makes this easier than ever to do.
It is done by basting the quilt design on the quilt top attached to a layer of quilt batting on the back. The excess batting that is not a part of the design is then trimmed away from the design. When the top is prepped, it is layered over another layer of quilt batting and the backing. The top is then quilted and the extra batting under the design creates added dimension to the shapes.
By using the GO! cutter and dies, the process of basting and trimming batting is gone. The shapes for both the appliqué and the batting can be cut with the AccuQuilt GO! cutter. As a quilter, one of the best elements in quilting is creating functional quilts that can be used and laundered many times. After many tries, I have come up with some tips and a method to create beautiful and functional machine embroidery appliqué quilts. Follow these tips and enjoy making your own trapunto quilt.
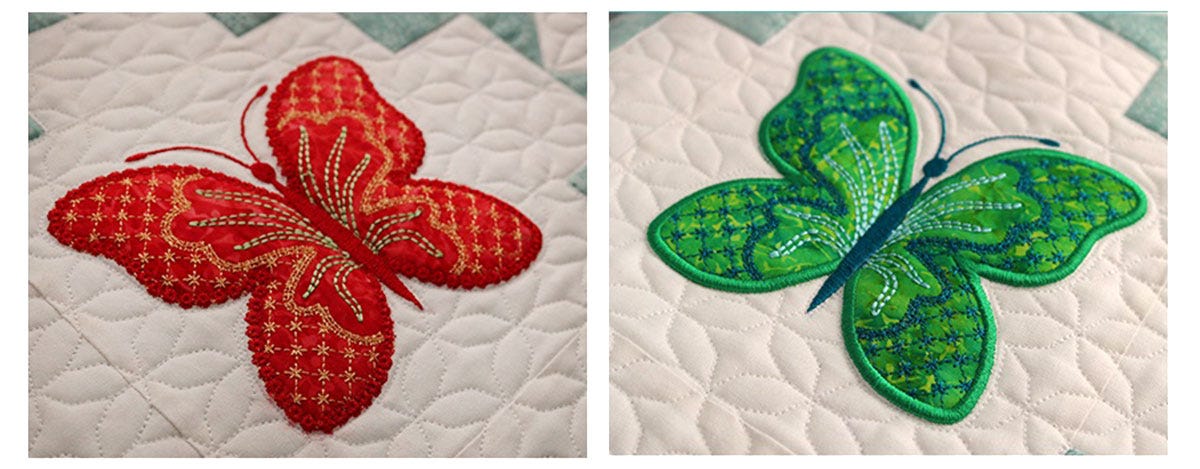
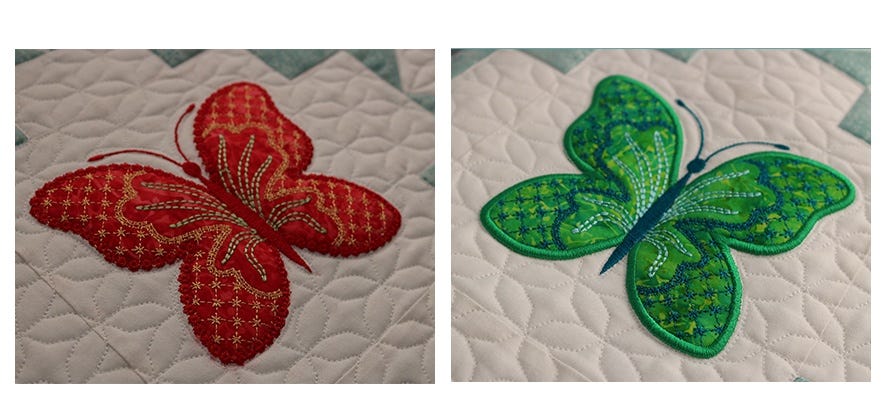
This machine embroidery quilt uses the pattern for the Holiday Medley Quilt with butterflies subbed in place of the holiday appliqués. It also uses the 6” QUBE Mix and Match Block set, the butterfly from the Critters die, and the Beautiful Butterflies machine designs.
Supplies:
- GO! QUBE Mix & Match 6” Block Set (Die Set #55775)
- GO! Critters die (Die #55030)
- GO! Butterfly Beauties Designs
- GO! Qube 6” Holiday Medley Throw Quilt Pattern
- Fabric for Quilt and for Appliqué Shapes
- Back ground Fabric
- Hoop that will fit a 6” x 6” or larger design
- Embroidery Machine and thread
- Tear away/wash away stabilizer
- Lite Steam-A-Seam II
- Cut butter fly shapes using the Critters die from Quilt Batting (I used Warm and White batting)
- Water soluble glue stick
Supply Notes:
When selecting a stabilizer, remember that you want the appliqué to remain soft and to have the full effect of the batting that you have added. The one that works best is a tear away stabilizer that also breaks down in water. The only way to know which stabilizer will work best is to cut a small square of stabilizer, hold it under water and see if it dissolves as you rub it gently between your fingers. Some are tear away but do not break down in water while others easily disintegrate in water. One more option is to use a water soluble stabilizer, but the best results I got was with the tear away/wash away one.
In this tutorial, I will be using photos from the stitching of several different butter flies through out. The steps are the same for each butter fly in the set.
1. Cut back ground fabric at about 8 inches square. The finished quilt block will be 6” and will be cut at 6-1/2” for assembling into the quilt. Cutting back ground fabric larger than the desired finished block assures that you can center the machine embroidery perfect for the final block. Hoop stabilizer and the back ground fabric into the hoop. If your hoop is larger than the back ground fabric, use a spray or water soluble adhesive to secure the fabric to the stabilizer.
The first step of the embroidery is to stitch the placement line and secure the appliqué shape into place as shown in the photos below. I use Lite Steam-A-Seam II as it is a reposition able fusible and is still tacky when the paper has been removed. This allows me to make sure that I have the shape positioned exactly inside or on top of the place ment lines. There is enough tackiness that the appliqué shape holds in place well enough to stitch the tack down stitches with out having to fuse it with a mini iron.
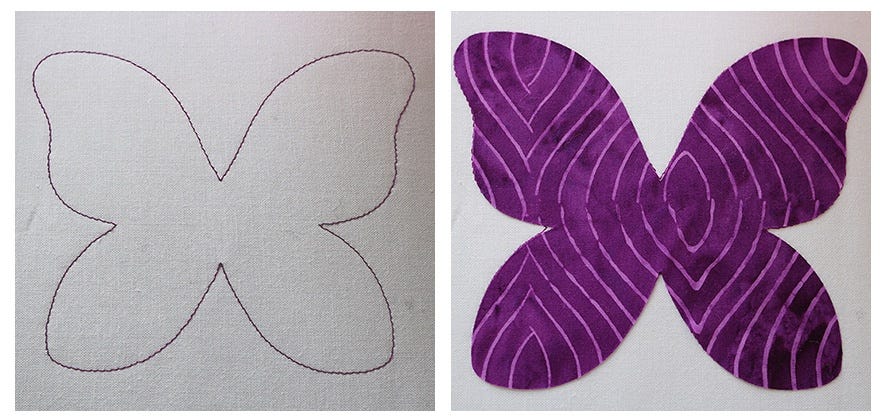
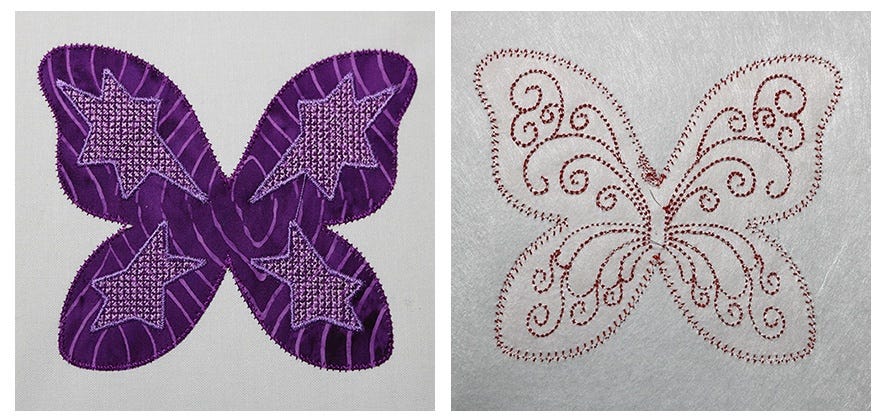
2. Once the shape is secured onto the back ground fabric, complete all the stitches except the outer appliqué stitches. These stitches will include the zig zag tack down stitch around the out side edge and the stitches on the butterfly wings.
3. Remove the hoop from the machine and turn it so that the back of the hoop and the stabilizer is facing toward you. Next you will glue the butterfly shape cut from quilt batting to the stabilizer. As you can see in the photo below, a blue glue stick is used to place glue inside the butterfly shape around the outer edges of the butterfly. While the glue is still wet, place the batting shape on the stabilizer so that it fits exactly inside the stitching of the butterfly. Lightly pressing the batting to the glue adheres it with out any problem.

4. Remount hoop with batting on the back. This step requires care to assure that the batting is not pulled or folded over by the feed dogs. I placed a sheet of note book paper over the feed dogs while remounting my hoop onto the machine and that made for a very smooth “remount”.
When the hoop is on, complete the appliqué stitching of the satin stitch or the motif stitch edging and the final stitching is the butterfly body and antennae. The batting seems to enhance the edge stitching and the fill stitches of the butterfly body compress the batting so that the wings show the dimension of the batting.
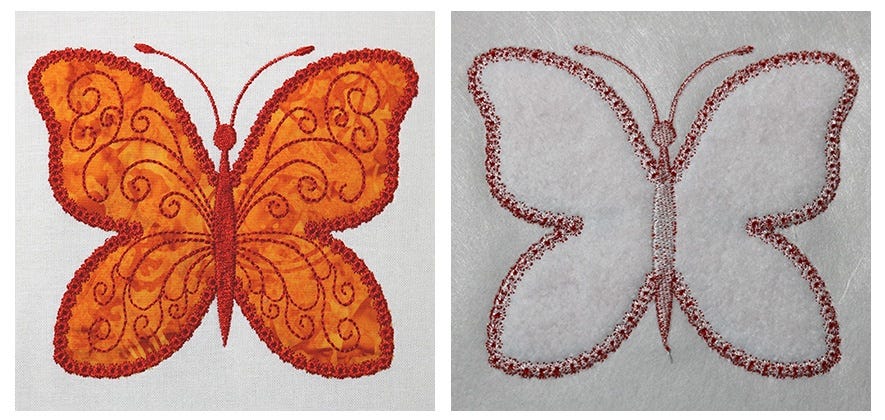
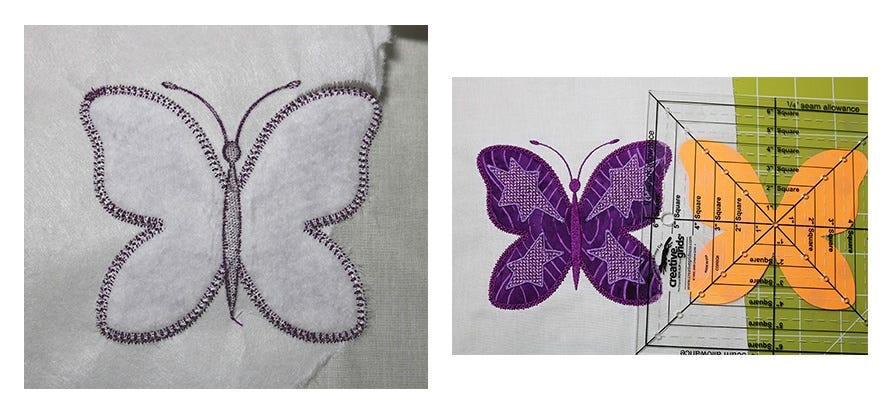
5. When all stitching is complete, remove the fabric and stabilizer from the hoop. Remove the tear away stabilizer from the edges of the butterfly. As you can see below the batting is completely secure underneath the edge stitches.
Trim the block using a 6-1/2” square ruler. To make sure all the blocks are trimmed the same, cut a butterfly shape from paper, center and tape it to the back of the ruler and use that shape as a guide for trimming all the blocks.
Complete the blocks for the quilt as shown in the Holiday Medley Quilt pattern. When quilting this quilt, be sure to out line the butter fly and the butterfly body with "stitch in the ditch" stitches to create the trapunto effect. I used Sulky poly mono filament thread for the stitches around the butterfly and the butterfly body. Enjoy your trapunto quilt.
Trapunto Quilt By Marjorie Busby
http://bluefeatherquiltstudio.com/blog
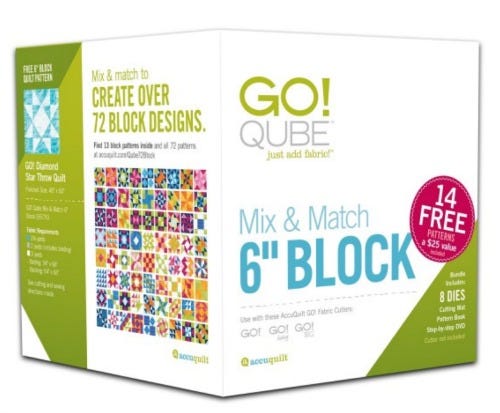
Introducing the GO! Qube Mix & Match 6" Block. This set of dies includes everything you need to cut out 6" pieced blocks, just add an AccuQuilt GO! Fabric Cutter and fabric!
The GO! Qube Mix & Match 6" Block includes eight GO! Dies, a cutting mat, an instructional DVD, PLUS a FREE 20-page pattern booklet which includes 13 Mix & Match block patterns.
GO! Dies included (with quilt shape number)
- GO! Square-3 1/2" (3" Finished)
- GO! Square-2" (1 1/2" Finished)
- GO! Half Square Triangle-3" Finished Square
- GO! Quarter Square Triangle-3" Finished Square
- GO! Half Square Triangle-1 1/2" Finished Square
- GO! Square on Point-2 5/8" (2 1/8" Finished)
- GO! Parallelogram 45°-2 1/4" x 2 13/16" Sides (1 1/2" x 2 1/8" Finished)
- GO! Rectangle-2" x 3 1/2" (1 1/2" x 3" Finished)


