
Hi, quilters! It's Marjorie Busby here from Blue Feather Quilt Studio.
Summertime is coming and many of us will be canning fruits and vegetables. If you’re a quilter, the GO! Canning Jar Pieced-8" Finished Die is perfect for showcasing your beautiful fabrics and quilt blocks. This Block on Board (BOB) die will have you “canning” beautiful quilts all year long.
The one thing I love most about this die is that the jar patch is large enough for applique (by machine or hand), pieced blocks with the 4”, 5” and 6” GO! Qubes, Seminole patchwork, crumb pieced or crazy quilt blocks and beautiful fabrics. One of the nicest things about this die is that you can make a quilt with many different jars, and it is just as stunning as a quilt using coordinating fabrics.
I made a table runner with pieced blocks using the 4” and 6” Qubes. Simple 2-patch and 3-patch blocks were completed. With the 4”, 5” and 6” Qube shapes, there are an infinite number of block combinations. This is a diagram of the way I made the quilt blocks:

To make the blocks fit the GO! Canning Jar Pieced-8" Finished Die, I added 2 1/2” background fabric strips on all four sides of the pieced quilt blocks. To center the blocks on the die, I used washi tape to mark the center of the jar on the die. The nice thing about washi tape is that it is a thin strip so that it is effortless to mark the center, and it is easily removed when you are finished cutting blocks that need to be centered. I folded the blocks and cut notches to mark the center of each side of the block and then lined the blocks up with the washi tape before cutting.

To make the Canning Jar Pieced quilt blocks, follow the Block Assembly Instructions. After the Canning Jar Pieced quilt blocks were finished, I made a table runner with them.
For the Qubed Canning Jar Table Runner, you will need:
- 1/2 yard of pink fabric for the background
- 1/4 yard of light red fabric for the inner border
- 1/2 yard of red fabric for the outer border and binding
- 1/8 yard of blue fabric for the quilt blocks
- 1/4 yard of light blue fabric for the jars
- 3/4 yards of fabric for backing
- Batting that is 34” x 18”
This is the layout for the table runner:

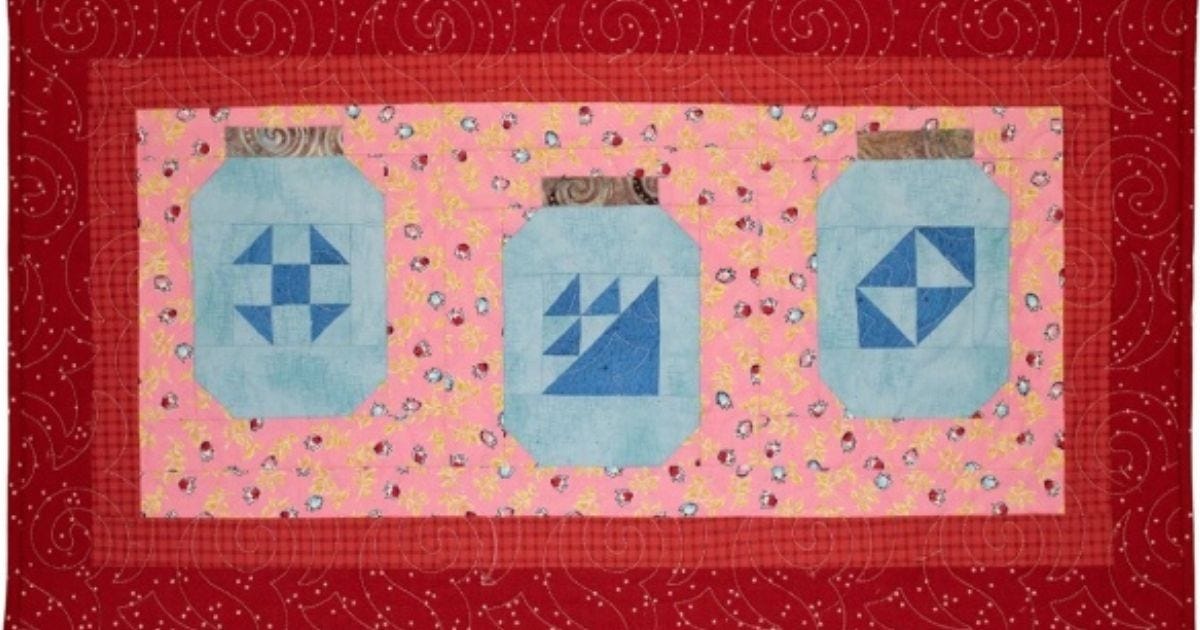
A 1 1/2” (1” finished) strip is added to the top or bottom of the blocks so that there is a staggered layout of the jars. The blocks are then sewn together side by side and a 1 1/2” (1” finished) border strip is added to the lower edge of the blocks. A 2 1/2” (2” finished) outer border is added to finish the table runner.
This is the finished Qubed Canning Jar Table Runner I made using the diagram above:

Bonus Inspiration
This die is so versatile and everyone loves a beautiful jar. I was having so much fun with this die that I made a few more blocks with “food fabric” that I had in my stash.

There are free patterns for more Canning Jar projects on AccuQuilt's website, too. The GO! Windowsill Blooms Table Runner is a striking table runner for spring and works with GO! Qube dies and the GO! Stems and Leaves Die.

Since the GO! Canning Jar Pieced-8" Finished Die is back permanently, we want to know: what will you make with it? Let us know in the comments below!
Please share photos of your finished Canning Jar Pieced projects with us on social media @mgbusby and @AccuQuilt using the hashtag #AccuQuiltBuilt so that we can see what you've made!


