
Hi, quilters! This is Marjorie Busby from Blue Feather Quilt Studio. You usually see my finished projects featured on AccuQuilt Live Events, but today, I am going to show you how to make a fun and useful project for summer cookouts!
Just In Time for Father's Day
For people who love to grill, an apron and an oven mitt (or a set of oven mitts) are must-haves for barbeques. If you are looking for a great last-minute Father's Day gift, these embroidered grill essentials can be finished before you know it!
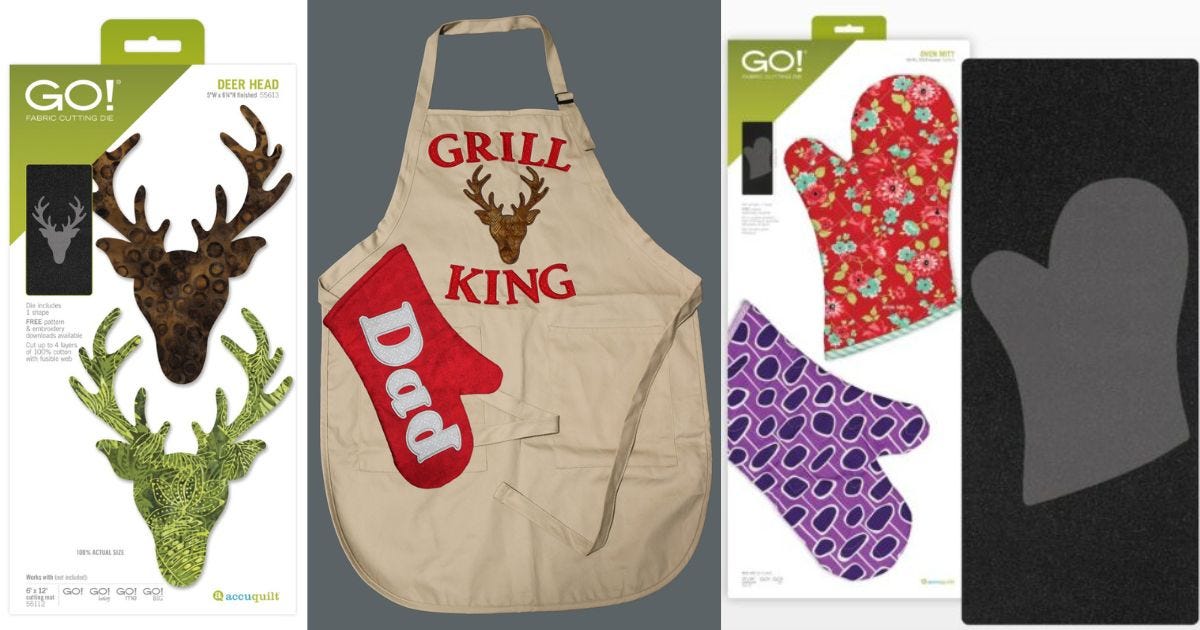
I used a ready-made apron, GO! Dies, a GO! Big Electric Fabric Cutter, and free downloadable machine embroidery files from AccuQuilt's website, so this project took no time at all!
GO! Dies Needed:
- GO! Carefree Alphabet Uppercase Set (2-Die Set) Dies
- GO! Carefree Alphabet Lowercase Set (2-Die Set) Dies
- GO! Classic 2" Alphabet Uppercase Set Die
- GO! Oven Mitt Die
- GO! Deer Head Die
Fabric Needed:
- 1/2 yard of fabric for the oven mitt OR 16" x 20” of fabric for the outer mitt and 16" x 20” of fabric for the mitt lining
- Pre-purchased apron for machine embroidery
- 1/8 yard of fabric for letters for the apron and oven mitt
- Fusible backing for the letters and deer head applique
Embroidery Supplies Needed:
- Embroidery machine
- Embroidery hoop that is 8” x 8” or 200mm x 200 mm
- GO! Classic 2" Alphabet Uppercase Embroidery Designs
- GO! Carefree Alphabet Lowercase Set Embroidery Designs
- GO! Carefree Alphabet Uppercase Set Embroidery Designs
- OPTIONAL: GO! Deer Head Embroidery Designs
- Medium weight tearaway stabilizer (AccuQuilt has a fantastic Medium Firm Tearaway - White - 1.8 oz - 12" x 10 yd Roll)
- Iron on fusible or fusible web
- Coordinating thread
- Bobbin thread
- Water-soluble glue stick (Elmer’s purple glue stick or a fabric glue stick or pen work well) OR temporary spray adhesive for fabric (I used Sulky KK2000)
- Water-soluble marker
Prepare and Cut Letters
1. Apply fusible according to the manufacturer's directions to the wrong side of the fabric for the letters and deer head applique shapes.
2. Precut rectangles for each letter and for the deer head. The applique will be precut to the following measurements:
- Uppercase "D" applique for the oven mitt applique - 4” x 3 1/2”
- Lowercase “a” and “d” applique for the oven mitt - 3 1/2” x 3 1/2”
- 2” uppercase applique letters (cut nine total) - 2 1/2” x 3”
3. Cut out the letters as shown in the images below.
PRO TIP: The uppercase GO! Carefree Alphabet letters are reversed on the die. The right side of the fabric must be facing the foam on the die when cutting.

NOTE: The lowercase GO! Carefree Alphabet letters are as written on the die and the paper on the fusible must be facing the foam on the die when cutting.

NOTE: The GO! Classic 2" Alphabet uppercase letters for the apron are all on one die and should be placed with the fusible paper facing the foam on the die as shown. Layer the fabric as desired to cut the number of letters needed:
- 2 of the letter "G"
- 2 of the letter "I"
- 1 letter "K"
- 2 of the letter "L"
- 1 letter "N"
- 1 letter "R"

Cut the Applique for the Deer Head
1. Place the applique fabric for the deer head on the die with the fusible paper facing the foam on the die. Once everything is cut, the applique shapes for this project will look like this:

Prepare for Embroidery
1. Hoop the medium weight tearaway stabilizer or sticky stabilizer in the embroidery hoop that is at least 8” x 8”.
2. Use a spray fusible or water-soluble glue stick or sticky stabilizer and position the apron in the hoop as shown.
3. Find the center of the apron using a quilting ruler and mark a line with a water-soluble pen along the center line of the front of the apron.

Embroider the Apron
1. Bring the letters from the free embroidery files into your machine and arrange them as desired.
PRO TIP: If you need help with stitching partial words, follow the instructions for the placement of embroidery in one of my recent blog posts. Another tutorial that may be very helpful is a YouTube video I made showing the placement of letters and shapes.
2. Stitch the letters for "Grill" as shown below.

3. To embroider the deer head and remaining lettering on the apron, align the template with the marked center line and mark the center of the embroidery.
4. Rehoop the stabilizer, secure the apron to the stabilizer, and stitch the rest of the embroidery.

5. Complete the apron by tearing away the excess stabilizer.

Make the Oven Mitt
1. Follow the instructions given with the GO! Oven Mitt Die and cut the oven mitt as directed.
2. Find the center of the mitt by folding one outer oven mitt shape in half and in half again to find the center of the mitt.
3. Center the mitt in your embroidery hoop and secure it with a spray adhesive, water-soluble glue stick, or a sticky stabilizer.
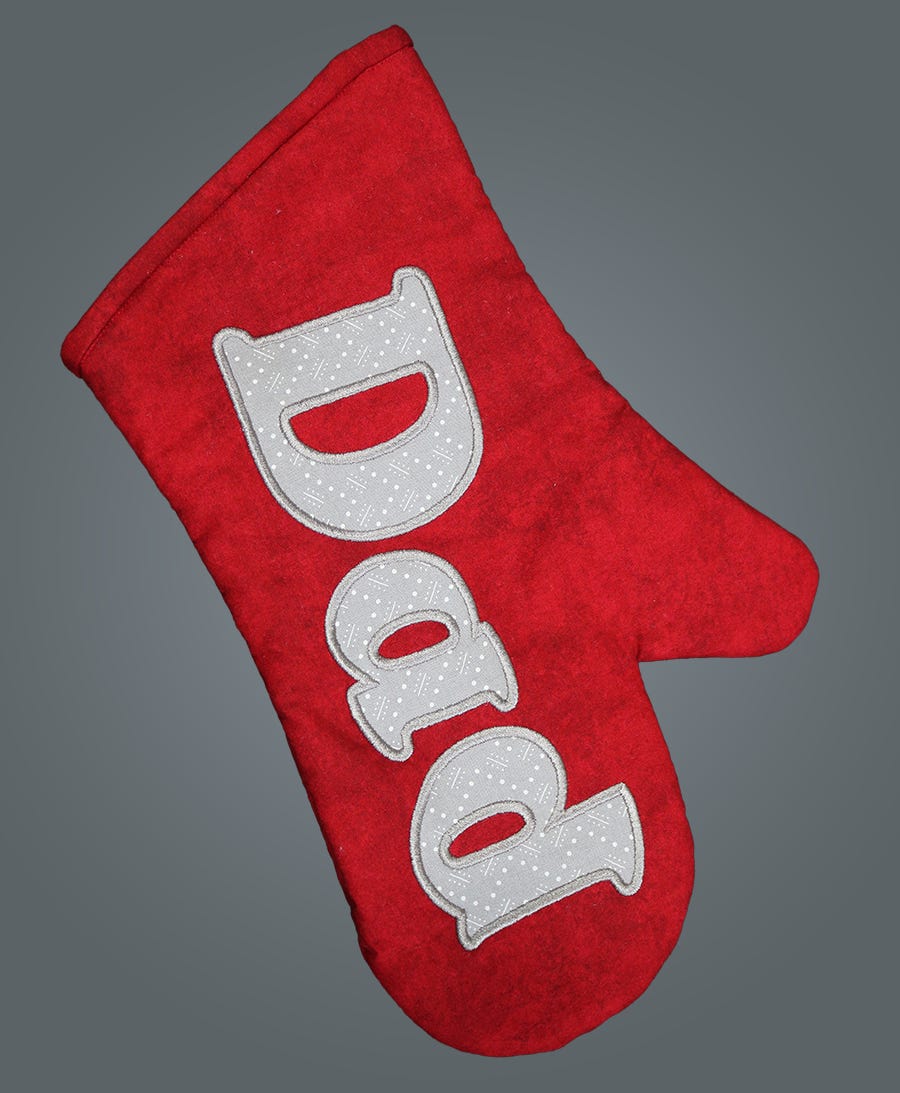
4. Load the embroidery files into your machine and stitch the letters “D a d” onto the mitt.
5. Follow the die's instructions for completing the construction of the oven mitt so that it looks like this:
GO! Make A Gift Set Perfect for Grillers
As you can see, this apron and oven mitt set is a quick and easy project that can be completed just in time for any summer barbeques you have.

The meal might be planned and made by the host, but surprise them with these grill essentials to show your appreciation!
If you make your own version of this tutorial, don't forget to use the hashtag #AccuQuiltBuilt and tag @AccuQuilt on social media so that we can see your adorable Father's Day gifts!


